
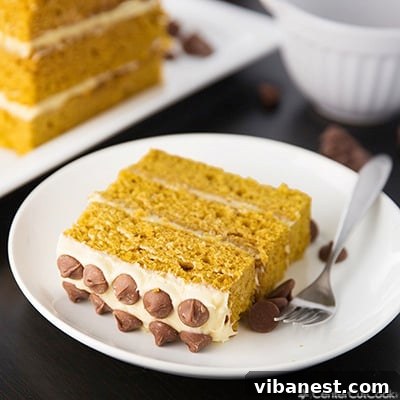
Decadent Pumpkin Layer Cake with Silky Cream Cheese Frosting and Chocolate Chips
As the leaves begin to turn vibrant hues of red and gold, and a crisp, cool breeze fills the air, there’s an undeniable magic that settles in. Fall isn’t just a season; it’s an experience, a symphony for the senses, and for many of us, it ushers in the glorious reign of all things pumpkin. From the comforting aroma of baking spices to the rich, earthy sweetness of pumpkin itself, this time of year offers countless excuses to indulge in seasonal delights. My kitchen, without fail, transforms into a pumpkin-lover’s paradise. I find myself crafting everything from fluffy pumpkin spice monkey bread to classic pumpkin pie, adorable pumpkin pie cupcakes, hearty pumpkin pancakes, and even luxurious pumpkin cheesecake. The list truly goes on, each recipe a testament to the versatility and charm of this autumnal superstar.
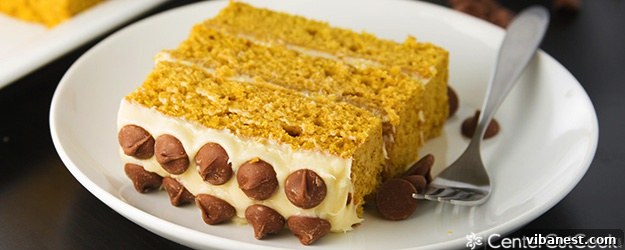
Amongst this delightful array of pumpkin-infused creations, one recipe consistently stands out, capturing hearts (and taste buds) with its sheer indulgence and irresistible charm: this magnificent Pumpkin Layer Cake. It’s a dessert that perfectly encapsulates the essence of fall baking, combining tender, spiced pumpkin cake layers with a luscious, tangy cream cheese frosting, all generously studded with sweet chocolate chips. Imagine that incredible combination: the warmth of pumpkin, the richness of cream cheese, and the delightful surprise of chocolate in every single bite. It’s more than just a cake; it’s pure pumpkin heaven that promises to be the star of any fall gathering or a comforting treat for a cozy evening at home.
The Inspiration Behind This Irresistible Pumpkin Creation
Every truly exceptional recipe often has an inspiring origin story, and this remarkable pumpkin cake is no exception. My journey to creating this delightful dessert began on the fantastic website of my talented friend, Heather, over at Sugar Dish Me. Heather’s site is a treasure trove of incredible, approachable recipes, consistently delivering delicious results that home bakers adore. As I scrolled through her tempting creations, one image, in particular, seized my attention and refused to let go: a stunning pumpkin torte, with generous, creamy layers of frosting peeking out between perfectly spiced pumpkin cake. The visual appeal alone was enough to convince me that I had to try my hand at this masterpiece. The promise of a moist pumpkin cake paired with that signature cream cheese frosting was simply too good to resist, and I immediately added it to my must-bake list.
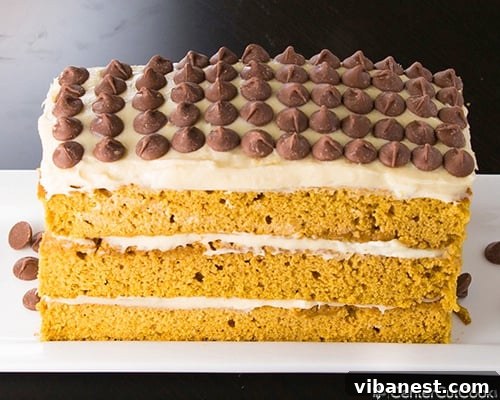
The Secret to Speed and Simplicity: Baking in a Jellyroll Pan
Beyond its incredibly delicious and utterly addictive flavor profile, one of the most remarkable aspects of this pumpkin layer cake is its surprising speed and ease of preparation. This isn’t your typical multi-round-cake layer cake that demands hours of baking and cooling. Instead, this recipe ingeniously utilizes a 9 x 13-inch jellyroll pan, which is truly the secret to its efficiency. By baking the cake in a thinner, flatter pan, we achieve several benefits that streamline the entire process.
Firstly, the thinner batter cooks through much faster. You’ll find that your cake is perfectly baked in a mere 14-16 minutes, a fraction of the time required for a traditional deep-dish cake. This quick baking time means less waiting and more enjoying! Secondly, because the cake layers are relatively thin – approximately an inch deep – they cool down exceptionally quickly once removed from the oven. There’s no need for extended chilling periods, which often bottleneck the baking process. This rapid cooling allows you to move on to the frosting stage in record time, bringing you closer to that first delightful bite. This smart baking method is what transforms a seemingly elaborate layer cake into an incredibly manageable and satisfying baking project, perfect for busy schedules.
Crafting the Layers: From Flat Sheet to Stacked Masterpiece
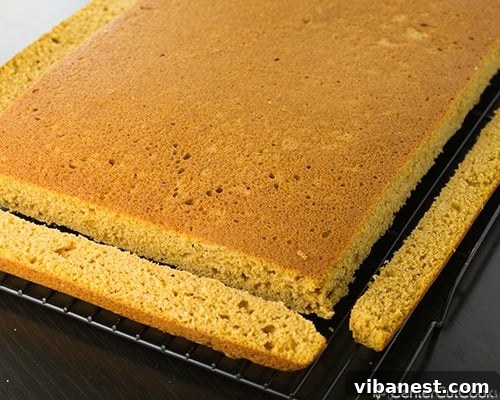
You might be wondering how a cake baked in a single, flat jellyroll pan transforms into a beautiful layered creation. The magic happens during the assembly! Once your thin sheet of pumpkin cake has completely cooled, you’ll simply use a knife to trim the edges for a clean finish and then slice the cake horizontally into three equal sections. These sections then become your individual layers, ready to be stacked high with that heavenly cream cheese frosting. This technique not only saves time but also ensures uniform layers, making assembly straightforward even for beginner bakers. It’s a clever hack that delivers all the elegance of a traditional layer cake with none of the fuss.
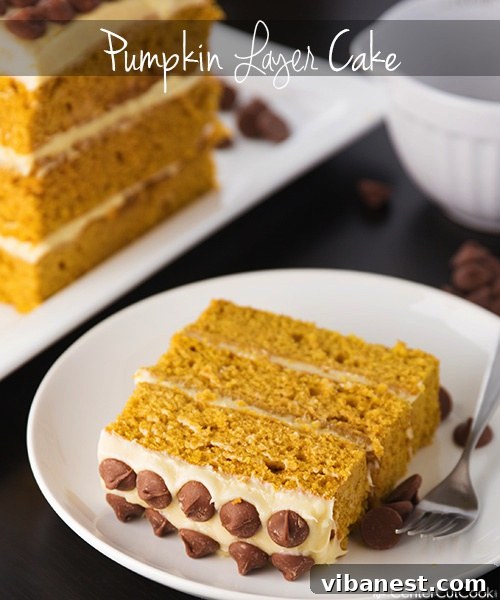
Personalizing Your Pumpkin Cake: Nuts or Chocolate Chips?
One of the joys of baking is the ability to personalize recipes to suit your own taste and preferences. The original recipe from Sugar Dish Me ingeniously incorporated toasted pecans, which undoubtedly add a lovely crunch and nutty depth. However, I confess I’m not always a nut enthusiast when it comes to my desserts. For me, the moment I discovered the sublime pairing of pumpkin and chocolate, there was no turning back! Ever since creating these delightful pumpkin chocolate chip cookies last year, that combination has held a special place in my heart.
The sweet, melty pockets of chocolate chips create a wonderful contrast to the warm spices and earthy notes of the pumpkin cake. They add an extra layer of indulgence that truly elevates this dessert. If you are a fan of pecans, by all means, toast them lightly and sprinkle them between your cake layers or over the top for a classic touch. They offer a satisfying texture and complementary flavor. But if you’re like me, or simply looking to try something new, I wholeheartedly recommend folding in those chocolate chips. You won’t regret the delightful bursts of cocoa goodness in every slice of this extraordinary pumpkin cake.
Beyond the Basics: Other Customization Ideas
Don’t stop at just nuts or chocolate chips! This versatile pumpkin layer cake can be adapted further to suit various palates. Consider adding a touch of grated orange zest to the cake batter for a bright, citrusy counterpoint to the pumpkin spices. A dash of ground ginger or cloves can further enhance the warmth of the pumpkin pie spice. For those who enjoy a little more texture, a sprinkle of toasted shredded coconut or a drizzle of caramel sauce between the layers could turn this cake into an entirely new experience. Feel free to experiment and make this recipe truly your own, transforming it into your signature fall dessert.
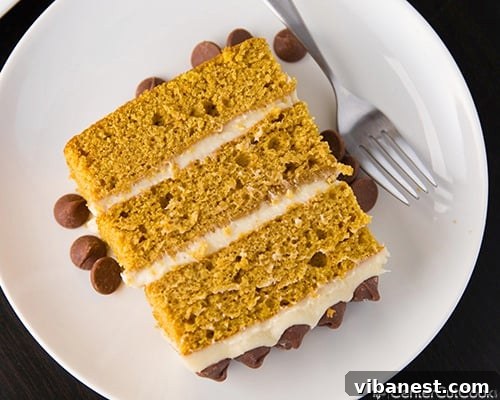
The Irresistible Crown Jewel: Cream Cheese Frosting
While the moist, spiced pumpkin cake forms the delicious foundation, it’s truly the cream cheese frosting that elevates this dessert to legendary status. Is there any pairing more iconic or perfectly balanced than pumpkin and cream cheese? The rich, tangy, and subtly sweet cream cheese frosting provides the ideal counterpoint to the warmth of the pumpkin, creating a harmony of flavors that is simply unparalleled. It’s light, fluffy, yet substantial enough to hold the layers together beautifully.
What makes this particular cream cheese frosting even better is how effortlessly it comes together. In just a few minutes, with a handful of simple ingredients, you can whip up a batch of velvety smooth frosting that’s far superior to anything store-bought. The key is to ensure your cream cheese and butter are adequately softened to room temperature, which helps prevent lumps and ensures a perfectly smooth, spreadable consistency. Beat them until light and fluffy, then gradually incorporate the vanilla and confectioner’s sugar for that classic, delightful sweetness.
Homemade vs. Store-Bought: Your Choice!
Of course, sometimes time is of the essence, and we all appreciate a good shortcut. If you’re short on time or prefer the convenience, a good quality store-bought cream cheese frosting can certainly work in a pinch. You’ll want to have approximately one and a half cups of prepared frosting on hand to generously cover your pumpkin layer cake. However, I truly believe that the homemade version adds an extra layer of freshness and flavor that is worth the small effort. It’s often less sweet and boasts a more pronounced tangy note, which beautifully cuts through the richness of the cake, making each bite even more satisfying.
Serving Your Masterpiece: Tips for Presentation and Enjoyment
Once your Pumpkin Layer Cake is assembled and chilled, it’s ready for its grand debut! Because this cake features multiple layers of cake and frosting, it tends to be quite tall and substantial. To truly savor each exquisite bite without feeling overwhelmed, I highly recommend cutting relatively thin slices. This allows everyone to enjoy the perfect balance of moist pumpkin cake, tangy cream cheese frosting, and sweet chocolate chips without falling into a delightful, yet potent, pumpkin-chocolate-frosting coma! With thin slices, you can comfortably yield about 10-12 generous servings, making this cake ideal for sharing at family dinners, holiday gatherings, or fall potlucks.
Presentation Perfect: Garnishing Your Pumpkin Layer Cake
For an extra touch of elegance, consider garnishing your finished cake. A light dusting of powdered sugar, a sprinkle of ground cinnamon or nutmeg, or even a few extra chocolate chips artfully arranged on top can elevate its visual appeal. For a truly festive look, you could add a few candied pecans (if you opted for the nut variation) or a sprig of fresh mint. Remember, we eat with our eyes first, and a beautifully presented cake tastes even better!
Storage Tips to Keep it Fresh
To ensure your pumpkin layer cake remains fresh and delicious, it’s best to store it in the refrigerator. Due to the cream cheese frosting, it needs to be kept cool. Cover it loosely with plastic wrap or place it in an airtight cake carrier. Stored properly, this cake will remain wonderfully moist and flavorful for 3-4 days, allowing you to enjoy its autumnal goodness over several delightful sittings. For best flavor and texture, let it come to room temperature for about 20-30 minutes before serving.
Pumpkin Torte or Pumpkin Layer Cake? It’s All Delicious!
Ultimately, whether you refer to this autumnal delight as a pumpkin torte or a pumpkin layer cake, the name matters far less than the sheer joy it brings. What truly counts is the incredible flavor, the comforting spices, the creamy frosting, and the simple pleasure of sharing a homemade treat. So go ahead, embrace the spirit of fall, gather your ingredients, and bake this amazing Pumpkin Layer Cake. It’s sure to become a beloved tradition in your household. Happy Fall, and happy baking!
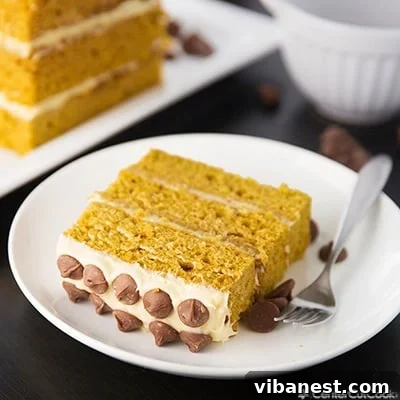
Ingredients for the Pumpkin Cake
- 1/2 cup unsalted butter, softened
- 1 cup granulated sugar
- 2 large eggs
- 1 cup pumpkin puree (not pumpkin pie filling)
- 2 cups all-purpose flour
- 1 teaspoon baking soda
- 3/4 teaspoon pumpkin pie spice
- 1/2 teaspoon ground cinnamon
- 1/4 teaspoon salt
Ingredients for the Cream Cheese Frosting
- 8-ounce package cream cheese, softened
- 1 stick (1/2 cup) unsalted butter, softened
- 1 teaspoon vanilla extract
- 1 heaping cup confectioner’s sugar
- 1/2 cup milk chocolate chips (Ghirardelli recommended for quality)
Instructions for Preparing Your Pumpkin Layer Cake
- Preheat your oven to 350°F (175°C) and prepare a 9 x 13-inch jellyroll pan by thoroughly spraying it with non-stick cooking spray.
- In a large mixing bowl, using an electric mixer, cream together the softened 1 stick of butter with 1 cup of granulated sugar. Beat for a few minutes until the mixture is light, fluffy, and well combined.
- Add the large eggs, one at a time, mixing well after each addition. Then, incorporate the pumpkin puree and mix until thoroughly combined.
- In a separate large bowl, sift together the all-purpose flour, baking soda, pumpkin pie spice, ground cinnamon, and salt. Sifting ensures a light, lump-free cake.
- Gradually add the dry ingredients into the wet mixture, mixing on low speed until just combined. Be careful not to overmix the batter.
- Evenly spread the pumpkin cake batter into the prepared 9 x 13-inch jellyroll pan, using a spatula to smooth the top.
- Bake for 14-16 minutes, or until a wooden toothpick inserted into the center of the cake comes out clean, indicating it’s fully cooked.
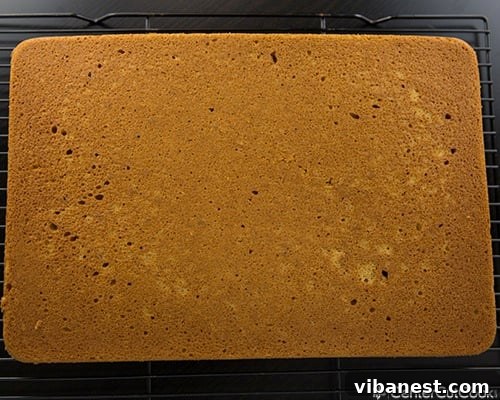
- Allow the baked cake to cool in the pan for a few minutes before carefully inverting it onto a wire cooling rack. Let it cool completely to room temperature.
- While the cake is cooling, prepare the cream cheese frosting. In a mixing bowl, combine the softened 8 ounces of cream cheese and 1 stick of softened unsalted butter. Beat with an electric mixer for a few minutes until smooth and well combined.
- Add the vanilla extract and confectioner’s sugar to the cream cheese mixture. Mix on low speed, then increase to medium, beating until the frosting is light, fluffy, and smooth.
- Once the cake has completely cooled, use a sharp knife to carefully trim off the very outer edges of the cake on all sides for a neat finish (refer to photos for visual guidance). Then, cut the cake horizontally into three equal rectangular pieces.
- Spread approximately 1/2 cup of the prepared cream cheese frosting evenly over the first (bottom) cake layer. Place the second cake layer on top, and spread another 1/2 cup of frosting evenly. Finally, top with the last cake layer and spread the remaining frosting over the top and sides of the cake.
- Generously sprinkle the milk chocolate chips over the top of the cake, or arrange them decoratively in rows if desired (again, see photos for inspiration). Place the finished cake in the refrigerator for at least 30 minutes to allow the frosting to set before slicing and serving.
Recipe slightly adapted from Sugar Dish Me