
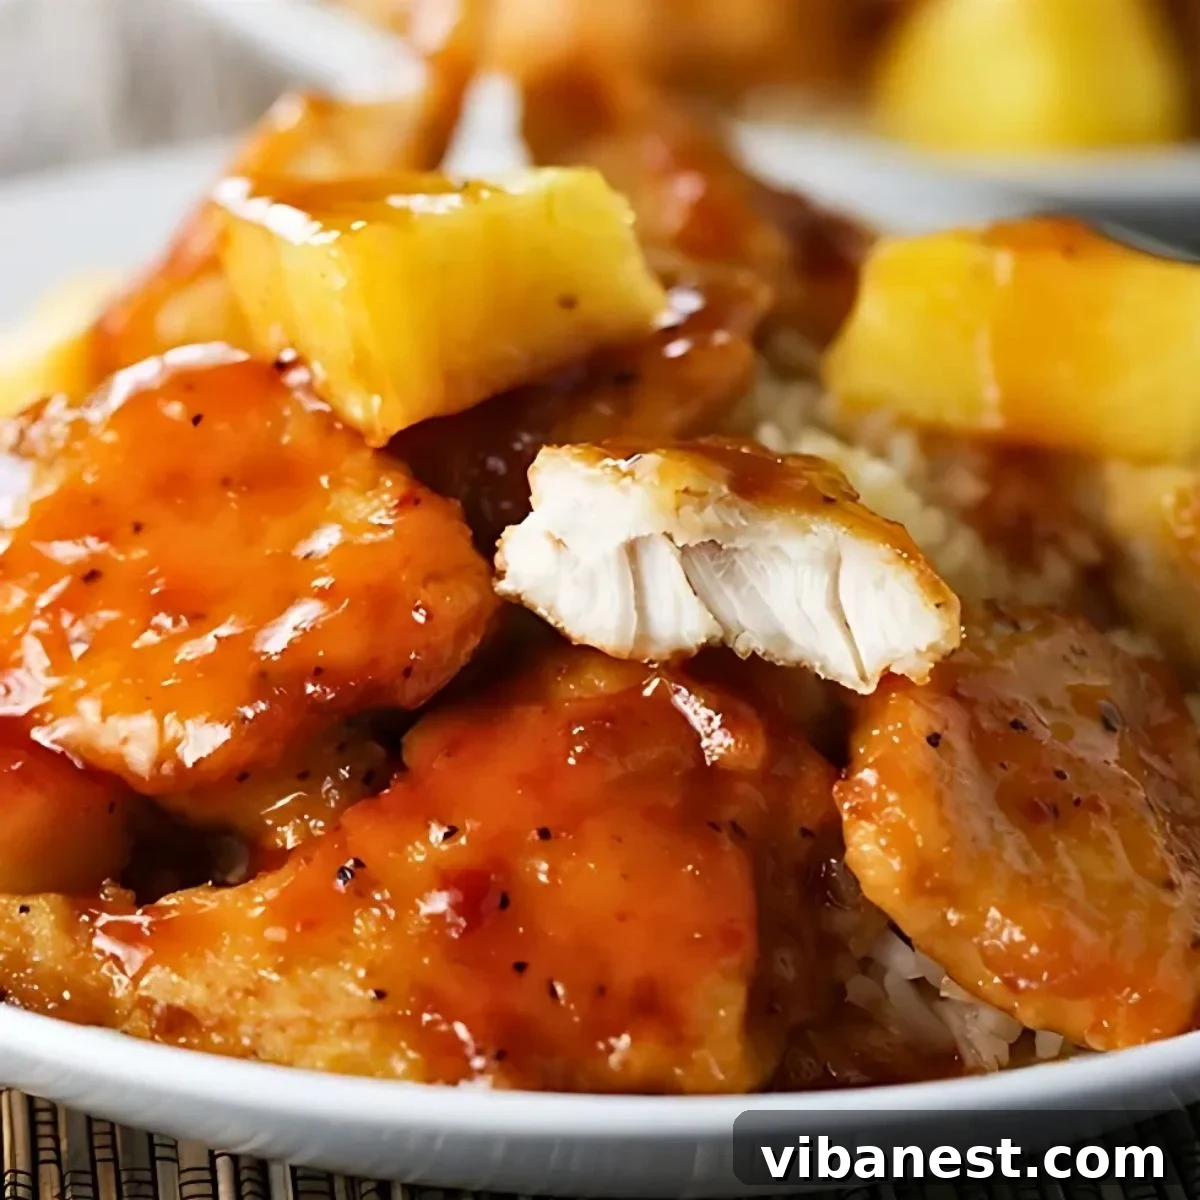
Homemade Sweet and Sour Chicken: The Ultimate Takeout-Style Recipe Made Easy
Unleash the flavors of your favorite Chinese takeout right in your own kitchen! This guide will teach you how to craft the most incredible homemade sweet and sour chicken, complete with a perfectly balanced sauce that will have you skipping the delivery menu. Forget the guilt of greasy deep-fried options; our recipe focuses on fresh ingredients and a healthier baking method, ensuring a delicious meal every time.
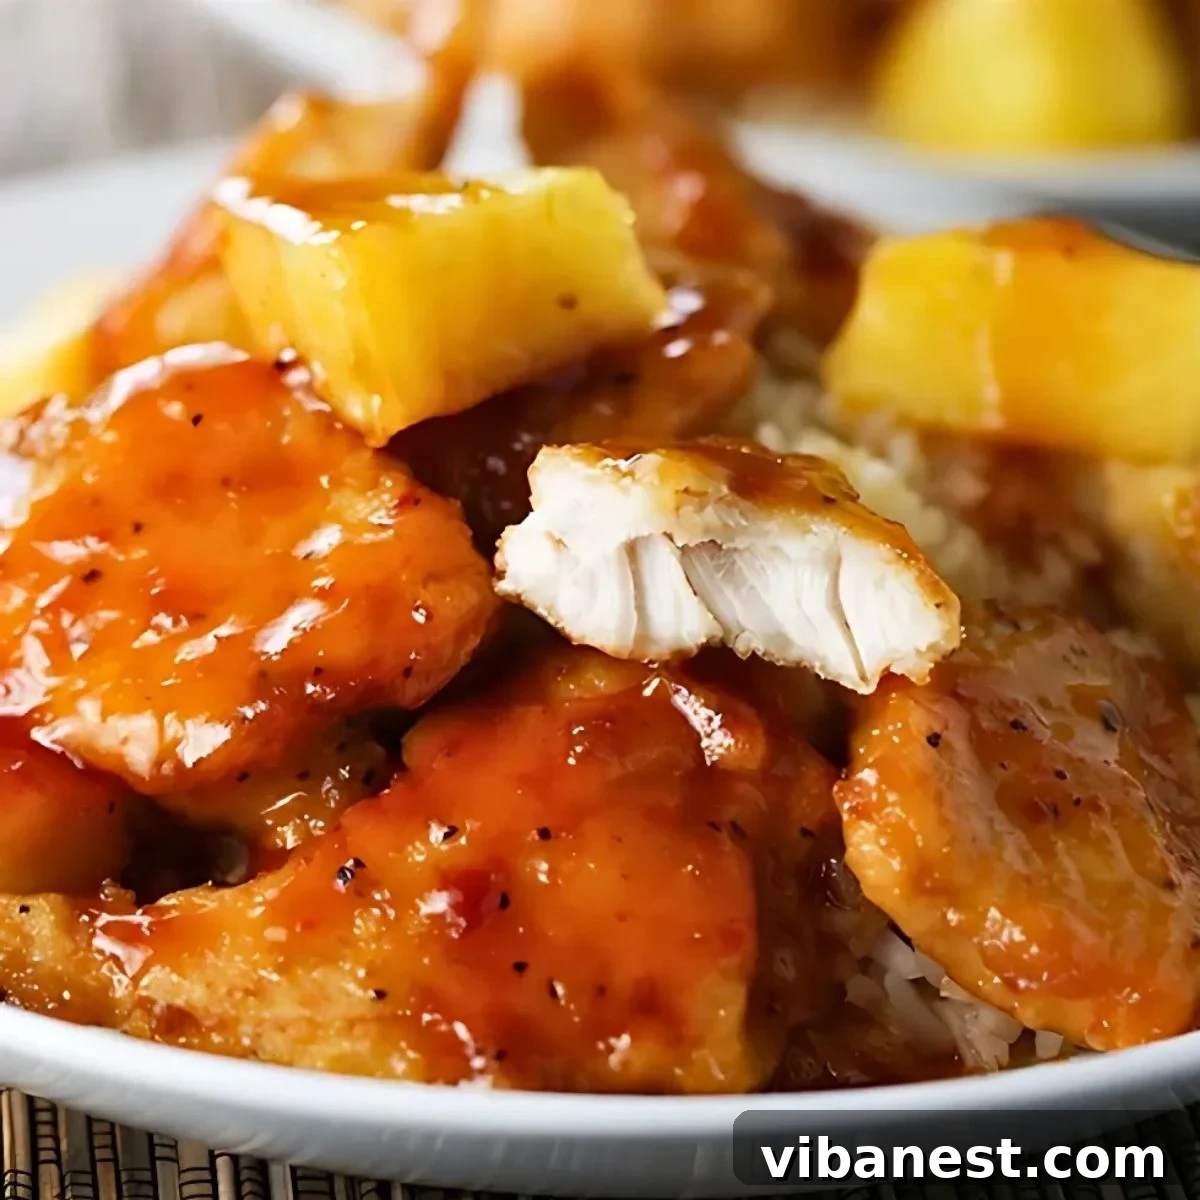
There’s something undeniably comforting about classic Chinese takeout, and for many, sweet and sour chicken stands out as a top contender. Its vibrant colors, crispy texture, and that iconic sweet-tangy glaze are simply irresistible. However, the convenience often comes with a trade-off. Traditional takeout versions are frequently deep-fried, loaded with unhealthy fats, and smothered in sauces brimming with excessive sugar, sodium, and artificial ingredients. This can leave you feeling less than great, negating the very comfort you sought.
But what if you could recreate that beloved flavor profile at home, with complete control over every ingredient and preparation method? Imagine sinking your teeth into tender, juicy chicken pieces coated in a homemade sweet and sour sauce that’s bursting with authentic flavor, all without the guilt. This isn’t just a fantasy; it’s a delicious reality waiting to happen in your kitchen. About a year ago, I embarked on a mission to perfect a homemade version of this classic, seeking to capture its essence while making it more wholesome and satisfying. After sifting through numerous recipes and countless trials, I found inspiration in a family favorite shared by Mel’s Kitchen Cafe, and with a few personal tweaks, I discovered the ultimate recipe that has since become a staple in our household.
Ditch the Takeout: Why Homemade Sweet and Sour Chicken Reigns Supreme
While the allure of a quick takeout meal is strong, opting for a homemade sweet and sour chicken recipe offers a multitude of benefits that extend beyond mere convenience. The primary advantage lies in the complete control you gain over the ingredients. Store-bought sauces and restaurant preparations often contain high fructose corn syrup, artificial colors, preservatives, and exorbitant amounts of sodium. When you make it from scratch, you choose fresh, high-quality components, ensuring a meal free from unwanted additives.
Beyond health considerations, the flavor and texture of homemade sweet and sour chicken are simply superior. Instead of a thick, sometimes gloopy sauce, you’ll create a vibrant, balanced glaze that clings beautifully to the chicken. Our method avoids deep-frying, which often results in excessively oily chicken, in favor of a pan-searing and baking technique. This approach yields a delightful crispness on the outside while keeping the chicken incredibly tender and moist on the inside. Plus, the satisfaction of preparing such a beloved dish from start to finish is a reward in itself.
The Anatomy of Flavor: What Makes Sweet and Sour Chicken So Irresistible?
The magic of sweet and sour chicken lies in its captivating duality – the harmonious interplay between contrasting flavors. The “sweet” typically comes from sugar or sometimes fruit juices, providing a delightful richness, while the “sour” element is often vinegar, delivering a sharp, tangy kick. This iconic flavor profile originated in Chinese cuisine, where the balance of five fundamental tastes – sweet, sour, salty, bitter, and umami – is paramount. In this dish, the sweetness is often provided by sugar, and sometimes pineapple, while the sourness comes from vinegar. Ketchup adds a touch of umami and a subtle savory depth, complemented by Worcestershire sauce and garlic powder.
Achieving this delicate balance is key to a truly authentic and enjoyable sweet and sour chicken. Too much sweetness can make it cloying, while too much sourness can be overwhelming. Our carefully crafted sauce recipe ensures that neither flavor dominates, allowing them to complement each other perfectly, creating a complex and highly addictive taste that keeps you coming back for more.
Mastering the Chicken Preparation for Optimal Texture
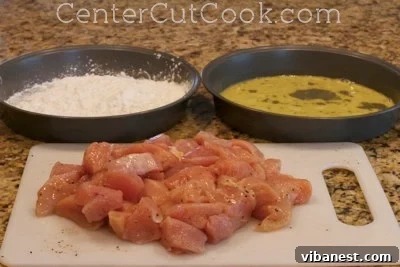
The foundation of great sweet and sour chicken starts with properly prepared chicken. For this recipe, we use boneless, skinless chicken breasts, but chicken thighs can also be a fantastic choice for their added moisture and flavor. Begin by cutting 3-4 chicken breasts into uniform 1-inch cubes. This ensures even cooking and allows each piece to get wonderfully coated in the sauce. Seasoning is crucial here; a generous sprinkle of salt, pepper, and garlic powder directly onto the chicken pieces will build a flavorful base from the start.
Next comes the dredging process, which creates that desirable crispy exterior. You’ll need two shallow dishes for this. In the first, place about 1 cup of cornstarch. In the second, lightly beat 2 large eggs. The process is simple: take each seasoned chicken piece, first dip it thoroughly in the cornstarch, ensuring it’s completely covered. The cornstarch helps absorb moisture, which is essential for crispiness. Then, immediately transfer the cornstarch-coated chicken to the beaten egg, allowing it to get a thin, even layer of egg wash. This egg layer acts as a binder, helping the subsequent browning step achieve a beautiful golden crust. Set the coated chicken pieces aside on a clean plate or baking sheet as you work through the rest.
Pan-Searing for a Golden Finish
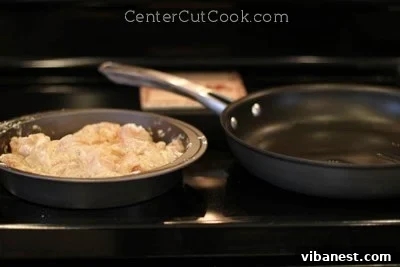
Once your chicken is prepped, it’s time for the crucial browning step. Heat about ¼ cup of vegetable oil in a large skillet over medium-high heat. The oil should be shimmering but not smoking. When it’s sufficiently hot, carefully add the coated chicken pieces to the skillet. It’s important to cook the chicken in batches, if necessary, to avoid overcrowding the pan. Overcrowding can lower the oil temperature, leading to steamed rather than browned chicken, which won’t achieve that desired texture. The goal at this stage is to simply brown the exterior of the chicken, forming a golden crust, not to cook it through completely.

Allow the chicken to cook for a few minutes on one side until it develops a beautiful golden-brown color. Then, flip each piece with tongs to brown the other side. This ensures an even crust and consistent texture. This browning process seals in the juices and adds a layer of flavor that can’t be achieved with just baking. Once both sides of the chicken have acquired a nice golden coating, remove them from the skillet.
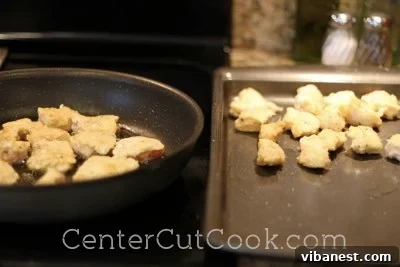
Transfer all the browned chicken pieces into a large, rimmed baking dish. A baking dish is essential as it will contain the sauce during the baking process and allow the chicken to bathe in the flavorful glaze.
The Vibrant Additions: Peppers and Pineapple
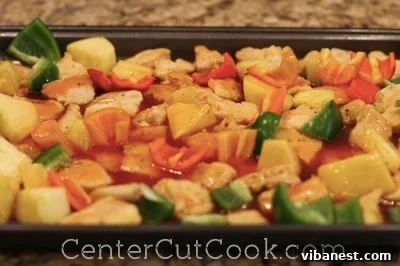
While the star of the show is undoubtedly the chicken, adding fresh vegetables and fruit elevates this dish with vibrant colors, textures, and additional layers of flavor. For a classic sweet and sour chicken experience, bell peppers and pineapple are customary. Cut one green bell pepper and one red or yellow bell pepper into chunky pieces. These add a delightful crunch and a hint of natural sweetness. Fresh pineapple chunks are highly recommended for their bright, tangy sweetness that complements the sauce perfectly, but canned pineapple (drained) works just as well. Arrange these colorful additions around the browned chicken in your baking dish.
This step is entirely optional, and you can customize it based on your preferences. Some prefer their sweet and sour chicken without extra fillings, while others might experiment with different vegetables like onions, carrots, or even snow peas. The key is to choose ingredients that can withstand the baking time without becoming too soft.
The Heart of the Dish: Homemade Sweet and Sour Sauce
Now for the pièce de résistance: the homemade sweet and sour sauce. This is where the magic truly happens, transforming simple ingredients into a rich, complex glaze. In a large mixing bowl, combine the following: 1 ½ cups sugar, ½ cup ketchup, 1 cup vinegar (white or rice vinegar works well), 1 ½ tablespoons Worcestershire sauce, 2 teaspoons garlic powder, and ½ teaspoon coarse black pepper. Whisk all these ingredients vigorously until the sugar is fully dissolved and the sauce is smooth and well combined. The ketchup provides a deep, savory tomato base, the vinegar delivers the essential tang, and the sugar balances it with sweetness. Worcestershire sauce adds a unique umami depth, while garlic powder and black pepper tie all the flavors together.
Once your sauce is ready, pour it evenly over the chicken, pineapple, and peppers in the baking dish. Ensure every piece is generously coated, as the chicken will soak up these magnificent flavors during baking. This homemade sauce is infinitely better than anything you’ll find in a bottle, allowing you to appreciate the fresh, vibrant taste in every bite.
Baking to Perfection: Infusing Every Bite with Flavor
With the chicken, vegetables, and sauce all assembled in the baking dish, it’s time to let the oven do its work. Preheat your oven to 325°F (160°C). Place the baking dish in the preheated oven and bake for approximately 1 hour. The key to ensuring maximum flavor absorption and even cooking is to turn the chicken pieces and vegetables every 15 minutes. This action helps every side of the chicken get thoroughly coated in the bubbling sauce, allowing it to caramelize slightly and develop an incredible depth of flavor. This gentle baking process also ensures the chicken cooks through to perfection, remaining tender and juicy.
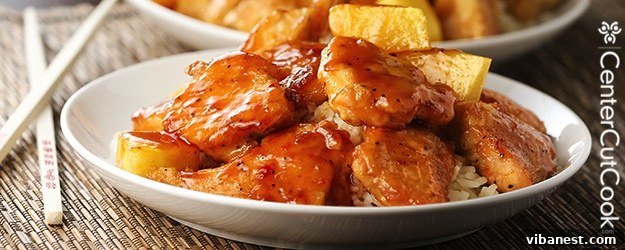
By the end of the hour, your kitchen will be filled with an intoxicating aroma. The chicken will be gloriously coated, the peppers slightly tender-crisp, and the pineapple perfectly infused with the sweet and sour glaze. The result is truly super delicious, tender Sweet and Sour Chicken!
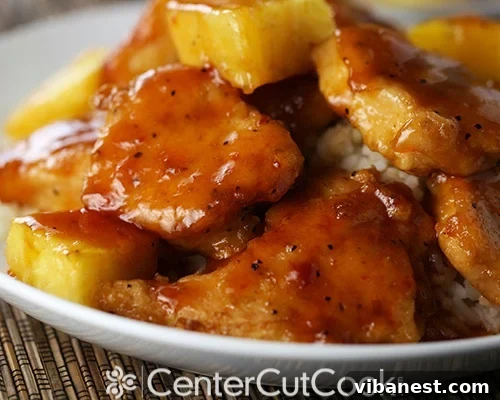
This dish is, without a doubt, one of our absolute favorite meals. The combination of crispy-tender chicken and that homemade sweet and sour sauce is simply unparalleled. If you’re searching for the best recipe to make Sweet and Sour Chicken at home, your search ends here!
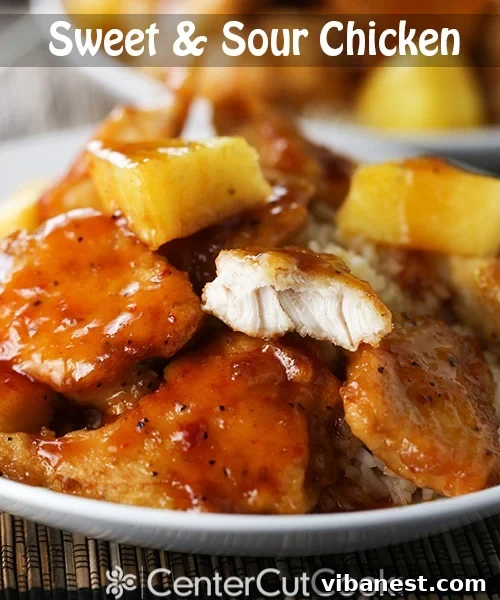
Sweet and Sour Chicken Recipe
Learn how to make the best Sweet and Sour Chicken at home! This recipe delivers tender chicken coated in a vibrant, homemade sweet and sour sauce, rivaling any takeout experience.
Cook Time: 1 hour
Servings: 4
Ingredients
CHICKEN INGREDIENTS
- 3-4 boneless, skinless chicken breasts, cut into 1-inch cubes
- 1 cup corn starch
- 2 large eggs, lightly beaten
- Salt, black pepper, and garlic powder (for seasoning chicken)
- 1/4 cup vegetable oil (or more, as needed, for browning)
- 1 green bell pepper, cut into chunks (optional)
- 1 red or yellow bell pepper, cut into chunks (optional)
- 1 cup pineapple chunks (fresh or canned, drained)
SAUCE INGREDIENTS
- 1 1/2 cups granulated sugar
- 1/2 cup ketchup
- 1 cup white vinegar
- 1 1/2 tablespoons Worcestershire sauce
- 2 teaspoons garlic powder
- 1/2 teaspoon coarse black pepper
Instructions
- Preheat your oven to 325°F (160°C).
- Cut the chicken breasts into uniform 1-inch cubes. Season generously with salt, black pepper, and garlic powder.
- Prepare your dredging stations: Place 1 cup of corn starch in one shallow dish and the 2 beaten eggs in another shallow dish.
- Dip each seasoned chicken piece first into the corn starch, ensuring it’s fully coated. Then, transfer it to the beaten egg, coating it completely. Set the coated chicken aside.
- Heat about 1/4 cup of vegetable oil in a large skillet over medium-high heat. Once hot, add the coated chicken pieces in batches. Do not overcrowd the pan; cook in multiple batches if necessary to ensure proper browning. The goal is to brown the chicken on all sides, not cook it through completely.
- Flip the chicken pieces regularly to ensure even browning and a beautiful golden crust. Once all sides are nicely browned, remove the chicken from the skillet and transfer it to a large, rimmed baking dish.
- If using, add the pineapple chunks and the bell pepper chunks to the baking dish alongside the chicken, arranging them evenly.
- In a separate large bowl, whisk together all the sauce ingredients: sugar, ketchup, vinegar, Worcestershire sauce, garlic powder, and coarse black pepper until the sugar is dissolved and the mixture is smooth.
- Pour the prepared sweet and sour sauce evenly over the chicken, pineapple, and peppers in the baking dish. Ensure everything is well coated.
- Bake in the preheated oven for approximately 1 hour. To ensure even cooking and thorough sauce absorption, turn the chicken and vegetables every 15 minutes during baking.
- Once baked, remove the dish from the oven. For those who love extra sauce, you can spoon any remaining sauce from the pan into a small bowl to serve alongside the chicken.
- Serve your delicious homemade Sweet and Sour Chicken hot over steamed white rice or your favorite noodles. Enjoy!
Serving Suggestions for a Complete Meal
This homemade sweet and sour chicken is a complete meal in itself, but it truly shines when paired with the right accompaniments. Steamed white rice is the traditional choice, soaking up the flavorful sauce beautifully. For a healthier option, consider brown rice or quinoa. If you’re a noodle lover, a side of simple lo mein or even just plain spaghetti tossed with a little sesame oil can be delightful. To boost your vegetable intake and add another layer of freshness, serve it alongside steamed broccoli, green beans, or a crisp cucumber salad. A sprinkle of toasted sesame seeds and chopped green onions as a garnish will add both visual appeal and a burst of fresh flavor.
Tips for Success and Delicious Variations
This recipe is incredibly versatile, allowing for customization to suit your taste. For an even tangier sauce, you can slightly increase the amount of vinegar, or for more sweetness, add a touch more sugar or a tablespoon of honey. If you enjoy a hint of spice, a pinch of red pepper flakes or a dash of sriracha in the sauce can add a wonderful kick. Don’t be afraid to experiment with other vegetables – sliced carrots, snap peas, or water chestnuts can all make excellent additions. For those who prefer different proteins, this recipe works wonderfully with pork, shrimp, or even firm tofu, adjusting cooking times as needed.
This dish also makes for excellent meal prep. You can prepare the chicken and sauce in advance, storing them separately, then combine and bake when ready. Leftovers keep well in the refrigerator for 3-4 days and can be easily reheated. You can also freeze portions of the cooked chicken and sauce (separately or together) for a quick future meal. Simply thaw overnight in the refrigerator and reheat in the oven or on the stovetop.
Enjoy the rich, authentic flavors and the rewarding experience of creating this classic dish right in your own home!
Recipe inspiration adapted from Mel’s Kitchen Cafe