
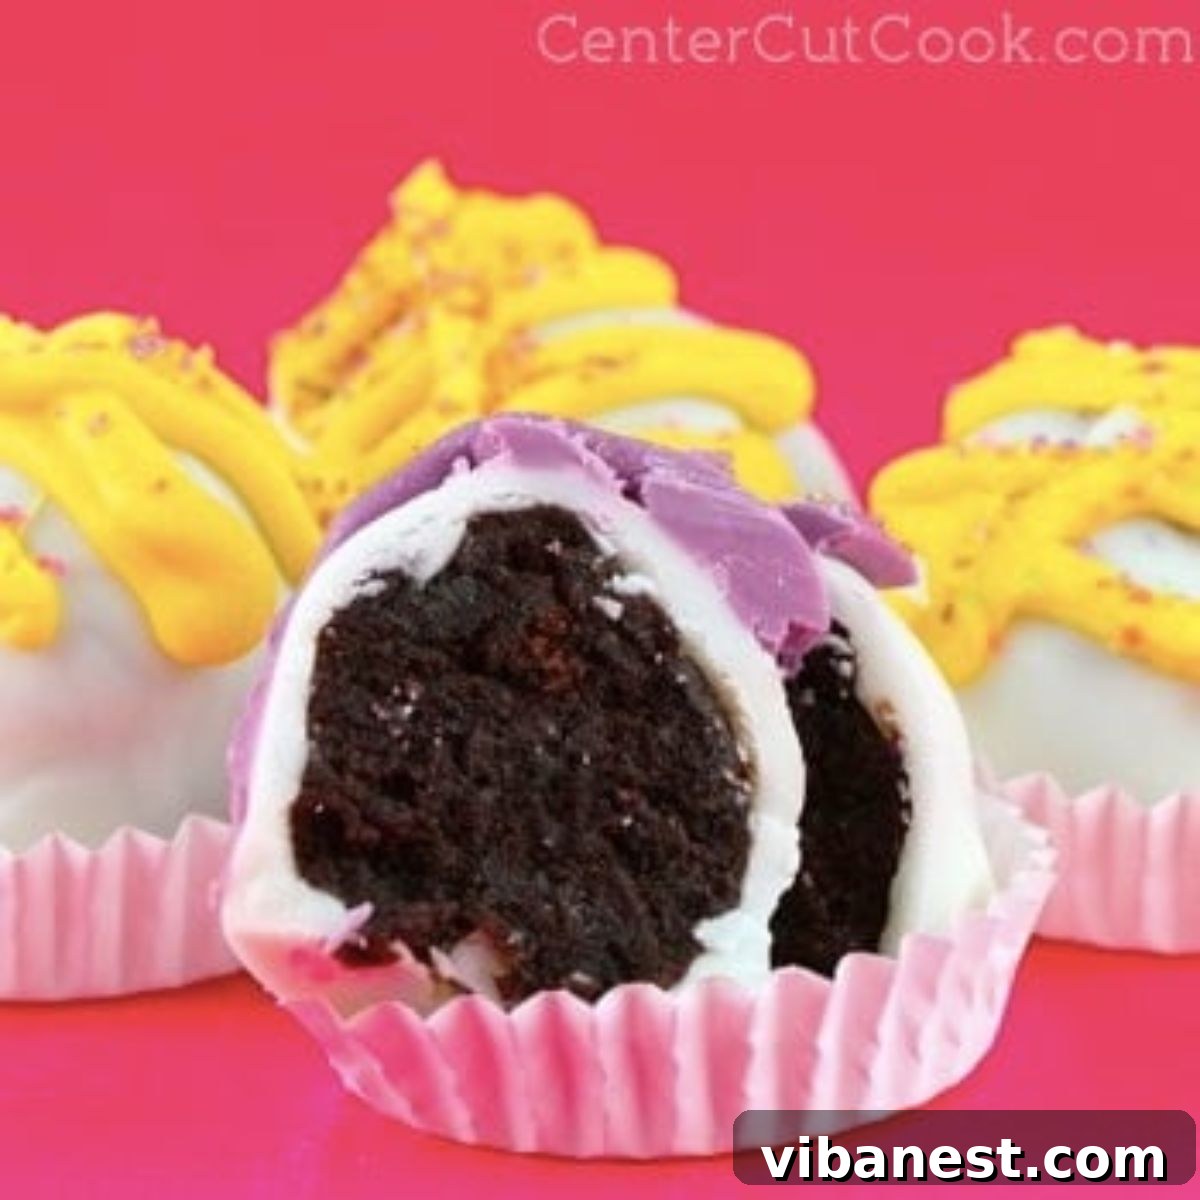
Easy Homemade Cake Balls: The Ultimate Party Treat Recipe
Forget the traditional cake and cupcakes; the dessert world has found a new darling: cake balls. These delightful, bite-sized treats are quickly becoming the must-have indulgence at every celebration, from birthday parties to baby showers, and even as a thoughtful homemade gift. Perfectly portioned, incredibly versatile, and undeniably charming, cake balls offer a convenient and mess-free alternative that everyone adores. If you’ve ever wondered how to create these captivating confections, you’ve come to the right place. We’ll guide you through a foolproof method, ensuring delicious results every time.
The Irresistible Rise of Cake Balls and Cake Pops
It seems like everywhere you look, cake balls and their stick-bound cousins, cake pops, are making an appearance. Their surge in popularity can largely be attributed to their convenience and the sheer joy they bring. No need for plates or forks; just pick up a perfect sphere of cakey goodness! While some might point to coffee shop chains for popularizing these treats, dedicated home bakers have been perfecting them for years. Their compact size makes them ideal for display, and their individual nature means less fuss for hosts and guests alike. They are miniature marvels of flavor and fun, suitable for any occasion.
Unlocking Creativity with Cake Ball Versatility
One of the most appealing aspects of cake balls is their incredible versatility. The possibilities are truly endless, allowing you to tailor them to any theme, flavor preference, or aesthetic. Whether you prefer a rich, decadent chocolate or a light, zesty lemon, cake balls can be customized to your heart’s content. You can experiment with different cake and frosting combinations, transforming a simple box mix into a gourmet experience. Beyond flavor, the decoration offers another realm of creativity. From elegant and simple drizzles to intricate designs with sprinkles, edible glitter, or colored candy melts, each batch can be a unique culinary canvas. And, of course, the choice between serving them as individual spheres or transforming them into playful “pops” with sticks adds another layer of charm.
The Secret to Delicious Simplicity: Our Go-To Recipe
For years, I’ve been delighting friends and family with these cake balls, and the most common reaction is always a surprised “How did you make these so perfect?” Many assume a complex, from-scratch recipe. They’re often amazed when I confess that my secret lies in a clever semi-homemade approach: a humble box of Devil’s Food Cake mix paired with a jar of rich fudge frosting! While the allure of baking entirely from scratch is strong, sometimes convenience triumphs, especially when the results are this spectacularly delicious. This method proves that you don’t need to be a pastry chef to create stunning and delectable treats. It’s all about technique, and that’s what we’re going to master together today. So, let’s dive into the step-by-step process of crafting these crowd-pleasing cake balls.
Essential Ingredients and Tools
Before we begin our delicious journey, gather your ingredients and ensure you have the necessary tools at hand. A well-prepared workspace makes the process smoother and more enjoyable.
Ingredients:
- 1 box (approximately 15.25 oz or 432g) of your favorite cake mix (Devil’s Food Cake is highly recommended for a rich flavor).
- Ingredients required for baking the cake mix (usually eggs, oil, and water).
- 1 (approximately 16 oz or 450g) jar of frosting (fudge frosting pairs beautifully with Devil’s Food cake, but feel free to choose your preferred flavor).
- 1 package (around 24 oz) vanilla or white almond bark, or high-quality white chocolate melting wafers.
- Optional: Wilton candy melts (any color) for additional decoration.
- Optional: Sprinkles, edible glitter, or other decorative toppings.
Tools You’ll Need:
- 9×13 inch baking pan.
- Large mixing bowl.
- Electric mixer (stand mixer or hand mixer).
- Parchment paper or wax paper.
- Baking sheet(s).
- Small scoop (like a tablespoon or cookie scoop) for forming balls.
- Two forks or a dipping tool for coating the cake balls.
- Microwave-safe bowl or double boiler for melting chocolate.
- Ziplock bag or piping bag for decorative drizzles (optional).
Step-by-Step Guide to Perfect Cake Balls
-
Bake Your Cake to Perfection
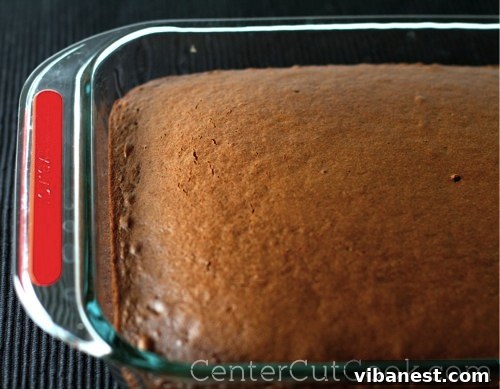
Begin by preparing your chosen cake mix according to the package directions. For optimal results, bake it in a 9×13 inch pan. Once baked, it’s crucial to allow the cake to cool completely. Rushing this step can lead to a sticky, overly moist mixture later on. You can speed up the cooling process by placing the cake in the refrigerator or freezer for a short period, ensuring it’s firm and cool to the touch.
-
Crumble the Cooled Cake
Once the cake has fully cooled, break it into manageable chunks. Transfer these chunks into a large mixer bowl. You can use your hands to crumble the cake into fine crumbs, or for a quicker method, use your stand mixer with the paddle attachment on low speed to gently break it down. The goal is an evenly crumbled cake base.
-
Combine Cake and Frosting
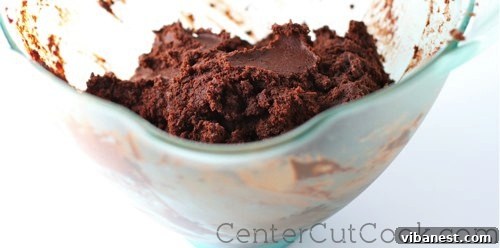
Now for the magic! Add approximately three-quarters of a jar of your chosen frosting to the crumbled cake in the mixer bowl. If you’re using Devil’s Food cake, rich fudge frosting is an unbeatable combination. Mix on low speed, gradually incorporating the frosting into the cake crumbs until a uniform, dough-like consistency is achieved. The mixture should be moist enough to hold its shape when rolled, but not overly sticky. Adjust frosting amount slightly if needed.

-
Chill the Mixture
To make the forming process significantly easier, place your cake and frosting mixture into the freezer for about 20-30 minutes. This chilling period allows the mixture to firm up, making it less sticky and much simpler to roll into perfect spheres. Don’t skip this step!
-
Prepare for Rolling
While your mixture is chilling, line a large baking sheet with parchment paper or wax paper. This prevents the cake balls from sticking and makes transfer a breeze. Have a clean, clear space ready for forming your cake balls.
-
Form and Re-Chill the Cake Balls
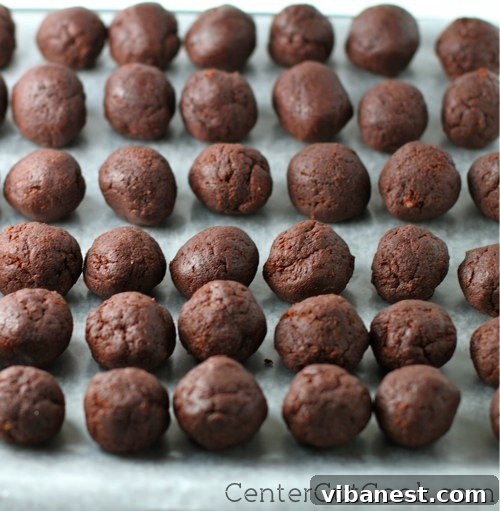
Remove the chilled mixture from the freezer. Using a small scoop (like a tablespoon) or your hands, begin forming 1-inch balls. Aim for consistency in size for even dipping and presentation. Place each formed ball onto your prepared parchment-lined baking sheet. Once all the cake balls are formed, return the entire baking sheet to the freezer for another 20-30 minutes. This second chill is crucial for firming the balls, preventing them from crumbling or melting when dipped into warm chocolate.
-
Melt the Dipping Chocolate
While your cake balls are undergoing their final chill, prepare your dipping chocolate. Melt the vanilla/white almond bark or white chocolate melting wafers according to the package instructions. This typically involves using a microwave in short intervals, stirring frequently, or a double boiler for a more controlled melt. Ensure the chocolate is smooth and fluid, without being too hot (which can cause the cake balls to crack). White almond bark is often preferred for its ease of melting and smooth consistency.
-
Dip and Decorate
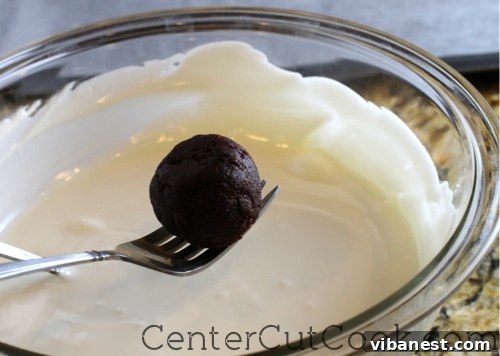
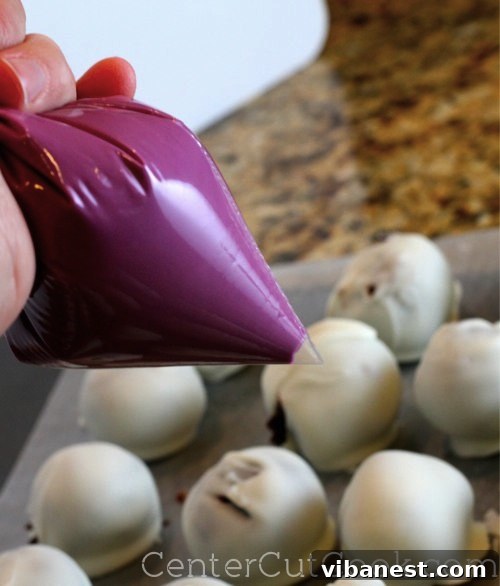
This is where your cake balls come to life! Remove only a few cake balls from the freezer at a time (about 5) to prevent the others from softening too quickly. Using two forks or a specialized dipping tool, gently submerge each cake ball into the melted white chocolate. Tap off any excess chocolate by gently tapping the fork against the side of the bowl. Immediately after dipping, while the chocolate is still wet, add sprinkles or any decorative frosting. For colorful drizzles, melt Wilton candy melts of your choice, place them in a small ziplock bag, snip off a tiny corner, and pipe designs over the coated cake balls.
-
Allow Chocolate to Set
Carefully place the dipped and decorated cake balls back onto the parchment-lined baking sheet. Allow them to sit for 10-15 minutes at room temperature, or briefly in the refrigerator, until the chocolate coating has fully set and hardened. This ensures a crisp, beautiful finish.
-
Serve and Enjoy!
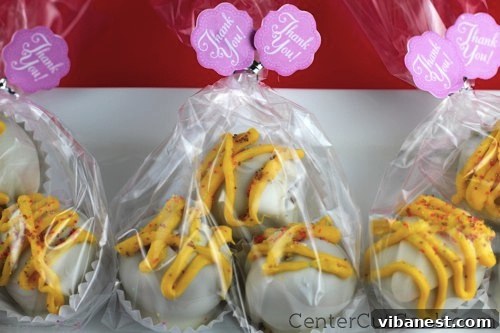
Once the chocolate has set, your stunning cake balls are ready to be devoured! Arrange them beautifully on a platter for your next gathering, package them charmingly as party favors, or simply enjoy them as a delightful treat for your family. They are fantastic for entertaining and make perfect thank-you gifts.
Tips for Cake Ball Success
- Don’t Overmix: When combining cake crumbs and frosting, mix just until incorporated. Overmixing can lead to a dense, tough cake ball.
- Proper Chilling is Key: The two chilling stages are vital. They ensure the balls hold their shape and prevent them from falling apart or melting into the warm chocolate.
- Chocolate Consistency: If your melted chocolate is too thick, add a tiny bit of shortening or coconut oil (1/2 tsp at a time) to thin it out. If it’s too thin, it might be too hot; let it cool slightly.
- Work in Batches: Always remove only a few cake balls from the freezer at a time for dipping. This keeps the remaining balls firm and easy to handle.
- Smooth Dipping: For a smooth coating, submerge the cake ball completely, lift it with two forks, and gently tap the fork against the edge of the bowl to allow excess chocolate to drip off.
- Immediate Decoration: Add sprinkles or drizzles immediately after dipping, before the chocolate sets, so they adhere properly.
Creative Flavor and Decoration Variations
While the Devil’s Food and fudge combination is a classic, don’t hesitate to explore new horizons:
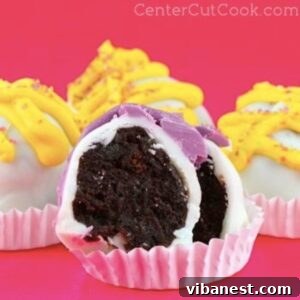
- Red Velvet Rhapsody: Use red velvet cake mix with cream cheese frosting, then dip in white chocolate and drizzle with red candy melts.
- Lemon Zest Delight: Lemon cake mix with lemon frosting, dipped in white chocolate, and topped with candied lemon peel or yellow sprinkles.
- Birthday Bash: Use vanilla or funfetti cake mix with vanilla frosting, dip in white chocolate, and adorn with colorful birthday sprinkles.
- Seasonal Sensations: Adapt your cake balls for holidays! Orange and black for Halloween, red and green for Christmas, pastels for Easter.
- Caramel Swirl: After dipping in white or milk chocolate, drizzle with a thin stream of melted caramel.
- Nutty Crunch: Roll the cake balls in finely chopped nuts (pecans, walnuts) before or after dipping in chocolate for added texture.
Serving and Storage Tips
Cake balls are best served at cool room temperature. For optimal freshness, store them in an airtight container in the refrigerator for up to a week. If you need to prepare them further in advance, they can be frozen for up to a month. Thaw them in the refrigerator before serving. They hold up incredibly well, making them a fantastic make-ahead dessert option.
How to Make Cake Balls
2 hours
30 minutes
2 hours
30 minutes
Ingredients
- 1 box Devil’s Food Cake Baked according to the directions on the box.
- 1 jar fudge frosting
- 1 package vanilla/white almond bark or white chocolate chips for melting
- 1 bag Wilton candy melts optional, any color of your choice
- sprinkles optional
Instructions
-
Prepare cake as directed on the box. Bake in a 9×13 inch pan.
-
When cake is done baking, allow it to cool completely.
-
Once the cake has cooled, cut it into chunks and place in your mixer bowl along with 3/4 of a jar of fudge frosting. Mix on low speed until the frosting has incorporated into the cake chunks.
-
Place the frosting/cake mixture in the freezer for 20-30 minutes so that forming balls will be easier.
-
Line a cookie sheet with parchment paper and begin forming one inch balls. I use a tablespoon to help me get the right size.
-
Once all of the balls have been formed, place them in the freezer to firm up for 20-30 minutes.
-
Melt the almond bark according to the directions on the package. Take a few cake balls out of the freezer at a time to dip in the white chocolate. I usually take about 5 out. If you take them all out, by the time you get to the last ones, they’ll be more difficult to work with from sitting out.
-
Melt Wilton candy melts according to the directions on the package. Use a piping bag or ziplock bag to decorate each cake ball. Top with sprinkles immediately before the chocolate has time to set.
Tried this recipe?
Mention @CenterCutCook and tag #CenterCutCook!

Conclusion: Your New Favorite Dessert
There you have it—a comprehensive guide to making incredible cake balls that are sure to impress! These delightful treats are more than just dessert; they’re a statement of creativity and care, perfect for any event or simply as a special indulgence. With their customizable flavors, endless decorating possibilities, and crowd-pleasing appeal, cake balls are destined to become a staple in your baking repertoire. So go ahead, unleash your inner baker, and enjoy the sweet success of these charming confections!