
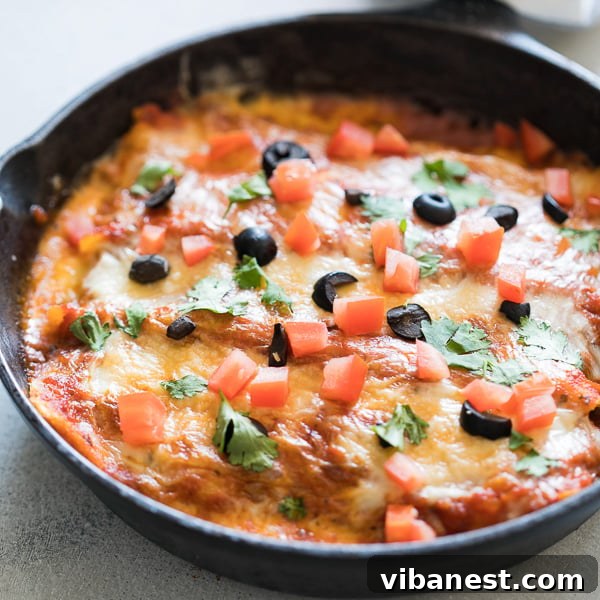
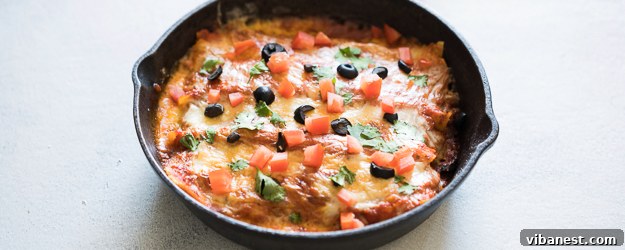
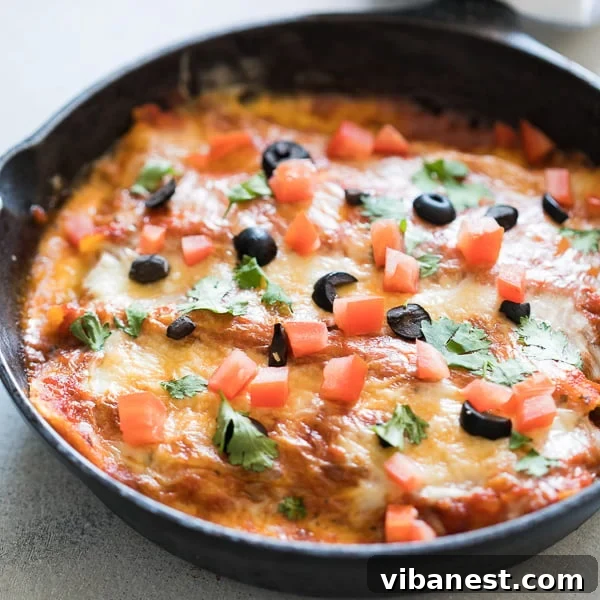
Prepare to have your weeknight dinner routine revolutionized with our incredible One-Pot Stovetop Enchiladas! Forget about preheating the oven, juggling multiple baking dishes, or facing a mountain of dirty dishes after enjoying a delicious meal. This recipe delivers all the rich, comforting flavors of classic enchiladas, cooked entirely on your stovetop from start to finish. It’s a game-changer for anyone craving authentic Mexican flavors with ultimate convenience.
Imagine tender tortillas generously filled with a savory mixture of refried beans, succulent shredded chicken, and ample melted cheese, all swimming in a vibrant, zesty enchilada sauce. The best part? It all comes together in a single pot, making cleanup an absolute breeze. Whether you’re a busy parent, a student in a small apartment, or simply someone who appreciates a straightforward yet profoundly satisfying meal, these stovetop enchiladas are destined to become a beloved staple in your culinary repertoire. Say goodbye to the fuss and hello to flavorful, mess-free dining!
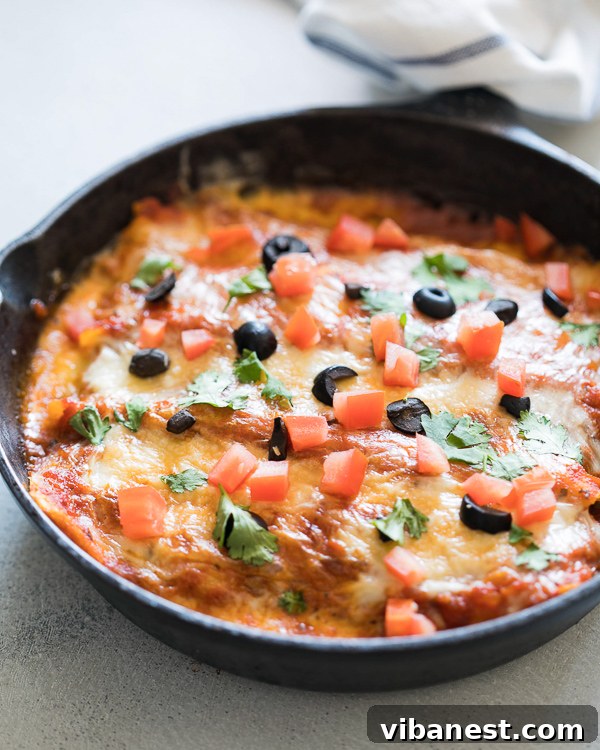
The Unrivaled Benefits of Stovetop Enchiladas
While traditional oven-baked enchiladas hold a special place in our hearts, the stovetop method introduces a level of convenience and efficiency that is simply unmatched. Embracing this one-pot approach offers a multitude of advantages that will make you rethink your usual cooking habits:
Effortless Cleanup: The Single Pot Advantage
The most immediate and perhaps most celebrated benefit of this recipe is the minimal cleanup. By utilizing a single skillet for the entire cooking process, you dramatically reduce the number of pots, pans, and baking dishes typically involved in making enchiladas. This translates to more time enjoying your meal and less time scrubbing dishes, making it perfect for busy weeknights or relaxed weekends.
Time-Saving: Skip the Oven Preheat
Traditional enchilada recipes often require a significant amount of oven preheating time, which can add 15-20 minutes to your total cooking duration. With stovetop enchiladas, you eliminate this step entirely. Simply heat your skillet, assemble your ingredients, and let the stovetop work its magic. This efficiency makes it an ideal option when you need a delicious meal on the table in a hurry.
Energy Efficient Cooking
Cooking on the stovetop generally consumes less energy compared to heating a large oven. This can lead to noticeable energy savings over time, especially if you frequently prepare meals. It’s a small change that contributes to a more sustainable kitchen practice.
Accessibility and Versatility
Not everyone has access to a fully functional oven, whether due to space constraints in a small kitchen, dorm room living, or a temporary setup. Stovetop enchiladas offer a fantastic solution, allowing you to enjoy this beloved dish regardless of your kitchen equipment. They are also incredibly versatile, easily adapting to various fillings and flavor profiles.
Superior Moisture and Flavor Infusion
Cooking enchiladas covered on the stovetop creates a wonderfully moist environment. This gentle steaming action ensures that your tortillas remain tender and pliable, absorbing the rich flavors of the enchilada sauce beautifully. The heat distribution from the bottom up also helps to meld all the ingredients together, creating a deeply satisfying, cohesive dish.
Crafting Your Perfect Filling: Ingredients & Customization
Our stovetop enchiladas are designed for flexibility, allowing you to tailor them to your taste preferences and what you have on hand. The classic combination of refried beans, shredded chicken, and cheese provides a comforting foundation, but don’t hesitate to get creative!
The Tortillas: Flour vs. Corn
For stovetop enchiladas, flour tortillas are often recommended for their flexibility and less tendency to tear, making them easier to roll and ensuring they stay intact during the cooking process. However, if you prefer corn tortillas, you can lightly warm them in a dry skillet or microwave for a few seconds before filling to make them more pliable and prevent cracking.
The Hearty Filling: Chicken, Beans, and Cheese
- Shredded Chicken: We use pre-cooked shredded chicken for ultimate convenience. This can be leftover rotisserie chicken, chicken breasts boiled and shredded, or even pre-packaged shredded chicken from your grocery store. For an extra layer of flavor, consider seasoning your chicken with chili powder, cumin, garlic powder, and a pinch of salt before adding it to the tortillas.
- Refried Beans: A can of refried beans is a secret weapon in enchilada fillings. They provide a creamy texture, bind the other ingredients together, and add a rich, earthy flavor. Feel free to use traditional pinto refried beans or opt for black bean refried beans for a slightly different taste.
- Shredded Cheese: We believe in an abundance of cheese! A good melting cheese is crucial. Mexican blend, Monterey Jack, Colby Jack, or a sharp cheddar all work wonderfully. We incorporate cheese into the filling to ensure every bite is gooey and delicious, and then generously sprinkle more on top for that irresistible golden, bubbly crust.
Endless Customization Options
This recipe truly shines with its adaptability. Here are some ideas to inspire your culinary exploration:
- Vegetarian Delight: Omit the chicken and replace it with black beans, corn, diced bell peppers, sautéed onions, or even roasted sweet potatoes for a delicious vegetarian version.
- Protein Power: Swap the chicken for seasoned ground beef, shredded pork (carnitas style), or even ground turkey for different flavor profiles.
- Spice it Up: Add a pinch of cayenne pepper, finely diced jalapeños, or a dash of your favorite hot sauce to the filling for an extra kick.
- Veggie Boost: Incorporate sautéed spinach, mushrooms, or zucchini into your filling for added nutrition and texture.
The Enchilada Sauce
For ultimate ease, a quality store-bought enchilada sauce is your best friend. Look for your preferred brand, whether you lean towards mild, medium, or spicy. If you have a bit more time and want to elevate the flavors even further, you could certainly opt for a homemade enchilada sauce – just be sure it’s thick enough to cling to the tortillas without being too watery.
Assembling Your Stovetop Masterpiece: Step-by-Step
The beauty of these enchiladas lies not only in their one-pot nature but also in their straightforward assembly. With a little preparation, you’ll have these delicious rolls ready for the skillet in no time.
Preparation is Key
Before you begin, ensure all your ingredients are prepped: chicken shredded, cheese grated, and any vegetables chopped. This streamlines the assembly process, making cooking more enjoyable.
Filling and Rolling the Tortillas
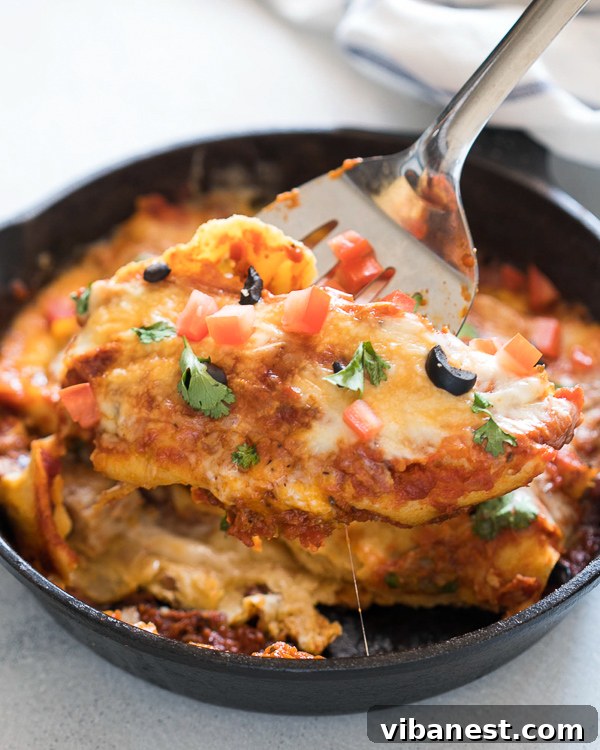
Lay your flour tortillas flat. Start by spreading a generous layer of refried beans across the center of each tortilla. This acts as a delicious base and helps bind the other ingredients. Next, pile on your shredded chicken, followed by a sprinkling of about a tablespoon of shredded cheese. Don’t overfill, or they’ll be hard to roll! Carefully roll each tortilla tightly into a cylinder. The tighter the roll, the better they will hold their shape during cooking.
Layering in the Skillet
Choose a 12-inch skillet with a tight-fitting lid – a cast iron or heavy-bottomed non-stick pan works best. Heat a teaspoon of oil in the skillet over medium heat. Once warm, pour about half of your enchilada sauce into the base of the pan, spreading it evenly. This creates a flavorful bed for your enchiladas and helps prevent sticking. Carefully arrange your rolled enchiladas side by side in the skillet. They should fit snugly, ideally in a single layer. Once all enchiladas are in place, pour the remaining enchilada sauce evenly over the top, ensuring each tortilla is well-coated.
The Gentle Cook: Achieving Perfection
Cover the skillet with its lid and reduce the heat to a low flame. The key to perfectly cooked stovetop enchiladas is a gentle, steady heat that allows them to steam and warm through without burning. Let them cook undisturbed for about 15 minutes. During this time, the tortillas will soften, the flavors will meld, and the filling will heat up. After 10 minutes, carefully lift the lid and generously sprinkle the remaining shredded cheese over the enchiladas. Re-cover the skillet and continue to cook for another 2-3 minutes, or until the cheese is beautifully melted and bubbly, and the enchiladas are thoroughly heated through. A gentle simmer of the sauce around the edges is a good indicator of doneness.
The Magic of Toppings: Elevate Your Enchiladas
While the enchiladas themselves are incredibly flavorful, toppings are truly what elevate them from great to extraordinary. They add layers of texture, freshness, and contrast that make every bite an experience. Don’t shy away from loading these stovetop enchiladas with your favorite garnishes!
- Freshness Factor:
- Chopped Tomatoes: Diced fresh tomatoes add a burst of juicy sweetness and vibrant color.
- Cilantro: A generous sprinkling of fresh cilantro provides a bright, herbaceous note that perfectly complements Mexican flavors.
- Green Onions: Sliced green onions offer a mild, oniony crunch and a touch of color.
- Pico de Gallo: A quick homemade pico de gallo (diced tomatoes, onions, cilantro, jalapeño, lime juice) adds incredible fresh flavor.
- Creamy & Cooling Elements:
- Avocado or Guacamole: Creamy slices of avocado or a dollop of fresh guacamole add richness and a cool counterpoint to the warm, cheesy enchiladas.
- Sour Cream or Greek Yogurt: A spoonful of sour cream or plain Greek yogurt provides a tangy, cooling contrast and luscious creaminess.
- Spicy Kicks:
- Sliced Jalapeños: Freshly sliced or pickled jalapeños can add a welcome touch of heat.
- Salsa: A drizzle of your favorite salsa (mild, medium, or hot) can further enhance the flavor profile.
- Crunch & Texture:
- Olives: Sliced black olives contribute a briny, salty pop.
- Crumbled Tortilla Chips: For an unexpected but delightful crunch, try crumbling a few tortilla chips over the top just before serving.
Experiment with different combinations to discover your ultimate topping creation. Each topping brings something unique to the table, transforming a simple dish into a vibrant feast for the senses.
Frequently Asked Questions About Stovetop Enchiladas
Can I make these enchiladas ahead of time?
Yes, you can! You can assemble the enchiladas (fill and roll them) and arrange them in the skillet, then cover and refrigerate for up to 24 hours. When you’re ready to cook, simply proceed with step 2 of the directions, adding a few extra minutes to the initial cooking time to account for the chill.
How do I store leftovers?
Allow any leftover enchiladas to cool completely. Transfer them to an airtight container and store them in the refrigerator for up to 3-4 days.
What’s the best way to reheat leftovers?
You can reheat individual portions in the microwave until warmed through. For larger portions, place them back in a skillet with a splash of water or extra enchilada sauce, cover, and gently warm on low heat until heated through. The stovetop method helps prevent the tortillas from drying out.
Can I use corn tortillas instead of flour?
Absolutely! If using corn tortillas, it’s highly recommended to lightly warm them in a dry skillet or microwave for about 10-15 seconds per side before filling. This makes them more pliable and significantly reduces the chance of them tearing when you roll them. The texture will be slightly different but still delicious.
What kind of skillet is best for this recipe?
A heavy-bottomed 10-12 inch skillet with a tight-fitting lid is ideal. Cast iron skillets work wonderfully for even heat distribution, but any good quality non-stick skillet will also do the trick.
We are massive fans of Mexican food in our household, and there’s an undeniable comfort that comes with those vibrant flavors, especially when it comes to enchiladas. This one-pot stovetop method has truly been a revelation, so much so that we might never go back to baking ours in the oven. It’s truly that good, that easy, and that delicious. We encourage you to use this recipe as a guide, letting your taste buds lead the way in customizing the fillings and toppings to your heart’s desire. We’re confident that once you try these, they’ll earn a permanent spot on your weekly menu rotation.
So, have we convinced you to try these incredible one-pot stovetop enchiladas for dinner tonight? We bet you already have most of the ingredients in your pantry, making that trip to the grocery store quick and painless. Don’t hesitate to give this recipe a try; you won’t regret it! If you do make them, please come back and leave us a comment below. We’d absolutely love to hear your thoughts and see your delicious creations!
INGREDIENTS
- 1 teaspoon Oil
- 1 10 ounce can Enchilada Sauce (your preferred mild, medium, or spicy)
- 5-6 Flour Tortillas (8-10 inch size recommended)
- 1 16 ounce can of Refried Beans
- 2 cups cooked shredded Chicken (rotisserie chicken works great)
- 2 cups shredded Cheese, divided (Mexican blend, Monterey Jack, or Cheddar)
- Optional Toppings: Chopped Tomatoes, Sliced Olives, Diced Avocado, Fresh Cilantro, Sour Cream, Sliced Green Onions, Jalapeños
DIRECTIONS
- Prepare the Filling: In a medium bowl, you can optionally mix the refried beans and shredded chicken together with a tablespoon or two of enchilada sauce for a more cohesive filling, or keep them separate as preferred.
- Assemble the Enchiladas: Lay each tortilla flat. Spread a generous layer of refried beans down the center, followed by shredded chicken. Sprinkle about 1 tablespoon of shredded cheese on top of the chicken. Tightly roll each tortilla into a cylinder and set aside.
- Prepare the Skillet: In a 12-inch skillet with a lid, heat 1 teaspoon of oil over medium heat. Pour half of the enchilada sauce into the base of the pan, spreading it evenly.
- Arrange and Cook: Carefully place the rolled enchiladas side by side in the skillet. They should fit snugly. Pour the remaining enchilada sauce evenly over the top of the enchiladas.
- Simmer to Perfection: Cover the skillet with the lid and reduce the heat to a low flame. Cook for 15 minutes.
- Add More Cheese: After 10 minutes of cooking, carefully lift the lid and sprinkle the remaining 1.5 cups of shredded cheese over the enchiladas. Recover the skillet and continue to cook for another 2-3 minutes, or until the cheese is beautifully melted and bubbly, and the enchiladas are heated through.
- Serve: Carefully remove the enchiladas from the skillet. Serve hot with your favorite toppings such as chopped tomatoes, olives, diced avocado, fresh cilantro, or a dollop of sour cream.