
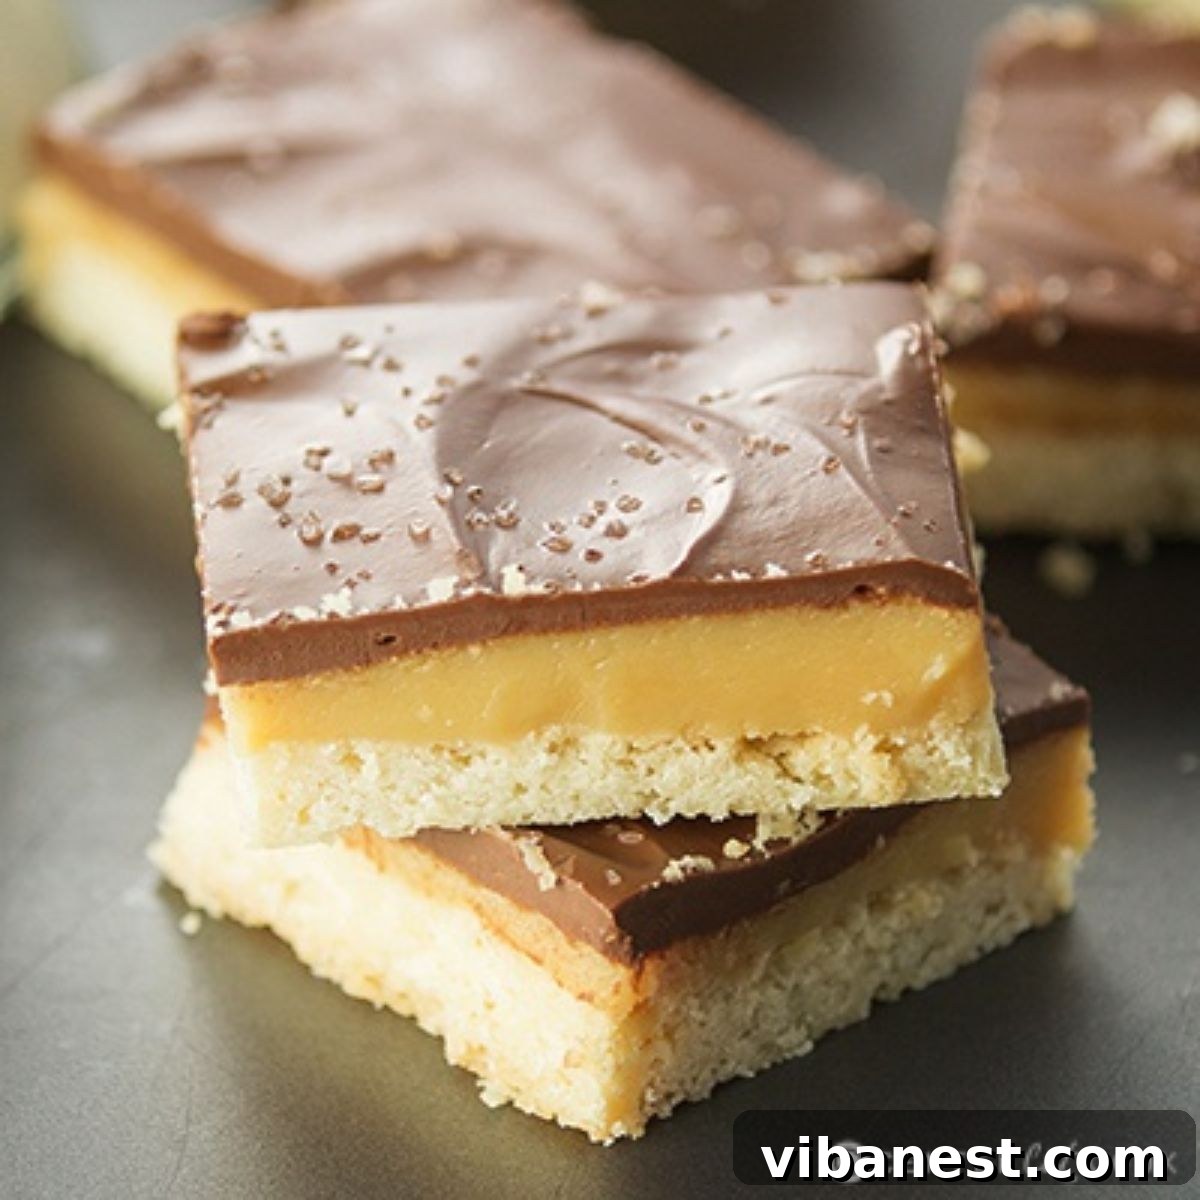
Ultimate Guide to Decadent Millionaire Bars: Shortbread, Caramel & Chocolate Perfection
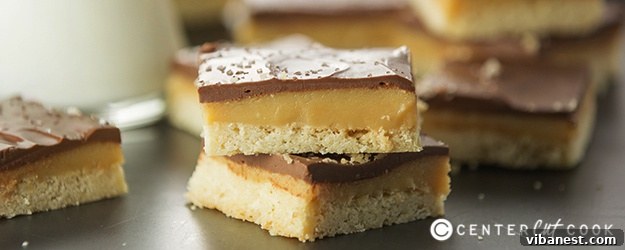
Prepare to embark on a culinary journey into the world of pure indulgence with our definitive guide to crafting the most exquisite **Millionaire Bars**. These legendary confections are a testament to layered perfection, combining a crisp, buttery shortbread base, a sumptuously soft and chewy caramel center, and a glossy, rich chocolate topping, often crowned with a delicate sprinkle of sea salt to balance the sweetness. If you’ve ever dreamt of a homemade treat that rivals the iconic Twix bar, or simply craved a dessert that embodies the best of both a sophisticated dessert bar and a fun candy bar, then look no further. This recipe promises an unforgettable experience that will have everyone reaching for another slice.
Millionaire Bars, also affectionately known as Millionaire Shortbread, have earned their opulent name for a reason: every bite feels like a million bucks! Some might even argue they deserve to be called “Billionaire Bars” for their sheer decadence. The magic lies in the harmonious interplay of textures and flavors – the crumbly shortbread melting in your mouth, the gooey caramel offering a satisfying chew, and the snap of the chocolate providing a luxurious finish. That hint of sea salt isn’t just for show; it’s a game-changer, elevating the sweetness and adding a complexity that makes these bars truly irresistible. These bars are a perfect cross between a hearty dessert bar and a delightful candy bar, offering the best of both worlds in every bite.
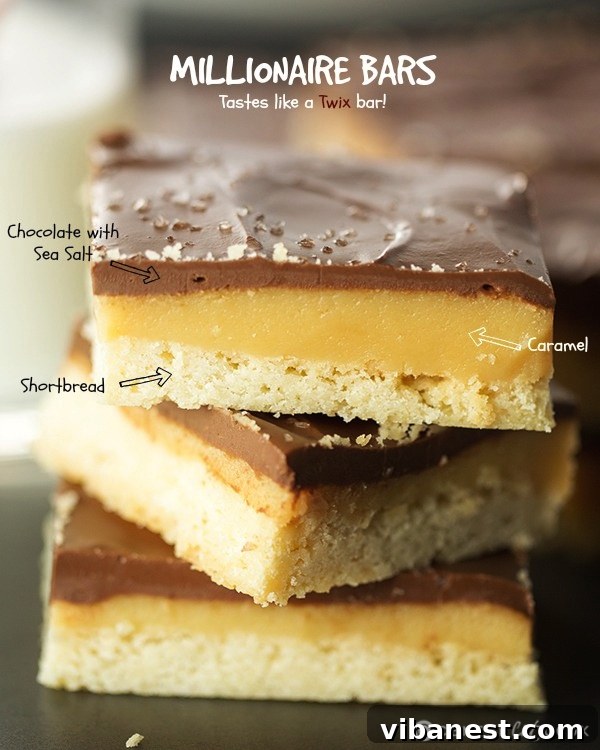
The Anatomy of a Perfect Millionaire Bar: Three Layers of Bliss
What makes Millionaire Bars so incredibly special? It’s the meticulous crafting of three distinct, yet complementary, layers. Understanding each component is key to achieving homemade perfection that stands out from store-bought alternatives. Each layer contributes uniquely to the overall experience, creating a symphony of taste and texture that is hard to resist.
1. The Buttery Shortbread Base: The Foundation of Flavor
Every great bar starts with an exceptional base, and for Millionaire Bars, that means a classic shortbread. Our shortbread recipe is designed to be tender, crumbly, and wonderfully buttery, providing the perfect counterpoint to the richer layers above it. Made with just a few simple ingredients – butter, all-purpose flour, granulated sugar, and a touch of salt – it bakes to a beautiful golden hue, creating a sturdy yet delicate foundation that holds everything together without being overly dense or dry. The subtle saltiness in the shortbread also plays a crucial role in enhancing the overall flavor profile of the entire bar, setting the stage for what’s to come.
2. The Irresistible Caramel Layer: Sweet, Chewy, and Golden
The heart of a Millionaire Bar is undeniably its luscious caramel layer. This isn’t just any caramel; it’s a rich, homemade creation that’s incredibly smooth, delightfully chewy, and bursting with buttery sweetness. Achieving the perfect consistency requires a little patience and attention during the cooking process, but the reward is immense. We use sweetened condensed milk, butter, and corn syrup to create a caramel that sets beautifully without becoming rock-hard, offering that delightful pull and chew that defines a truly great caramel treat. Its deep golden color hints at the rich, comforting flavor that awaits, making it a truly decadent middle layer.
3. The Decadent Chocolate Topping: A Smooth, Melty Embrace
Crowning these magnificent layers is a generous blanket of smooth, melty chocolate. For this recipe, we recommend using milk chocolate to complement the sweetness of the caramel and shortbread, but you can certainly experiment with dark or semi-sweet chocolate for a bolder, more intense flavor. The key here is achieving a perfectly smooth consistency for pouring and spreading, which we accomplish by melting the chocolate gently with a small amount of butter. This not only makes the chocolate easier to work with and ensures an even coating but also gives it a beautiful sheen and a softer snap when set. And, of course, a final sprinkle of flaky sea salt on top is non-negotiable for that ultimate sweet and salty crunch that truly elevates these bars to gourmet status!
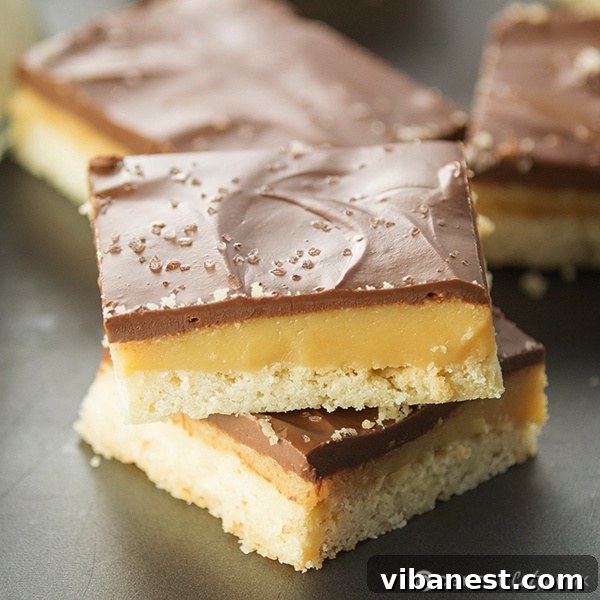
Love this recipe? Pin it now to save it for later!
Pin It Now
Why This Millionaire Bar Recipe Stands Out: Your Go-To Sweet Treat
While many recipes for Millionaire Bars exist, ours is meticulously designed for both ease of preparation and exceptional flavor, making it a perennial favorite for home bakers and dessert enthusiasts alike. Here’s why you’ll adore adding this recipe to your baking repertoire:
- Unbeatable Flavor Profile: The harmonious combination of crisp, buttery shortbread, sumptuously gooey caramel, and rich, melt-in-your-mouth chocolate is simply divine. The carefully balanced sweetness, coupled with that irresistible hint of sea salt, creates a truly gourmet experience that satisfies every craving.
- Twix Bar Reimagined: If you’re a devoted fan of the classic Twix candy bar, prepare to be amazed. These homemade Millionaire Bars capture that coveted shortbread-caramel-chocolate harmony in an elevated, more luxurious form. They offer a nostalgic taste with a sophisticated twist.
- Impressive Presentation, Simple Execution: Despite being relatively straightforward to make, these Millionaire Bars look incredibly sophisticated and professional. Their distinct layers and glossy chocolate topping make them perfect for potlucks, holiday gatherings, celebratory events, or as a thoughtful and delicious homemade gift.
- Minimal Hands-On Time: While each layer requires adequate setting and cooling time – a crucial step for achieving those perfect distinct layers – the actual time you spend actively preparing and assembling these bars is surprisingly short. This makes them a feasible and rewarding baking project for a leisurely weekend afternoon.
- The Ingenious Foil Trick: Our secret weapon for effortless dessert bar preparation! Lining your baking pan with aluminum foil allows you to easily lift the entire slab out once cooled and set, making cutting into neat, uniform squares an absolute breeze. This also significantly simplifies cleanup, leaving you more time to enjoy your delicious creation.
Essential Tip for Effortless Baking: The Magic of Foil Lining
One of the most valuable tricks I’ve learned over years of making various dessert bars is the absolute necessity of lining your baking pan with foil. This isn’t just about making cleanup easier (though it certainly does that!); it’s about flawlessly removing your delicate Millionaire Bars from the pan without any sticking, crumbling, or breaking. This simple technique ensures a perfect outcome every time. Here’s how to do it effectively for maximum benefit:
- Start by taking a long sheet of heavy-duty aluminum foil and pressing it firmly into the bottom of the pan, ensuring it covers the entire surface. Allow a generous amount of foil to hang over two opposite sides – these will act as your “handles.”
- Next, take another piece of foil, slightly shorter than the first, and place it perpendicular to the first sheet, allowing it to hang over the remaining two sides. This creates a sturdy “sling” or “cross” pattern, covering all sides and the bottom of the pan.
- Ensure the foil is smoothed down meticulously into the corners and along the bottom of the pan to create a nice, even surface without wrinkles. This helps prevent the shortbread from baking unevenly.
- Before adding your shortbread mixture, lightly spray the entire foil-lined pan with nonstick cooking spray. This provides an extra layer of insurance, preventing any sticking, especially with the buttery shortbread.
Once your Millionaire Bars have completely cooled and set – which is crucial for structural integrity – you simply use the overhanging foil edges as convenient handles to lift the entire block of bars cleanly out of the pan. Place it on a cutting board, peel back the foil, and slice away! This method guarantees perfect, clean, and beautifully presented cuts every single time, saving you from frustrating moments of trying to pry sticky bars from the bottom of your pan.
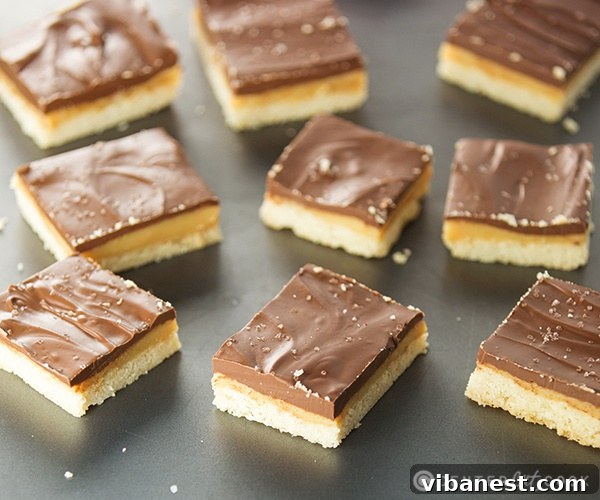
Millionaire Bars: The Ultimate Recipe
Ingredients
Shortbread Layer Ingredients
- 1 stick (8 tablespoons) unsalted butter, softened and cut into small pieces
- 1 cup all-purpose flour
- 1/3 cup granulated sugar
- 1/4 teaspoon table salt
Caramel Layer Ingredients
- 1 stick (8 tablespoons) unsalted butter
- 1 (14 ounce) can sweetened condensed milk
- 4 tablespoons light corn syrup
Chocolate Layer Ingredients
- 12 ounces milk chocolate, good quality, chopped or in chip form
- 1 tablespoon unsalted butter
- Flaky sea salt, for sprinkling (optional, but highly recommended for flavor balance)
Instructions
- Prepare Your Pan: Begin by preheating your oven to 350°F (175°C). Prepare an 8×8 inch (20×20 cm) baking pan by thoroughly lining it with aluminum foil, ensuring a generous overhang on all four sides. This overhang will serve as handles. Lightly spray the entire foil-lined pan with nonstick cooking spray. This essential step will guarantee easy removal and facilitate clean cuts later.
- Make the Shortbread Layer: In the bowl of a food processor, combine the all-purpose flour, granulated sugar, and table salt. Pulse these dry ingredients a few times to ensure they are well combined. Add the softened butter pieces to the food processor and pulse until the mixture resembles coarse crumbs and just begins to clump together. Avoid over-mixing. Press this crumbly mixture evenly and firmly into the bottom of your prepared pan. Bake for 20-22 minutes, or until the edges of the shortbread crust are lightly golden brown. Remove the pan from the oven and let the shortbread cool completely on a wire rack. This cooling is absolutely crucial before proceeding to the next layer.
- Prepare the Caramel Layer: In a large, deep microwave-safe bowl, melt 8 tablespoons (one stick) of unsalted butter. This typically takes about 1 minute 30 seconds on high power in most microwaves. Once the butter is fully melted, stir in the entire can of sweetened condensed milk and the light corn syrup. Whisk the mixture well until the butter is fully incorporated and the mixture is smooth and uniform.
- Cook the Caramel: Microwave the caramel mixture on high for approximately 6-8 minutes. During this time, it is vital to stop and stir the mixture vigorously every 30 seconds to prevent scorching and ensure even cooking. Initially, the mixture may seem thin and resistant to thickening, but patience is key. Continue stirring and microwaving until the caramel thickens significantly and transitions into a beautiful light golden-brown color. It should be thick enough to coat the back of a spoon. Be very careful not to overcook, as this can result in a hard or brittle caramel.
- Assemble Caramel on Shortbread: Carefully pour the warm, freshly cooked caramel layer evenly over the completely cooled shortbread crust. Use an offset spatula or the back of a spoon to gently spread the caramel to the edges of the pan if necessary, ensuring an even layer. Allow the caramel layer to set and cool to room temperature. To expedite this setting process, you can place the pan in the refrigerator for approximately 1 hour.
- Create the Chocolate Layer: In another large microwave-safe bowl, combine the chopped milk chocolate and 1 tablespoon of unsalted butter. Microwave this mixture at 50% power for 1 minute. After this initial minute, stir the chocolate and butter well. Then, continue microwaving in 20-second increments, stirring thoroughly after each interval, until the chocolate is completely melted and beautifully smooth with no lumps. Be cautious not to overheat the chocolate, as this can cause it to seize and become grainy.
- Finish and Chill: Pour the smooth, melted chocolate evenly over the cooled and fully set caramel layer. Immediately sprinkle with flaky sea salt, if you are using it, for that delightful sweet-salty contrast. Allow the chocolate to set at room temperature for about 10 minutes to firm up slightly. Then, transfer the pan to the refrigerator to cool completely for at least 30 minutes, or until the chocolate layer is firm and solid.
- Cut and Serve: Once completely chilled and firm, use the foil overhangs as handles to carefully lift the entire slab of Millionaire Bars out of the pan and onto a clean cutting board. Using a large, very sharp knife that has been warmed slightly (by running it under hot hot water and wiping it completely dry), cut the bars into your desired squares or rectangles. For the cleanest cuts, wipe your knife clean after each slice. Enjoy your glorious, homemade, and utterly decadent Millionaire Bars!
Pro Tips for Millionaire Bar Perfection
Achieving bakery-quality Millionaire Bars at home is entirely possible with a few insider tricks. These tips will help ensure your bars are not only delicious but also visually stunning:
- Patience is Your Best Friend: Rushing the cooling process for each individual layer is the biggest mistake you can make. It’s absolutely essential to allow each layer – shortbread, caramel, and chocolate – to set completely before adding the next. This prevents the layers from bleeding into each other, ensures clean, distinct lines, and creates the ideal texture for each component.
- Quality Ingredients Truly Matter: Since Millionaire Bars are composed of relatively few ingredients, the quality of each component really shines through in the final product. Invest in good quality, unsalted butter, a trusted brand of sweetened condensed milk, and a chocolate that you genuinely enjoy eating on its own. These small upgrades make a significant difference in flavor.
- Don’t Overcook the Caramel: Keep a very close eye on the caramel as it microwaves. It should thicken and turn a beautiful light golden-brown, but if it gets too dark or becomes excessively thick, it will become hard, brittle, and difficult to chew when cooled. Stirring frequently, as instructed, helps prevent scorching and ensures even cooking.
- Achieve Evenly Spread Layers: For the shortbread base, press it firmly and evenly into the prepared pan, paying attention to the corners. For the caramel and chocolate, use an offset spatula or the back of a spoon to gently spread them smoothly and evenly to the edges for a professional, polished finish.
- The Sea Salt Advantage: While technically optional, a sprinkle of flaky sea salt on the chocolate topping is a game-changer. It beautifully cuts through the richness and sweetness of the bars, adding a delightful textural crunch and a sophisticated flavor dimension. Don’t skip it if you love that irresistible sweet-salty dynamic!
- For Perfectly Clean Cuts: To achieve beautifully neat and professional-looking squares, use a large, very sharp chef’s knife. For the absolute cleanest cuts, warm your knife by running it under hot water, then wipe it completely dry before making each slice. This slight warmth helps the chocolate glide, preventing cracks.
Variations and Customizations for Your Millionaire Bars
Once you’ve mastered the classic Millionaire Bar, feel free to unleash your creativity and experiment with these delicious variations and customizations to tailor them to your taste:
- Dark Chocolate Lover’s Dream: Swap the milk chocolate for a high-quality dark or semi-sweet chocolate (60-70% cocoa solids work wonderfully) for a more intense, less sweet, and slightly bitter finish that balances the caramel perfectly.
- Nutty Notes: Enhance the texture and flavor by sprinkling finely chopped toasted nuts (such as pecans, walnuts, or almonds) over the caramel layer before adding the chocolate, or even on top of the chocolate for an added crunch.
- Spice It Up: Introduce warm, aromatic notes by adding a pinch of ground cinnamon, cardamom, or even a tiny dash of cayenne pepper (for a subtle kick) to your shortbread dough.
- Espresso Infusion: For coffee lovers, stir a teaspoon of high-quality instant espresso powder (or finely ground espresso beans) into your melted chocolate layer to create a delightful mocha-flavored topping.
- Tropical Coconut Delight: Incorporate shredded coconut into the shortbread layer or sprinkle it generously on top of the chocolate for a lovely tropical flair and added chewiness.
- White Chocolate Swirl: After pouring the milk or dark chocolate layer, drizzle melted white chocolate over the top and gently swirl it with a skewer or toothpick for a beautiful marbled effect.
- Citrus Zest: Add a teaspoon of finely grated orange or lemon zest to the shortbread dough for a bright, refreshing counterpoint to the richness.
Storage Instructions for Millionaire Bars
To keep your Millionaire Bars fresh and delicious, proper storage is key. They are a robust dessert that can be enjoyed for several days after baking:
- Room Temperature: Millionaire Bars are best stored in an airtight container at cool room temperature for up to 3-4 days. This allows the chocolate and caramel to remain perfectly soft and chewy.
- Refrigeration: For longer storage, you can keep them in an airtight container in the refrigerator for up to a week. If refrigerated, allow the bars to sit at room temperature for 10-15 minutes before serving to soften the caramel and chocolate slightly for optimal texture and flavor.
- Freezing: Millionaire Bars freeze exceptionally well, making them perfect for meal prep or future cravings. Wrap individual bars tightly in plastic wrap, then place them in an airtight freezer-safe container or freezer bag. They can be frozen for up to 1-2 months. Thaw at room temperature or in the refrigerator before serving.
Frequently Asked Questions About Millionaire Bars
Can I make Millionaire Bars ahead of time?
Absolutely! Millionaire Bars are an excellent make-ahead dessert, making them perfect for entertaining or holiday baking. In fact, many find that the flavors meld and deepen even further when left overnight, making them taste even better the next day. You can prepare them up to 3-4 days in advance and store them at room temperature in an airtight container.
Why is my caramel too hard or too soft?
Caramel consistency is paramount for Millionaire Bars. If your caramel turned out too hard and brittle, it was likely overcooked. Microwaving for too long or at too high a power can cause the sugar to crystalize excessively and harden. Conversely, if your caramel is too soft and runny, it was undercooked and didn’t reach the proper thickening stage. Ensure you stir frequently and carefully watch for the color change and thickening described in the instructions to hit that perfect chewy consistency.
Can I use different types of chocolate for the topping?
Yes, you certainly can! While milk chocolate offers a classic, sweeter profile that pairs wonderfully with the rich caramel, semi-sweet or dark chocolate can be used for a richer, less sweet bar that appeals to different palates. White chocolate can also be used, but note that it is significantly sweeter and has a different melting and setting texture. Feel free to experiment with your favorite type of chocolate to customize your bars.
My chocolate topping cracked when I cut the bars. How can I prevent this?
Cracking chocolate is a common issue, especially if the bars are too cold when cut, which makes the chocolate brittle. To prevent cracking and achieve clean slices:
- Avoid over-chilling the bars right before cutting. About 30-60 minutes in the refrigerator to firm up is usually sufficient.
- Allow the bars to sit at room temperature for 10-15 minutes before you begin cutting. This helps the chocolate soften just enough.
- Always use a very sharp, large knife. For the cleanest cuts, warm your knife under hot water and wipe it completely dry before each individual slice.
What size pan should I use for this recipe?
This recipe is specifically designed for an 8×8 inch (20×20 cm) baking pan, which yields wonderfully thick, generous bars with distinct layers. If you opt to use a larger pan (e.g., a 9×13 inch), your layers will be noticeably thinner. In such a case, you may need to adjust the baking times for the shortbread (likely reducing it) and might consider increasing the ingredient quantities for all layers by 1.5 times to maintain a similar desired thickness for each layer.
Indulge in Homemade Luxury Today!
Millionaire Bars are more than just a dessert; they are an experience – a journey through rich flavors and comforting textures that culminates in a treat that truly feels luxurious and special. Each carefully crafted layer contributes to a symphony of taste that is both satisfying and incredibly addictive. Whether you’re making them for a special occasion, to impress discerning guests, or simply to satisfy a personal craving for something truly decadent, this comprehensive recipe ensures success. So, gather your high-quality ingredients, follow our detailed step-by-step instructions, and prepare to create a batch of homemade Millionaire Bars that will undoubtedly earn you rave reviews and solidify your reputation as a master baker. Get ready to taste pure bliss!
Tried this recipe? Share your creations with us!
Mention @CenterCutCook and tag #CenterCutCook on social media!