

Experience the delightful simplicity of this 4-Ingredient Lemon Pie with Graham Cracker Crust – a truly creamy and refreshingly delicious dessert that effortlessly brightens any occasion. Whether you opt for the ultimate convenience of a store-bought graham cracker crust or embrace the joy of crafting your own from scratch, this recipe promises a perfect blend of tangy lemon and sweet indulgence with minimal effort.
As the warmth of summer days beckons, certain desserts immediately spring to mind, offering a cool and zesty escape. Among these beloved treats are the classic Key Lime Pie, the vibrant Frozen Pink Lemonade Pie, and of course, this incredibly creamy and flavorful 4-Ingredient Lemon Pie. Often affectionately known as lemon icebox pie, it captures the essence of sunshine in every bite. While choosing a favorite from such an exquisite lineup would be nearly impossible, this lemon pie stands out for its straightforward preparation and captivating taste that embodies the very spirit of summer.
Today’s recipe for lemon pie isn’t just easy; it’s a testament to how a few quality ingredients can combine to create something truly spectacular. Bursting with bright, tangy lemon flavor balanced by a sweet, rich filling and a perfectly crumbly crust, it’s a dessert that will have everyone asking for seconds. Get ready to embark on a delicious baking adventure; you absolutely have to try this one!
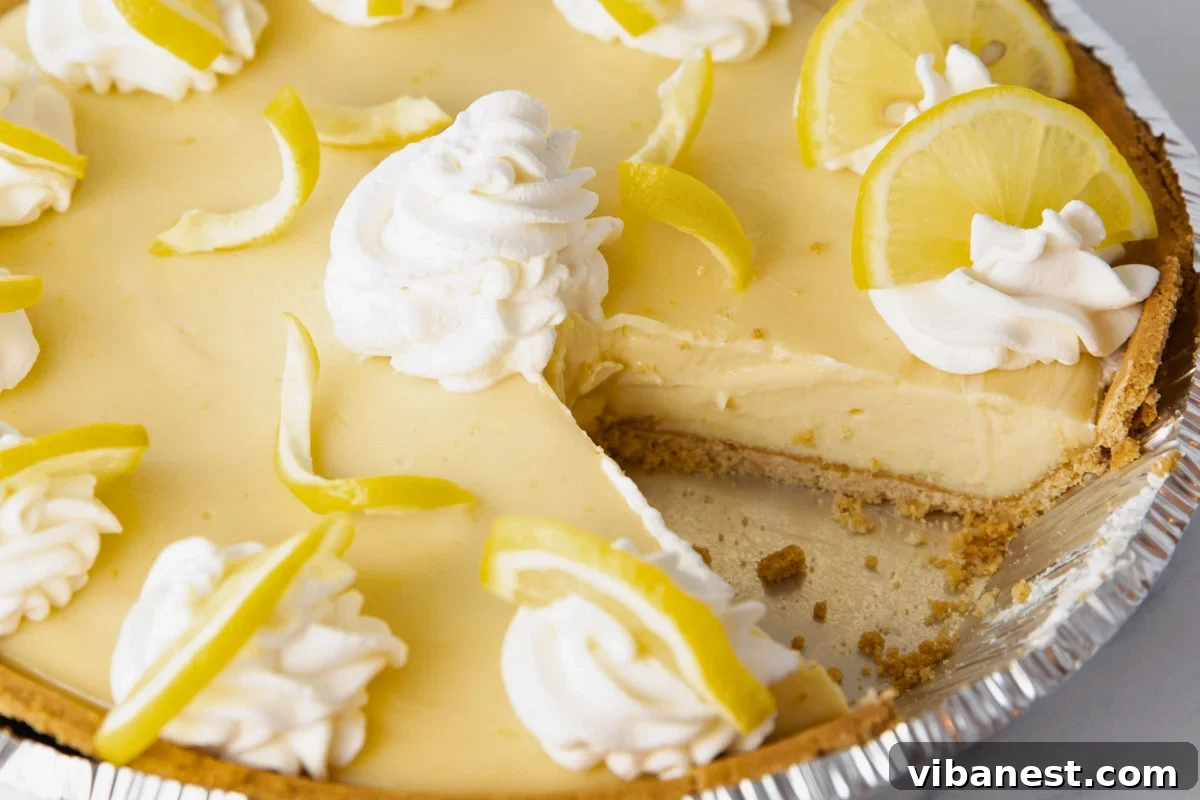
Unlock Zesty Flavor with Just 4 Key Ingredients for Your Lemon Pie
Crafting this luscious lemon pie requires only four foundational ingredients, excluding the graham cracker crust. This minimalist approach doesn’t compromise on flavor; instead, it highlights the quality and interplay of each component, creating a harmonious and unforgettable dessert. Let’s explore the essential elements that bring this zesty creation to life:
- Sweetened Condensed Milk – This forms the rich and creamy base of our lemon pie filling. Its thick consistency and inherent sweetness are crucial, contributing to the smooth texture and balanced flavor that perfectly complements the tartness of the lemon. It acts as a natural thickener and binder, helping the pie set beautifully without requiring extensive baking.
- Egg Yolks – Beyond adding a beautiful golden hue, large egg yolks play a vital role in binding the ingredients, thickening the filling, and imparting an unparalleled creaminess. They contribute to the pie’s luxurious mouthfeel and structure. Don’t discard the egg whites! They can be saved and repurposed for various delicious endeavors, such as airy meringues, light and fluffy angel food cakes, or delicate macarons.
- Fresh Lemon Juice – This is truly the star ingredient, providing the signature vibrant, tangy flavor that defines our lemon pie. The importance of using fresh lemon juice cannot be overstated, as it delivers a brighter, more authentic citrus punch compared to its bottled counterparts. To ensure a silky-smooth filling free from any unwanted bits, I highly recommend straining the fresh lemon juice through a fine-mesh strainer. This simple step removes any seeds or pulp, guaranteeing a pristine texture.
- Cool Whip – Found in the frozen dessert section of most grocery stores, Cool Whip adds a wonderful lightness and airiness to the pie filling. It helps achieve that signature creamy yet ethereal texture that makes this lemon pie so irresistible. Its ready-to-use nature also streamlines the preparation process, contributing to the recipe’s overall ease.
For those who wish to intensify the aromatic lemon notes, adding the zest from one lemon is an excellent optional step. Lemon zest, the bright yellow outermost peel of the lemon, is packed with essential oils that carry a potent, fragrant lemon essence. Incorporating zest will amplify the lemon flavor and aroma without adding extra tartness. To obtain fine zest, use a microplane grater, being careful to only grate the yellow part and avoid the bitter white pith underneath. A pro tip: always zest your lemon before you juice it, as it’s much easier to handle a whole lemon for zesting.

On average, a single fresh lemon yields approximately 2-3 tablespoons of juice. Therefore, to obtain the required 3/4 cup of fresh lemon juice for this recipe, you will typically need about 4-6 medium to large lemons. Keep in mind that the exact number can vary depending on the size, ripeness, and juiciness of the individual lemons you choose.
When properly stored in the refrigerator, covered with plastic wrap or in an airtight container, this lemon pie can last for 3-4 days. For optimal flavor and texture, it’s best enjoyed within the first 2-3 days.
Crafting the Perfect Graham Cracker Crust: Homemade or Store-Bought
One of the beauties of this lemon pie recipe lies in its flexibility, particularly when it comes to the graham cracker crust. While I often opt for a pre-made, store-bought graham cracker crust as a fantastic time-saving hack, there’s a unique satisfaction in creating your own. A homemade crust offers superior freshness and allows you to control the quality of ingredients and the exact texture. The full, detailed instructions are provided in the recipe card below, but here’s a quick overview of what you’ll need and how to prepare this delightful foundation:
- 1 ½ cups graham cracker crumbs (this usually equates to about 10-12 full graham cracker sheets)
- ¼ cup granulated sugar
- ½ cup unsalted butter, thoroughly melted
To prepare a perfectly buttery and crisp homemade graham cracker crust for this exquisite lemon pie, follow these simple steps:
- Preheat Your Oven – Begin by preheating your oven to 350 degrees Fahrenheit (175 degrees Celsius). This ensures the oven is at the correct temperature for baking the crust, giving it a delightful crispness.
- Crush the Graham Crackers – The goal is fine, even crumbs. You can achieve this by placing the graham cracker sheets in a large zip-top bag and crushing them with a rolling pin until uniformly fine. For an even quicker and more consistent result, pulse them in a food processor until they resemble fine sand.
- Combine Ingredients – In a medium-sized bowl, combine the freshly crushed graham cracker crumbs with the granulated sugar. Pour in the melted unsalted butter. Mix thoroughly until all the crumbs are moistened and resemble wet sand. This ensures an even distribution of butter, which is essential for binding the crust together.
- Press into a Pie Dish – Transfer the crumb mixture into a 9 or 10-inch pie dish. Using your fingers, the back of a spoon, or even the bottom of a flat-bottomed glass, firmly press the mixture evenly across the bottom and up the sides of the pie plate. It’s important to press firmly to create a compact crust that won’t fall apart when sliced.
- Bake to Golden Perfection – Place the pressed crust in the preheated oven and bake for 8-10 minutes. This baking step helps to toast the crumbs, deepen their flavor, and achieve a wonderfully crisp texture that holds up well against the creamy filling. Alternatively, for a no-bake crust, you can simply chill it in the refrigerator for at least 30 minutes to an hour to allow it to set.
With your perfect graham cracker crust ready – whether homemade or store-bought – you are now poised to create the star of the show: the creamy, dreamy lemon pie filling.
Effortlessly Crafting the Creamy Lemon Pie Filling
The instructions for assembling this luscious lemon pie filling are remarkably simple, making it an ideal recipe for both novice and experienced bakers alike. The magic happens with minimal fuss, resulting in a velvety-smooth and vibrantly flavored filling.
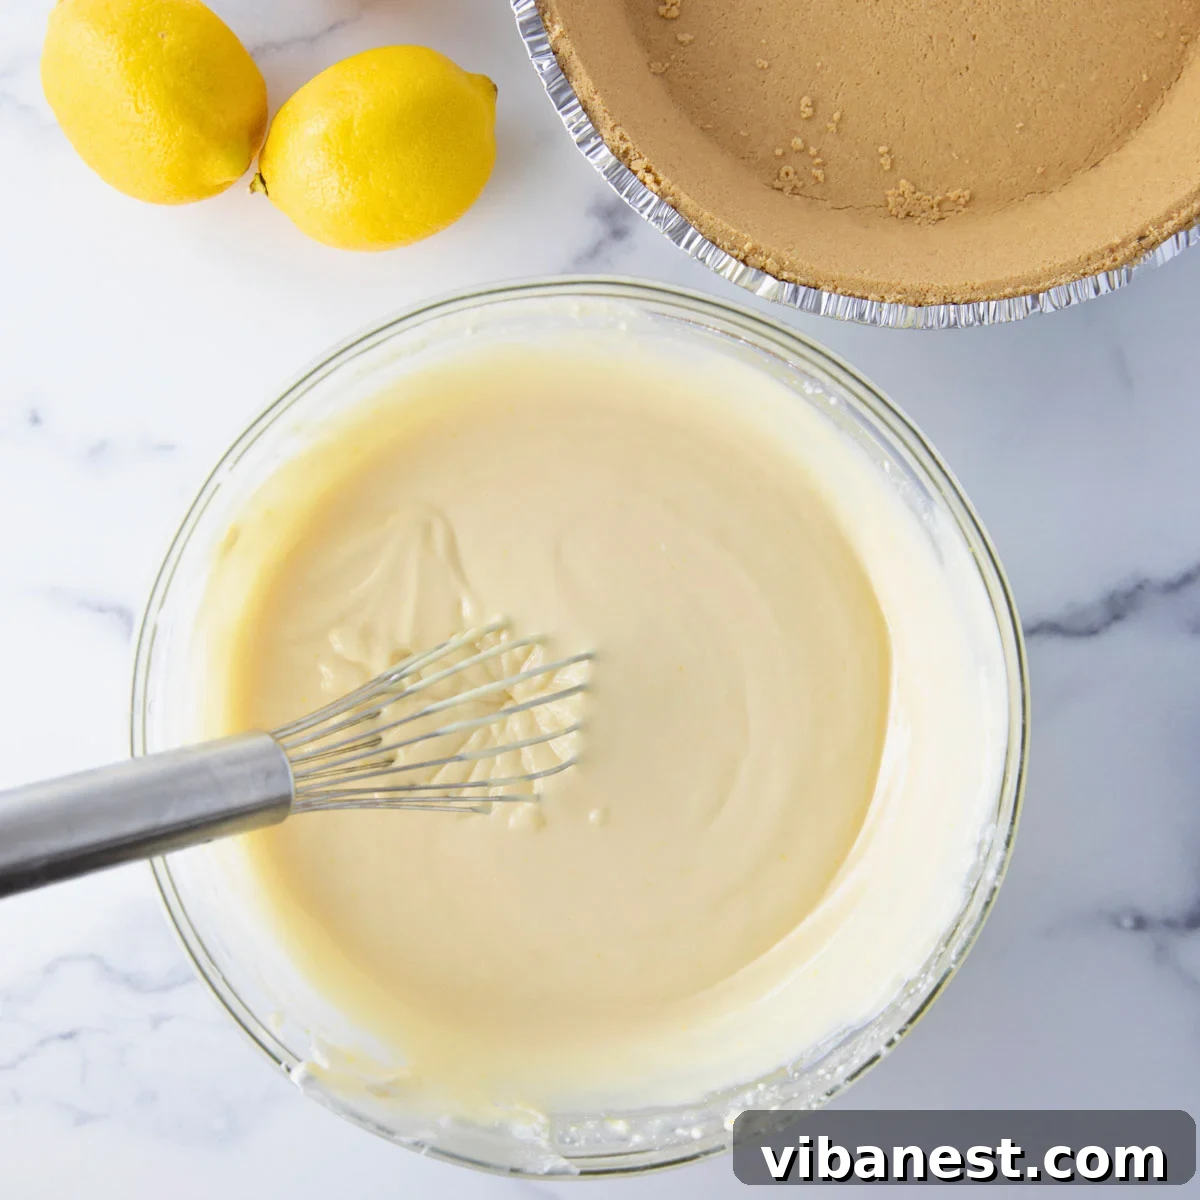
- Combine Wet Ingredients: In a large mixing bowl, begin by whisking together the sweetened condensed milk, the bright fresh lemon juice, and the large egg yolks. Whisk thoroughly until the mixture is completely smooth and well combined. This initial step ensures that the base of your filling is uniform and ready to incorporate the other elements.
- Incorporate Lightness: Gently fold in the Cool Whip and, if you’re using it, the aromatic lemon zest. Continue to whisk until the mixture is perfectly smooth and no streaks remain. The Cool Whip is key to achieving the pie’s characteristic light and airy texture, making it melt-in-your-mouth delicious.
- Fill the Crust: Carefully pour the prepared creamy lemon filling into your graham cracker crust. Spread it evenly using a spatula to ensure a uniform layer from edge to edge.
- Bake to Set: Place the pie in the preheated oven and bake for approximately 20 minutes. This short baking time is just enough to gently set the egg yolks, helping the pie firm up without overcooking, which maintains its creamy consistency. The edges of the filling might appear slightly set, but the center will still have a gentle wobble.
- Cool to Room Temperature: Once baked, remove the pie from the oven and allow it to cool completely at room temperature for about one hour. This gradual cooling process is important for preventing cracks and allowing the pie to begin setting naturally.
- Achieve Optimal Chill: The final and crucial step is chilling. Transfer the cooled pie to the refrigerator and let it chill for at least 2-3 hours, or ideally, overnight. This extended chilling period allows the pie to fully set, solidifying its creamy texture and intensifying its flavors. This pie is undeniably best served cold, offering a refreshing burst of lemon with every bite.
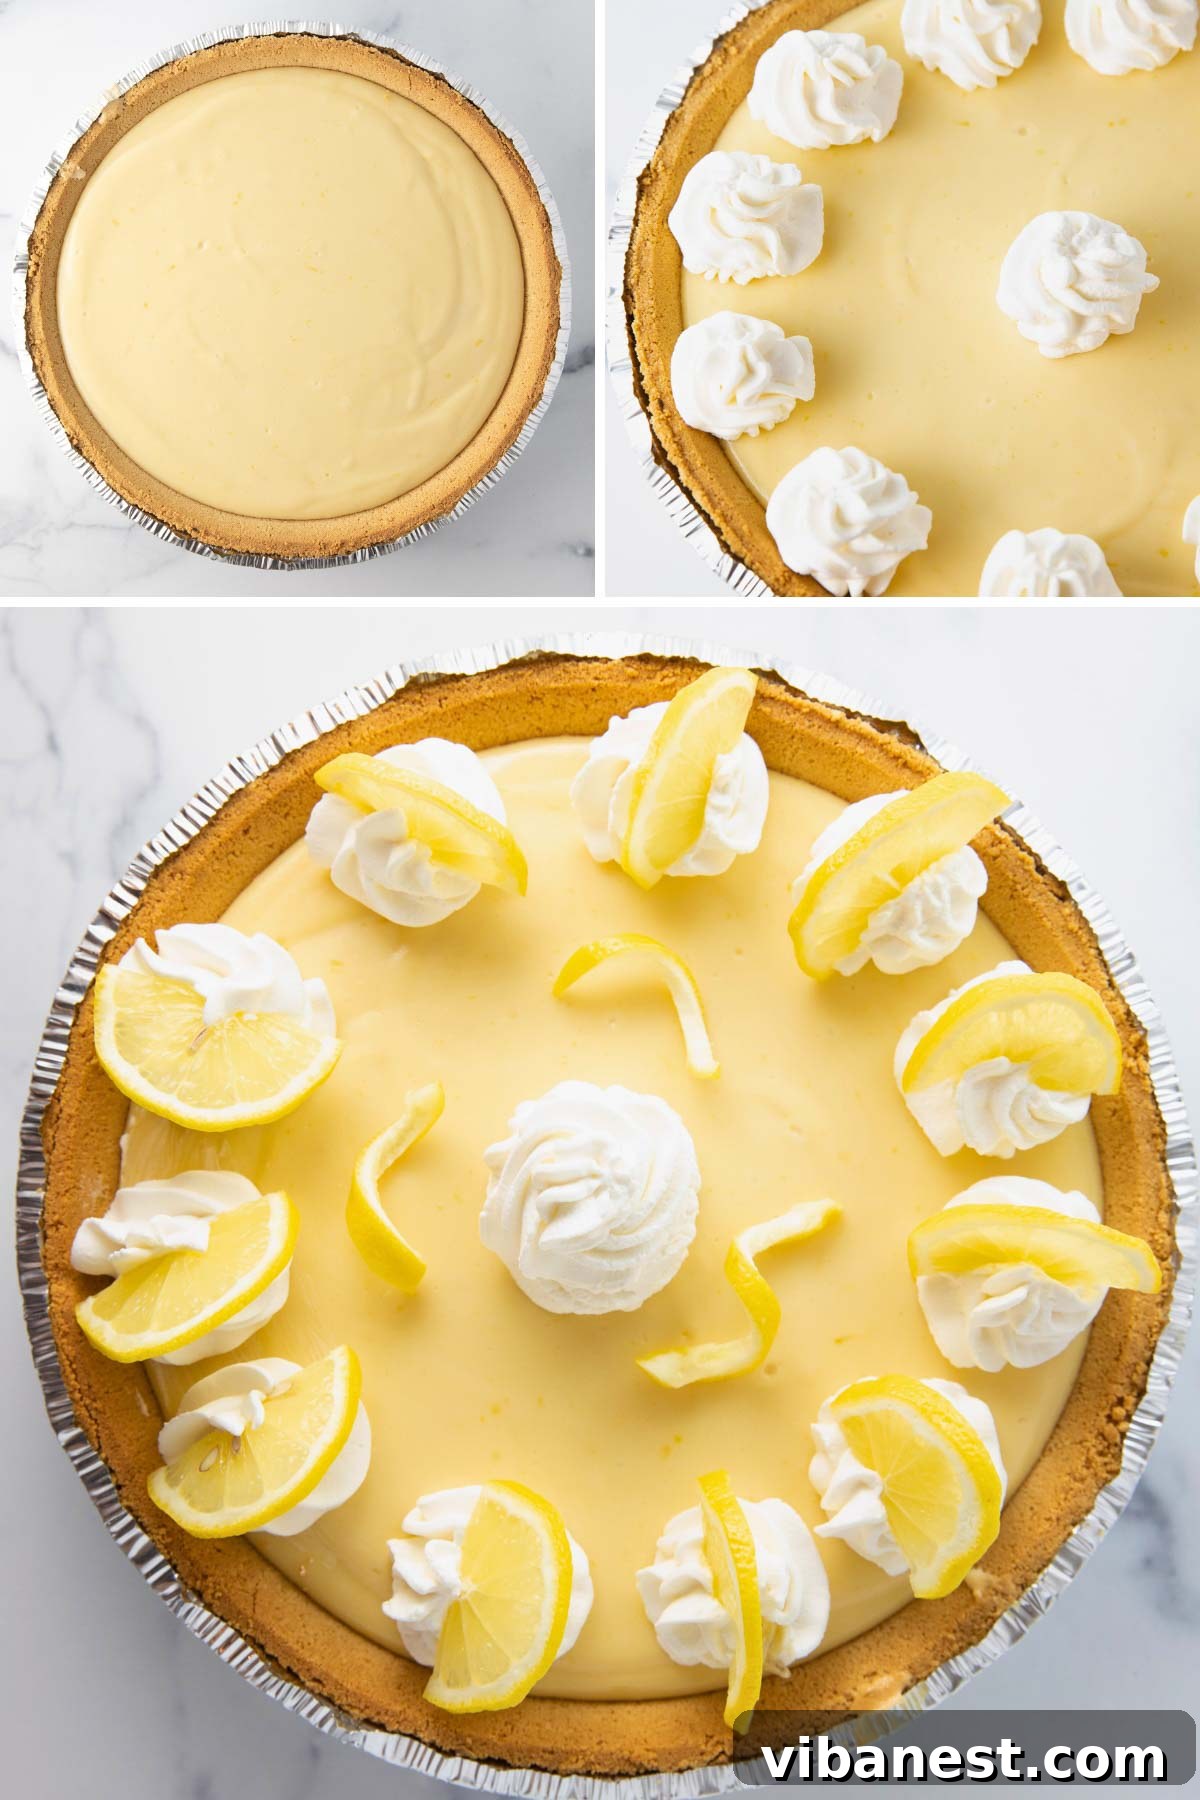
After it has thoroughly chilled, your exquisite lemon pie is ready for its grand debut. You can choose to serve it simply as is, letting its pure lemon flavor shine. Alternatively, elevate the presentation and taste by topping it with a generous dollop of homemade whipped cream and garnishing with delicate lemon slices or fresh berries for an extra touch of elegance.
The Perfect Topping: Homemade Whipped Cream
While this lemon pie is utterly delicious on its own, a cloud of homemade whipped cream takes it to another level of indulgence. This optional but highly recommended addition provides a delicate, airy contrast to the rich, tangy filling. Making your own whipped cream is incredibly simple and allows for customization of sweetness and flavor. Here’s what you’ll need and how to prepare it:
- Heavy whipping cream, chilled
- Powdered sugar (also known as confectioners’ sugar)
- Vanilla extract or, for an extra citrusy kick, lemon extract
To ensure your whipped cream achieves maximum volume and stiffness, a little preparation goes a long way. I always recommend placing your mixing bowl (preferably a metal one) and the whisk attachment or beaters in the freezer for about 15 minutes before you begin. This ensures they are exceptionally cold, which is key to stable whipped cream.
Now, let’s create that perfect whipped cream:
- Begin Whipping the Cream: Pour the cold heavy cream into your chilled bowl. Using an electric mixer (stand mixer or hand mixer) fitted with the whisk attachment, start beating the cream on medium speed. Observe as the cream gradually begins to thicken. This initial stage typically takes a quick 1-2 minutes.
- Add Sweetness and Flavor: Once the cream shows signs of thickening, add the powdered sugar and your chosen extract (vanilla for classic sweetness or lemon for an intensified citrus note). Increase the mixer speed to high and continue whipping until stiff peaks form. Stiff peaks mean that when you lift the whisk, the cream holds its shape firmly without collapsing.
A crucial word of caution: Be mindful not to over-whip the cream. If you continue to beat it past the stiff peak stage, the fat molecules will separate, and you’ll end up with butter instead of light and fluffy whipped cream. As soon as stiff peaks are achieved, turn off your mixer.
Serve immediately over slices of your lemon pie for an exquisite combination of textures and flavors. The coolness of the cream and its delicate sweetness provide a beautiful counterpoint to the pie’s zesty brightness.
Storage and Make-Ahead Tips for Your Lemon Pie
To ensure your 4-Ingredient Lemon Pie remains as fresh and delicious as possible, proper storage is key. After the initial chilling period, cover any leftover pie slices or the entire pie tightly with plastic wrap or transfer them to an airtight container. Store the pie in the refrigerator. It will maintain its best quality and flavor for 3-4 days. This pie is meant to be served cold, so always return it to the fridge promptly after serving.
This recipe is also wonderfully suited for making ahead, which is perfect for entertaining or when you simply want to enjoy a stress-free dessert. You can prepare the entire pie a day in advance and let it chill overnight in the refrigerator. This ensures it’s perfectly set and flavors are fully developed by the time you’re ready to serve. If you’re making homemade whipped cream, it’s best to prepare it just before serving for the freshest and lightest texture, as whipped cream can deflate over time. However, you can make the graham cracker crust a day or two in advance and store it at room temperature, covered, or chilled in the fridge.
Creative Variations and Customizations
While this 4-Ingredient Lemon Pie is perfect in its classic form, its simple base makes it a fantastic canvas for creative variations and customizations. Don’t be afraid to experiment and make it your own!
- Citrus Swaps: For a different twist, try substituting part or all of the lemon juice with other citrus fruits. Key lime juice will give you a classic Key Lime Pie flavor, while orange or even grapefruit juice could offer a unique and refreshing alternative.
- Crust Alternatives: Beyond graham crackers, consider other crumb crusts. Vanilla wafer cookies, gingersnaps, or even shortbread cookies can be crushed and mixed with butter and sugar to create a distinct flavor profile for the base of your pie.
- Flavor Boosters: A tiny pinch of ground ginger or cardamom added to the graham cracker crust can add an unexpected layer of warmth. For the filling, a tablespoon of limoncello can deepen the lemon flavor for an adult-friendly version.
- Topping Innovations: Instead of plain whipped cream, consider adding a sprinkle of toasted coconut flakes, a drizzle of raspberry coulis, or a handful of fresh berries (strawberries, blueberries, raspberries) for added color, texture, and flavor. A light dusting of powdered sugar or a spiral of lemon zest can also make for an elegant finish.
These simple adjustments allow you to tailor the lemon pie to your taste preferences or the specific occasion, ensuring it always feels fresh and exciting.
More Irresistible Desserts for Lemon Lovers:
If you’re as passionate about the bright and tangy flavor of lemon as we are, then you’re in for a treat! The versatility of lemon shines in a myriad of desserts, offering a refreshing zest that cuts through richness and invigorates the palate. Beyond this delightful lemon pie, here are a few more exceptional lemon-infused recipes that are guaranteed to captivate any citrus enthusiast:
- Lemon Bars: A classic for a reason, these bars feature a buttery shortbread crust topped with a tangy, sweet lemon curd, often dusted with powdered sugar.
- Lemon Cupcakes with Raspberry Jam Filling: Light and fluffy lemon-flavored cupcakes, complete with a delightful burst of sweet raspberry jam in the center.
- Starbucks Lemon Loaf: Recreate the beloved coffee shop favorite at home with this moist lemon loaf, often finished with a bright lemon glaze.
- Carrot Cake with Lemon Cream Cheese Frosting: A unique twist on a traditional favorite, where the earthy sweetness of carrot cake is perfectly complemented by a zesty lemon cream cheese frosting.
- Lemon Zucchini Bread: A wonderfully moist quick bread, where grated zucchini adds tenderness and lemon zest and juice provide a refreshing citrus punch.
Each of these recipes offers a different way to enjoy the vibrant and refreshing taste of lemon, proving that this citrus fruit is truly a star in the dessert world.
I genuinely hope you cherish creating and savoring this simple yet incredibly satisfying recipe for an easy lemon pie with graham cracker crust. It’s a dessert that truly bursts with refreshing lemon flavor and offers an utterly delicious experience with every forkful. Its straightforward preparation makes it the perfect dessert for those sunny spring and summer gatherings, or truly, any time you find yourself craving the irresistible tang of a classic lemon pie. Enjoy every moment of making and tasting this delightful treat!

If you decide to make this wonderful pie, please don’t hesitate to share your experience by leaving a comment below or tagging me on your social media posts. I absolutely love hearing from you and seeing your delicious creations! Enjoy!

Pin
Lemon Pie with Graham Cracker Crust
Ingredients
- 2 cans sweetened condensed milk 14 ounces each, 28 ounces total
- 3 egg yolks (large)
- 3/4 cup fresh lemon juice about 4-6 lemons
- ½ cup Cool Whip
- 1 graham cracker crust store-bought
- zest from 1 lemon optional
Graham Cracker Crust Ingredients
- 1 ½ cups graham cracker crumbs about 10-12 graham crackers
- ¼ cup granulated sugar
- ½ cup butter, unsalted, melted
Homemade Whipped Cream
- 1 cup heavy cream (cold)
- 3 tablespoons powdered sugar
- 1 teaspoon vanilla or lemon extract
Instructions
-
Preheat oven to 350 ℉ (175 °C).
-
In a large bowl, whisk together the sweetened condensed milk, fresh lemon juice, and egg yolks until thoroughly combined and smooth.
-
Gently fold in the Cool Whip and optional lemon zest. Whisk until the mixture is uniform and completely smooth.
-
Carefully pour the creamy lemon filling into your prepared graham cracker crust (if using a store-bought crust).
-
Bake for 20 minutes, until the edges are lightly set but the center still has a slight wobble.
-
Allow the pie to cool at room temperature for 1 hour to prevent cracking. Then, transfer to the refrigerator and chill for at least 2-3 hours, or preferably overnight, until fully set.
-
This pie is best enjoyed when thoroughly chilled.
-
Optionally, serve topped with fresh homemade whipped cream and garnished with lemon slices or fresh berries.
Graham Cracker Crust Instructions
-
Preheat oven to 350 ℉ (175 °C).
-
Crush the graham crackers into fine crumbs using a food processor or by placing them in a zip-top bag and crushing with a rolling pin.
-
In a bowl, combine the graham cracker crumbs with granulated sugar and melted butter. Mix until all crumbs are moistened.
-
Press the mixture firmly and evenly into a 9 or 10-inch pie dish, covering the bottom and sides. Use your fingers or the back of a spoon for a compact crust.
-
Bake for 8-10 minutes until lightly golden, or for a no-bake option, chill in the refrigerator for 30 minutes to set.
Homemade Whipped Cream Instructions
-
For best results, chill your mixing bowl and whisk attachment in the freezer for 15-20 minutes before starting.
-
Add the cold heavy cream to the chilled bowl. Beat on medium speed until the cream begins to thicken, usually within 1-2 minutes.
-
Add in the powdered sugar and vanilla or lemon extract. Increase the speed to high and continue whipping until stiff peaks form. Be careful not to over-whip, as this can turn the cream into butter. Stop the mixer as soon as stiff peaks are achieved.