
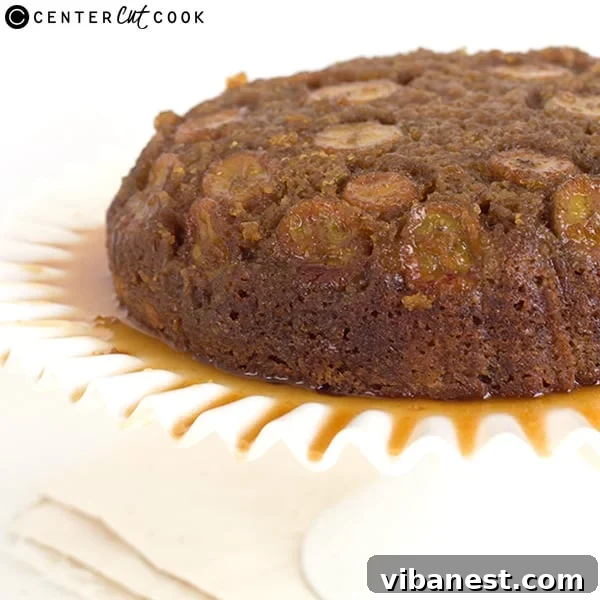
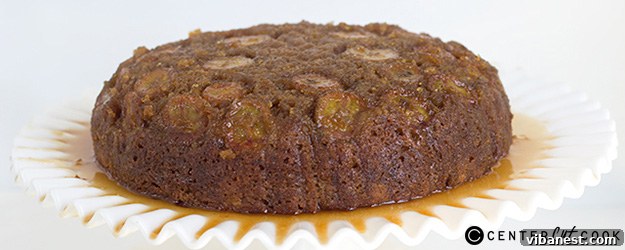
The Ultimate Banana Upside Down Skillet Cake: Transforming Overripe Bananas into Pure Delight
Do you often find yourself with a bunch of bananas that have passed their prime, adorned with those tell-tale brown spots? For many home bakers, these are not signs of fruit going bad, but rather a delicious invitation! Overripe bananas are nature’s gift to baking, packed with intensified sweetness and moisture, making them perfect for creating incredibly tender and flavorful desserts. This recipe for an irresistible Banana Upside Down Skillet Cake is the ultimate way to utilize those forgotten fruits, turning them into a show-stopping dessert that’s both easy to make and incredibly satisfying.
An upside-down cake is always a delightful surprise, with its dramatic reveal of a beautifully caramelized fruit topping. When baked in a cast iron skillet, this classic dessert reaches new heights. The skillet’s unique properties ensure an even bake and a perfectly golden, slightly crisp crust that beautifully complements the moist, banana-infused cake. Prepare to be amazed as you transform a few simple ingredients and those perfectly aged bananas into a stunning and utterly delectable treat that will have everyone asking for seconds.
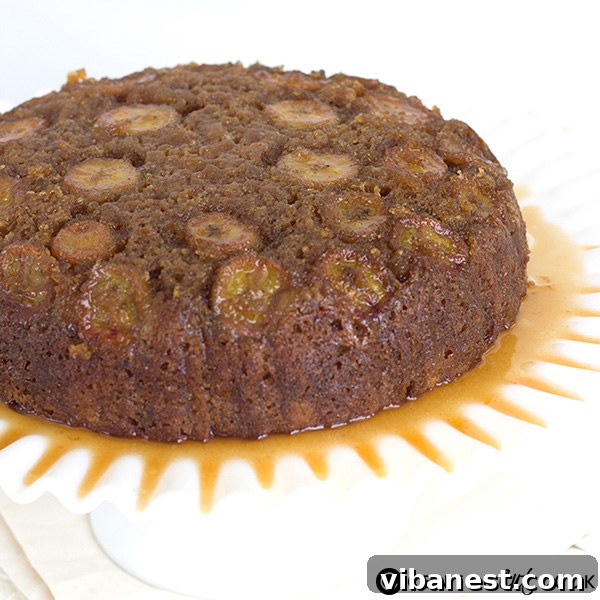
Mastering the Magic of Overripe Bananas in Baking
The saga of overripe bananas is a familiar one in many kitchens. One moment they’re yellow and firm, the next they’re speckled brown and softening. While it might be tempting to toss them, seasoned bakers know this is precisely when bananas are at their peak for baking. The natural starches convert to sugars, enhancing their sweetness, and their texture softens, making them easy to mash and incorporate into batters. This higher sugar content also contributes to a wonderfully moist finished product, ensuring your cake is tender and flavorful without needing excessive added sugar.
For this specific Banana Upside Down Skillet Cake, it’s important to differentiate between the types of overripe bananas you’ll need. For the beautiful, neatly sliced layer that forms the caramelized topping, you’ll want overripe bananas that are still somewhat firm—meaning they’re spotted brown but haven’t turned entirely mushy or been frozen. These will hold their shape during baking, creating an appealing visual and textural contrast. However, for the mashed bananas incorporated into the cake batter, the softer and browner, the better! These extremely ripe bananas will blend seamlessly into the batter, lending maximum flavor and moisture. Typically, 1 to 1.5 medium-sized, unfrozen overripe bananas are ideal for the bottom layer of a 10-inch skillet, providing ample coverage and a stunning presentation.
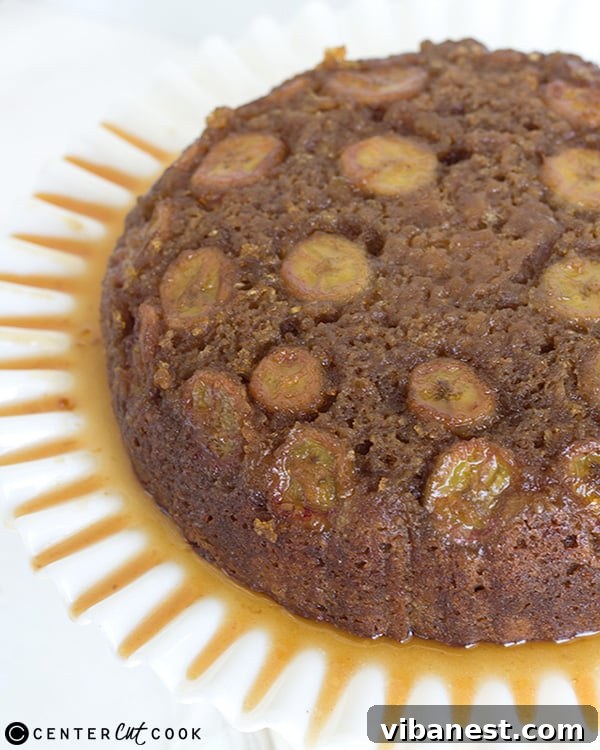
The Unparalleled Benefits of Baking in a Cast Iron Skillet
A 10-inch cast iron skillet, ideally about 3 inches deep, is more than just a pan for this recipe—it’s an essential tool that elevates the cake to perfection. Cast iron is celebrated for its exceptional heat retention and ability to distribute heat incredibly evenly across its surface. This means your cake will bake uniformly, developing a gorgeous, even golden-brown crust and a thoroughly cooked interior. While the initial lift of a heavy cast iron skillet might make you feel a bit “wimpy” at times, its robust nature is precisely what delivers such outstanding baking results. The consistent, gentle heat ensures the caramel topping melts and bubbles into a rich, unburnt glaze, while the cake itself achieves a perfectly moist texture.
To ensure both an effortless cleanup and a flawlessly smooth flip, an ingenious yet simple trick is to line your cast iron skillet with heavy-duty aluminum foil. This creates a protective, non-stick barrier between the delicious, sticky caramel topping and the pan itself. The foil cradles the entire cake, allowing it to be inverted onto your serving plate or cake stand with remarkable ease, minimizing the risk of the caramel adhering stubbornly to the pan. This preventative measure not only saves you significant time and effort in scrubbing but also ensures your stunning cake emerges perfectly intact, ready to impress.
Using Alternative Baking Pans: Tips and Adjustments
While the unique thermal properties of cast iron make it the ideal choice for this Banana Upside Down Skillet Cake, you can certainly adapt the recipe if a cast iron skillet isn’t available. Other baking pans, such as ceramic, glass, or even a heavy-bottomed non-stick metal pan, can be used. However, it’s important to note that these materials conduct and retain heat differently than cast iron, meaning your baking time will likely vary. You might find the cake needs to bake for a longer duration to achieve the same level of doneness and a beautiful golden-brown finish. Always rely on the classic toothpick test: insert a clean wooden toothpick into the center of the cake; if it comes out clean, your cake is perfectly baked and ready to be removed from the oven. Keep a close eye on your cake, especially towards the end of the baking cycle, to prevent over-browning.
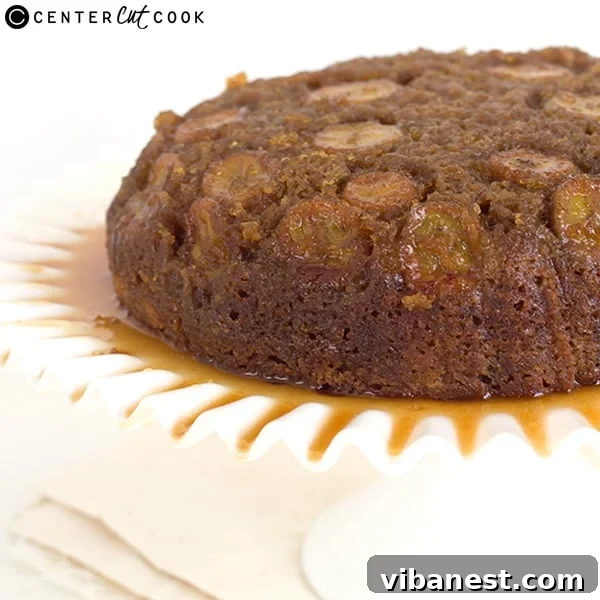
Recipe: Heavenly Banana Upside Down Skillet Cake
This recipe combines simple, wholesome ingredients with an easy-to-follow process to create a truly spectacular dessert. Get ready to bake pure deliciousness!
TOPPING INGREDIENTS
These core ingredients form the buttery, sweet, and perfectly caramelized base for your banana topping.
- 6 tbsp. unsalted butter
- 3/4 cup packed light brown sugar
- 1 1/2 medium-sized overripe bananas, thinly sliced (unfrozen, still somewhat firm)
CAKE INGREDIENTS
A harmonious blend of wet and dry components ensures a supremely moist and flavorful cake that beautifully complements the rich, sticky banana topping.
- 1/2 cup unsalted butter, melted
- 2 1/2 very ripe bananas, thoroughly mashed (the browner, the better for flavor!)
- 1/4 cup packed light brown sugar
- 3/4 cup granulated sugar
- 1 large egg, at room temperature
- 1/4 cup sour cream (full-fat is recommended for optimal texture and richness)
- 1/2 cup whole milk
- 2 cups all-purpose flour
- 1 tsp. baking soda
- 1/2 tsp. ground cinnamon
- (Note: Sour cream is listed twice in the original recipe; one instance is assumed correct for the cake batter ingredients.)
TOPPING DIRECTIONS: Crafting the Caramelized Foundation
- Preheat Oven and Prepare Skillet: Begin by preheating your oven to a steady 350 degrees F (175 degrees C). Crucially, line your 10-inch cast iron skillet with heavy-duty aluminum foil. Ensure the foil generously covers the entire bottom and extends up the sides of the pan, pressing it gently into place. This step is your secret weapon for an easy, clean release.
- Melt Butter and Brown Sugar: Place the 6 tablespoons of unsalted butter and 3/4 cup of packed brown sugar directly into the foil-lined skillet. Transfer the skillet to the preheated oven for approximately 6-8 minutes, or until the butter is completely melted and the sugar begins to dissolve into a bubbling, rich caramel sauce. Watch carefully to prevent burning.
- Stir and Arrange Bananas: Carefully remove the hot skillet from the oven using oven mitts. Using a heat-resistant spatula, gently stir the melted butter and brown sugar mixture until it’s well combined and evenly spread across the bottom of the pan. Be extremely gentle to avoid tearing the foil. Now, artfully arrange your thinly sliced banana pieces over the warm caramel. You can create a beautiful pattern of concentric circles or a whimsical design—the choice is yours! Set the skillet aside to allow the caramel to cool slightly while you prepare the cake batter.
CAKE DIRECTIONS: Whipping Up the Moist Banana Batter
- Combine Wet Ingredients (Bananas & Butter): In a large mixing bowl, add the 1/2 cup of melted butter and the 2 1/2 thoroughly mashed ripe bananas. Using a hand mixer on medium speed, beat these two ingredients together until they are well incorporated and the mixture is relatively smooth. This ensures the banana flavor is evenly distributed.
- Integrate Sugars: Add both the granulated sugar and the remaining 1/4 cup of packed brown sugar to the banana mixture. Continue to mix on medium speed until the sugars are fully combined, and the batter lightens slightly in color and becomes creamy. Periodically scrape down the sides of your bowl with a spatula to ensure no dry pockets remain.
- Add Egg and Sour Cream: Crack in the large egg and add the 1/4 cup of sour cream to the batter. Mix on medium speed until all these ingredients are fully integrated, yielding a smooth and cohesive mixture. The sour cream plays a vital role in contributing to the cake’s tenderness and rich texture.
- Incorporate Milk: Gently pour in the 1/2 cup of whole milk. At this stage, it’s advisable to switch from the hand mixer to a spatula or spoon to stir the milk in. This prevents splashing and allows for a more controlled incorporation, ensuring the batter remains smooth. Mix just until combined.
- Introduce Dry Ingredients and Spices: In a separate medium bowl, whisk together the 2 cups of all-purpose flour, 1 teaspoon of baking soda, and 1/2 teaspoon of ground cinnamon until well combined. Gradually add these dry ingredients to the wet batter. Using your hand mixer on low speed, beat just until the flour mixture is incorporated and the batter comes together. Be careful not to overmix, as overmixing can develop gluten excessively, leading to a tough cake. Scrape down the sides of the bowl once more and beat for an additional 15 seconds on low speed to ensure a uniform batter.
- Layer the Batter: Carefully and evenly pour the prepared cake batter over the arranged banana slices and caramel in the skillet. Gently spread the batter with a spatula to cover the entire surface, being mindful not to disturb the beautiful banana pattern below.
- Bake to Golden Perfection: Place the skillet into your preheated oven. Bake for approximately 1 hour and 6 minutes. The exact baking time can vary depending on your oven, so rely on the tried-and-true toothpick test: insert a wooden toothpick into the very center of the cake; if it comes out clean, your cake is done. If the top appears to be browning too quickly, you can loosely tent it with aluminum foil for the remainder of the baking time.
- Cool, Flip, and Serve with Flair: Once baked, remove the skillet from the oven and allow the cake to cool in the pan for a critical 10-15 minutes. This cooling period is essential as it allows the hot caramel to set slightly, preventing it from running excessively when flipped and ensuring the cake holds its shape. After cooling, carefully place a serving plate or a cake stand (one with a slight lip works best to contain any glorious excess caramel syrup) upside down on top of the skillet. Gripping both the skillet and the plate firmly with oven mitts, swiftly and confidently flip them over together. The foil should assist the cake in sliding out easily. Gently lift the skillet, then carefully peel off the aluminum foil from the top of the cake to reveal your stunning masterpiece. Cut into generous slices and serve immediately!
Perfect Pairings and Storage Suggestions
This Banana Upside Down Skillet Cake is undeniably at its best when served warm, allowing the caramel to remain perfectly gooey and the cake to be at its most tender. Elevate the experience with a scoop of premium vanilla bean ice cream, a cloud of freshly whipped cream, or even a light drizzle of extra caramel sauce. The contrast of warm cake with a cold, creamy accompaniment is simply divine. Should you find yourself with leftovers—a rare occurrence, perhaps—they can be stored at room temperature for up to 2 days, kept tightly covered, or refrigerated for up to 4 days. For that freshly baked taste, gently reheat individual slices in the microwave for a few seconds or in a low oven until warmed through.
Essential Tips for Skillet Cake Success Every Time
- Patience During Cooling is Key: Resisting the urge to flip the cake immediately after removing it from the oven is crucial. The 10-15 minute cooling period allows the molten caramel to solidify just enough to maintain its structure and prevent a messy cascade when inverted.
- Choose Heavy-Duty Foil: Opting for heavy-duty aluminum foil rather than standard foil will significantly reduce the risk of tearing when stirring the caramel or during the crucial flipping stage, ensuring a smooth process.
- The Browner the Banana, the Better the Flavor: Don’t shy away from using bananas that are very brown and spotty for mashing into the cake batter. Their intensified sweetness and moisture will result in a more flavorful and tender cake.
- Know Your Oven: All ovens vary, so consider the provided baking time as a guideline. Always trust the visual cues of a golden-brown top and, most importantly, the clean toothpick test for perfect doneness. Adjust baking time as needed if using a non-cast iron pan.
- Spice It Up: For an added layer of complexity, consider incorporating a tiny pinch of ground nutmeg or a whisper of ground cloves along with the cinnamon. These warm spices beautifully complement the banana flavor.
Conclusion: Your New Go-To Banana Dessert Awaits
This Banana Upside Down Skillet Cake is more than just a recipe; it’s an enchanting culinary journey. From the satisfying aroma of butter and brown sugar caramelizing to the gratifying moment you unveil the perfectly adorned banana topping, every step is a delight. It offers a truly magnificent and delicious way to rescue those forgotten overripe bananas, transforming them into a dessert that is not only visually stunning but also incredibly comforting and flavorful. So, the next time those familiar brown spots appear on your bananas, don’t just see overripe fruit—see the promise of a glorious skillet cake waiting to be baked!