
Irresistible Pumpkin Hand Pies: Your Ultimate Guide to a Flaky, Flavorful Fall Treat
There’s something truly magical about a hand pie. These delightful, portable pastries have always held a special place in my heart, and certainly in my home. I remember a time when I would meticulously bake a batch of these individual treats, carefully wrapping one to take with me to work each day. It was more than just a snack; it was a cherished moment of indulgence, a small, sweet escape during a demanding workday. Among all the delightful variations, the pumpkin hand pie stands out as an undeniable favorite, a culinary masterpiece that encapsulates the essence of comfort and joy. Bringing a dollop of fresh whipped cream to the breakroom elevated these moments, turning a simple lunch into a truly luxurious affair. And on those coveted pumpkin hand pie days, I often found myself packing an extra for a certain co-worker whose adoration for all things pumpkin rivaled my own.
Embracing the Charm of Pumpkin Hand Pies: A Nod to Nostalgia and Magic
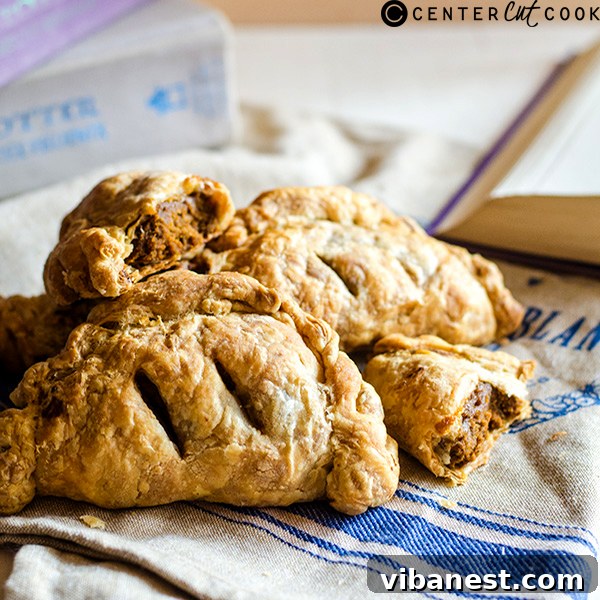
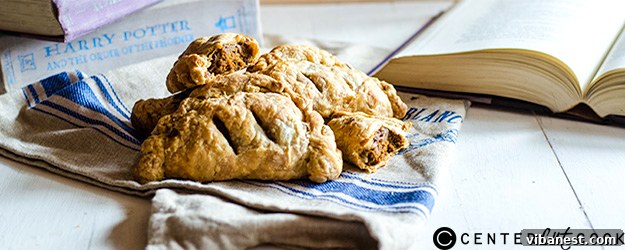
Let’s be candid about one of the most delightful aspects of these pumpkin hand pies: they evoke a wonderfully whimsical sense of nostalgia, reminiscent of the famed pumpkin pasties from the enchanting pages of the Harry Potter series. While our interpretation offers a distinct twist, these treats undeniably share the spirit of those magical, handheld delights. We’re taking a clever shortcut here by utilizing ready-made puff pastry, which streamlines the process beautifully. This allows us to achieve that coveted flaky texture with remarkable ease. However, for those culinary adventurers among you who possess the skill and passion for crafting traditional pasty dough from scratch, I wholeheartedly encourage you to use your own homemade creation. The unparalleled depth of flavor and texture from a bespoke dough is truly something special, transforming these hand pies into an even more extraordinary experience.
The allure of the hand pie lies in its simplicity and portability. It’s a complete dessert or snack, perfectly portioned for individual enjoyment. No plates, no forks (unless you’re adding whipped cream like I do!), just pure, unadulterated pleasure. This makes them ideal for on-the-go breakfasts, school lunchboxes, festive holiday gatherings, or simply as a comforting treat during a quiet afternoon. The rich, spiced pumpkin filling, encased in a golden, flaky crust, creates a harmonious blend of textures and flavors that is utterly irresistible. Each bite delivers a burst of autumnal warmth, making these pumpkin hand pies a quintessential fall indulgence.
The Secret to Success: Mastering the Pumpkin Filling
One of the most crucial steps to achieving perfectly structured and flavorful pumpkin hand pies is how you prepare the filling. This recipe is wonderfully adaptable and can be easily doubled or even tripled to cater to a larger crowd or ensure you have plenty of leftovers (which, let’s be honest, you’ll want!). When scaling up, you’ll need to slightly extend the initial baking time for the pumpkin mixture. This initial bake is an absolute game-changer, transforming what would otherwise be an overly liquidy filling into a beautifully firm, yet still moist, consistency that is much easier to work with.
Why is this pre-baking step so vital? Imagine trying to spoon a watery pumpkin mixture onto delicate puff pastry – it would be a messy, frustrating endeavor, likely leading to leaks and soggy crusts. The gentle bake firms up the filling just enough to make it “spoonable” (a term I insist should be in every culinary dictionary!). This semi-firm state ensures that when you enclose it within the pastry, it holds its shape beautifully and prevents any unsightly seepages during the final bake. Crucially, the filling should still retain a slight jiggly quality in the center; we’re not aiming for a fully cooked pumpkin custard at this stage, but rather a partially set mixture that will finish cooking in harmony with the pastry. This thoughtful preparation guarantees that your pumpkin hand pies emerge from the oven with a perfect balance of flaky crust and creamy, spiced pumpkin goodness.
The combination of pumpkin puree, evaporated milk, egg, brown sugar, pumpkin pie spice, vanilla extract, and a pinch of salt creates a filling that is rich, sweet, and perfectly balanced with warm autumn spices. Each ingredient plays a vital role: the egg acts as a binder, the evaporated milk adds creaminess without excessive moisture, and the brown sugar provides a deep, molasses-like sweetness that complements the pumpkin beautifully. The spices, of course, are the heart of the pumpkin flavor profile, offering that quintessential taste of fall. Getting this filling just right is the foundation for truly exceptional pumpkin hand pies.
Crafting Your Perfect Hand Pies: Tips for Flaky Perfection
Now that our filling is prepped and perfectly cooled, it’s time for the creative part: assembling your magnificent pumpkin hand pies. Working with puff pastry is a dream, as it effortlessly delivers that desirable airy, layered texture. Begin by gently rolling out your sheets of puff pastry on a lightly floured surface. The key here is not to overwork the dough, just enough to ensure it’s pliable and easy to cut. Divide each sheet into four equal squares. These squares will form the base of your individual pies.
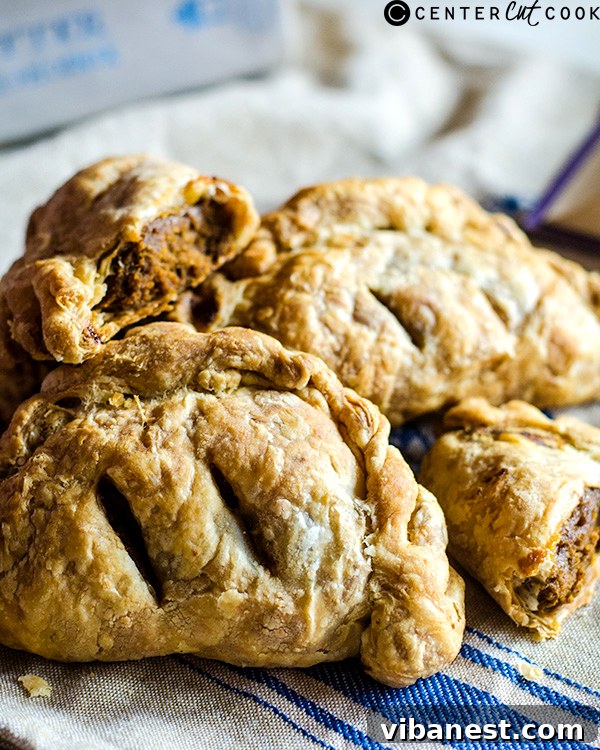
Carefully spoon a generous portion of the pre-baked pumpkin filling onto the center of each pastry square. Be mindful not to overfill, as this can lead to burst seams and leaking pies. Leave a clear border around the edges, which will be essential for proper sealing. Once the filling is in place, fold one corner of the pastry over to meet the opposite corner, creating a triangular shape. Gently press down around the edges to seal the filling within. To ensure a secure seal and to add a charming decorative touch, use the tines of a fork to crimp all around the edges. This step is not just for aesthetics; it forms a strong barrier, preventing any of that delicious pumpkin filling from escaping during baking. Finally, create two small slits on the top of each pastry. These slits are crucial for allowing steam to escape, which helps the pastry puff up beautifully and prevents it from becoming soggy or bursting open.
For an extra touch of golden perfection, consider brushing the tops of your assembled pumpkin hand pies with an egg wash (one beaten egg mixed with a tablespoon of water or milk) before baking. This not only gives them a beautiful, glossy, golden-brown finish but also enhances their overall appeal. Arrange your pastries on a baking sheet lined with parchment paper, leaving enough space between them for even cooking. The anticipation as they bake, filling your kitchen with the warm, inviting aroma of pumpkin and spice, is almost as delightful as enjoying the pies themselves.
Serving Suggestions and Variations for Your Pumpkin Hand Pies
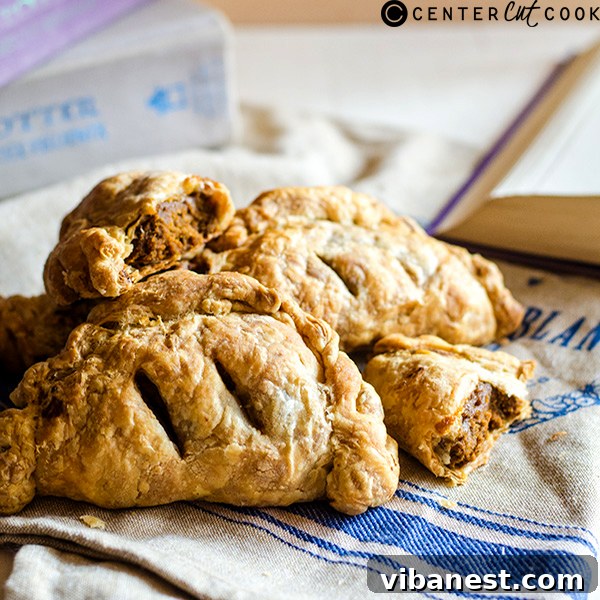
Once your glorious pumpkin hand pies emerge from the oven, puffed and golden, allow them to cool slightly on a wire rack. While they are absolutely divine on their own, a few additions can elevate the experience even further. As previously mentioned, a dollop of freshly whipped cream is a classic pairing that adds a luxurious creaminess, perfectly contrasting the spiced pumpkin filling. For those with an even sweeter tooth, a scoop of vanilla bean ice cream melting over a warm hand pie creates an unforgettable dessert. A light dusting of powdered sugar or a drizzle of caramel sauce can also add a delightful finishing touch.
These versatile pastries aren’t just for dessert; they make an excellent accompaniment to your morning coffee, a wholesome afternoon snack, or even a charming addition to a brunch spread. Their individual nature makes them perfect for parties, holiday potlucks, or simply as a comforting treat to enjoy curled up with a good book on a crisp autumn day.
Feeling adventurous? While the classic recipe is perfect, consider subtle variations. A pinch of ground ginger or cloves can intensify the spice profile. For an added textural element, a small amount of finely chopped pecans or walnuts could be folded into the cooled filling, though ensure they are finely chopped to avoid tearing the pastry. You could even experiment with a cream cheese frosting drizzle instead of whipped cream for a richer experience. The possibilities are endless when it comes to customizing these delightful pumpkin hand pies to suit your personal taste.
Storage and Reheating Tips for Freshness
Should you be fortunate enough to have any pumpkin hand pies leftover (a rare occurrence in my experience!), proper storage will ensure they remain fresh and delicious. Store them in an airtight container at room temperature for up to two days, or in the refrigerator for up to five days. For longer storage, hand pies freeze beautifully. You can freeze them either before baking or after. If freezing unbaked, arrange them on a baking sheet until solid, then transfer to a freezer-safe bag or container. Bake from frozen, adding about 10-15 minutes to the baking time. If freezing baked pies, simply wrap them individually in plastic wrap and then aluminum foil, and store them in a freezer bag for up to two months.
To reheat baked and chilled pies, simply place them on a baking sheet in a preheated oven at 300°F (150°C) for about 10-15 minutes, or until warmed through and the crust regains some of its crispness. Reheating in a toaster oven also works wonderfully for a single pie, ensuring that delightful flaky texture returns.
Ready to Bake? Let’s Make These Pumpkin Hand Pies!
So, clear your counter, preheat your oven, and prepare for a truly rewarding baking experience. These pumpkin hand pies are more than just a recipe; they’re an invitation to create moments of warmth, comfort, and pure delight. Get ready to impress your family and friends, or simply treat yourself to the ultimate fall indulgence. Put down the fork for a moment, wash your hands, and let’s embark on the delicious journey of making these incredible pastries!
INGREDIENTS
- 1 1/3 cup pumpkin puree (ensure it’s 100% pumpkin, not pie filling)
- 1/4 cup evaporated milk
- 1 large egg, lightly beaten (for filling)
- 1/3 cup packed light brown sugar
- 1 teaspoon pumpkin pie spice
- 1/2 teaspoon pure vanilla extract
- 1/4 teaspoon salt
- 2 sheets (approximately 17.3 oz total) frozen puff pastry, thawed according to package directions
- 1 large egg, beaten with 1 tablespoon water or milk (for egg wash, optional but recommended)
DIRECTIONS
- Preheat your oven to 425 degrees F (220 degrees C).
- In a medium-sized bowl, thoroughly whisk together the pumpkin puree, evaporated milk, the first beaten egg, packed brown sugar, pumpkin pie spice, vanilla extract, and salt until well combined and smooth.
- Pour this pumpkin mixture into a small oven-safe container or baking dish (a 6-inch cake pan or a similar size works perfectly). Bake for approximately 15 – 20 minutes. The goal here is to partially cook the filling so it firms up enough to be easily handled, but it should still be noticeably jiggly in the center. It will not be completely solid. Remove from the oven and allow it to cool completely to room temperature. This step is crucial for preventing soggy pastry! Once cooled, reduce your oven temperature to 350 degrees F (175 degrees C).
- On a lightly floured surface, carefully unroll one sheet of thawed puff pastry. Using a sharp knife or pastry wheel, divide each sheet into four equal squares. Repeat with the second sheet, yielding a total of eight squares.
- Evenly distribute the cooled pumpkin filling among the centers of the eight puff pastry squares. Make sure to leave a clear border of about 1/2 inch around the edges of each square.
- Fold one corner of each pastry square over the filling to meet the opposite corner, forming a triangle. Gently press down around the edges to seal. For a more secure seal and a decorative touch, use the tines of a fork to crimp all around the edges of each hand pie.
- Using a small knife, create two short slits on the top of each pastry. This allows steam to escape during baking, ensuring a flaky crust.
- Carefully transfer the assembled pastries to a large baking sheet lined with parchment paper. If desired, brush the tops of the hand pies with the egg wash (the second beaten egg mixed with water/milk) for a beautiful golden-brown finish.
- Bake in the preheated 350°F (175°C) oven for 20 – 25 minutes, or until the tops are beautifully puffed, golden brown, and the pastry is cooked through.
- Remove the pumpkin hand pies from the oven and let them cool on a wire rack for at least 10-15 minutes before serving. This allows the filling to set completely and prevents burns from the hot filling. Enjoy!