
The Ultimate Decadent French Silk Pie: A Worry-Free Recipe for Chocolate Lovers
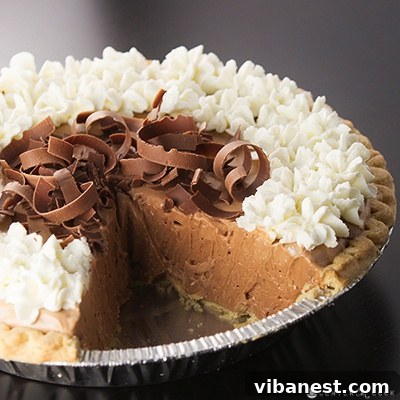
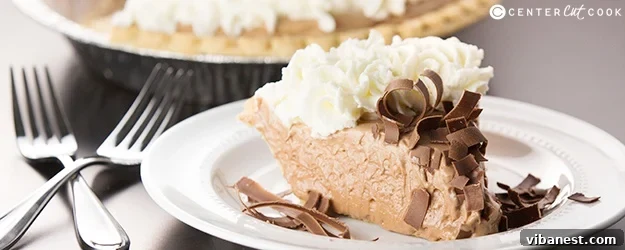
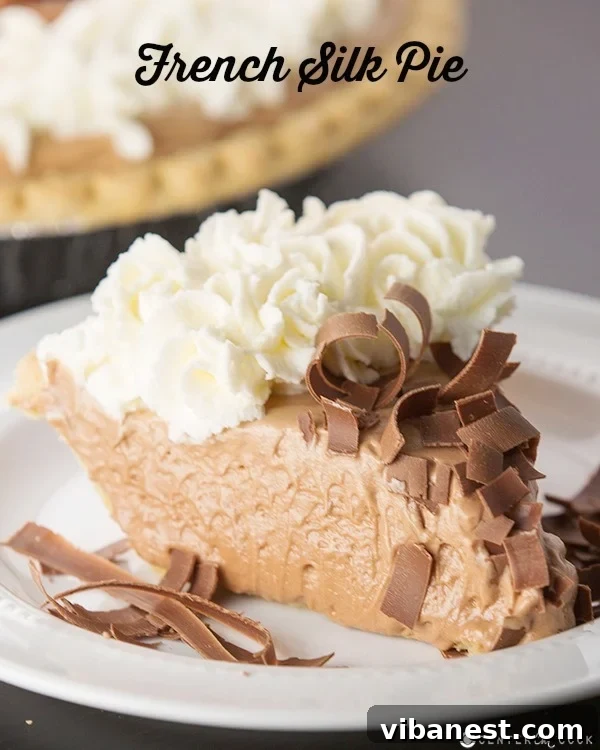
There are few desserts that capture the hearts of chocolate enthusiasts quite like French Silk Pie. Its reputation precedes it: a luscious, silky-smooth chocolate filling nestled in a flaky crust, crowned with a generous swirl of fresh whipped cream and delicate chocolate shavings. For many, including myself, it evokes a sense of nostalgic indulgence, reminiscent of special occasions or a well-deserved treat from a beloved bakery. Years ago, my visits to Baker’s Square were never complete without a slice of this heavenly creation. The moment that first spoonful melted on my tongue, a rich blend of deep chocolate and airy cream, it was pure bliss. It’s a dessert that truly speaks to the soul.
Yet, for all its undeniable allure, French Silk Pie traditionally comes with a common apprehension: the use of raw eggs in its filling. This detail has historically made many home bakers, myself included, hesitant to recreate this masterpiece in their own kitchens. The concern about foodborne illnesses like Salmonella is a valid one, and it kept me from attempting my own homemade version for far too long. However, what if I told you there’s a simple, safe solution that allows you to enjoy the authentic, melt-in-your-mouth experience of French Silk Pie without a single worry? This recipe embraces that solution, opening up a world of safe, homemade indulgence.
Embrace Worry-Free Baking with Pasteurized Eggs
The game-changer for this French Silk Pie recipe, and indeed for any recipe calling for raw or lightly cooked eggs, is the use of Davidson’s Safest Choice Pasteurized Eggs. You might be familiar with pasteurization in other food products like milk and certain cheeses, where heat treatment is used to eliminate harmful bacteria and viruses, including Salmonella. What many people don’t realize is that this same safety process can be applied to eggs. Unlike most eggs found in grocery stores, which are not pasteurized, Davidson’s Safest Choice eggs undergo a gentle, warm water bath pasteurization process that destroys potential pathogens while preserving the egg’s nutritional value, flavor, and cooking properties.
This innovation provides immense peace of mind, especially for those who are pregnant, young children, the elderly, or anyone with a compromised immune system, who are typically advised to avoid raw eggs. Knowing that the eggs in your delicious French Silk Pie filling are safe to consume raw means you can fully enjoy every single bite without a moment of concern. It’s a simple switch that makes a world of difference, transforming a potentially risky ingredient into a completely safe one, allowing you to recreate classic recipes with confidence. This commitment to food safety is invaluable, particularly for home cooks who prioritize the health and well-being of their loved ones.
Finding Davidson’s Safest Choice Pasteurized Eggs is often easier than you think. Many major grocery store chains carry them. To locate a retailer near you, Davidson’s provides a convenient store locator on their website. Just enter your zip code, and you’ll be directed to the closest stores stocking these essential ingredients. Making the conscious choice to use pasteurized eggs not only ensures safety but also empowers you to explore a wider range of culinary delights that might have otherwise been off-limits.

Crafting Your Perfect French Silk Pie: A Step-by-Step Guide
Creating this French Silk Pie is a surprisingly straightforward process, especially with your trusted stand mixer doing much of the heavy lifting. The key is in understanding each component and giving it the attention it deserves. Let’s break down the journey to this irresistible dessert.
The Foundation: A Flaky Pie Crust
Every great pie begins with a solid foundation, and for French Silk Pie, that means a perfectly baked crust. You have flexibility here: you can opt for the convenience of a good quality store-bought pie shell, ensuring it’s pre-baked and completely cooled before you begin the filling. This is a fantastic time-saver, particularly if you’re new to pie making or simply short on time. Alternatively, if you enjoy the art of baking from scratch, a homemade pie crust adds an extra layer of love and flakiness. Whichever route you choose, the crucial step is to ensure it is thoroughly baked (often referred to as blind baking) and then cooled to room temperature. A warm crust will melt your beautiful chocolate filling, so patience here is paramount.
The Silky Heart: Decadent Chocolate Filling
Now, for the star of the show: the incredibly smooth and rich chocolate filling. This is where the magic truly happens, and surprisingly, it involves just a handful of simple ingredients: butter, sugar, chocolate, pasteurized eggs, salt, and vanilla. But don’t let the simplicity fool you; the technique is crucial for achieving that signature silky texture. Begin by beating softened unsalted butter with granulated sugar until the mixture becomes light, fluffy, and almost white. This aeration is the first step in creating that airy richness. Next, incorporate your cooled, melted chocolate, salt, and vanilla extract, mixing until everything is beautifully combined.
The most important step, and what truly sets this filling apart, is the careful addition of the cold pasteurized eggs. It’s imperative that your eggs are right out of the fridge – their cold temperature helps emulsify the mixture and contributes to the final texture. Add each egg one at a time, beating for a full five minutes after each addition. Yes, twenty minutes of beating for four eggs might seem like a long time, but this extended mixing is not just for incorporation; it’s essential for aerating the mixture and developing that characteristic light, fluffy, yet impossibly smooth consistency that defines French Silk Pie. It introduces air into the batter, preventing a dense, fudge-like texture and instead creating a delicate, mousse-like experience that truly melts in your mouth.
The Cloud-Like Topping: Perfect Whipped Cream
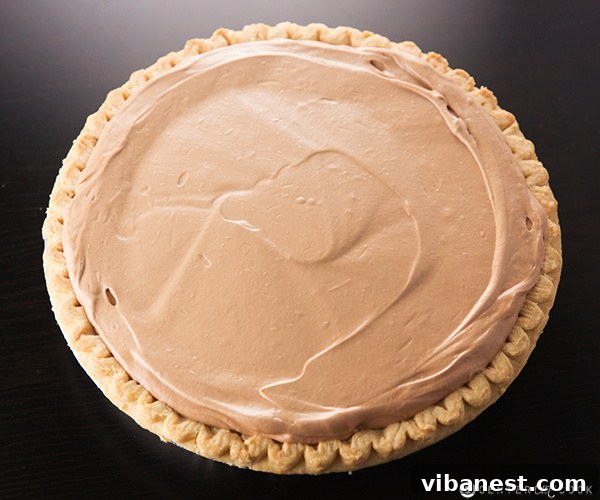
Once your luscious chocolate filling is spread evenly into the cooled pie crust, it’s time to think about the crowning glory: the whipped topping. You have two main routes here. For ultimate convenience, a thawed frozen whipped topping works perfectly well and provides a delightful contrast to the rich filling. Simply spread it gently over the pie. However, for an extra touch of gourmet elegance and unparalleled freshness, homemade whipped cream is the way to go.
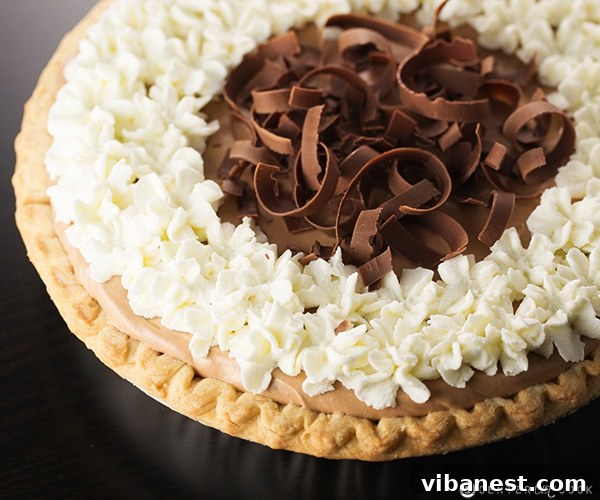
I highly recommend making a “stable” homemade whipped cream for this pie. The secret to stable whipped cream, which won’t deflate over time, is a touch of unflavored gelatin. This method ensures your beautiful peaks and swirls hold their shape, maintaining the pie’s stunning presentation for longer. The process involves blooming gelatin in cold water, dissolving it gently over low heat, and then whipping it into your heavy cream and confectioners sugar until stiff peaks form. Whether you choose to artfully pipe the whipped cream (a Wilton 1M tip creates lovely stars, for example) or simply spread it with an offset spatula, this airy topping adds a wonderful creamy texture and a hint of sweetness that perfectly balances the rich chocolate beneath.
The Finishing Touch: Elegant Chocolate Curls
To truly elevate your French Silk Pie from delicious to dazzling, a garnish of delicate chocolate curls is a must. While they might look like they require a professional pastry chef’s touch, creating chocolate curls is surprisingly simple and incredibly satisfying. All you need is a chilled bar of good quality milk chocolate and a standard vegetable peeler. Simply hold the chocolate bar firmly and run the edge of your vegetable peeler lengthwise across the surface. The pressure you apply will dictate the thickness of your curls – a lighter touch yields delicate ribbons, while firmer pressure creates broader, more substantial curls. Scatter these beautiful curls generously over the whipped cream, and watch your pie transform into an edible work of art. This simple step adds both visual appeal and an extra layer of chocolatey goodness.
Chilling and Serving Your Masterpiece
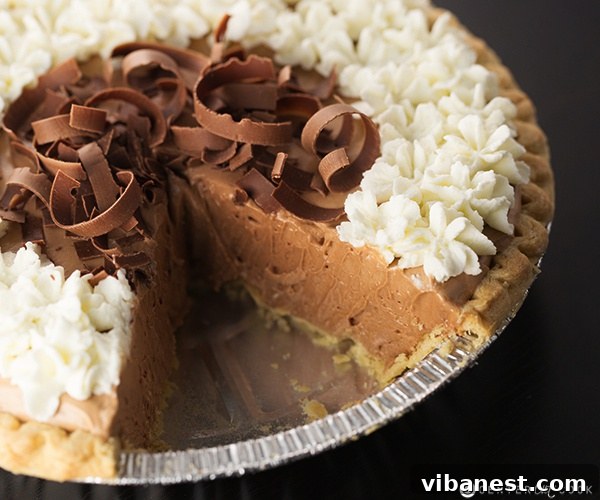
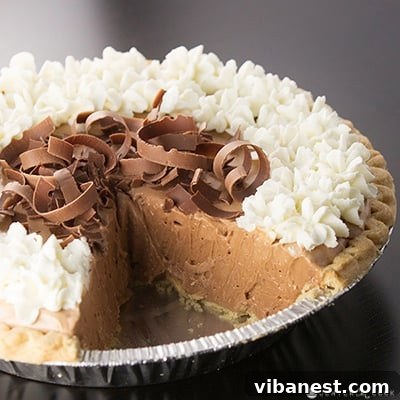
Once assembled, your magnificent French Silk Pie requires a crucial period of refrigeration. Chilling for at least four hours, or ideally overnight, allows the chocolate filling to fully set and its flavors to meld and deepen. This patience is rewarded with a firm, sliceable pie that maintains its shape and offers the ultimate silky-smooth texture with every forkful. Serve this decadent dessert chilled, perhaps with a fresh cup of coffee or a glass of cold milk, and watch your friends and family marvel at your culinary prowess. Leftovers, if any manage to survive, should be stored in the refrigerator to maintain their freshness and texture. Enjoy every indulgent, worry-free bite!
Why This French Silk Pie Recipe Stands Out
This recipe isn’t just about baking a pie; it’s about reclaiming a classic dessert with confidence and joy. By incorporating pasteurized eggs, we eliminate the apprehension often associated with raw egg fillings, making this treat accessible to everyone. The detailed steps ensure that even novice bakers can achieve the signature silky texture, fluffy whipped cream, and elegant chocolate curls that define a truly exceptional French Silk Pie. It’s an easy, yet incredibly impressive, homemade chocolate pie that promises a decadent experience every single time.
I am excited to have partnered with Davidson’s Safest Choice Eggs to bring you this post. As always, all opinions are my own. Thank you for supporting the companies and brands that make CenterCutCook Possible!
PIE INGREDIENTS
- 4 ounces good quality unsweetened or semi-sweet baking chocolate
- 1 cup unsalted butter, softened (do NOT use margarine)
- 1 1/2 cups granulated sugar
- 1/4 teaspoon salt
- 2 teaspoons vanilla extract
- 4 Davidson’s Safest Choice pasteurized eggs (make sure they are right out of the fridge, you want them cold)
- 1 baked pie shell (store bought or make your own) – completely cooled
WHIPPED CREAM INGREDIENTS *You can skip this and use frozen whipped topping as an alternative
- 1 1/2 teaspoons unflavored gelatin
- 6 teaspoons cold water
- 1 cup heavy whipping cream, very cold
- 1/4 cup confectioners sugar
CHOCOLATE CURL INGREDIENTS
- 4 ounce milk chocolate candy bar – chilled
DIRECTIONS
- Melt 4 ounces good quality unsweetened or semi-sweet baking chocolate according to package directions. Allow the melted chocolate to cool completely to room temperature before adding to the butter mixture.
- In a large bowl using your stand mixer with the paddle attachment, beat 1 cup of softened unsalted butter with 1 and 1/2 cups of granulated sugar. Mix on medium-high speed for about 2-3 minutes until the mixture is light, fluffy, and pale in color.
- Scrape down the sides of the bowl. Add in the cooled melted chocolate, 1/4 teaspoon salt, and 2 teaspoons vanilla extract. Mix on low speed until just combined.
- Now for the crucial step: Add the Davidson’s Safest Choice pasteurized eggs one at a time. After adding the first cold egg, beat the mixture on medium speed for a full 5 minutes. Scrape down the bowl. Repeat this process for each subsequent egg, beating for 5 minutes after each addition. This vigorous mixing, totaling about 20 minutes, is essential for incorporating air and creating the signature silky, light texture of the French Silk Pie filling.
- Once all eggs have been added and beaten thoroughly, pour the smooth, decadent chocolate mixture into your prepared and completely cooled baked pie crust. Spread it evenly with a spatula.
- To make the Stable Whipped Cream: In a small saucepan, combine 1 1/2 teaspoons unflavored gelatin with 6 teaspoons cold water. Let it sit for 5 minutes to allow the gelatin to “bloom” or thicken. Place the saucepan over very low heat and stir continuously until the gelatin completely dissolves and the mixture is clear (do not boil). Remove from heat and allow it to cool to room temperature, but make sure it does not set.
- In a separate, chilled mixing bowl, whip 1 cup of very cold heavy whipping cream with 1/4 cup confectioners sugar using your mixer until soft peaks begin to form. Slowly drizzle in the cooled, dissolved gelatin mixture while continuing to whip. Continue whipping until stiff peaks form and the whipped cream is stable. As an alternative, you can use prepared frozen whipped topping (thawed) from the grocery store.
- Carefully spread the homemade stable whipped cream over the chocolate filling in the pie. For a more decorative touch, transfer the whipped cream to a pastry bag fitted with a star tip (like a Wilton 1M) and pipe stars or swirls around the pie’s surface.
- Prepare the chocolate curls: Take your chilled 4-ounce milk chocolate candy bar. Using a vegetable peeler, run the peeler lengthwise across the chocolate bar to create delicate curls. The harder you press, the thicker the curls will be.
- Sprinkle the freshly made chocolate curls generously over the whipped cream.
- Chill the French Silk Pie in the refrigerator for at least 4 hours, or preferably overnight, to allow the filling to set completely. Store any leftovers in the refrigerator. Enjoy your incredibly decadent and worry-free homemade French Silk Pie!
Recipe from
CenterCutCook