
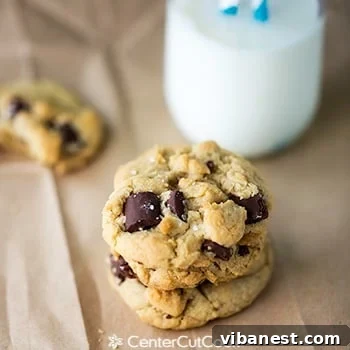

The Ultimate Salted Brown Butter Chocolate Chunk Cookies: A Quest for Perfection
Every baker, home cook, and dessert enthusiast embarks on a lifelong quest for the perfect chocolate chip cookie. This elusive ideal morphs with our cravings – sometimes we yearn for an irresistibly gooey center, other times a delicate chew, or perhaps a crisp edge with a tender crumb. What defines perfection is intensely personal, a delicious journey of discovery. For me, the pinnacle of chocolate chip cookie excellence lies in a chewy texture, rich depth of flavor, and an abundance of molten chocolate. This particular recipe for Salted Brown Butter Chocolate Chunk Cookies delivers precisely that, promising a sensory experience thanks to the unique combination of browned butter, generous chocolate chunks, and a hint of sea salt.
Forget everything you thought you knew about your go-to chocolate chip cookie recipe. We’re about to elevate the classic to an entirely new dimension. This isn’t just another cookie; it’s a testament to how simple tweaks can transform a familiar treat into something extraordinary. If you’ve never experienced the magic of brown butter, prepare for a revelation. Combined with the satisfying melt of sizable chocolate chunks and the brightening contrast of sea salt, these cookies are designed to be unforgettable.
Unlocking Flavor: The Art of Browning Butter for Superior Cookies
The secret weapon in this recipe, and what truly sets these cookies apart, is the brown butter. If you’re unfamiliar with this technique, you’re in for a delightful surprise. Browning butter is a culinary game-changer, introducing a complex, nutty, and slightly caramel-like flavor that simply cannot be achieved with plain melted butter. It’s a simple process that yields profound results, transforming humble butter into an ingredient that adds incredible depth and sophistication to your baked goods. This additional step, while requiring a few extra minutes, is absolutely worth the effort for the unparalleled flavor it imparts.
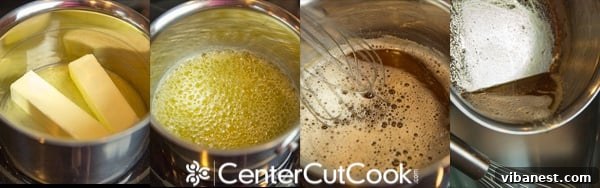
To begin, you’ll gently melt two sticks of unsalted butter in a light-colored saucepan over medium heat. The key is a light-colored pan so you can easily monitor the color changes as the milk solids toast. As the butter melts, it will begin to foam. This is where the magic starts to happen. Keep whisking vigorously, ensuring the milk solids at the bottom of the pan don’t burn and toast evenly. You’ll notice the color transitioning from bright yellow to a golden amber, then finally to a rich, nutty brown. You’ll also smell a distinct, inviting aroma of toasted nuts and caramel – a clear sign that the Maillard reaction is underway. Tiny brown bits will collect at the bottom of the pan – these are the flavorful milk solids that have undergone this chemical transformation, contributing immensely to the butter’s enhanced taste. Once you see these brown flecks and the butter has achieved a beautiful amber hue, immediately remove it from the heat to prevent burning. Pour this liquid gold into your mixing bowl and allow it to cool completely before proceeding. This cooling step is crucial; adding hot butter to your sugar and eggs can scramble them or melt the sugar too much, affecting the final texture of your cookies.
The Indulgence of Chocolate Chunks: Why Size Matters for Gooey Perfection
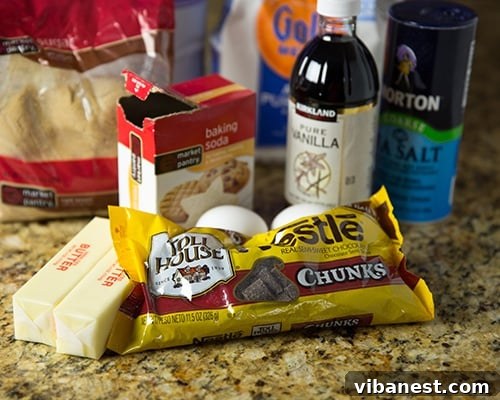
While classic chocolate chips are perfectly acceptable in many recipes, the true indulgence in these brown butter cookies comes from using substantial chocolate chunks. Have you ever noticed how much more satisfying it is to bite into a cookie and discover a generous, yielding pool of molten chocolate, rather than just small, scattered chips? Chocolate chunks, like the Nestle variety mentioned, are ideal for this purpose. Their larger size creates incredible pockets of gooey, deeply flavorful chocolate that elevate every single bite into a moment of pure bliss. As I wander the baking aisle, I’m always on the lookout for new and exciting chocolate varieties, but for this recipe, hearty chunks are non-negotiable for achieving that ultimate chocolatey goodness and desired texture.
Essential Ingredients for Perfect Chewy Cookies
Beyond the star ingredient of brown butter and decadent chocolate chunks, the rest of the ingredients are mostly standard cookie fare, each playing a vital role in achieving that coveted chewy texture and balanced flavor. We’re talking about a harmonious blend of packed brown sugar and granulated sugar; the brown sugar contributes moisture and chewiness, while granulated sugar aids in spreading and provides crisp edges. Room temperature eggs, including an extra egg yolk, ensure a richer texture and help bind the dough beautifully, adding to the cookies’ chewiness without making them cakey. A good quality pure vanilla extract is essential for adding aromatic depth and complementing the nutty butter notes, while the combination of all-purpose flour and baking soda provides the necessary structure and lift. And, of course, the ever-important table salt in the dough, complemented by a finishing sprinkle of flaky sea salt, balances the sweetness and enhances all the other flavors, creating that irresistible sweet and salty contrast.
Crafting Your Dough: A Step-by-Step Journey to Cookie Bliss
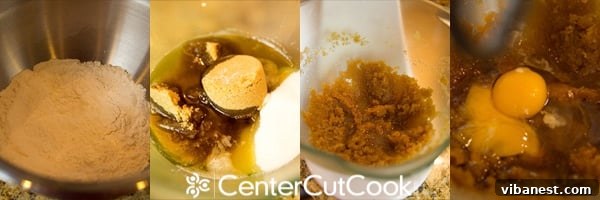
Once your brown butter has cooled completely to room temperature (it should be solid but still soft, or at least no longer hot to the touch), the real fun begins. First, ensure your dry ingredients – all-purpose flour, baking soda, and fine table salt – are thoroughly sifted together in a separate medium bowl. This crucial step prevents lumps and ensures an even distribution of the leavening agent and salt throughout the dough, which is vital for consistent texture and flavor in every bite. Set this mixture aside.
Next, return your attention to the cooled brown butter in your large mixing bowl. Add both the packed light brown sugar and granulated sugar to it. Beat these together with an electric mixer on medium speed (or by hand with a sturdy whisk) for several minutes, typically 2-3 minutes, until the mixture is light, fluffy, and well combined. This creaming process incorporates air, which contributes to the cookies’ desirable tender yet chewy texture. Then, incorporate the large egg, the extra egg yolk (which significantly adds to the richness and chewiness of the final cookie), and a generous tablespoon of pure vanilla extract. Mix thoroughly until everything is beautifully emulsified, smooth, and no streaks of egg remain. Don’t rush this step; proper mixing ensures a cohesive and flavorful dough foundation.
Now, it’s time to gently marry the wet and dry ingredients. Gradually add the sifted dry flour mixture into the wet ingredients, mixing on low speed or by hand until just combined. The golden rule here is to avoid overmixing. Overmixing develops the gluten in the flour too much, leading to tough, cake-like cookies instead of the soft, chewy delights we’re aiming for. Stop mixing as soon as no dry streaks of flour remain visible in the dough; a few lumps are perfectly acceptable.
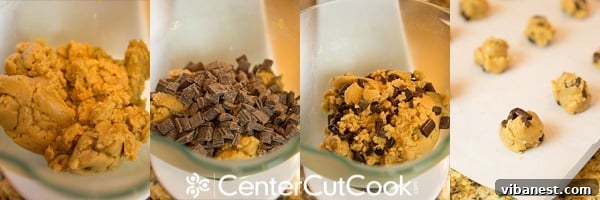
Finally, the moment we’ve all been waiting for: the chocolate chunks! Gently fold these luscious morsels into the cookie dough using a large wooden spoon or spatula. Ensure they are evenly distributed throughout the dough, promising a delightful burst of chocolate in every bite. This careful folding technique prevents crushing the chunks and, just as importantly, keeps the dough from becoming overworked, preserving that tender texture.
Baking Perfection: From Dough to Golden Goodness
With your perfectly crafted dough ready, it’s time to prepare for baking. Line two large baking sheets with parchment paper; this simple step not only prevents sticking but also ensures even baking and makes cleanup an absolute breeze. Scoop generous, heaping tablespoons of cookie dough onto the prepared sheets, leaving ample space (about 2 inches) between each cookie to allow for proper spreading without merging into one giant cookie. These cookies are sizable, so don’t overcrowd the pan; bake in batches if necessary.
Bake in your preheated oven at 350°F (175°C) for approximately 10 to 12 minutes. The exact baking time may vary slightly depending on your specific oven, so it’s crucial to keep a close eye on them. You’re looking for edges that are just beginning to turn a delicate golden brown, while the centers still appear slightly soft, puffed, and perhaps a touch underbaked. This visual cue is the secret to achieving that wonderfully gooey, chewy interior that defines a truly exceptional chocolate chunk cookie. Do not overbake! A slightly underbaked cookie, firming up as it cools, is far superior to an overbaked, dry, and crumbly one.
The moment these beauties emerge from the oven, while they are still warm, glistening, and their chocolate is perfectly molten, it’s crucial to sprinkle them with a touch of flaky sea salt. This finishing touch isn’t merely decorative; the coarse salt crystals provide a delightful textural contrast and a burst of savory flavor that beautifully cuts through the richness of the chocolate and butter, enhancing the overall taste profile and making every bite even more addictive. This sweet and salty combination is truly a match made in heaven.
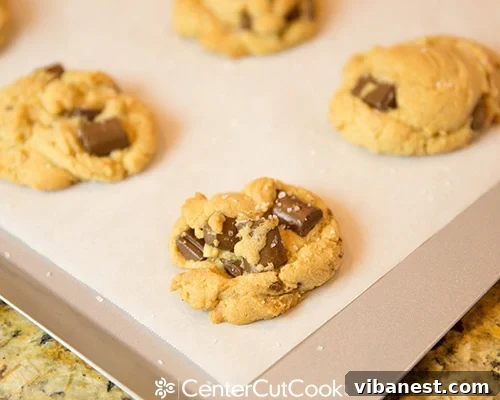
Allow the cookies to cool on the baking sheet for just 5 minutes before carefully transferring them to a wire cooling rack. They will be quite delicate and prone to breaking when hot, but will firm up considerably as they cool. Resisting the urge to devour them immediately is often the hardest part, but a slightly cooled cookie allows the flavors to fully meld and the chocolate to set just enough for that perfect, satisfying ooey-gooey bite.
The Irresistible Result: Your New Favorite Cookie Obsession
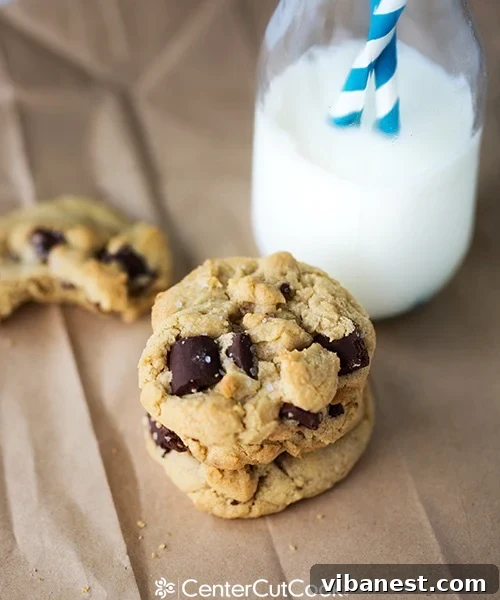
What you’ll discover is a cookie that transcends expectations. An ooey-gooey, impossibly rich, and utterly chocolatey masterpiece with an exquisite hint of saltiness that dances on your palate. The depth of flavor from the browned butter, the generous pockets of molten chocolate from the chunks, and the perfect balance from the sea salt create an experience that is nothing short of sublime. These aren’t just cookies; they’re a revelation. Be warned: after tasting these Salted Brown Butter Chocolate Chunk Cookies, your cookie jar will likely never be without them again. They are destined to become a cherished staple in your baking repertoire, bringing immense joy with every chewy, chocolate-filled bite. Prepare to answer the inevitable question: “Can I have the recipe?”
Tips for Cookie Success and Variations
Achieving cookie perfection is within your reach with these helpful tips and ideas:
- Room Temperature Ingredients: For optimal emulsification and a smoother dough, ensure your eggs are at room temperature. This helps them incorporate better with the butter and sugar, contributing to a more uniform and delicious final product.
- Don’t Skip Cooling the Butter: This step is critical! Hot brown butter will melt your sugars prematurely and can even start to cook your eggs, drastically altering the final texture of your cookies. Patience here is key; allow the butter to cool completely to avoid flat, greasy cookies.
- Chill the Dough (Optional but Recommended): While not strictly required by the recipe, chilling the cookie dough for at least 30 minutes, or even overnight, can deepen the flavors significantly. It also results in a thicker, chewier cookie with less spread, as the butter solidifies.
- Measuring Flour Accurately: Use the spoon-and-level method for measuring flour. Spoon flour into your measuring cup and then level off the top with a straight edge. Scooping directly from the bag can compact the flour, leading to too much flour and dry, dense cookies.
- Storage: Store these delicious cookies in an airtight container at room temperature for up to 3-4 days to maintain their freshness and chewiness. They also freeze exceptionally well for longer storage – simply thaw at room temperature or warm gently in the microwave for a fresh-baked experience.
- Variations: Feel free to experiment and make this recipe your own! Add a handful of chopped walnuts or pecans for extra crunch and nutty flavor. Try a mix of different chocolate types (milk, dark, semi-sweet) for a more complex chocolate profile. A dash of cinnamon or a pinch of cayenne pepper could also add a warm, subtle spice for an adventurous twist.
- Troubleshooting Flat Cookies: If your cookies are spreading too much, ensure your brown butter wasn’t too warm when added to the sugars, your flour was measured correctly, and consider chilling your dough for at least 30 minutes before baking. An oven thermometer can also help ensure your oven temperature is accurate.
INGREDIENTS
- 2 sticks (1 cup) unsalted butter
- 1 1/3 cups packed light brown sugar (dark brown sugar also works for a deeper molasses flavor)
- 1/4 cup granulated sugar
- 1 large egg + 1 egg yolk (preferably at room temperature)
- 1 tablespoon pure vanilla extract
- 2 1/4 cups all-purpose flour
- 1 teaspoon baking soda
- 3/4 teaspoon fine table salt
- 11.5 ounce bag (approximately 2 cups) Nestle Chocolate Chunks or other high-quality chocolate chunks
- Flaky sea salt, for garnish (e.g., Maldon)
DIRECTIONS
- Preheat your oven to 350°F (175°C). Line two large baking sheets with parchment paper.
- In a large, light-colored saucepan, melt the two sticks of unsalted butter over medium heat. Continue cooking, stirring occasionally, until the butter turns golden brown and nutty-smelling, with small brown bits forming at the bottom. This usually takes 5-8 minutes. Immediately pour the browned butter into a large mixing bowl and allow it to cool completely (this can take 20-30 minutes).
- While the butter cools, whisk together the all-purpose flour, baking soda, and fine table salt in a separate medium bowl. Set aside.
- Once the brown butter is completely cool and semi-solid (or at least not hot), add the packed light brown sugar and granulated sugar to it. Beat with an electric mixer (or by hand) for 2-3 minutes until light, fluffy, and well combined.
- Add the large egg, egg yolk, and pure vanilla extract to the sugar mixture. Mix well until fully incorporated and smooth, scraping down the sides of the bowl as needed.
- Gradually add the dry flour mixture to the wet ingredients, mixing on low speed or by hand until just combined. Be careful not to overmix; stop as soon as no dry streaks of flour are visible.
- Gently fold in the Nestle Chocolate Chunks with a wooden spoon or spatula until evenly distributed throughout the dough.
- Drop heaping tablespoons of cookie dough onto the prepared baking sheets, leaving about 2 inches between each cookie for proper spread.
- Bake for 10-12 minutes, or until the edges are lightly golden brown and the centers are still slightly soft and puffed. Do not overbake.
- Immediately upon removing the cookies from the oven, sprinkle them generously with flaky sea salt.
- Let the cookies cool on the baking sheets for 5 minutes before carefully transferring them to a wire cooling rack to cool completely.
- Store any leftover cookies in an airtight container at room temperature for up to 4 days.
- This recipe yields approximately 3 dozen delightfully chewy and flavorful cookies.
Recipe adapted from
Kevin and Amanda