
Irresistible No-Bake Peanut Butter Cheesecake Jars: Your New Go-To Dessert
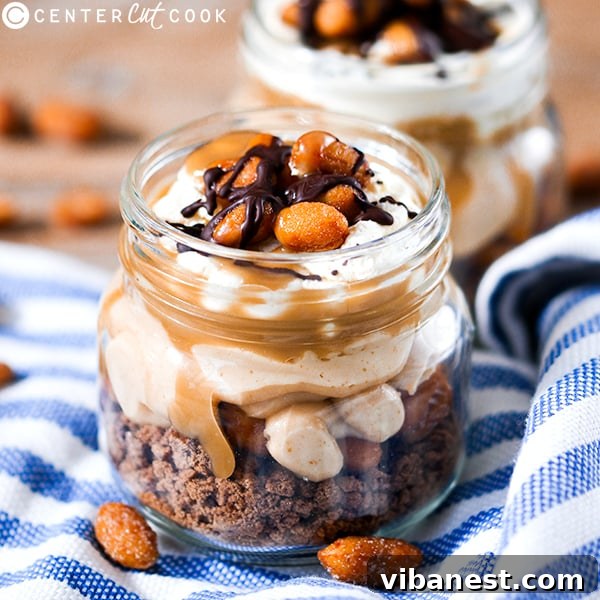
Prepare to fall in love with a dessert that’s as simple to make as it is utterly delicious. These **no-bake peanut butter cheesecake jars** are a masterpiece of convenience and flavor, combining a crunchy base, a rich and fluffy peanut butter cheesecake filling, and decadent caramel layers. Perfect for any occasion, these individual treats are designed for maximum enjoyment with minimum effort.
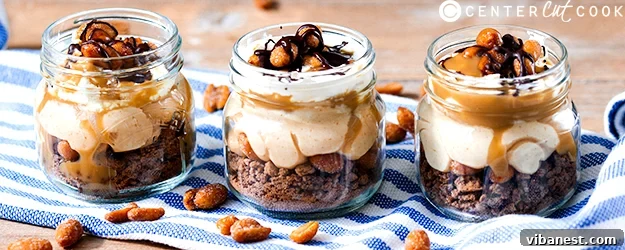
Imagine a dessert that requires no oven, no complicated techniques, and can be prepared well in advance. That’s precisely what these peanut butter cheesecake jars offer. Made in charming individual mason jars, they are not only delightful to look at but also incredibly practical. No more wrestling with serving slices from a large cheesecake; each jar is a perfectly portioned delight, ready to grab and enjoy. Simply place the lids on, and these delightful jars can be stashed away in your refrigerator, patiently awaiting their moment to shine for a day or two, or even longer if stored properly.
Why These Peanut Butter Cheesecake Jars Will Become Your Favorite Dessert
Effortless Preparation, Unforgettable Flavor
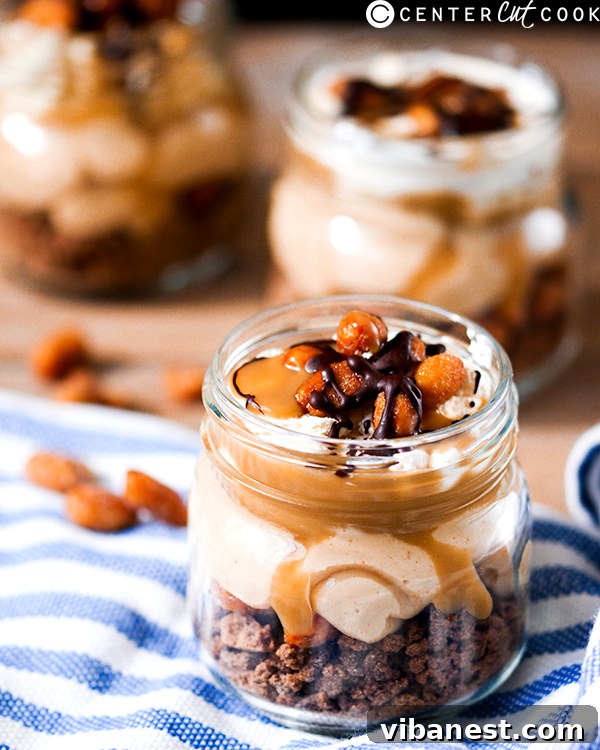
The star of this dessert is undoubtedly the creamy, dreamy peanut butter cheesecake filling. Crafted from a straightforward blend of smooth peanut butter, rich full-fat cream cheese, fragrant vanilla extract, and sweet confectioners’ sugar, this filling is pure bliss. What elevates it further is the clever incorporation of a little whipped cream, which transforms the texture into something light, airy, and exquisitely fluffy. Even if you’re not typically a fervent peanut butter enthusiast, the balance of flavors in this cheesecake is surprisingly captivating. Many find themselves unable to resist a second spoonful, and the ritual of “licking the spoon” after preparation becomes an anticipated cook’s treat!
The Magic of Mason Jars and Make-Ahead Convenience
One of the standout features of this **easy dessert recipe** is its presentation in individual mason jars. This method offers a multitude of benefits. Firstly, it eliminates the need for any complicated plating; each guest receives a perfectly layered, visually appealing dessert. Secondly, the make-ahead aspect is a game-changer for busy hosts or those simply looking to streamline their meal prep. These jars can be assembled and refrigerated, allowing the flavors to meld beautifully and the layers to set perfectly. They’re ideal for parties, picnics, potlucks, or simply having a decadent treat ready for an evening craving. Their compact size means they don’t demand a large space in your refrigerator, fitting into nooks and crannies that a full-sized cheesecake never could.
Customization is Key: Caramel and Beyond
While the recipe calls for dulce de leche (often sold as Carnation Caramel), the beauty of this dessert lies in its flexibility. Feel free to use your favorite store-bought caramel sauce, or if you’re feeling adventurous, whip up a batch of homemade caramel. For those who adore the contrasting notes of sweet and savory, a tiny pinch of sea salt added to your caramel can transform it into a delightful salted caramel layer, elevating the flavor profile even further. But don’t stop there! Think about other delightful additions: a sprinkle of mini chocolate chips, a few banana slices for a classic peanut butter and banana combo, or even a different type of crushed cookie for the base. The possibilities are endless, allowing you to tailor this dessert to your exact preferences and truly make it your own.
Crafting Your Perfect Peanut Butter Cheesecake Jars: Ingredients & Directions
INGREDIENTS
- 2/3 cup heavy cream: Ensure it’s very cold for optimal whipping.
- 1/2 cup full-fat cream cheese: Softened to room temperature for a smooth, lump-free mixture.
- 5 tbsp creamy peanut butter: Choose a good quality, smooth peanut butter. Natural peanut butter can work but might alter the texture slightly.
- 1/2 cup confectioners’ sugar: Also known as icing sugar, it dissolves easily for a silky smooth filling.
- 1 tsp vanilla extract: Pure vanilla extract provides the best flavor.
- 6 oz Oreo cookies: Approximately 18-20 cookies, including the creamy centers. Finely crumbled for the perfect crunchy base. A food processor or a Ziploc bag with a rolling pin works wonders here.
- 1/2 cup honey roast peanuts: These add a wonderful crunch and a touch of sweetness. Plain roasted peanuts are also an option.
- 8 tbsp dulce de leche (or other caramel sauce): Carnation Caramel is a great choice, but any thick, rich caramel sauce will do.
- 2 oz semi-sweet chocolate: Melted for a decorative drizzle and extra chocolatey goodness.
DIRECTIONS
- Whip the Cream: In a large, chilled bowl, whisk the heavy cream until soft peaks just begin to form. Be careful not to over-whisk at this stage, as you’ll be whisking again later. Gently spoon half of this whipped cream out into a separate bowl and set aside. This reserved portion will be used for the final topping layer.
- Prepare the Peanut Butter Cheesecake Filling: To the bowl containing the remaining half of the whipped cream, add the softened full-fat cream cheese and the creamy peanut butter. Gently whisk these ingredients together for a few seconds, just until they are well combined. Next, incorporate the confectioners’ sugar and vanilla extract. Continue whisking until the mixture is completely smooth, lump-free, and all ingredients are thoroughly incorporated. The mixture should be light, fluffy, and absolutely irresistible.
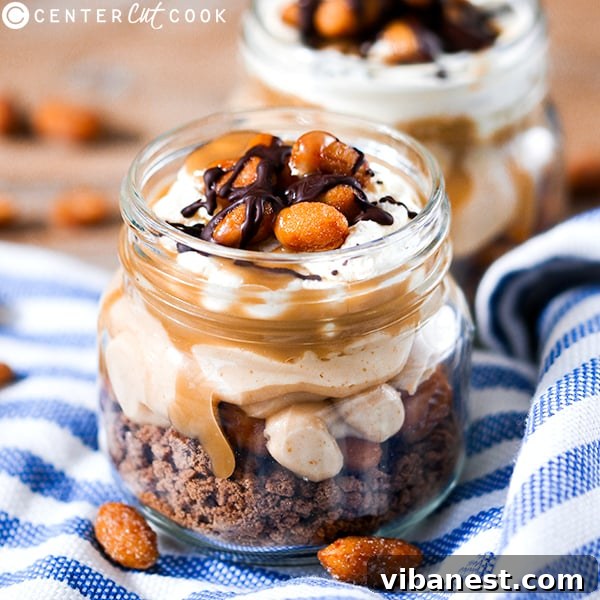
- Assemble the Jars: Begin by dividing the finely crumbled Oreo cookies evenly among four 9fl oz mason jars. These will form the delicious, crunchy base. Next, scatter half of the honey roast peanuts over the Oreo crust in each jar. Now, it’s time for the star filling: spoon or pipe two generous, heaped tablespoons of the peanut butter cheesecake mixture into each jar, carefully layering it on top of the peanuts. Following this, add about 1 tablespoon of dulce de leche or caramel sauce into each jar, creating a luscious caramel layer. Finally, top with the reserved whipped cream and an additional tablespoon of dulce de leche for an extra touch of decadence.
- Garnish and Serve: Just before serving, sprinkle the remaining half of the honey roast peanuts on top of each jar. For a beautiful finish and an extra burst of flavor, drizzle the melted semi-sweet chocolate over the desserts. If you are preparing these jars ahead of time, it’s best to leave the top layer of peanuts off until just before serving to maintain their crunch. Remember to chill the assembled jars for at least 2-4 hours before serving to allow them to set completely.
Tips for the Best No-Bake Peanut Butter Cheesecake Jars Every Time
Ingredient Quality Matters
For a truly exceptional dessert, the quality of your ingredients makes a significant difference. Opt for full-fat cream cheese; it provides the best stability and richest flavor for your cheesecake filling. While natural peanut butter can be used, ensure it’s well-stirred and smooth. Conventional creamy peanut butter often yields a more consistent texture for this no-bake recipe. Always use pure vanilla extract for the most authentic flavor, avoiding artificial alternatives. And remember, cold heavy cream is crucial for achieving stiff, well-whipped peaks—it’s less likely to split and will create a much lighter texture.
Mastering the Layers for a Perfect Look
To achieve those picture-perfect layers that make these **mason jar desserts** so appealing, patience and technique are key. When adding your crumbled Oreo crust, gently press it down to form a firm base. For the peanut butter cheesecake filling, using a piping bag (even a sturdy Ziploc bag with a corner snipped off) can help create neater, more even layers than spooning. Similarly, for the caramel, a small spoon or another piping bag can give you precise placement. Don’t worry if your first jar isn’t perfectly symmetrical; practice makes perfect, and they’ll all taste amazing regardless of their aesthetic!
Advance Preparation and Storage Solutions
One of the greatest advantages of this **make-ahead dessert** is its flexibility. You can assemble these jars up to 2-3 days in advance. Simply ensure they are tightly sealed with lids before refrigerating. This allows the flavors to meld beautifully and the layers to set firmly. For longer storage, you can even freeze these jars! Without the top peanut and chocolate garnish, they can be frozen for up to a month. Thaw them in the refrigerator overnight or for a few hours before serving, then add your fresh garnishes. This makes them an excellent option for meal prepping desserts or having a delicious stash of treats on hand for unexpected guests.
Customization Ideas & Flavor Variations for Your No-Bake Jars
These **peanut butter cheesecake jars** are wonderfully versatile, inviting you to unleash your creativity. Here are a few ideas to inspire your next batch:
- Different Crusts: Instead of Oreos, try crushed graham crackers, vanilla wafers, Nilla wafers, or even digestive biscuits. You could even mix them with a tablespoon or two of melted butter for an even richer base.
- Nut Butter Swaps: Experiment with almond butter, cashew butter, or even sunbutter for a nut-free option, keeping in mind that the flavor profile and perhaps the consistency will change slightly.
- Extra Toppings: Elevate your jars with mini chocolate chips, chopped peanut butter cups, a sprinkle of sea salt flakes (especially with salted caramel), toasted coconut, or even fresh banana slices right before serving for a classic combination.
- Chocolate Peanut Butter Explosion: Integrate a tablespoon or two of cocoa powder into your cheesecake filling for a chocolate peanut butter swirl, or use chocolate whipped cream for the top layer.
- Fruity Twist: Add a layer of sliced fresh bananas or a spoonful of banana puree to the bottom for a delightful peanut butter banana cheesecake jar, creating a tropical twist.
Serving Suggestions for Your Individual Desserts
These elegant **individual desserts** are perfect for almost any gathering. Serve them at a casual backyard barbecue, a sophisticated dinner party, a festive holiday meal, or as a fun treat for a children’s birthday party. Because they are pre-portioned, they simplify serving logistics immensely, allowing you to relax and enjoy your guests. Present them on a decorative tray, or simply let guests grab them directly from the fridge. They are also fantastic for packing into lunchboxes (for adults!) or bringing to potlucks, as there’s no need for plates or cutlery beyond a spoon. Just remember to add the final crunchy garnishes right before serving to ensure optimal texture and visual appeal.
Frequently Asked Questions About No-Bake Peanut Butter Cheesecake Jars
Q: Can I use low-fat cream cheese or peanut butter?
A: While you can, it’s generally not recommended for this recipe. Full-fat cream cheese provides the necessary structure and richness for the cheesecake filling to set properly and have the desired creamy texture. Low-fat alternatives may result in a thinner, less stable filling that doesn’t hold its shape as well. Similarly, natural or low-fat peanut butter might alter the consistency, making it less robust and potentially separating.
Q: How long do these jars last in the refrigerator?
A: When tightly covered with lids, these no-bake peanut butter cheesecake jars will stay fresh and delicious in the refrigerator for up to 3 days. Beyond that, the cookies might start to soften too much, and the overall texture of the cheesecake may begin to decline slightly. For longer storage, refer to the freezing tips provided above.
Q: Can I make this recipe vegan?
A: With a few thoughtful substitutions, absolutely! You would need to use a high-quality vegan cream cheese, a plant-based heavy cream alternative suitable for whipping (like full-fat coconut cream or a commercial vegan whipping cream), and vegan-friendly Oreo-style cookies. Ensure your caramel sauce is also dairy-free. The basic layering and mixing method would remain the same, yielding a delightful vegan treat.
Q: Do I need to chill the jars before serving?
A: Yes, chilling is absolutely crucial! After assembly, the jars need at least 2-4 hours in the refrigerator to allow the cheesecake filling to set properly and the flavors to fully meld and develop. Overnight chilling is even better for achieving the best possible texture and taste experience, ensuring the layers are firm and creamy.
Final Thoughts: Your Next Sweet Obsession Awaits!
These **no-bake peanut butter cheesecake jars** are more than just a dessert; they’re a convenient, crowd-pleasing culinary creation that promises rich flavors and satisfying textures without the fuss. Whether you’re a seasoned baker or a kitchen novice, this recipe is designed for success, delivering individual portions of pure bliss every time. Dive into the delightful world of creamy peanut butter, crunchy Oreos, and luscious caramel – your taste buds will thank you! Don’t hesitate to make them your own with creative additions and toppings. Enjoy crafting and savoring these delectable **creamy peanut butter desserts**!