
Homemade Indulgence: The Ultimate Guide to Chocolate Covered Peanut Butter Pretzels
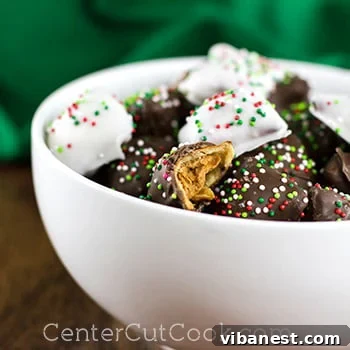
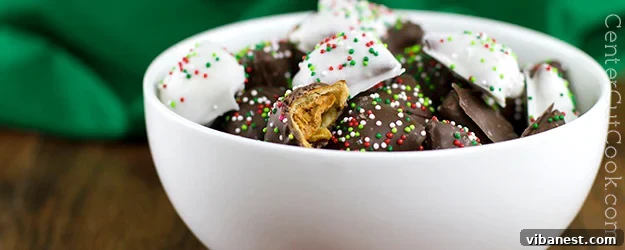
There’s something truly magical about the combination of sweet and salty, crunchy and creamy. When these elements converge in a single bite, the result is often irresistible. This is precisely the case with chocolate covered pretzels – a classic treat that has delighted taste buds for generations. But what if we told you there’s a way to elevate this beloved snack to an entirely new level of deliciousness? Enter the magnificent Chocolate Covered Peanut Butter Pretzel. Imagine crisp, salty pretzels, generously filled with smooth, creamy peanut butter, all enrobed in a rich layer of your favorite chocolate. It’s a symphony of flavors and textures that promises to be nothing short of extraordinary.
My journey to perfecting these homemade marvels began, as many good food adventures do, with a discovery at a specialty grocery store. While browsing the aisles of a well-known chain, I stumbled upon a small bag of chocolate-coated peanut butter pretzels. Intrigued by the concept, and with a glowing recommendation from my husband, I decided to give them a try. The verdict? Absolutely amazing! However, the price tag for that modest bag was a bit steep, prompting a moment of culinary inspiration. I realized that with just a few simple ingredients and a little bit of effort, I could recreate these decadent treats at home, saving money and enjoying the satisfaction of a homemade confection.
Why Craft Your Own Chocolate Covered Peanut Butter Pretzels?
Beyond the sheer joy of creating something delicious with your own hands, there are several compelling reasons to make these peanut butter pretzel delights at home:
- Cost-Effectiveness: As my experience at the grocery store revealed, store-bought specialty treats can be surprisingly expensive. By purchasing your ingredients in bulk, especially the peanut butter filled pretzels and chocolate, you can produce a generous batch for a fraction of the cost. Stores like Costco frequently offer large containers of peanut butter pretzels at an unbeatable value, making this an incredibly economical indulgence.
- Unleash Your Creativity: Making your own gives you complete control over the ingredients and presentation. You can choose your preferred type of chocolate – milk, dark, white, or even a blend. The possibilities for toppings are endless, allowing you to customize each batch to suit different tastes or occasions.
- Freshness and Quality: There’s an undeniable difference in taste and texture when you enjoy a treat made with fresh ingredients. Homemade chocolate covered pretzels maintain their crispness and vibrant flavors much better than their pre-packaged counterparts.
- Perfect for Gifting: These treats make fantastic homemade gifts for holidays, birthdays, or just because. Beautifully packaged, they convey thoughtfulness and culinary effort, making them much more personal than anything you could buy off a shelf.
- Fun and Rewarding: The process itself is enjoyable and surprisingly simple. It’s a wonderful activity to do with family, especially during holiday seasons, and the reward of seeing everyone enjoy your creations is truly priceless.
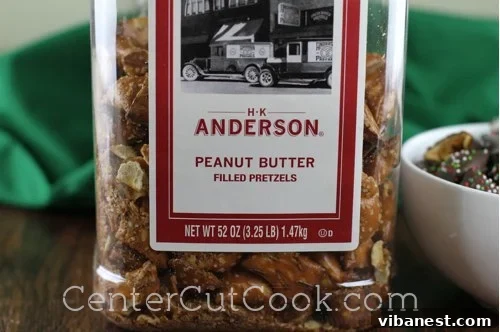
The foundation of this recipe lies in quality peanut butter filled pretzels. I often source mine from Costco, which offers a robust and flavorful product that holds up beautifully to being coated in chocolate. But rest assured, most major grocery stores now carry excellent peanut butter filled pretzels, so you’ll have no trouble finding them locally.
The Sweet Science of Perfect Dipping: Tips and Techniques
The beauty of making chocolate covered peanut butter pretzels lies in its simplicity. With a few key steps and some helpful tips, you’ll be creating professional-looking treats in no time.
Gather Your Tools and Ingredients
- Peanut Butter Filled Pretzels: Choose your favorite brand. Different shapes (mini twists, nuggets, squares) can offer varied textures and visual appeal.
- Chocolate of Choice: Almond bark (white or chocolate flavored) is incredibly easy to work with as it melts smoothly and sets quickly without tempering. High-quality melting wafers or chocolate chips (milk, semi-sweet, dark) can also be used, but may require tempering for a glossy finish that resists melting at room temperature. For convenience, almond bark or candy melts are highly recommended for beginners.
- Sprinkles/Toppings: Classic rainbow sprinkles are always a hit, but don’t limit yourself! Coarse sea salt, chopped nuts (peanuts, pecans, almonds), crushed candy canes, toffee bits, shredded coconut, or even a drizzle of contrasting chocolate can elevate your pretzels.
- Equipment: Baking sheets, wax paper or parchment paper, microwave-safe bowl (or double boiler), spoon, fork, and an airtight container for storage.
The Dipping Process: Step-by-Step Perfection
- Prepare Your Workspace: Line a baking sheet with wax paper or parchment paper. This non-stick surface is crucial for easily removing the hardened pretzels without breakage.
- Melt Your Chocolate: If using almond bark or melting wafers, follow the package directions. Typically, this involves melting in the microwave in 30-second intervals, stirring thoroughly after each, until smooth and creamy. Be careful not to overheat, as this can scorch the chocolate and make it thick or grainy. For a double boiler method, place chocolate in a heatproof bowl over a saucepan of simmering water, ensuring the bowl doesn’t touch the water. Stir until melted.
- Dip with Precision: Using a fork, gently submerge one peanut butter pretzel into the melted chocolate. A spoon can help ensure it’s fully coated. Lift the pretzel out with the fork, allowing the excess chocolate to drip off through the tines. This step is key to avoiding thick, clumpy coatings and ensuring a crisp bite.
- Topping Time: Immediately after dipping and shaking off excess chocolate, carefully transfer the coated pretzel to your prepared baking sheet. While the chocolate is still wet and tacky, generously sprinkle it with your chosen toppings. The immediacy is vital here, as chocolate sets quickly, especially if it’s almond bark, and sprinkles won’t adhere to hardened chocolate.
- Set and Repeat: Allow the chocolate to firm up completely. This usually takes about 15-20 minutes at room temperature, or slightly faster in a cool room. Once firm, they’re ready to enjoy! Continue this process, perhaps alternating between different types of chocolate or toppings, until you’ve made as many as your heart desires (or until you run out of ingredients!).
Efficiency is Key: Batching Your Work
While dipping one pretzel at a time ensures precision, you can optimize your workflow. I often find it efficient to dip about 6-8 pretzels consecutively, placing them on the wax paper. Then, I go back and sprinkle all of them at once before the chocolate has a chance to set. This rhythm allows for a steady pace without compromising on quality or causing the chocolate to harden prematurely.
Endless Variations and Customizations
One of the most exciting aspects of making these pretzels is the freedom to experiment with different flavors and presentations. Here are some ideas to spark your creativity:
- Chocolate Choices:
- Dark Chocolate: For a sophisticated, less sweet profile that perfectly balances the creamy peanut butter.
- White Chocolate: A creamy, sweet option that provides a beautiful contrast, especially when paired with colorful sprinkles. You can even tint white chocolate with food coloring for themed treats.
- Milk Chocolate: The classic, universally loved choice that offers a familiar sweetness.
- Flavored Candy Melts: Available in a rainbow of colors and various flavors (peppermint, caramel, strawberry), these are excellent for holiday or party themes.
- Topping Extravaganza:
- Coarse Sea Salt: A simple yet profound addition that enhances the chocolate’s flavor and adds another layer of crunch and saltiness.
- Chopped Nuts: Peanuts, pecans, walnuts, or almonds provide an extra layer of texture and nutty flavor.
- Crushed Candy: Mini M&M’s, Heath bar bits, or crushed candy canes during the holidays add a festive touch and burst of flavor.
- Shredded Coconut: Toasted or untoasted, it adds a tropical note and chewy texture.
- Drizzles: After the main chocolate layer has set, drizzle contrasting colored chocolate over the pretzels for an artistic finish.
- Spices: A tiny pinch of cinnamon or chili powder mixed into the chocolate can offer an unexpected depth of flavor.
Storage and Gifting Ideas
Once your chocolate covered peanut butter pretzels have fully set, store them in an airtight container at room temperature. They will remain fresh and delicious for up to a week. If stacking them, separate layers with wax paper to prevent sticking.
These treats are incredibly popular as gifts. Here are some ideas for packaging:
- Place them in clear cellophane bags tied with festive ribbons.
- Arrange them in small decorative boxes lined with tissue paper.
- Create a “dessert board” with an assortment of different pretzel variations for parties.
A word of caution: these tasty no-bake treats are incredibly addicting! I often find myself passing them out as gifts or sending them with my husband to work just to ensure they don’t linger around my house for too long. If they’re within sight, they’re likely to disappear quickly!
Irresistible Chocolate Covered Peanut Butter Pretzels
INGREDIENTS
- 1 large container or bag of peanut butter filled pretzels (Costco, Trader Joe’s, or your local grocery store)
- 1-2 lbs (approx. 450-900g) Chocolate Almond Bark or high-quality melting chocolate of your choice (milk, dark, or white), melted
- Assorted Sprinkles or desired toppings (e.g., sea salt, chopped nuts, crushed candy)
DIRECTIONS
- Prepare your workspace by lining a large baking sheet with wax paper or parchment paper. This will prevent the coated pretzels from sticking.
- Melt your chosen chocolate or almond bark according to the package directions. If using a microwave, heat in 30-second intervals, stirring well after each, until smooth and completely melted. Be careful not to scorch the chocolate.
- Once the chocolate is melted and smooth, begin to coat the peanut butter filled pretzels one at a time. Using a fork, submerge a pretzel into the chocolate until fully coated. Lift the pretzel with the fork, gently tapping it against the side of the bowl to allow any excess chocolate to drip off. This ensures a clean, even coating.
- Carefully place the coated pretzel onto the prepared baking sheet. If you are adding sprinkles or other toppings, do so almost immediately after placing the pretzel on the wax paper, while the chocolate is still wet and tacky. This ensures the toppings adhere properly.
- Allow the chocolate-covered pretzels to firm up completely. This typically takes about 15-20 minutes at room temperature, or you can place the baking sheet in the refrigerator for a few minutes to speed up the setting process (be mindful of condensation if doing this).
- Continue dipping and decorating pretzels until you have used all your desired pretzels or run out of chocolate.
- Once firm, store your delicious chocolate covered peanut butter pretzels in an airtight container at room temperature. Enjoy them as a snack, dessert, or a wonderful homemade gift!
Recipe idea inspired by
Trader Joe’s specialty treats
Conclusion: Your New Favorite Homemade Treat
Making chocolate covered peanut butter pretzels at home is more than just a recipe; it’s an enjoyable culinary experience that yields incredibly satisfying results. From the cost savings and customizable options to the sheer joy of creating a treat that everyone adores, there’s every reason to make these a staple in your kitchen. Whether you’re preparing them for a holiday party, a thoughtful gift, or simply to satisfy a personal craving, these sweet and salty masterpieces are guaranteed to be a hit.
So, next time you’re looking for a simple yet impressive dessert that caters to all ages and tastes, grab your peanut butter pretzels, melt some chocolate, and get ready to indulge in an utterly irresistible creation. Just be warned: once you start making (and eating) them, it’s hard to stop!