
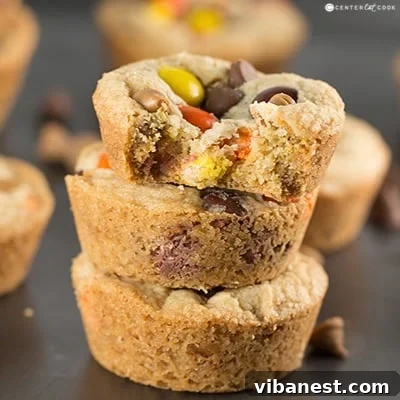

Irresistible Reese’s Cookie Cups: Your New Favorite Peanut Butter Treat!
For anyone who considers themselves a true connoisseur of confectionery, there’s an almost universal truth: the allure of Reese’s is simply undeniable. Whether you’re captivated by the classic combination of chocolate and peanut butter in a Reese’s Peanut Butter Cup or the delightful crunch and vibrant colors of Reese’s Pieces, this iconic brand holds a special place in the hearts of sweet treat enthusiasts everywhere. Personally, I find myself utterly powerless against their charm. It was precisely this enduring love, combined with a bag of Reese’s Pieces in my pantry just begging to be transformed, that sparked the inspiration for these ultimate Reese’s Cookie Cups. Drawing inspiration from beloved recipes like Chocolate Chip Lava Cookies, I set out to create a dessert that marries the soft, chewy texture of a perfect cookie with an explosion of peanut butter flavor, generously loaded with both Reese’s Pieces and creamy peanut butter chips. The result? A dessert so incredibly delicious and utterly addictive, it’s bound to become a staple in your baking repertoire.
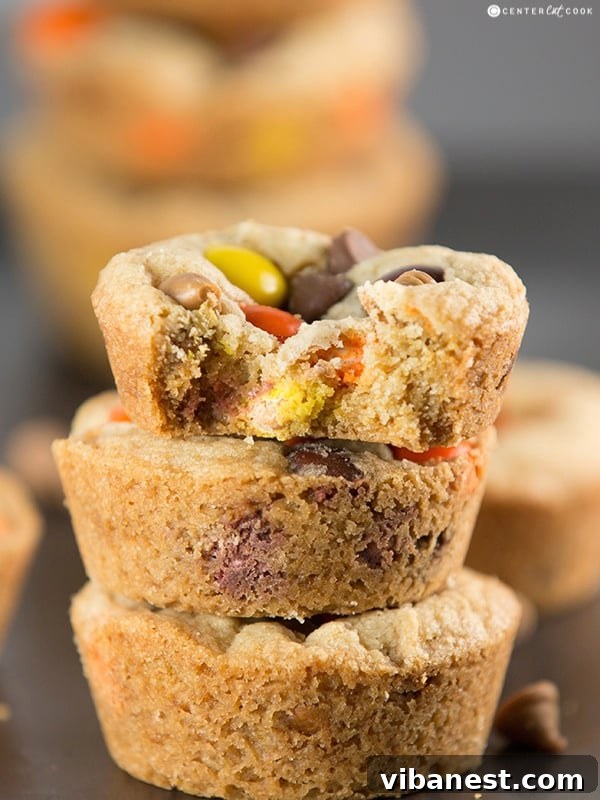
What Makes Reese’s Pieces So Irresistible? The Magic Behind the Craving
Have you ever stopped to wonder what it is about Reese’s Pieces that makes them so incredibly addictive? Their vibrant orange, yellow, and brown candy shells, the satisfying crunch, and that unmistakable burst of creamy peanut butter flavor inside create a symphony for the senses. It’s a nostalgic taste that transports many back to childhood, making them a consistently popular choice for snacking and baking alike. In my household, a bag of Reese’s Pieces rarely stands a chance; it’s a dangerous commodity! This same level of delightful danger applies directly to these Reese’s Pieces peanut butter cookies. Once you take that first bite into a soft, chewy cookie cup brimming with those delightful candies and rich peanut butter chips, you’ll understand exactly what I mean. They are an experience that goes beyond just a simple cookie – they are a celebration of all things peanut butter.
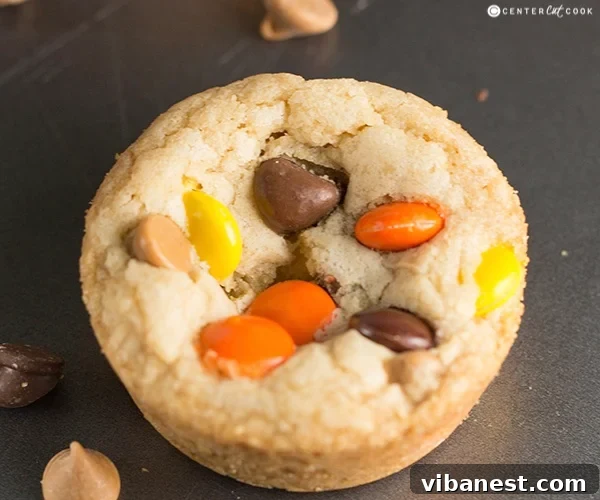
The Joy of Baking Reese’s Cookie Cups: Perfect Portions, Endless Delight
While traditional cookies are always a treat, there’s something uniquely special about baking these delightful creations in cup form. Not only is it incredibly fun and provides a beautiful presentation, but it also ensures perfect portion control for every single serving. Each cookie cup is a delightful, self-contained package of pure bliss, making them ideal for any occasion. And have I mentioned just how soft, chewy, and utterly delicious they are? Oh, I haven’t? Well, let me rectify that: they are incredibly soft and utterly delicious! The tender cookie base cradles a molten core of peanut butter chips and crunchy Reese’s Pieces, creating a textural paradise with every bite. I wholeheartedly encourage you to grab your apron, head into the kitchen, and whip up a batch of these glorious cookie cups. They are fantastic as an everyday pick-me-up, a much-deserved treat for the kids after school, or elegant enough for entertaining guests. In fact, I proudly served them at my Gender Reveal Party, and they were an absolute hit with everyone. I have no doubt that you and your entire family are going to fall head over heels for these Reese’s Cookie Cups.
Crafting the Perfect Reese’s Cookie Cups: A Detailed Recipe Guide
Creating these sensational Reese’s Cookie Cups is a surprisingly straightforward process, yielding incredibly rewarding results. Follow these detailed steps to ensure your cookie cups are perfectly golden, gloriously soft, and bursting with that beloved peanut butter flavor. From selecting the right ingredients to mastering the baking technique, we’ll walk you through everything you need to know to achieve cookie cup perfection.
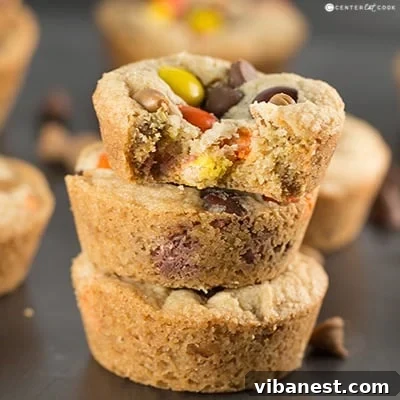
INGREDIENTS FOR ULTIMATE REESE’S COOKIE CUPS
- 1 cup unsalted butter, softened: Ensure your butter is at room temperature for optimal creaming with the sugars. This creates a light and airy base for your cookies.
- 1 cup packed light brown sugar: Brown sugar adds moisture and a delicious caramel-like depth of flavor, contributing to the chewy texture. Make sure it’s firmly packed when measuring.
- 1 cup granulated sugar: White granulated sugar provides sweetness and helps with the spread and crispness of the cookie edges.
- 2 large eggs: Eggs act as a binder, adding richness and helping to emulsify the batter for a smooth consistency. Use large eggs for consistency.
- 1/2 tablespoon vanilla extract: A high-quality vanilla extract enhances all the other flavors in the cookie, adding warmth and complexity.
- 2 1/2 cups all-purpose flour: The backbone of our cookie cups, all-purpose flour provides structure. Measure it correctly by spooning it into your measuring cup and leveling off, rather than scooping directly from the bag.
- 1 teaspoon salt: Salt is crucial for balancing the sweetness and enhancing the overall flavor profile of the cookies. Don’t skip it!
- 1 teaspoon baking soda: This leavening agent reacts with the acids in the brown sugar to create a soft, tender crumb and a slight lift, preventing overly dense cookies.
- 1 cup peanut butter chips: These creamy chips melt beautifully, infusing every bite with intense peanut butter flavor and a delightful gooeyness.
- 1 1/2 cups Reese’s Pieces + more for garnish: The star of the show! These colorful candies add a satisfying crunch and an extra layer of peanut butter goodness. Having extra for garnish makes for a visually appealing finished product.
DIRECTIONS FOR BAKING YOUR REESE’S COOKIE CUPS
- Prepare Your Oven and Muffin Tins: Begin by preheating your oven to 350 degrees Fahrenheit (175°C). This ensures even baking from the moment your cookies enter the oven. Next, liberally spray two standard 12-cup muffin tins with non-stick cooking spray. This crucial step prevents sticking and makes for easy removal of your finished cookie cups.
- Cream Butter and Sugars: In the bowl of a stand mixer fitted with the paddle attachment, or with a large bowl and a hand mixer, combine the softened butter, packed light brown sugar, and granulated sugar. Beat them together on medium speed until the mixture becomes light, fluffy, and pale in color. This process incorporates air, which is essential for a tender cookie texture.
- Incorporate Wet Ingredients: Add the two large eggs one at a time, mixing well after each addition until fully incorporated. Follow with the vanilla extract and mix until just combined. Be careful not to overmix at this stage.
- Combine Dry Ingredients: In a separate, large bowl, sift together the all-purpose flour, salt, and baking soda. Sifting helps to remove lumps and ensures these dry ingredients are evenly distributed throughout the batter.
- Gradually Add Dry to Wet: With the mixer on low speed, slowly add the dry ingredient mixture into the wet ingredients. Mix until just combined, being careful not to overmix the dough. Overmixing can develop the gluten in the flour too much, leading to tough cookies.
- Fold in the Stars: Remove the bowl from the mixer and, using a spatula, gently fold in the peanut butter chips and the 1 1/2 cups of Reese’s Pieces. Mix just enough to distribute them evenly throughout the cookie dough.
- Portion into Muffin Tins: Measure out approximately 2 heaping tablespoons of cookie dough for each muffin cup. Gently flatten each portion slightly with your fingers or the back of a spoon so it fits snugly into the bottom of each muffin cup. Continue this process until all the cookie batter is used. This recipe should yield about 24 delicious cookie cups.
- Garnish for Visual Appeal: For an extra touch of beauty and flavor, press additional Reese’s Pieces onto the top of each cookie cup before baking. This makes them even more enticing when they emerge from the oven.
- Bake to Golden Perfection: Place the muffin tins in the preheated oven and bake for 15-20 minutes. Keep a close eye on them; the cookie cups are done when the edges begin to turn a light golden brown, and the centers are just set but still look soft. Immediately after removing them from the oven, run a thin knife or offset spatula around the perimeter of each cookie cup. This helps to loosen them from the pan before they cool and potentially stick.
- Cool Completely: Allow the cookie cups to cool completely in the muffin tins on a wire rack before attempting to remove them. This is a critical step, as warm cookie cups are fragile and prone to breaking. As they cool, they firm up and become easier to handle.
- Store for Freshness: Once completely cool, store your Reese’s Cookie Cups in an airtight container at room temperature for up to 3-4 days to maintain their freshness and soft texture.
Tips for Baking Flawless Reese’s Cookie Cups Every Time
Achieving cookie perfection is all about attention to detail. Here are some pro tips to ensure your Reese’s Cookie Cups turn out beautifully every single time:
- Room Temperature Ingredients: Always use room temperature butter and eggs. They cream together much more smoothly, creating a uniform batter that incorporates air effectively, leading to a lighter, more tender cookie.
- Measure Flour Correctly: Avoid scooping flour directly from the bag with your measuring cup, as this compacts it and can lead to adding too much. Instead, spoon the flour into your measuring cup and then level it off with a straight edge.
- Don’t Overmix: Once you add the dry ingredients to the wet, mix only until just combined. Overmixing develops gluten, which can result in tough, dense cookies. A few streaks of flour are fine; they’ll disappear during baking.
- Oven Temperature Matters: Ovens can vary. If you find your cookies are baking too fast or too slow, consider investing in an oven thermometer to ensure your oven is accurately heating to 350°F.
- Cooling is Key: Patience is a virtue, especially when it comes to cooling. Allow the cookie cups to cool completely in the muffin tin. This allows them to set fully, making them easier to remove without breaking and ensuring they maintain their shape.
- Don’t Skip the Non-Stick Spray: Even if your muffin tins are non-stick, a generous spray of cooking spray provides an extra layer of insurance against sticking.
Creative Variations and Serving Suggestions
While these Reese’s Cookie Cups are absolutely divine as is, there are plenty of ways to customize them and elevate your serving experience:
- Add More Chocolate: Introduce a handful of semi-sweet or milk chocolate chips to the dough for an even richer chocolate-peanut butter combo.
- Different Reese’s Forms: Instead of or in addition to Reese’s Pieces, try chopping up Reese’s Peanut Butter Cups (mini or regular size) and folding them into the dough.
- Nutty Crunch: For an added textural dimension, fold in some chopped salted peanuts or mini pretzels. The saltiness will beautifully complement the sweet peanut butter.
- Glaze or Drizzle: Once cooled, drizzle the cookie cups with a simple peanut butter glaze (powdered sugar, milk, peanut butter) or a melted chocolate drizzle for extra decadence.
- Ice Cream Sundaes: Serve warm cookie cups with a scoop of vanilla ice cream and an extra drizzle of chocolate or peanut butter sauce for an unforgettable dessert experience.
- Holiday Themed: Use different colored Reese’s Pieces (sometimes available for holidays) to match specific occasions like Halloween or Easter.
These Reese’s Cookie Cups are incredibly versatile, making them perfect for almost any occasion. They are fantastic for bake sales, potlucks, birthday parties, or simply as a comforting dessert after dinner. Pack them in lunchboxes for a delightful surprise, or arrange them on a platter for a crowd-pleasing party treat. The individual portion size makes them incredibly convenient for guests to grab and enjoy without needing plates and forks.
Storage and Shelf Life: Keeping Your Cookie Cups Fresh
To enjoy your Reese’s Cookie Cups at their best, proper storage is essential. Once they have cooled completely, transfer them to an airtight container. They will stay fresh and soft at room temperature for up to 3-4 days. For longer storage, you can freeze them! Place the cooled cookie cups in a single layer on a baking sheet and freeze until solid (about 1-2 hours). Then, transfer them to a freezer-safe bag or container, separating layers with parchment paper, and freeze for up to 2-3 months. Thaw at room temperature or gently warm in the microwave for a few seconds for that freshly baked taste.
In conclusion, these Reese’s Cookie Cups are more than just a recipe; they are an invitation to experience pure joy in every bite. With their perfect balance of soft cookie, gooey peanut butter chips, and crunchy Reese’s Pieces, they are destined to become a beloved favorite in your home. Get ready to impress your family and friends with this delightfully easy yet incredibly impressive treat!
Recipe inspiration from
CenterCutCook