
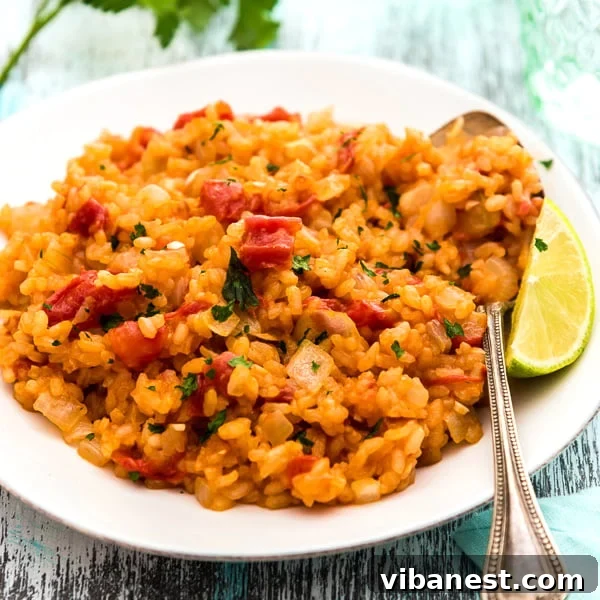
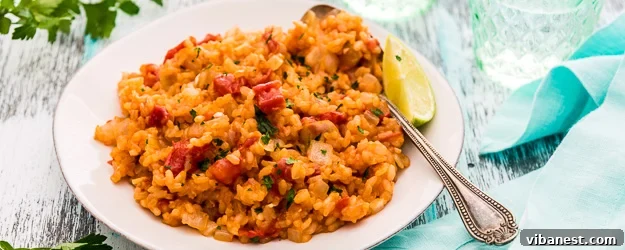
Mastering Authentic Spanish Rice: A Flavorful and Versatile Side Dish
Embark on a culinary journey to create the most delicious Spanish rice right in your own kitchen. Often referred to as Mexican rice, this vibrant, tomato-infused side dish is a staple in many households, cherished for its rich flavor and incredible versatility. While it may require a touch more attention than plain white rice, the reward is a deeply satisfying and aromatic dish that elevates any meal. Imagine cooking a generous batch on the weekend, then effortlessly incorporating it into your weekday dinners. It’s not just for taco night; this flavorful rice beautifully complements a wide array of main courses, from succulent grilled chicken and perfectly seared steak to hearty burritos and comforting soups.
The magic of Spanish rice begins with a crucial step: browning the rice alongside finely chopped onion and minced garlic. This initial process is vital, as it toasts the rice grains, imparting a delightful nutty flavor and laying a robust aromatic foundation for the entire dish. Following this, the rice is gently steamed with crushed or diced tomatoes and rich chicken stock, allowing all the flavors to meld and the rice to cook to tender perfection. There are numerous variations of this beloved dish, some calling for fresh tomatoes, others for canned salsa, or even tomato paste. Our preferred method utilizes canned diced tomatoes for their consistent flavor, vibrant color, and the invaluable convenience they offer in saving prep time without compromising taste.
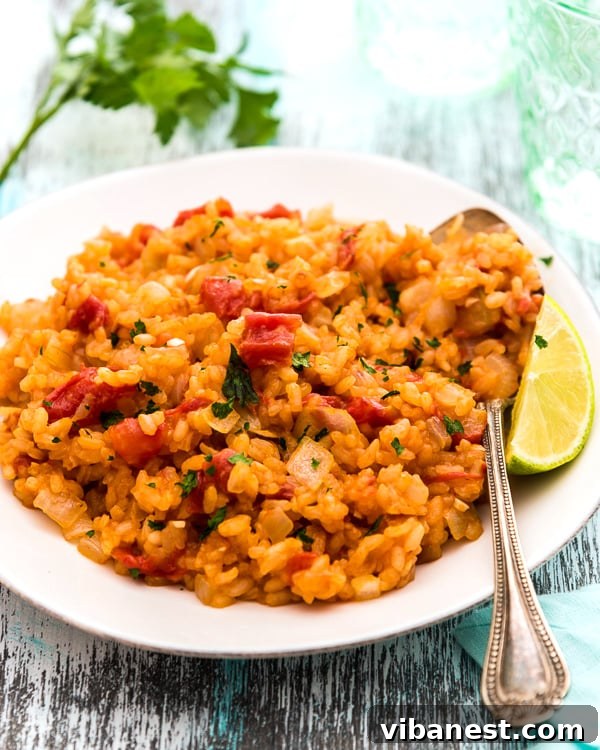
Why Homemade Spanish Rice Is a Must-Try
Beyond its delicious taste, homemade Spanish rice offers several compelling advantages that make it a cornerstone of any home cook’s repertoire:
- Unmatched Flavor: The combination of browned rice, savory aromatics, and a tomato-infused broth creates a depth of flavor that store-bought versions simply can’t replicate. Each grain is seasoned to perfection.
- Incredible Versatility: This rice isn’t just a side; it can be the star. Serve it with classic Mexican dishes, alongside grilled meats and vegetables, or even as a filling for burritos and bowls.
- Economical and Wholesome: Making Spanish rice from scratch is far more cost-effective than buying pre-made versions. Plus, you have complete control over the ingredients, ensuring a healthier meal for your family.
- Perfect for Meal Prep: As highlighted, Spanish rice freezes beautifully, making it an ideal candidate for meal prepping. Cook a large batch, portion it out, and enjoy flavorful sides throughout the week, saving precious time on busy evenings.
- Customizable: This recipe provides a fantastic base, but it’s incredibly adaptable. Adjust the seasoning, add your favorite vegetables, or introduce a touch of heat to make it uniquely yours.
The Humble Origins: A Note on Spanish vs. Mexican Rice
It’s common to hear this dish referred to as both “Spanish rice” and “Mexican rice,” often used interchangeably. While true Spanish cuisine features many rice dishes (like paella), the vibrant, tomato-based rice we’re discussing here is most accurately described as a staple of Mexican and Mexican-American cooking. Its characteristic orange-red hue comes from tomatoes, and its savory profile is built on garlic, onion, and often cumin. The name “Spanish rice” likely emerged as a descriptive term in English-speaking countries, perhaps referring to the Spanish-speaking origins of Mexican culture. Regardless of nomenclature, this recipe delivers the beloved flavors of the Mexican-American kitchen, bringing comfort and warmth to your table.
Unlocking the Flavor: Key Steps to Perfect Spanish Rice
Achieving perfectly cooked, intensely flavorful Spanish rice hinges on understanding a few crucial techniques. These steps are simple but make all the difference:
1. The Art of Browning the Rice
This initial step is non-negotiable for superior Spanish rice. Coating the dry rice grains in melted butter and toasting them gently until they turn a pale golden color creates a nutty depth of flavor that permeates every bite. This process, often called toasting or frying the rice, also helps the grains maintain their individual structure, preventing them from becoming sticky or mushy later on.
2. Building an Aromatic Foundation
Incorporating finely chopped onion and minced garlic early in the cooking process is essential. As these aromatics soften and release their fragrant oils into the butter, they infuse the rice with layers of savory goodness. The slight sweetness of the cooked onion and the pungent kick of the garlic are the backbone of this dish’s irresistible aroma and taste.
3. The Versatile Tomato Base
Canned diced tomatoes are a secret weapon in our recipe. They offer a rich, slightly tangy flavor and contribute to the rice’s signature reddish-orange hue. Their convenience means less chopping and a consistent result every time. For those who prefer, fresh pureed tomatoes or even a good quality canned tomato sauce can be used, but diced tomatoes provide a lovely texture and robust flavor profile.
4. The Liquid Gold: Chicken Stock
Using chicken stock instead of water is a simple yet powerful way to amplify the flavor of your Spanish rice. The savory, umami notes from the stock deeply penetrate the rice grains as they cook, adding another dimension of richness. For a vegetarian version, a high-quality vegetable stock can be substituted with excellent results.
5. Steaming to Perfection and Resting
Once the liquids are added, covering the pot and allowing the rice to steam over low heat is critical. This gentle cooking method ensures the rice cooks evenly and absorbs the flavorful broth without drying out. Just as important is the resting period off the heat. This allows the remaining steam to finish cooking the rice, ensuring every grain is tender and fluffy, and preventing any from sticking to the bottom of the pot.
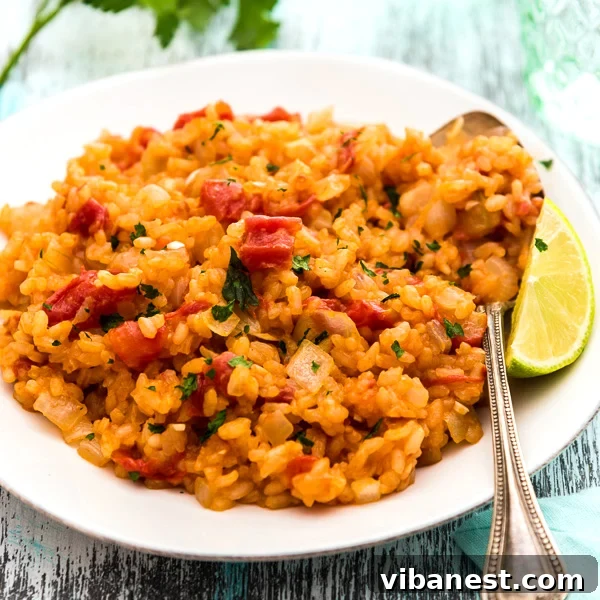
INGREDIENTS
- 2 tablespoons unsalted butter
- 2 cups long-grain or medium-grain white rice (e.g., Basmati, Jasmine, or medium grain white rice)
- 1 large onion, finely chopped (about 1.5 cups)
- 4 cloves garlic, minced (about 1 tablespoon)
- 1 (28-ounce) can diced tomatoes, undrained
- 2 cups low-sodium chicken stock (or vegetable stock for a vegetarian option)
- 1/4 teaspoon salt, plus more to taste
- 2 dried bay leaves
- Optional: A pinch of sugar to balance acidity, a dash of cumin or chili powder for extra flavor.
DIRECTIONS
- Melt Butter & Sauté Aromatics: In a medium-sized Dutch oven or a heavy-bottomed pot with a tight-fitting lid, melt the 2 tablespoons of butter over medium heat. Once the butter is fully melted and shimmering, reduce the heat to medium-low. Add the uncooked rice, finely chopped onion, and minced garlic to the pot. Cook and stir continuously for 5-8 minutes. It’s crucial during this step to toast the rice until it turns a pale yellow or light golden color and the onion becomes translucent and soft. The rice will develop a distinct nutty aroma. Ensure the rice doesn’t burn, adjusting heat as needed. This browning step is key for flavor and preventing sticky rice.
- Add Liquids and Seasoning: Carefully add the entire can of undrained diced tomatoes, the 2 cups of chicken stock, and 1/4 teaspoon of salt to the pot. Stir all the ingredients thoroughly to combine them well, making sure no rice is sticking to the bottom. Place the bay leaves on top of the mixture; do not stir them in. If you’re adding optional spices like cumin or chili powder, this is the time to stir them in.
- Simmer and Steam: Bring the mixture to a rolling boil over medium-high heat. Once boiling vigorously, immediately reduce the heat to the lowest setting possible. Cover the pot tightly with its lid. Cook undisturbed for exactly 20 minutes. Resist the temptation to lift the lid during this time, as it allows precious steam to escape, which is essential for cooking the rice evenly.
- Rest for Perfection: After 20 minutes, remove the pot completely from the stove, but keep the lid tightly on. Let the rice sit, covered, for an additional 10 minutes. This resting period allows the remaining steam to fully absorb into the rice grains, ensuring they are tender, fluffy, and perfectly cooked, without being mushy or sticky.
- Fluff and Adjust: Discard the bay leaves. Gently fluff the rice with a fork, separating the grains. Taste the rice and season with additional salt if needed. If the tomato flavor is too tart for your liking, a small pinch of sugar (1/4 to 1/2 teaspoon) can be added and stirred in to balance the acidity.
- Troubleshooting Tips:
- If the rice is too wet: If after fluffing, the rice seems too moist or watery, uncover the pot, return it to very low heat, and cook and stir gently for another 3-5 minutes, allowing excess moisture to evaporate.
- If the rice is dry but not cooked through: If the rice is dry but still a bit firm or crunchy, add 1/2 cup of hot chicken stock (or water), cover the pot again, and cook on low heat for another 5 minutes, followed by a 5-minute rest off the heat.
- Serve: Serve your delicious Spanish rice warm or at room temperature.
Mastering the Liquid Ratio: Tips for Success
The only truly “tricky” aspect of Spanish rice is getting the liquid ratio just right. This isn’t an exact science, as factors like the specific type of rice you use (long-grain vs. medium-grain, brand differences), the moisture content of your canned tomatoes, and even your stove’s heat can influence absorption. Here are some pro tips to ensure perfect results every time:
- Start with the Recipe: Always begin with the liquid quantities provided in the recipe. It’s a reliable baseline.
- Assess Your Rice: Long-grain varieties (like Jasmine or Basmati) often require slightly less liquid than medium-grain rice. If you typically find your rice too wet or too dry with a standard recipe, make a mental note for next time.
- Tomato Variability: Canned diced tomatoes can vary in their liquid content. If you notice your brand is particularly watery, you might slightly reduce the stock by a tablespoon or two. Conversely, if it seems very thick, you might need a touch more stock.
- Resist Peeking: As mentioned in the directions, avoid lifting the lid during the 20-minute cooking phase. Each time you peek, steam escapes, which can affect the final texture and require more liquid.
- Trust the Rest: The 10-minute rest off the heat is crucial. It allows the rice to continue cooking with residual heat and absorb any remaining moisture, leading to perfectly fluffy grains.
- Don’t Be Afraid to Adjust: The troubleshooting tips in the recipe are there for a reason! It’s perfectly fine to add a little more liquid if it’s too dry, or cook a little longer uncovered if it’s too wet. Experience will be your best guide.
Creative Serving Suggestions for Your Spanish Rice
The beauty of this Spanish rice lies in its incredible versatility. While it’s an essential component of any Mexican feast, its robust flavor profile makes it a fantastic accompaniment to a wide variety of cuisines. Here are some inspiring ideas to serve your homemade Spanish rice:
- Classic Mexican Pairings:
- As a side to your favorite burritos, tacos, enchiladas, fajitas, or quesadillas.
- Served alongside carne asada, carnitas, or pollo asado.
- As a flavorful bed for chili con carne or various types of beans (black beans, pinto beans).
- Grilled & Roasted Delights:
- A perfect accompaniment to grilled chicken breasts, steak, or pork chops.
- Pairs wonderfully with roasted vegetables like bell peppers, zucchini, or corn.
- Comforting Soups & Stews:
- A hearty addition to chicken tortilla soup, black bean soup, or a spicy chili.
- Can be incorporated into stews for added bulk and flavor.
- Creative Bowls & Salads:
- Form the base of a vibrant grain bowl with roasted veggies, avocado, and a protein of choice.
- Cooled Spanish rice can be added to hearty salads for texture and flavor.
- Breakfast & Brunch:
- Believe it or not, a scoop of Spanish rice can be delicious alongside scrambled eggs, perhaps with a dash of hot sauce and some fresh cilantro.
Meal Prep & Storage: Enjoy Spanish Rice All Week Long
One of the most appealing aspects of this Spanish rice recipe is its suitability for meal prepping. Making a large batch means you have a delicious and convenient side dish or meal component ready to go throughout the week (and even longer!).
- Cooling: After cooking, spread the Spanish rice out on a baking sheet to help it cool quickly and evenly. This prevents it from sitting in the “danger zone” temperature for too long, reducing bacterial growth.
- Portioning: Once completely cooled, divide the rice into individual, airtight containers. This makes grabbing a single serving quick and easy.
- Refrigeration: Stored in an airtight container in the refrigerator, Spanish rice will stay fresh and delicious for 3-4 days.
- Freezing: Spanish rice freezes beautifully! Place cooled, portioned rice into freezer-safe airtight containers or heavy-duty freezer bags. Ensure as much air as possible is removed from bags to prevent freezer burn. It will maintain its quality for up to 3 months. Clearly label containers with the date for easy tracking.
- Reheating:
- Microwave: For individual servings, transfer frozen or refrigerated rice to a microwave-safe dish. Add a tablespoon or two of water or chicken stock, cover loosely, and microwave on high until heated through, stirring occasionally.
- Stovetop: For larger quantities, place rice in a pot with a splash of water or stock, cover, and heat over low-medium heat, stirring occasionally, until hot.
- Oven: If reheating a big batch, place rice in an oven-safe dish with a small amount of liquid, cover with foil, and bake at 300°F (150°C) until warmed through.
Variations to Try: Customize Your Spanish Rice
This recipe provides a classic, foundational Spanish rice, but it’s an excellent canvas for customization. Feel free to experiment with these additions to tailor the dish to your taste:
- Add Vegetables: Stir in 1/2 cup of frozen peas and carrots, or diced bell peppers (red, green, or yellow), during the last 5 minutes of cooking or during the resting phase. Corn kernels are also a popular addition.
- Spice it Up: For an extra layer of flavor, consider adding 1/2 teaspoon of ground cumin, 1/4 teaspoon of chili powder, or a pinch of smoked paprika along with the salt and stock. A finely diced jalapeño or serrano pepper can also be added with the onion and garlic for a spicy kick.
- Fresh Tomatoes: Instead of canned diced tomatoes, you can use 2-3 large fresh tomatoes, peeled, seeded, and finely chopped, or blended into a puree. You might need to adjust the cooking liquid slightly.
- Cilantro Finish: Stir in a handful of freshly chopped cilantro just before serving for a burst of fresh, herbaceous flavor.
- Vegetarian Version: Simply substitute chicken stock with vegetable stock to make this a delicious vegetarian side dish.
- Different Rices: While white long or medium-grain rice is traditional, you can experiment with brown rice. Note that brown rice will require significantly more liquid and a longer cooking time (often 40-50 minutes, plus resting).
Frequently Asked Questions About Spanish Rice
Here are answers to some common questions about making and enjoying Spanish rice:
Q: What is the main difference between Spanish rice and Mexican rice?
A: While often used interchangeably, the term “Spanish rice” usually refers to the tomato-based, flavorful rice dish common in Mexican and Mexican-American cuisine, which is the style of this recipe. True Spanish rice dishes, like paella, have different flavor profiles and preparations, often featuring saffron and seafood.
Q: Can I use brown rice instead of white rice?
A: Yes, you can! However, brown rice requires more liquid and a longer cooking time (typically around 40-50 minutes of simmering, followed by a 10-15 minute rest). You’ll likely need to increase the chicken stock by about 1/2 to 1 cup. The texture and flavor will also be slightly different.
Q: How can I prevent my Spanish rice from being sticky?
A: Several factors contribute to fluffy, non-sticky rice:
- Thoroughly browning the rice at the beginning helps seal the grains.
- Using the correct liquid ratio is key.
- Resisting the urge to stir the rice once the lid is on prevents starch release.
- Allowing the rice to rest off the heat ensures all moisture is absorbed evenly.
Q: Can I make this spicier?
A: Absolutely! Add a finely diced jalapeño or serrano pepper when sautéing the onion and garlic. You can also include a pinch of cayenne pepper or more chili powder with the other seasonings.
Q: Is this recipe gluten-free?
A: Yes, typically all the ingredients used in this recipe (rice, butter, vegetables, diced tomatoes, chicken stock, salt, bay leaves) are naturally gluten-free. Always check labels on processed items like chicken stock to be certain.
Conclusion: Your New Favorite Side Dish Awaits
Homemade Spanish rice is more than just a side; it’s a celebration of flavor, comfort, and versatility. With its vibrant color, aromatic spices, and tender texture, it’s a dish that brings warmth and satisfaction to any meal. This recipe, designed to be both straightforward and incredibly rewarding, provides you with all the tips and tricks to achieve perfect results every time. Whether you’re planning a lively Mexican feast, a simple weeknight dinner, or preparing meals in advance, this Spanish rice will quickly become a cherished favorite in your culinary collection. Don’t hesitate to experiment with the variations and make this classic dish uniquely your own. Get cooking, and enjoy the delicious journey!