
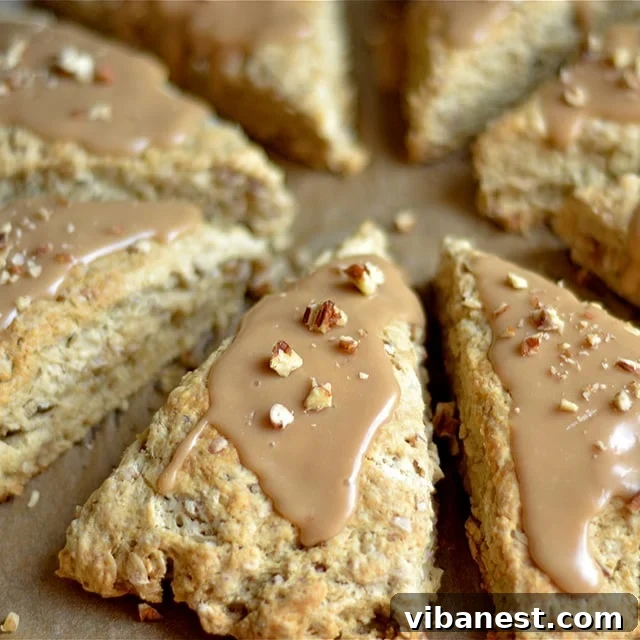
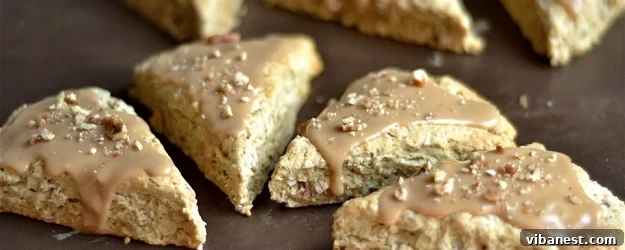
Indulge in Homemade Maple Oat Pecan Scones: Your New Favorite Breakfast Pastry
Are you ready to elevate your breakfast game and say goodbye to expensive coffee shop treats? Prepare to be amazed by these incredible homemade Maple Oat Pecan Scones! Forget the long lines and the sometimes-stale offerings; this recipe delivers a scone that is not only far superior in taste and texture but also incredibly satisfying to make yourself. With a perfect balance of wholesome oats, crunchy pecans, and the warm, inviting sweetness of maple, these scones are destined to become a beloved staple in your home.
My journey to crafting the perfect scone began years ago, fueled by nostalgic memories of college Saturday mornings spent with a stack of books and a beloved Maple Oat Pecan Scone from a certain popular coffee chain. While those days are fondly remembered, I realized I could recreate and even surpass that experience in my own kitchen, without the “weird ingredients” often found in commercial pastries. Since mastering the art of scone baking, these delightful treats have become a cherished tradition, bringing comfort and joy to our mornings.
Why Bake Your Own Maple Oat Pecan Scones?
There’s a unique magic that comes with baking from scratch, and scones are no exception. Beyond the significant cost savings compared to buying them out, making your own Maple Oat Pecan Scones offers a multitude of benefits:
- Unbeatable Freshness: Nothing compares to a scone pulled warm from your own oven. The aroma alone is enough to wake up the whole house!
- Control Over Ingredients: You choose what goes in. No artificial flavors, preservatives, or questionable additives. Just pure, wholesome goodness.
- Customization: While this recipe is perfect as is, you have the freedom to adjust sweetness, add extra spices like cinnamon, or even experiment with different nuts.
- Family Fun: Baking is a wonderful activity to share with children. My kids absolutely adore these scones and often help out, making Saturday morning baking a cherished ritual.
- Freezer-Friendly Convenience: This recipe is ideal for making a large batch. Freeze the leftovers, and you’ll have a gourmet breakfast ready in minutes on busy weekday mornings.
While often associated with fall flavors, these Maple Oat Pecan Scones are a year-round favorite in our household. The comforting blend of maple and pecans is just as welcome on a spring morning as it is on a crisp autumn day. They are surprisingly simple to make, requiring no specialized baking tools, although a pastry blender can certainly make the process a bit easier.
Mastering the Art of Scone Dough
The secret to light, flaky, and tender scones lies in the dough preparation, particularly how you incorporate the butter. This is crucial for achieving that irresistible crumbly texture. You want cold butter to create pockets of steam during baking, which results in a wonderfully airy scone. Here’s how to do it:
- The Cold Butter Rule: Always start with very cold butter, cut into small cubes. You can even pop your butter back into the freezer for 10-15 minutes before starting to ensure it’s super chilled.
- Cutting in the Butter:
- Pastry Blender: This is my preferred tool. It quickly cuts the butter into the flour mixture, creating pea-sized crumbs without overworking the dough or melting the butter with your hands.
- Food Processor: For a super-fast method, pulse the dry ingredients with the cold butter until coarse crumbs form. Be careful not to overmix!
- Your Hands (Fingertips): If you don’t have a pastry blender or food processor, use your fingertips to quickly rub the butter into the flour. Work fast to prevent the butter from getting too warm.
- Adding Wet Ingredients: Once your dry ingredients and butter are well combined into a crumbly mixture, gently add the milk and maple syrup. The key here is to mix just until everything comes together. Overmixing develops gluten, which can lead to tough scones. A slightly sticky dough is perfectly fine.
Parchment paper is a handy helper during the shaping phase, preventing sticking and making cleanup a breeze, but a lightly floured surface works just as well. When it comes to shaping, you have a couple of options:
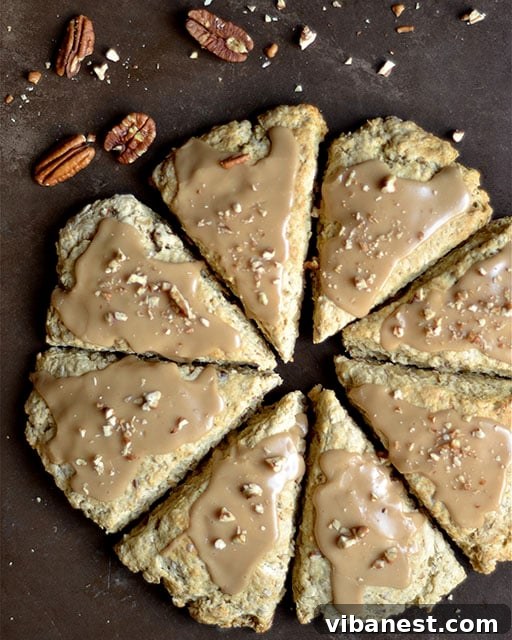
- Classic Triangles: Roll your dough into a large circle, about ½ to ¾ inch thick. Then, use a large knife or pizza cutter to divide the circle into 8 wedges, just like cutting a pie.
- Smaller Portions with a Biscuit Cutter: For uniformly sized, often daintier scones (perfect for little hands or afternoon tea), a biscuit cutter is ideal. Simply cut out rounds and re-roll the scraps gently to cut more.
The Irresistible Maple Glaze: The Crowning Glory
While the scones themselves are magnificent, the creamy maple glaze is truly the best part, adding a touch of decadent sweetness that perfectly complements the rich flavors of oat and pecan. This simple glaze comes together in minutes and transforms your baked goods into an even more enticing treat.
The glaze is made with just a few basic ingredients: melted butter, powdered sugar, milk, and that essential maple extract which amplifies the maple flavor. The trick to a beautiful, even coating is to pour the glaze over the scones while they are still slightly warm. This allows the glaze to spread beautifully and slightly absorb into the surface, creating a delicate crust once dried. A final sprinkle of chopped pecans on top adds extra crunch and visual appeal.
Allow the glaze to set for about 5-10 minutes before diving in. This allows the glaze to firm up slightly, preventing it from being too messy while enhancing its texture. Once the glaze has dried, these scones are ready to be devoured!
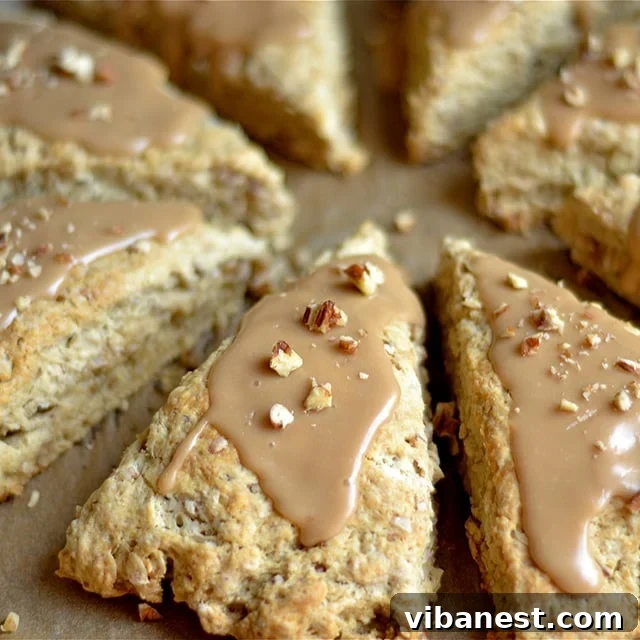
Maple Oat Pecan Scones Recipe
SCONE INGREDIENTS
- 2 cups all-purpose flour
- 1 cup rolled oats (old-fashioned work best for texture)
- ¾ cup chopped pecans, plus extra for topping
- ¼ cup packed light brown sugar
- 1 tablespoon baking powder
- 1 teaspoon baking soda
- ½ teaspoon salt
- 1 stick (½ cup) unsalted butter, very cold and cut into small chunks
- ¾ cup whole milk (or buttermilk for extra tenderness)
- 1 tablespoon pure maple syrup (not pancake syrup)
MAPLE GLAZE INGREDIENTS
- 1 tablespoon unsalted butter, melted
- 1 teaspoon pure maple extract (essential for strong maple flavor)
- ½ cup powdered sugar (confectioners’ sugar)
- 1 tablespoon milk (add more ½ tsp at a time if needed for consistency)
DIRECTIONS
- Preheat Oven: Preheat your oven to 375°F (190°C). Line a baking sheet with parchment paper for easy cleanup.
- Combine Dry Ingredients: In a large mixing bowl, whisk together the flour, rolled oats, ¾ cup chopped pecans, brown sugar, baking powder, baking soda, and salt. Ensure all ingredients are evenly distributed.
- Cut in Butter: Add the cold, cubed butter to the dry ingredients. Using a pastry blender, two forks, or a food processor, cut the butter into the mixture until it resembles coarse crumbs with some pea-sized pieces of butter remaining. If using your hands, work quickly with your fingertips.
- Add Wet Ingredients: Pour in the ¾ cup milk and 1 tablespoon maple syrup. Stir with a spoon or your hands just until the dough comes together and all the dry ingredients are moistened. Be careful not to overmix; the dough will be slightly sticky.
- Shape the Scones: Transfer the dough to a lightly floured surface or a piece of parchment paper. Gently knead it a few times until it forms a cohesive ball. Roll the dough into a large circle, approximately ½ to ¾ inch thick. For traditional wedge-shaped scones, use a large knife or pizza cutter to cut the circle in half, then into quarters, and finally into 8 equal triangles. Alternatively, use a 2-inch biscuit cutter to create smaller, round scones. Re-roll any scraps gently to cut additional scones.
- Bake: Carefully transfer the shaped scones to the prepared baking sheet. Bake for 15-18 minutes, or until the scones are lightly golden brown on the edges and cooked through. The internal temperature should be around 200-205°F (93-96°C). Remove from the oven and let them cool on the baking sheet for a few minutes before transferring to a wire rack.
- Prepare the Glaze: While the scones are cooling slightly, prepare the maple glaze. In a small bowl, melt 1 tablespoon of butter. Whisk in the powdered sugar, maple extract, and 1 tablespoon of milk until smooth and pourable. If the glaze is too thick, add a tiny bit more milk (½ teaspoon at a time) until it reaches your desired consistency.
- Glaze and Serve: Drizzle each slightly warm scone with about ½ tablespoon of the maple glaze. Immediately sprinkle with your remaining chopped pecans. Allow the glaze to set for about 5-10 minutes before serving.
Serving and Storage Tips for Your Homemade Scones
These Maple Oat Pecan Scones are best enjoyed fresh and warm, perhaps with a cup of hot coffee or tea. However, they are also incredibly versatile for future enjoyment!
How to Store Fresh Scones:
While they will likely be devoured quickly, any leftover scones should be stored in an airtight container at room temperature for up to 2-3 days. For optimal freshness, consider freezing them.
Freezing Scones for Future Enjoyment:
Scones freeze beautifully, making them perfect for meal prepping. You can freeze them either before or after baking:
- Freezing Unbaked Scones: Shape the scones as directed in the recipe, but do not bake. Place them on a baking sheet and freeze until solid. Once frozen, transfer them to a freezer-safe bag or container. When ready to bake, place frozen scones on a baking sheet and bake at 375°F (190°C) for 20-25 minutes, or until golden brown. You may need to add a few extra minutes to the baking time.
- Freezing Baked Scones: Allow baked and glazed scones to cool completely. Wrap each scone individually in plastic wrap, then place them in a freezer-safe bag or container. They can be stored in the freezer for up to 2-3 months.
Reheating Frozen Scones:
To enjoy a frozen baked scone, you have a couple of options:
- Room Temperature: Simply remove a scone from the freezer and let it thaw at room temperature for about an hour.
- Microwave: For a quick warm-up, defrost a single scone in the microwave for 20-30 seconds. Be careful not to overheat, as this can make them tough.
- Oven: For the best texture, preheat your oven to 300°F (150°C). Place frozen scones on a baking sheet and heat for 5-10 minutes, or until warmed through.
Variations to Customize Your Scones
Feel free to get creative with this base recipe! Here are a few ideas for variations:
- Spice It Up: Add ½ teaspoon of ground cinnamon or a pinch of nutmeg to the dry ingredients for an extra layer of warmth.
- Dried Fruit: Mix in ½ cup of dried cranberries, chopped dried apricots, or golden raisins along with the pecans for added chewiness and flavor.
- Chocolate Chips: For a sweeter treat, fold in ½ cup of white chocolate chips or dark chocolate chunks.
- Nut Swap: If pecans aren’t your favorite, try walnuts or even slivered almonds.
Whether you’re recreating cherished college memories or simply seeking the ultimate homemade breakfast pastry, these Maple Oat Pecan Scones are sure to impress. Their perfect balance of flavors and textures, combined with the ease of preparation and storage, makes them an unbeatable choice. So, roll up your sleeves, gather your ingredients, and get ready to bake some magic in your kitchen!