
Mastering the Art of the Perfect Omelet: A Step-by-Step Guide to Fluffy, Creamy Goodness
The humble omelet often appears deceptively simple. Yet, many home cooks can attest to the frequent culinary mishaps: burnt bottoms, dry and overcooked eggs, or frustratingly undercooked centers. Achieving that ideal balance – a golden, slightly crispy exterior giving way to a rich, creamy interior – can seem like a daunting task. However, the omelet remains a beloved breakfast staple for its speed, versatility, and sheer deliciousness. With the right techniques and a few simple tips, you can transform your omelet-making skills from hit-or-miss to consistently perfect. This comprehensive guide will walk you through every step, ensuring every bite is a pure delight.
The journey to omelet perfection is often paved with trial and error. For me, the motivation came from a sibling who was a notoriously picky eater, especially when it came to eggs. As eggs were a quick and convenient meal, they became a frequent feature on our table. Through countless attempts and observations, a crucial understanding emerged: the secret to an outstanding omelet lies in the harmonious blend of crispy, perfectly cooked edges, a firm yet tender bottom, and a luxuriously creamy center. It’s an experience where each forkful delivers texture and flavor in equal measure. My personal favorite involves generously filling it with freshly grated sharp cheese and vibrant chives, then folding it over to allow the residual heat to gently melt the cheese into a gooey, savory core.
Why Every Home Cook Needs a Go-To Omelet Recipe
An omelet isn’t just a breakfast item; it’s a culinary chameleon, adapting effortlessly to any meal of the day. Need a quick, protein-packed start to your morning? An omelet fits the bill. Looking for a light yet satisfying lunch? An omelet with a fresh salad is ideal. Even for a speedy dinner, a robust omelet brimming with vegetables or leftover meats can be a lifesaver. Beyond its incredible versatility, the omelet boasts significant nutritional benefits. Eggs are a powerhouse of protein, essential vitamins, and minerals, making them an excellent choice for maintaining energy levels and supporting overall health. Mastering the omelet means you always have a quick, healthy, and incredibly satisfying meal option at your fingertips, customizable to whatever ingredients you have on hand.
It’s this blend of convenience, nutritional value, and endless possibilities that elevates the omelet from a mere dish to an indispensable part of any home cook’s repertoire. Learning to craft a perfect omelet isn’t just about cooking eggs; it’s about gaining confidence in the kitchen and unlocking a world of simple, delicious meals that impress with minimal effort.
From Botched to Brilliant: My Journey to Omelet Perfection
The path to making a consistently great omelet taught me invaluable lessons about precision and patience in cooking. I remember countless mornings filled with frustration, trying to coax delicate eggs into a perfect form, only to end up with a sticky, shapeless mess. The burnt edges, the dry texture from overcooking, or the unsettling liquid center were common occurrences. It felt like a culinary enigma, a simple dish that was surprisingly hard to perfect.
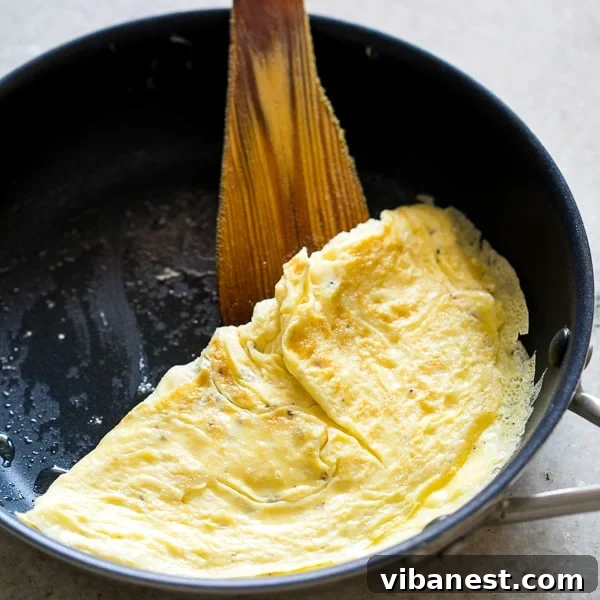
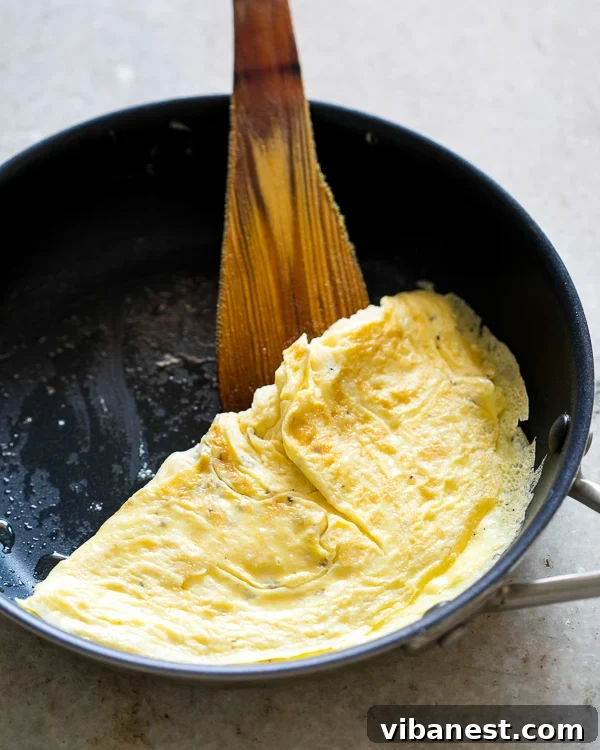
However, each attempt, even the failed ones, brought me closer to understanding the nuances of egg cookery. I learned that the perfect omelet isn’t just about ingredients; it’s about technique, timing, and a few essential tools. The revelation came through persistent experimentation: the ideal omelet must have a light golden-brown bottom that releases easily from the pan, a slightly crispy perimeter that offers a delightful textural contrast, and most importantly, a gloriously creamy, barely set interior that melts in your mouth. This creamy core, often enhanced by melting cheese, is what truly defines a superior omelet, transforming it from a mere scrambled egg pancake into an exquisite culinary creation. It’s about creating an experience, not just a meal.
Essential Tools for Omelet Success
Before you even crack an egg, having the right equipment makes a significant difference in your omelet-making journey. Investing in a few key items will elevate your results from mediocre to magnificent.
- The Indispensable Non-Stick Skillet: While I deeply appreciate the versatility and even heating of a well-seasoned cast-iron pan for many dishes, when it comes to omelets, a high-quality non-stick skillet is truly non-negotiable. Its slick surface ensures that your delicate egg mixture doesn’t adhere to the bottom, allowing it to cook evenly and slide effortlessly onto your plate without tearing. Opt for a pan that’s 8-10 inches in diameter for a single-serving omelet, as this size allows the eggs to spread thinly enough to cook properly without being too crowded. The material should be durable, and the non-stick coating intact to prevent sticking.
- The Right Spatula: A flexible, heat-resistant silicone spatula is your best friend when making an omelet. Its soft edges can gently scrape the cooked egg from the sides of the pan without damaging the non-stick surface, and its flexibility allows you to easily lift and fold the omelet without tearing. Avoid metal spatulas, which can scratch and ruin your non-stick pan.
- A Good Whisk and Mixing Bowl: A balloon whisk is perfect for incorporating air into your eggs, a crucial step for a light and fluffy omelet. Pair it with a bowl large enough to comfortably whisk your eggs without splashing, allowing for vigorous aeration. Alternatively, a fork can work in a pinch, or even a small blender for maximum aeration if you’re making multiple omelets.
Key Ingredients for an Unforgettable Omelet
The quality of your ingredients plays a pivotal role in the final flavor and texture of your omelet. Choose wisely, and your efforts will be richly rewarded.
The Foundation: Fresh Eggs
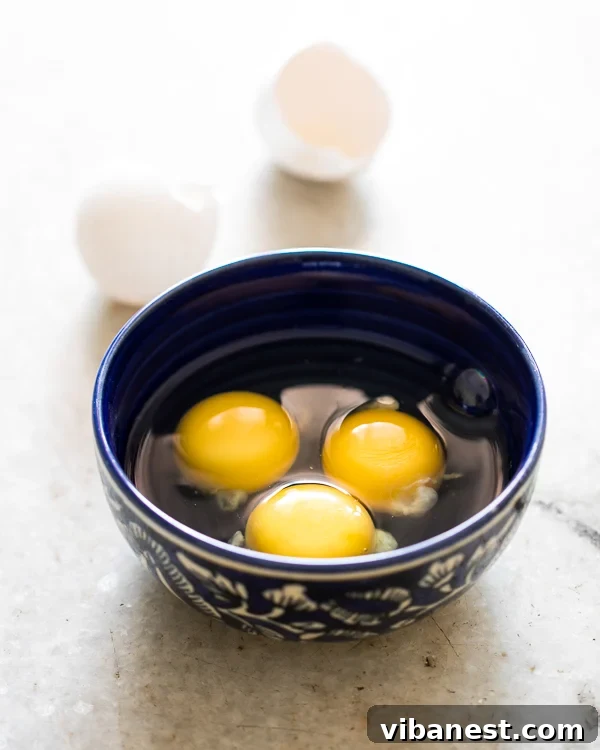
Always opt for the freshest large eggs you can find. Fresh eggs have firmer whites and yolks, which contribute to a better texture when cooked. While some chefs prefer room-temperature eggs for more even cooking, chilled eggs work perfectly fine, especially if you whisk them vigorously.
The Flavor Factor: Butter Reigns Supreme
While various oils can be used for cooking, butter is undeniably superior when making an omelet. The nutty, rich flavor that melted butter imparts to the eggs is simply unmatched. It helps create those desirable golden-brown edges and adds a lusciousness that oils typically cannot. Use unsalted butter to control the overall saltiness of your dish.
Seasoning to Perfection: Salt, Pepper, and Beyond
Simple seasonings like salt and freshly ground black pepper are essential. They enhance the natural flavor of the eggs. Don’t add salt too early, however, as it can break down the egg proteins and make them watery if left sitting for too long before cooking. Consider adding a pinch of white pepper for a subtle spice without visible black flecks, or a dash of your favorite dried herbs like chives or parsley for an extra layer of flavor.
Creative Fillings: Your Omelet, Your Way
This is where your creativity can truly shine! Omelets are incredibly versatile and can accommodate a wide array of fillings, from savory meats to fresh vegetables and decadent cheeses. However, there’s a golden rule to follow for most fillings:
- Pre-Cook Your Fillings: This step is crucial for achieving a perfect omelet. Raw vegetables (like mushrooms, onions, bell peppers, or spinach) contain water that will release during cooking, making your omelet watery and soggy. Similarly, raw meats (like bacon or sausage) need to be fully cooked to ensure they are safe to eat and to develop their flavor and texture. Pre-cooking your fillings ensures they are tender, flavorful, and don’t introduce excess moisture into your delicate eggs. Cook vegetables until tender-crisp and any meat until fully cooked through and slightly browned.
- Exceptions: Some ingredients, like deli ham or pre-cooked chicken, can be added directly to the omelet as they don’t require further cooking or release significant moisture. Fresh herbs like chives, dill, or parsley can also be added directly without pre-cooking.
- Cheese Choices: Shredded cheese is a classic omelet filling. Opt for good melting cheeses like cheddar, Gruyère, Monterey Jack, or mozzarella. Grate your own cheese for superior flavor and melting consistency compared to pre-shredded varieties. Add it towards the end of the cooking process so it melts beautifully without burning.
Expert Tips for Making a Fluffy Omelet Every Time
Now that you’re equipped with the right tools and ingredients, let’s dive into the techniques that will guarantee a consistently perfect omelet.
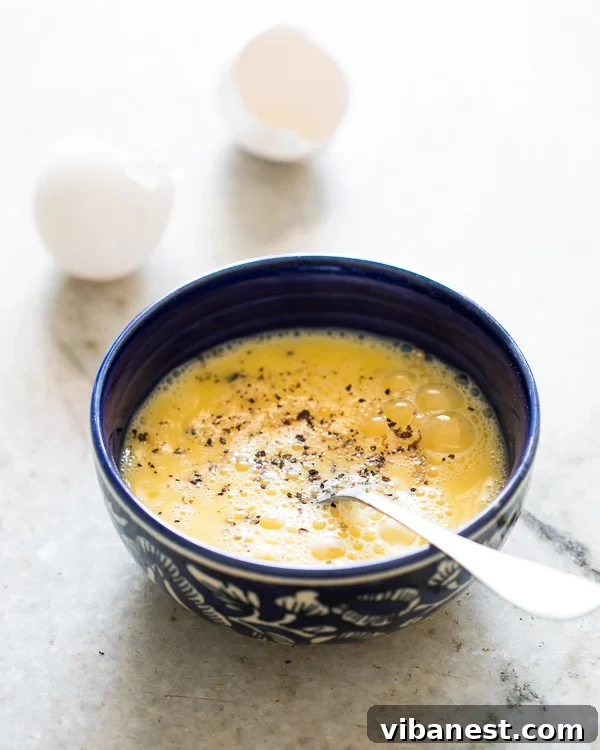
- Whisk Your Eggs Like a Pro: This is arguably the most critical step for a light and fluffy omelet. Don’t just stir your eggs; whisk them vigorously until they are pale yellow and slightly frothy. This incorporates air into the mixture, which expands as the eggs cook, resulting in that desirable airy texture. The more air you incorporate, the lighter your omelet will be. You can use a hand whisk, an electric hand mixer, or even a blender for a minute or two to achieve maximum fluffiness.
- Mastering Heat Control: The temperature of your pan is paramount. Too high, and your omelet will brown too quickly, become rubbery, and likely burn on the bottom while remaining raw on top. Too low, and it will take forever to cook, drying out in the process. The sweet spot is medium-low heat. This allows the eggs to cook gently and evenly, creating a tender texture and a beautiful golden hue. Always preheat your pan adequately before adding the eggs.
- The Butter Advantage (Revisited): Once your pan is hot, add your butter. Allow it to melt completely and coat the entire bottom surface of the pan. The butter should foam slightly but not brown or smoke. This indicates the perfect temperature and creates a non-stick surface while adding rich flavor.
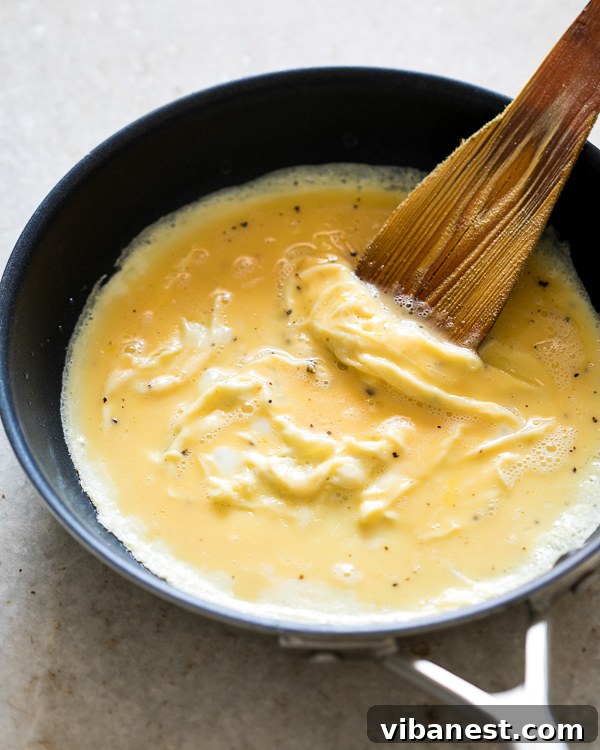
- The Gentle Push and Tilt Technique: After pouring the whisked eggs into the hot, buttered pan, let them cook undisturbed for about 30 seconds until the edges start to set. Then, using your flexible spatula, gently push the cooked edges towards the center of the pan, tilting the pan as you go. This allows the uncooked liquid egg to flow into the empty spaces created by pushing the cooked egg. Repeat this motion around the entire perimeter of the omelet until most of the liquid egg has set, and the surface looks creamy but no longer runny. This creates those characteristic light waves and ensures even cooking.
- The Power of the Lid: For the final minute of cooking, covering your omelet with a lid can make a remarkable difference. This traps steam within the pan, gently cooking the top layer of the omelet without requiring you to flip it. The result is a perfectly set top that remains creamy and moist, while the bottom achieves a desirable light crispness. Ensure there’s no loose, flowing egg before covering.
Common Omelet Mistakes and How to Avoid Them
Even with the best intentions, it’s easy to fall into common omelet pitfalls. Here’s how to steer clear of them:
- Overcooking: The most common mistake. Overcooked eggs become rubbery and lose their delicate texture. An omelet should be removed from the heat when the center is still slightly moist and creamy, as it will continue to cook slightly from residual heat.
- Using Too High Heat: As mentioned, high heat leads to rapid browning, uneven cooking, and a tough texture. Always stick to medium-low heat.
- Not Whisking Enough: Insufficient whisking results in dense, flat omelets. Embrace the whisking step; it’s key to lightness.
- Overcrowding with Fillings: While fillings are delicious, too much can prevent the eggs from cooking evenly and make the omelet difficult to fold. Use fillings sparingly, focusing on quality over quantity.
- Using a Damaged or Sticky Pan: A pan with a compromised non-stick surface will inevitably lead to sticking and tearing, ruining the omelet’s presentation and texture. Ensure your pan is in good condition.
- Impatience: Omelet making requires a little patience, especially with the gentle pushing and tilting. Rushing the process can lead to tears, uneven cooking, or a messy result.
Omelet Variations and Customization Ideas
Once you’ve mastered the basic technique, the world of omelet possibilities truly opens up. You can explore different styles and flavor profiles to suit any craving or occasion:
- French Omelet: Known for its smooth, unbrowned exterior and incredibly soft, creamy, almost custardy interior. It’s typically folded into an oval shape and focuses on the pure flavor of eggs with minimal fillings. Achieving this requires precise heat control and continuous stirring of the eggs with a fork in the pan before setting.
- American Omelet: This is the style most commonly found in diners, often thicker, more thoroughly cooked, and usually folded in half. It’s perfect for hearty fillings like cheese, ham, or sautéed vegetables. Our recipe leans more towards this robust and satisfying style.
- Frittatas and Spanish Tortillas: While technically not omelets (they are open-faced and often cooked in the oven or finished under a broiler), these dishes are cousins to the omelet, allowing you to incorporate even more fillings and serve larger groups.
-
Flavor Profiles from Around the World:
- Mediterranean: Feta cheese, spinach, sun-dried tomatoes, and olives.
- Mexican: Salsa, avocado, black beans, corn, and a sprinkle of cilantro.
- Asian Inspired: A dash of soy sauce in the eggs, filled with sautéed shiitake mushrooms and green onions.
- Garden Fresh: Asparagus, bell peppers, zucchini, and cherry tomatoes.
The beauty of the omelet is its adaptability. Don’t be afraid to experiment with your favorite ingredients, always remembering the golden rule of pre-cooking wet or bulky fillings.
Classic Fluffy Omelet Recipe: Your Perfect Breakfast Solution
This recipe provides a solid foundation for a delicious, creamy, and fluffy omelet every single time. It’s quick, easy, and yields a satisfying meal.
Ingredients
- 3 large Eggs
- 2 teaspoons Unsalted Butter
- Salt and freshly ground Black Pepper to taste
- 1/4 cup pre-cooked filling (optional, e.g., sautéed mushrooms, cooked ham, cooked spinach)
- 2 tablespoons shredded cheese (optional, e.g., cheddar, Gruyère)
Directions
- Crack all three eggs into a medium-sized bowl. Season generously with salt and freshly ground black pepper. Using a whisk, vigorously whisk the eggs until they are pale yellow and light, almost frothy, ensuring plenty of air is incorporated.
- Heat a 10-inch non-stick skillet over medium-low heat. Add the unsalted butter and allow it to melt completely, swirling the pan to ensure the bottom and sides are well coated. The butter should foam slightly but not brown or smoke, indicating the pan is at the perfect temperature.
- Pour the whisked eggs into the hot, buttered skillet. Let them cook undisturbed for about 30 seconds, until the edges begin to set.
- Gently use a flexible silicone spatula to push the cooked edges of the omelet towards the center of the pan. As you do this, tilt the pan to allow the uncooked liquid egg mixture to flow underneath and fill the empty spaces. Continue this gentle pushing and tilting motion around the entire circumference of the omelet until most of the egg appears set, with a creamy, moist surface but no loose, flowing liquid.
- Cover the skillet with a lid for about 1 minute. This traps steam and gently finishes cooking the top of the omelet, ensuring it’s fully set and creamy without needing to be flipped. The bottom should be light golden and slightly crisp.
- Remove the lid. If using, carefully add your pre-cooked filling and shredded cheese onto one half or in the center of the omelet.
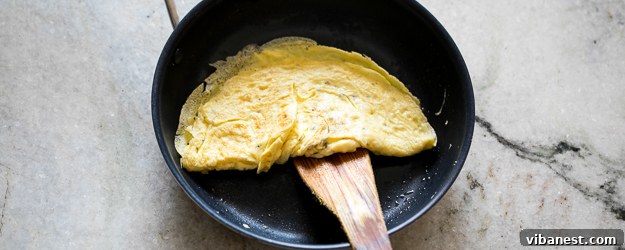
- Using your spatula, gently fold one side of the omelet over the filling to meet the other side, forming a half-moon shape. Alternatively, you can fold one-third of the omelet over the center, and then fold the remaining third over that, creating a classic three-fold omelet.
- Carefully slide the perfectly cooked omelet from the pan directly onto a serving plate. Serve immediately and enjoy the creamy, flavorful goodness!
Your Journey to Omelet Perfection Begins Now!
Making a truly perfect omelet is a skill that, once mastered, will bring you immense satisfaction and countless delicious meals. By following these detailed tips – from selecting the right pan and whisking your eggs properly, to controlling the heat and expertly folding your creation – you’ll consistently achieve that desirable balance of crispy edges, a tender bottom, and a lusciously creamy center. Gone are the days of dry, overcooked, or undercooked eggs. Embrace these techniques, experiment with your favorite fillings, and transform your breakfast, brunch, or any meal into a delightful culinary experience.
So, crack those eggs, warm up your skillet, and embark on your journey to omelet perfection. You’ll be amazed at how simple it is to achieve gourmet results right in your own kitchen. Happy cooking!