
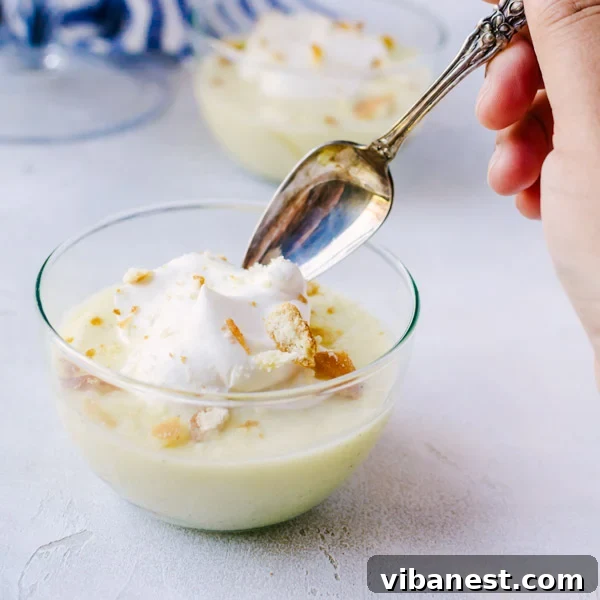
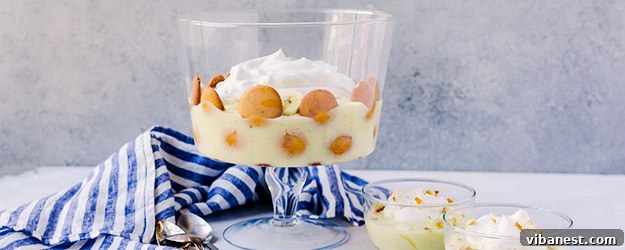
The Ultimate Guide to Classic Homemade Banana Pudding
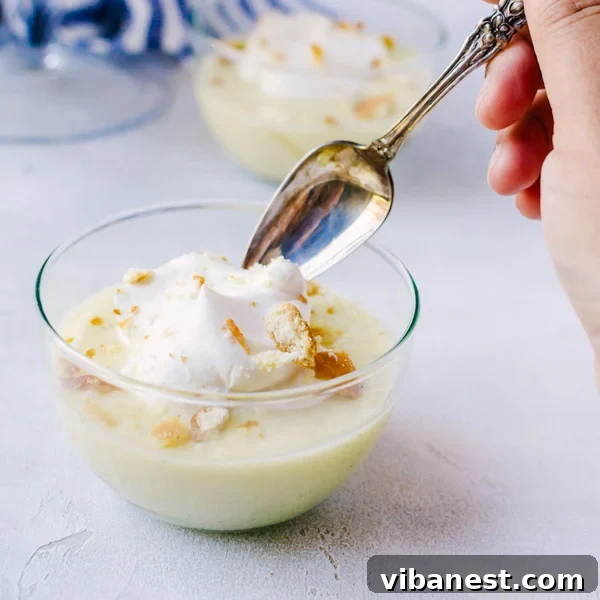
There are some desserts that instantly transport you back to childhood, conjuring images of warm family gatherings and comforting flavors. For many, especially in the American South, classic banana pudding is that iconic dish. I still vividly remember my grandmother’s banana pudding, a staple at every Sunday dinner. The way the Nilla Wafers would transform, becoming wonderfully soft and infused with the sweet banana and creamy pudding, was pure magic. To this day, that delightful texture remains my favorite part.
While life sometimes gets in the way of our favorite traditions, the craving for that authentic, homemade banana pudding recently resurfaced, prompting me to revisit this beloved dessert. And I must say, after countless attempts, this particular homemade banana pudding recipe not only honors those cherished memories but, dare I say, surpasses them. It’s an extraordinary blend of nostalgia and perfected flavor that truly stands out.
Why This Homemade Banana Pudding Stands Above the Rest
What truly elevates this banana pudding from good to absolutely unforgettable is the rich, velvety vanilla pudding made entirely from scratch. Unlike many recipes that rely on instant mixes, this homemade version boasts a luscious, creamy texture and a depth of flavor that simply cannot be replicated. Despite its decadent taste, you’ll be pleasantly surprised by how straightforward it is to prepare. The best part? You can make the pudding base up to three days in advance, allowing you to assemble your masterpiece whenever the craving strikes or company calls.
Crafting pudding from scratch might sound daunting, but it’s a rewarding process that guarantees a superior result. The control over ingredients ensures a pure, unadulterated vanilla flavor, free from artificial additives. This foundational element is what truly sets our classic banana pudding apart, creating a dessert that is both sophisticated and deeply comforting.
The Secret to Unforgettable Creaminess: Egg Yolk Pudding
Most basic pudding recipes often use cornstarch as a primary thickener. While effective, I find that incorporating egg yolks into the base lends an unparalleled richness, a silken texture, and a beautiful pale yellow hue that signifies a truly premium vanilla pudding. This technique, while requiring a touch more finesse, is well worth the effort for the luxurious mouthfeel it imparts.
Mastering the Tempering Technique
When working with an egg yolk-based pudding, the crucial step is tempering your eggs. This process gradually introduces heat to the egg yolks, preventing them from scrambling when combined with the hot milk mixture. It involves slowly drizzling a small amount of the hot milk into the lightly beaten egg yolks while continuously whisking them swiftly. This gentle marriage of temperatures ensures a smooth, uniform custard. Patience and consistent whisking are your allies here, making the process much smoother and guaranteeing a flawless pudding base.
Once your exquisite pudding is prepared, the rest of the process is a delightful exercise in layering and patience. It’s a cycle of chilling, assembling, a little more chilling, and then, finally, pure enjoyment. Honestly, the most challenging aspect of creating this incredible banana pudding is the waiting period. This is precisely why its make-ahead potential is such a game-changer, allowing flavors to meld beautifully and the pudding to set perfectly.
Ingredient Spotlight: What You Need for Perfection
Achieving the perfect classic banana pudding relies on a few key ingredients, each playing a vital role:
- Granulated Sugar: Provides the essential sweetness. Adjust to your preference, but this recipe offers a balanced sweetness.
- Cornstarch: Used in conjunction with egg yolks to achieve the ideal pudding consistency – thick but still spoonable.
- Salt: A pinch of salt enhances all the other flavors, balancing the sweetness and adding depth.
- Whole Milk: Crucial for the creamy texture. Whole milk’s fat content contributes significantly to the richness of the pudding.
- Egg Yolks: The star ingredient for that incredibly rich, smooth, and custard-like consistency and beautiful color.
- Unsalted Butter: Added at the end, butter melts into the warm pudding, contributing to its luxurious texture and shine.
- Vanilla Extract: Essential for classic vanilla pudding. Use good quality pure vanilla extract for the best flavor.
- Nilla Wafers: The quintessential cookie for banana pudding. Their subtle vanilla flavor and ability to soften beautifully are unmatched.
- Ripe Bananas: Choose bananas that are ripe (yellow with a few brown spots) but still firm. Overripe bananas can become mushy too quickly, while underripe ones lack sweetness.
- Heavy Whipping Cream & Powdered Sugar: These combine to create a light, airy whipped cream topping that perfectly complements the rich pudding and bananas.
Selecting the right ingredients is the first step towards an extraordinary dessert. Don’t skimp on quality; your taste buds will thank you!
Tips for Success: Achieving Banana Pudding Nirvana
Even with a stellar recipe, a few insider tips can elevate your banana pudding from great to truly exceptional:
- Don’t Rush the Pudding: The constant whisking and slow cooking are critical for a smooth, lump-free pudding. Scrape the bottom and sides of the saucepan frequently to prevent scorching.
- Tempering is Key: As mentioned, take your time when tempering the egg yolks. This prevents a grainy texture and ensures a perfectly emulsified pudding.
- Proper Chilling: The pudding needs ample time to chill and set. This allows the flavors to meld and the texture to firm up. The direct plastic wrap contact prevents a “skin” from forming on top, keeping it silky smooth.
- Banana Selection: Use ripe bananas (yellow with some brown spots) for optimal sweetness and flavor. However, avoid overly soft, bruised bananas as they can make the pudding watery. Slice them just before layering to minimize browning.
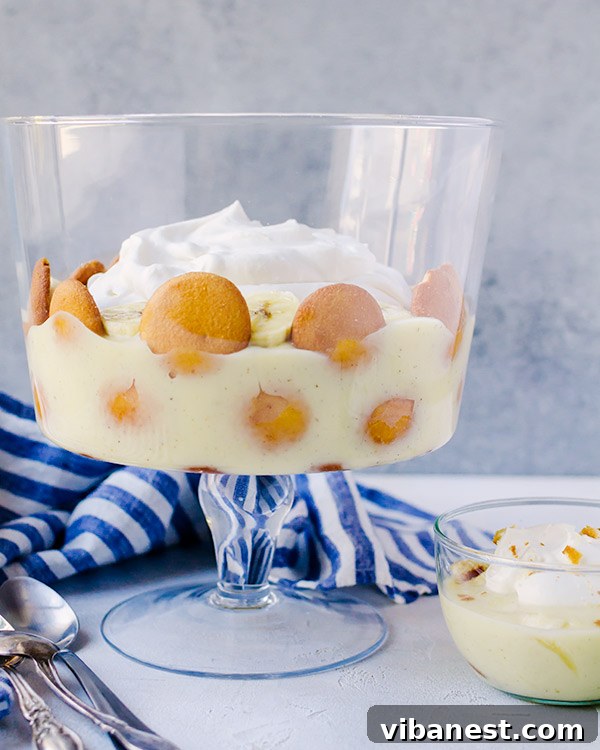
- Layering Strategy: Start and end with Nilla Wafers. This protects the bananas from direct contact with air (reducing browning) and provides a delightful crust on top. Don’t overload each layer; aim for even distribution.
- Whipped Cream Peaks: When whipping the cream, aim for soft peaks. Over-whipping can result in a grainy texture. The soft peaks offer a light, airy contrast to the dense pudding.
- Make Ahead Advantage: This dessert shines when made a day in advance. The wafers have time to soften perfectly, and the flavors deepen.
Variations to Explore
While this recipe focuses on the classic, don’t hesitate to experiment once you’ve mastered the base:
- Chocolate Banana Pudding: Swirl a small amount of melted chocolate or cocoa powder into the warm pudding.
- Caramel Drizzle: Add a layer of homemade or store-bought caramel sauce between pudding layers for an extra touch of indulgence.
- Different Cookies: While Nilla Wafers are traditional, try graham crackers, shortbread cookies, or even gingersnaps for a unique twist.
- Nutty Crunch: Sprinkle toasted pecans or walnuts between layers for added texture.
- Spices: A tiny pinch of nutmeg or cinnamon in the pudding can add a subtle warmth.
INGREDIENTS
- 3/4 cups granulated sugar
- 2 tablespoons cornstarch
- 1/4 teaspoon salt
- 3 cups whole milk
- 4 egg yolks, beaten
- 2 tablespoons unsalted butter
- 2 teaspoons vanilla extract
- 3/4 box Nilla Wafers
- 3 ripe bananas, sliced
- 1/2 cup heavy whipping cream
- 3 tablespoons powdered sugar
DIRECTIONS
- In a medium saucepan, combine the granulated sugar, cornstarch, and salt. Whisk these dry ingredients together thoroughly. Then, gradually stir in the whole milk until no lumps remain.
- Place the saucepan over medium heat. Whisk the mixture constantly, paying special attention to scraping the bottom and sides of the pan to prevent sticking and ensure even cooking.
- Continue heating until the mixture comes to a quick, gentle simmer. You’ll notice it starting to thicken slightly.
- Carefully scoop about one cup of the hot milk mixture into a small bowl containing the beaten egg yolks. Slowly drizzle the hot milk into the yolks while vigorously whisking the egg yolks to temper them. This prevents the eggs from cooking too quickly.
- Once the tempered yolk mixture is completely smooth and combined, pour it back into the saucepan with the remaining hot milk mixture.
- Continue stirring constantly, scraping the sides and bottom of the pan, as the pudding cooks and further thickens. Cook until it reaches a consistency where if you dip a wooden spoon into the mixture and run your finger down the back, a clear line remains.
- Remove the saucepan from the heat. Stir in the unsalted butter and vanilla extract until completely melted and well combined, creating a smooth, glossy pudding.
- Pour the finished pudding into a clean bowl. Immediately cover the surface of the pudding with plastic wrap, ensuring the wrap directly touches the pudding. This crucial step prevents a “skin” from forming as it cools.
- Refrigerate the pudding until it is completely chilled and set. This will take at least four hours, but preferably overnight for the best texture and flavor development. For a quicker chill, place the saucepan with the thickened pudding into an ice bath (a larger bowl filled with ice and a little water). Stir continuously for about 10 minutes, then transfer the pudding to a gallon freezer bag, pressing out all air before sealing. Place in the freezer for approximately one hour.
- To assemble, line the bottom of a trifle bowl or a deep serving dish with Nilla Wafers. Arrange a single layer of sliced bananas over the wafers. Follow with an even layer of the thoroughly cooled vanilla pudding. Repeat this pattern, building layers of wafers, bananas, and pudding, until you run out of pudding.
- In a separate clean bowl, combine the heavy whipping cream and powdered sugar. Using an electric mixer, whip the mixture until soft peaks form. Be careful not to over-whip.
- Gently spoon the freshly whipped cream over the top layer of the assembled banana pudding. For an extra touch, you can optionally garnish with a few more banana slices and Nilla Wafers before serving.
Storing Your Delicious Banana Pudding
Proper storage is essential to enjoy your banana pudding for as long as possible. Once assembled and topped with whipped cream, cover the trifle bowl tightly with plastic wrap or an airtight lid. Store the pudding in the refrigerator for up to 2-3 days. While it’s best enjoyed within the first 24-48 hours (when the wafers have softened perfectly but the bananas are still fresh), it remains a delightful treat for a few days.
Due to the fresh bananas and dairy, freezing assembled banana pudding is not recommended, as it can affect the texture of both the bananas and the pudding upon thawing. However, the homemade pudding base can be frozen for up to a month if stored in an airtight container, allowing you to have a head start on future batches.
Conclusion: A Timeless Dessert for Every Occasion
This classic homemade banana pudding isn’t just a dessert; it’s an experience. It’s a testament to the power of simple, quality ingredients transformed into something truly magical. Whether you’re making it for a special family gathering, a comforting weekend treat, or to impress guests, this recipe promises a rich, creamy, and deeply satisfying dessert that will evoke fond memories and create new ones. So, gather your ingredients, follow these steps, and prepare to savor the unparalleled delight of truly homemade banana pudding.