
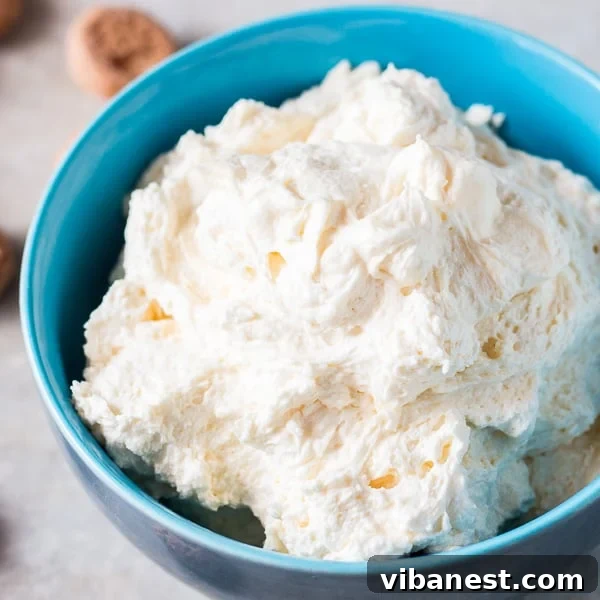
The Ultimate Guide to Making Fluffy, Smooth Homemade Buttercream Frosting
Are you ready to elevate your baking game and create the most irresistible desserts? Today, we’re diving deep into the art of making perfect buttercream frosting. You might think you’ve mastered buttercream, perhaps you’ve been whipping it up for years, but have you ever encountered that slight graininess that just won’t disappear? Or perhaps your frosting isn’t quite as fluffy and ethereal as you dream it could be? You’re not alone, and we’re here to solve all those buttercream mysteries!
Forget everything you thought you knew about quick frosting. The secret to truly exceptional buttercream isn’t just about the ingredients; it’s about patience and a little extra time in your stand mixer. We’re talking about whipping, and whipping some more, until every crystal of sugar is perfectly dissolved, transforming simple ingredients into a cloud of creamy, dreamy perfection. Get ready to impress everyone with your newfound buttercream prowess!
Why Homemade Buttercream is Always Best
While store-bought frosting offers convenience, it simply can’t compare to the rich flavor, smooth texture, and endless versatility of homemade buttercream. When you make it yourself, you control the quality of ingredients, the sweetness level, and the precise consistency. This means no artificial flavors, no strange preservatives, and a frosting that tastes genuinely incredible – a true complement to any cake, cupcake, or cookie. Beyond the taste, the satisfaction of creating something so delicious from scratch is a reward in itself, allowing you to tailor every aspect to your personal preferences and dietary needs.
The Science Behind Fluffy Buttercream
Creating light and fluffy buttercream isn’t magic; it’s a bit of culinary science. The key lies in aeration. As butter and sugar are beaten together, air is incorporated, which lightens the mixture both in color and texture. The longer you whip, the more air is incorporated, resulting in a frosting that’s not just smooth but also incredibly light and voluminous. Properly softened butter is also crucial, as it allows for better emulsification and air incorporation. Cold butter won’t cream properly, leading to a lumpy frosting, and melted butter will result in a greasy, dense, and unstable buttercream. The fat molecules in the butter trap the air, creating a stable, airy structure, while the sugar dissolves to ensure a smooth mouthfeel.
My Secret Ingredient for the Smoothest Buttercream
Now, let’s talk about that little secret ingredient I swear by for achieving the silkiest, smoothest buttercream frosting you’ve ever tasted. Most recipes call for milk, but I firmly believe that **heavy whipping cream** is the game-changer. Why cream? The higher fat content in heavy cream doesn’t just add a luxurious richness; it significantly enhances the lightness and mouthfeel of your buttercream. It helps create a more stable emulsion, resulting in a frosting that’s incredibly smooth, less prone to graininess, and holds its shape beautifully for piping intricate designs. The extra fat coats the sugar crystals more effectively, contributing to that desired smooth texture, and the higher viscosity helps to create a more robust structure. Once you try it, you’ll never go back to milk!
Essential Equipment for Perfect Buttercream
Whether you’re a seasoned baker or just starting, having the right tools makes all the difference when crafting the best buttercream frosting. A **stand mixer** fitted with the paddle attachment is truly a godsend for buttercream. It allows you to “set it and forget it” for the crucial long whipping times, ensuring consistent results without tiring your arms. The paddle attachment is ideal for creaming butter and sugar, as it thoroughly mixes without incorporating too much air too quickly, leading to a stable frosting. However, if a stand mixer isn’t in your arsenal, don’t despair! A **hand mixer** works just as wonderfully; you’ll just need to hold it steady for a bit longer, rotating the bowl as you mix to ensure even incorporation. Both options will deliver fantastic results, so choose what works best for you. A good quality rubber spatula is also absolutely essential for scraping down the sides and bottom of the bowl frequently, ensuring every speck of butter and sugar gets evenly incorporated into the fluffy mixture, leaving no unmixed pockets.
Versatile Buttercream: Beyond the Cake
The beauty of this classic vanilla buttercream frosting is its incredible versatility. It’s not just for cakes! Its stable yet melt-in-your-mouth texture makes it perfect for a myriad of sweet applications. Pipe it generously onto fluffy cupcakes, creating beautiful swirls and rosettes. Spread it smoothly between layers of delicate cookies, turning them into elegant sandwich treats. Use it as a rich filling for pastries like cream puffs or éclairs, or even as a delightful topping for brownies and bars. And honestly, if you’re like me, you might just find yourself sneaking spoonfuls directly from the bowl – it’s that good. This recipe yields a stable frosting perfect for detailed decorating work, yet remains wonderfully soft and airy, ensuring every bite is pure bliss.
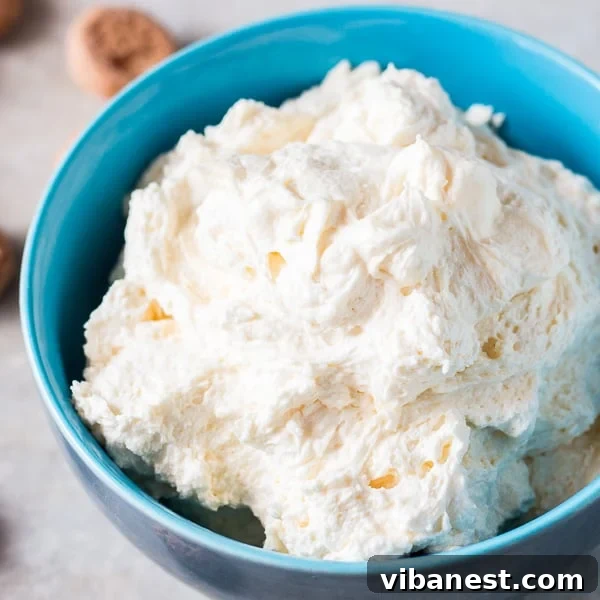
Perfectly Fluffy Vanilla Buttercream Frosting Recipe
INGREDIENTS
- 1 cup (226g) Unsalted Butter, at perfect room temperature (soft but still cool to the touch, not greasy)
- 4 cups (approx. 480g) Icing Sugar (Powdered Sugar), sifted for ultimate smoothness
- 2-3 tablespoons Heavy Whipping Cream, chilled or at room temperature (start with 2, add more if needed)
- 1 teaspoon Pure Vanilla Extract, or your preferred flavoring
- 1/8 teaspoon Fine Sea Salt, to balance the sweetness
DIRECTIONS
- Prepare Your Butter: Ensure your unsalted butter is at true room temperature. This is crucial for a smooth, lump-free buttercream. It should be soft enough to indent with a finger easily, but not so soft that it’s melting or greasy. If it’s too cold, microwave it in 5-second bursts, flipping each time, until just right. Cut it into smaller pieces to help it cream faster and more evenly.
- Combine Initial Ingredients: In the bowl of your stand mixer fitted with the paddle attachment (or a large bowl if using a hand mixer), add the room temperature butter. Sift your icing sugar directly into the bowl over the butter. Sifting helps prevent lumps and ensures a super smooth frosting. Add 2 tablespoons of heavy whipping cream, your chosen pure vanilla extract, and the fine sea salt.
- Start Slow: Begin mixing on the lowest speed until all the dry ingredients are just moistened and the mixture starts to come together. This crucial step prevents a cloud of icing sugar from escaping your bowl and creating a mess! Continue mixing on low for about 1-2 minutes until no dry streaks of sugar are visible. Scrape down the sides of the bowl as needed to ensure everything is thoroughly incorporated.
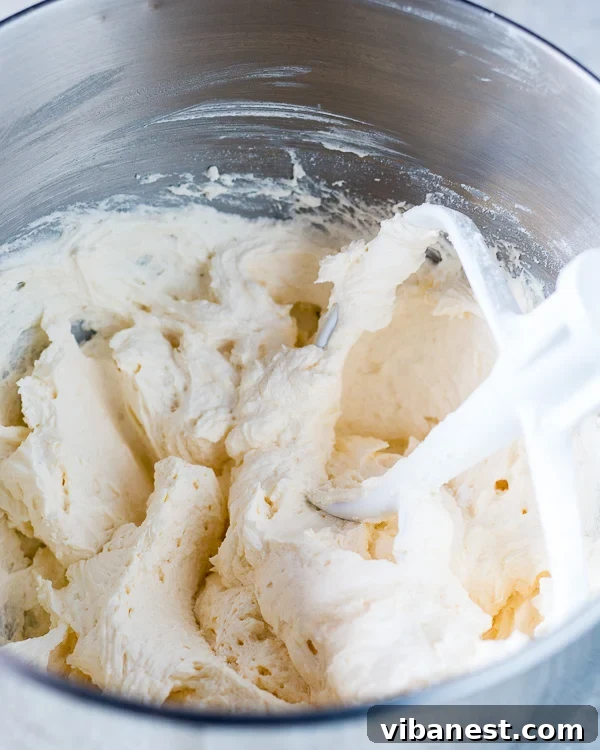
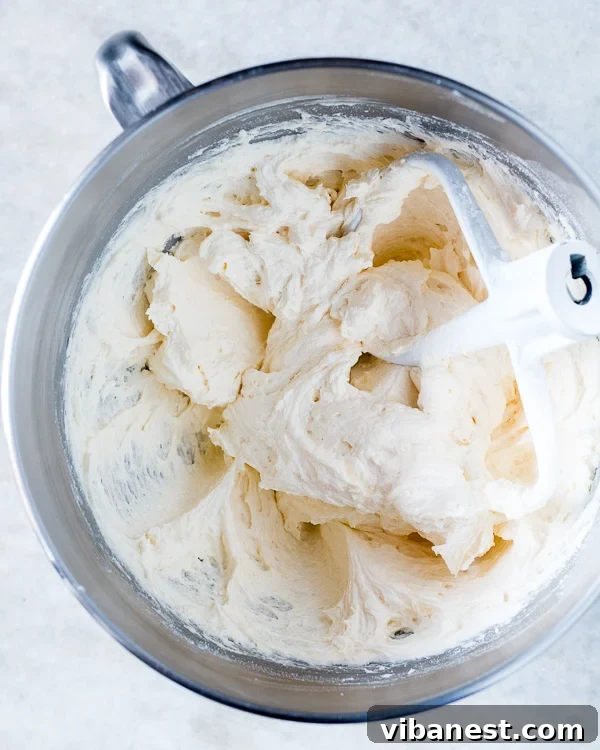
- Whip to Perfection: Once the ingredients are initially combined, increase the mixer speed to medium-high. Beat for a full 8-10 minutes. During this extended whipping stage, you’ll notice the buttercream transform dramatically: it will lighten significantly in color, become incredibly fluffy, and increase noticeably in volume as air is incorporated. Do not rush this step! This is where the magic happens and where that dreaded grainy texture is banished as the sugar fully dissolves.
- Scrape and Finish: Stop the mixer and use a sturdy rubber spatula to thoroughly scrape down the sides and bottom of the bowl. Pay special attention to the bottom, where dense sugar might settle. This ensures all parts of the frosting are evenly whipped. Continue beating on high for another 2-3 minutes until it reaches your desired light, airy, and pipeable consistency. If it seems too stiff or dry, add the remaining tablespoon of heavy cream, a little at a time, until it’s perfectly smooth and spreadable.
- Test for Smoothness: To confirm perfection, rub a tiny bit of frosting between your thumb and forefinger. If it feels smooth with absolutely no gritty sugar crystals, it’s perfect! If you still detect a slight graininess, continue beating on high for another minute or two, scraping the bowl once more if necessary.
- Use as Desired: Your wonderfully fluffy, incredibly smooth, and deliciously rich homemade vanilla buttercream is now ready to be used on your favorite cakes, cupcakes, or cookies. Transfer it to a piping bag or spread it generously with an offset spatula. Enjoy the incredible texture and flavor!
- Storage: This versatile buttercream can be stored in an airtight container in the refrigerator for up to 2 weeks. Before using chilled frosting, let it come to room temperature for about an hour (or longer for large quantities), then re-whip it on medium-high speed for a few minutes until it’s light and fluffy again, just like freshly made. For longer storage, freeze it for up to 3 months. Thaw in the fridge overnight, then let it come to room temperature and re-whip until smooth and airy.
Tips for Buttercream Success
- Perfect Room Temperature Butter: This cannot be stressed enough for making the best buttercream frosting. Butter that is too cold will result in a lumpy, difficult-to-mix frosting. Butter that is too warm (melting or greasy) will create a runny, unstable buttercream that lacks structure. The ideal consistency is soft enough to leave an indent when pressed, but still cool to the touch and holds its shape.
- Sift Your Icing Sugar: Even if your bag of powdered sugar claims to be lump-free, a quick sift through a fine-mesh sieve ensures the smoothest possible buttercream. This is a non-negotiable step to avoid that dreaded grainy texture and achieve a truly professional finish.
- Don’t Skimp on Whipping Time: Patience is truly a virtue here. The extended whipping time (at least 8-10 minutes on medium-high after combining) is what dissolves the sugar crystals and incorporates enough air to make the frosting light, fluffy, and smooth. This step is crucial for both texture and appearance.
- Adjusting Consistency: If your buttercream is too thick for your desired application (e.g., spreading vs. piping), add more heavy cream, a teaspoon at a time, until the perfect consistency is reached. If it’s too thin or runny, add a tablespoon or two of additional sifted icing sugar. Remember, whipping it longer can also stiffen it slightly as more air is incorporated.
- Flavor Variations: While classic vanilla is always a hit, feel free to experiment! Replace vanilla extract with almond extract, lemon extract, peppermint extract, or add citrus zests, sifted cocoa powder for chocolate buttercream, or even a touch of coffee extract for different flavors. Melted and cooled chocolate, fruit purees (ensure they are thick and reduced), or finely ground freeze-dried fruit powders can also be folded in.
- Coloring Buttercream: For vibrant and rich colors without altering the consistency, use gel food coloring. Add a small amount with a toothpick to the finished buttercream and mix until the desired shade is achieved. Gel colors are highly concentrated and won’t thin out your frosting like liquid food coloring can.
Common Buttercream Troubleshooting
- Grainy Buttercream: This is almost always due to insufficient whipping time. Keep beating it! The sugar crystals need ample time to fully dissolve into the fat. Ensure your icing sugar was thoroughly sifted as well. If it’s very stubborn, you can try adding a tiny splash (half a teaspoon) of warm cream while beating.
- Too Soft/Runny Buttercream: This can happen if your butter was too warm to begin with, or if you added too much liquid. Try chilling the buttercream in the fridge for 15-20 minutes to firm up the butter, then re-whip it. You can also add a tablespoon or two of additional sifted icing sugar to absorb excess moisture and add structure.
- Too Stiff/Dry Buttercream: If your buttercream is too firm to spread or pipe easily, it might be too cold or simply needs more liquid. Add heavy cream, half a teaspoon at a time, until it reaches the desired smooth and pliable consistency. Alternatively, if it’s just cold, let it sit at room temperature for a bit before re-whipping.
- Curdled Appearance: Sometimes, especially if butter and other ingredients are at vastly different temperatures, buttercream can look slightly curdled or separated. Don’t panic! Continue beating on medium-high speed. Often, with continued whipping and temperature equalization, it will come together and become smooth. If not, a very small amount of warm cream (just a tiny bit!) while beating can sometimes help it emulsify and smooth out.
Frequently Asked Questions About Buttercream Frosting
- What is the difference between American buttercream and other types?
- American buttercream, like this recipe, is the simplest and most common type, made from butter, powdered sugar, liquid (milk/cream), and flavorings. It’s known for its sweetness and sturdy texture. Other types, such as Swiss Meringue Buttercream, Italian Meringue Buttercream, and French Buttercream, involve cooking egg whites or yolks with sugar to create a meringue or custard base, resulting in a lighter, less sweet, and often more stable frosting that’s ideal for delicate work or warmer climates.
- Can I use salted butter instead of unsalted?
- While unsalted butter is generally preferred for baking as it gives you complete control over the salt content, you can use salted butter in a pinch. If you do, omit the 1/8 teaspoon of added salt in this recipe, or add it very sparingly after tasting. Be aware that the flavor profile might change slightly due to the salt content in the butter, which can vary by brand.
- How far in advance can I make buttercream?
- This particular buttercream is quite stable and can be made up to 2 weeks in advance. Store it in an airtight container in the refrigerator to prevent it from absorbing odors or drying out. Remember to bring it back to room temperature (allow at least an hour) and give it a good re-whip on medium-high speed for a few minutes until it’s light and fluffy again before using.
- My buttercream tastes too sweet. How can I fix this?
- A common complaint with American buttercream is its sweetness. Ensuring you add the specified amount of salt helps significantly to balance this. You can also try adding a bit of lemon juice or zest, or increasing the amount of vanilla or other extracts to deepen the flavor. Whipping it longer also helps incorporate more air, making it feel less dense and therefore less intensely sweet per bite. Using high-quality butter and extracts also makes a big difference.
- Can I make this buttercream dairy-free?
- Yes, absolutely! You can adapt this recipe to be dairy-free. Use high-quality dairy-free butter sticks (such as Miyoko’s Kitchen, Earth Balance baking sticks, or similar firm vegan butters) and a dairy-free heavy cream alternative (like full-fat canned coconut cream – only the thick top part, or a vegan whipping cream). Ensure all other ingredients, like vanilla extract, are also dairy-free. The texture might vary slightly depending on the brands used, but it can still be a delicious and fluffy dairy-free frosting.
- What’s the best way to get a super white buttercream?
- To achieve a super white buttercream, start with butter that is naturally light in color. Some brands are yellower than others. Whipping the buttercream for an extended period, as described in this recipe, will naturally lighten its color as air is incorporated. For an even whiter shade, you can add a tiny, tiny drop of purple gel food coloring (seriously, just a toothpick tip!) to counteract any yellow tones, similar to how purple shampoo works on blonde hair. This trick can subtly neutralize yellow without making the frosting purple.
Conclusion: Master the Art of Buttercream
Creating truly exceptional homemade buttercream frosting isn’t just about following a recipe; it’s about understanding the nuances of the ingredients, embracing the power of proper whipping, and having a little patience with your mixer. With this comprehensive guide and my secret ingredient – heavy whipping cream – you’re now equipped to make a buttercream that’s not only incredibly fluffy and smooth but also rich in flavor and perfectly stable for any celebratory treat. So go ahead, whip up a batch, and prepare to delight everyone with your decadent, restaurant-quality creations!