
Creamy, smoky, and bursting with irresistible cheesy goodness, this Jalapeño Bacon Cheese Ball is the ultimate crowd-pleasing appetizer. Crafted without nuts and packed with bold, unforgettable flavor, it’s an incredibly easy dish that pairs perfectly with crackers, fresh veggies, or your favorite dippers.
If you’re on the hunt for delicious appetizers that truly stand out, this Jalapeño Bacon Cheese Ball recipe deserves a top spot on your list. Imagine the fiery kick of a jalapeño popper perfectly fused with the rich, creamy texture of a classic cheese ball – the result is nothing short of phenomenal! Whether you’re preparing for an amazing holiday feast, an exciting game day celebration, or simply craving a savory snack, this recipe promises to be a hit. Its unique blend of flavors and textures makes it a truly versatile and beloved addition to any spread.

Why You’ll Love This Jalapeño Bacon Cheese Ball
Beyond its incredible taste, there are numerous reasons why this Jalapeño Bacon Cheese Ball will become your go-to appetizer:
- Nut-Free Goodness: Perfect for those with nut allergies or simply those who prefer their cheese balls without nuts. This recipe focuses on pure savory flavor from cheese, bacon, and jalapeños.
- Explosion of Flavor: The combination of smoky bacon, sharp cheddar, zesty jalapeños, and creamy cheese creates a dynamic flavor profile that tantalizes the taste buds with every bite.
- Easy to Make: With straightforward steps and readily available ingredients, even novice cooks can create a show-stopping appetizer that looks and tastes gourmet.
- Versatile Serving: It’s incredibly adaptable and can be served with a wide array of dippers, making it suitable for various dietary preferences and occasions.
- Crowd-Pleaser Guaranteed: This cheese ball consistently disappears quickly at parties and gatherings, proving its universal appeal. It’s truly a dish that brings people together.
- Make-Ahead Friendly: Prepare it in advance to reduce stress on event day, allowing you to enjoy your guests and the celebration.
Key Ingredients for the Perfect Jalapeño Bacon Cheese Ball
This recipe hinges on a few essential ingredients, with a special emphasis on preparing the jalapeños for optimal flavor. While you can use raw jalapeños, I highly recommend roasting them. This simple step unlocks an incredible depth of flavor and a nuanced smoky sweetness that raw peppers simply can’t offer, making your cheese ball truly exceptional.
- Cream Cheese: You’ll need 16 ounces of plain, full-fat cream cheese. This typically means two standard 8-ounce packages. For the smoothest possible texture, allow the cream cheese to soften at room temperature for about 30 minutes to an hour before you begin mixing. This makes it much easier to combine with other ingredients and ensures a creamy, lump-free base. Avoid low-fat varieties, as they can affect the texture and richness of the cheese ball.
- Sour Cream or Mayonnaise: A mere 1/4 cup of either sour cream or mayonnaise adds an extra layer of creaminess and a subtle tang that complements the other bold flavors. Use whichever you have on hand or prefer – both work beautifully.
- Cheddar Cheese: Sharp cheddar is my go-to choice for its robust flavor, which stands up wonderfully to the jalapeño and bacon. For the best texture and melt, always grate your cheese fresh. Pre-shredded cheeses often contain anti-caking agents that can make your cheese ball less smooth. You’ll need to reserve half of the grated cheese for the delightful exterior topping. For a delicious twist, consider using pepper jack cheese to amplify the spicy kick!
- Bacon: Crispy, smoky bacon is a non-negotiable ingredient that perfectly balances the heat of the jalapeños and the richness of the cheese. Six slices of thick-cut bacon, cooked until perfectly crisp, then crumbled into small bits, is ideal. Need a quick guide? Learn how to bake bacon in the oven for easy cleanup and consistent crispiness. Remember to reserve half of your crumbled bacon to coat the cheese ball for that irresistible crunch and flavor.
- Jalapeños: Two fresh jalapeño peppers are central to this recipe. As mentioned, roasting them on the stovetop or in the oven is highly recommended. Roasting mellows their heat, deepens their flavor, and adds a fantastic smoky note. If time is short, you can certainly use finely diced raw jalapeños, but the roasted version truly elevates the dish. Unlike the cheese and bacon, all of the diced jalapeños will be incorporated directly into the cheese mixture.
- Green Onions: About three finely sliced green onions provide a fresh, mild onion flavor and a beautiful pop of color. They add a subtle sharpness that brightens the overall profile of the cheese ball.
- Ranch Seasoning: Two tablespoons of Hidden Valley Ranch seasoning mix are used here to infuse a classic, savory flavor. These seasoning packets are convenient and widely available. If you don’t have a packet on hand, a homemade blend works just as well: combine 1/2 teaspoon garlic powder, 1/2 teaspoon black pepper, 1/2 teaspoon salt, 1/2 teaspoon onion powder, 1/4 teaspoon dried dill, 1 teaspoon dried chives, and 1 teaspoon dried parsley. This blend will mimic the beloved ranch flavor perfectly.

A Cheese Ball for Everyone: Nut-Free and Flavor-Rich!
Many traditional cheese ball recipes feature chopped nuts as part of their outer coating. While delicious for some, this can be a deal-breaker for others due to allergies or simply a preference. Our Jalapeño Bacon Cheese Ball proudly stands as a nut-free option, making it an ideal choice for gatherings where dietary restrictions might be a concern, or if you simply prefer your appetizers without the added crunch of nuts. This recipe proves that you don’t need nuts to deliver an extraordinary texture and an explosion of flavor!
Instead, this cheese ball is generously coated with the savory triumvirate of sharp cheddar cheese, crispy bacon bits, and fresh green onions. This combination provides a delightful contrast to the creamy interior, offering a satisfying texture with every scoop. The robust flavors from the roasted jalapeños, sharp cheddar, and smoky bacon are more than enough to create a truly memorable and highly addictive appetizer.
Of course, if you are a fan of nuts and wish to include them, feel free to add finely chopped pecans or walnuts to the outer coating mixture. The beauty of this recipe lies in its adaptability!
How to Master the Art of Forming a Cheese Ball
Creating that perfectly spherical cheese ball might seem daunting, but it’s surprisingly simple and straightforward. Once all your delicious ingredients are thoroughly combined in a large mixing bowl, here’s how to achieve that classic shape and coat it beautifully:
- Prepare Your Surface: Lay a large piece of plastic wrap flat on your clean kitchen counter. This will be your primary tool for shaping and coating the cheese ball.
- Initial Shaping: Using a sturdy spatula, scrape down the sides of the bowl, gently coaxing the cream cheese mixture into a rough ball shape within the bowl. The softened cream cheese will be quite pliable.
- Transfer and Refine: Carefully transfer the roughly formed cheese mixture onto the center of the plastic wrap. Now, use your hands (you might want to wear gloves for less mess) to further refine the shape, pressing and smoothing the mixture until it forms a perfectly round and compact ball.
- Apply the Coating: In a separate shallow bowl, combine your reserved finely grated cheddar cheese, crumbled bacon, and finely sliced green onions. This colorful and flavorful mixture will form the crust of your cheese ball.
- Coat and Chill: Gently roll the cheese ball in the topping mixture, pressing firmly to ensure an even and thorough coating. Once coated, pull the sides of the plastic wrap up around the ball, enclosing it tightly. This not only protects it but also helps the toppings adhere.
- Chill for Firmness: At this stage, your cheese ball will be at room temperature and quite soft. It’s crucial to place it in the refrigerator for at least an hour (or ideally, several hours) to allow it to firm up properly. This chilling time ensures it holds its shape beautifully and is easy to serve without collapsing.
When you’re ready to serve, simply unwrap the firm cheese ball, place it prominently on a large serving platter, and arrange an inviting array of your favorite dippers around it. This presentation not only looks appealing but also makes it easy for guests to enjoy!
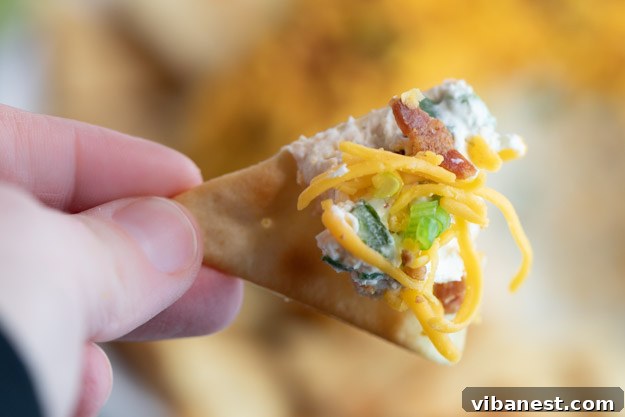
Serving Suggestions and Perfect Pairings
This Jalapeño Bacon Cheese Ball is incredibly versatile and pairs well with a variety of dippers. Here are some ideas to inspire your serving platter:
- Crackers: Classic butter crackers, multi-grain crackers, water biscuits, or even sturdy pita chips are excellent choices.
- Fresh Vegetables: For a lighter, healthier option, offer crisp celery sticks, carrot sticks, bell pepper strips (red, yellow, or orange for color), cucumber slices, or broccoli florets.
- Pretzels: Pretzel sticks or crunchy pretzel thins add a salty, satisfying crunch that complements the creamy cheese ball beautifully.
- Bread: Slices of toasted baguette, mini bagels, or even small pieces of toasted sourdough can be fantastic for spreading.
- Fruit: While less common, crisp apple slices can offer a delightful sweet-savory contrast.
No matter the occasion – whether it’s a festive holiday gathering, a thrilling game day, or a casual get-together – this jalapeño cheese ball is the perfect appetizer to share. It’s like a giant, deconstructed jalapeño popper that invites everyone to dig in and enjoy!
Make-Ahead and Storage Tips
One of the best features of this Jalapeño Bacon Cheese Ball is its make-ahead potential, which makes party planning so much easier:
- Make Ahead: You can prepare the entire cheese ball, including coating it with the toppings, up to 2-3 days in advance. Simply ensure it is tightly wrapped in plastic wrap and stored in the refrigerator. This allows the flavors to meld beautifully and reduces stress on the day of your event.
- Storage: Any leftover cheese ball should be wrapped tightly in plastic wrap and stored in an airtight container in the refrigerator for up to 5 days.
- Serving Temperature: For the best flavor and spreadable consistency, allow the cheese ball to sit at room temperature for about 15-20 minutes before serving, especially if it has been refrigerated for a long time.

Variations to Customize Your Cheese Ball
While this recipe is perfect as is, you can easily adapt it to suit your personal taste or to experiment with new flavors:
- Cheesy Swaps: Replace sharp cheddar with smoked gouda, Monterey Jack, or a spicy colby jack for a different cheese profile.
- Heat Level Adjustment: For more heat, leave some jalapeño seeds in, or add a pinch of cayenne pepper or a dash of your favorite hot sauce to the mixture. For less heat, be meticulous about removing all seeds and membranes from the jalapeños.
- Herbacious Additions: Fresh chives, parsley, or cilantro finely chopped can be folded into the mixture for an extra layer of fresh flavor.
- Spiced Up: A touch of smoked paprika or cumin can enhance the smoky notes and add more depth.
- Protein Boost: Experiment with finely diced ham, shredded chicken, or even vegetarian bacon bits for an alternative protein source.
More Jalapeño-Inspired Recipes to Explore
If you’re a fan of the zesty kick of jalapeños, you’re in for a treat! This versatile pepper can elevate a myriad of dishes. After mastering this incredible cheese ball, why not explore some other fantastic jalapeño recipes? We highly recommend trying our Jalapeño Stuffed Mushrooms for another elegant appetizer or diving into the comforting depths of Jalapeño Popper Mac and Cheese for a hearty main course. Each offers a unique way to enjoy the vibrant flavor of jalapeños, ensuring your culinary adventures are always exciting and full of zest!
Jalapeño Bacon Cheese Ball Recipe

Jalapeño Bacon Cheese Ball
10
Ingredients
- 2 – 8 ounce packages cream cheese softened
- 1/4 cup sour cream or mayo
- 8 ounces finely shredded sharp cheddar cheese
- 6 slices bacon cooked and crumbled
- 2 roasted jalapeños (you can use raw jalapeños if you wish)
- 3 green onions sliced
- 2 tablespoons ranch seasoning (or a 1 oz packet ranch seasoning)
Instructions
ROASTED JALAPEÑO DIRECTIONS
-
Begin by roasting the jalapeños. If you have a gas stove, heat to medium. Place the peppers directly on the grate. Rotate every 30 seconds or so until the jalapeños are evenly charred. Immediately place the charred jalapeños in a bowl, then cover for about 15 minutes to steam the peppers. At this point, you can peel the charred skin from the peppers (wearing kitchen gloves is recommended for this task). Cut open the jalapeños lengthwise, remove the stems and scrape out the seeds, then dice the roasted jalapeños.
-
If roasting the peppers in the broiler, preheat your broiler to high. Cut open the jalapeños lengthwise, remove stems and scrape out the seeds. Place peppers on a foil-lined baking sheet with the skin side up. Broil in the oven for 3-4 minutes or until the skin of the peppers is charred and blistered. Remove the peppers and place them in a bowl, then cover for about 15 minutes to steam them. The charred skin should then come off easily. Dice the roasted jalapeños.
JALAPEÑO BACON CHEESE BALL DIRECTIONS
-
In a large bowl, combine 16 ounces of softened cream cheese and 1/4 cup sour cream (or mayo) along with 2 tablespoons of Ranch seasoning mix. Use a hand mixer or a sturdy spoon to mix until the mixture is smooth and well combined.
-
Fold in all of the diced roasted jalapeños, half of the finely grated cheddar cheese, half of the crumbled crispy bacon, and half of the sliced green onions. Stir gently with a spatula to evenly distribute all the delicious ingredients.
-
Lay a large piece of plastic wrap on your clean work surface. Use a spatula to scrape the cheese mixture from the bowl onto the center of the plastic wrap, forming it into a rough ball shape.
-
Gently scoop the roughly formed ball into your hands and continue shaping it until it’s a smooth, symmetrical ball.
-
In a separate small bowl, combine the remaining half of the cheddar cheese, bacon, and green onions. Roll the cheese ball in this mixture, pressing gently but firmly to ensure it’s evenly coated on all sides.
-
Once coated, pull the sides of the plastic wrap up over the cheese ball to cover it completely. Place the wrapped cheese ball in the refrigerator for at least one hour to allow it to firm up. Chilling for several hours or overnight yields the best results.
-
When ready to serve, unwrap and place the firm cheese ball on a serving platter. Surround it with an assortment of crackers, celery sticks, pretzel sticks, or any of your favorite dippers for an unforgettable appetizer experience.
Tried this recipe?
Mention @CenterCutCook and tag #CenterCutCook!