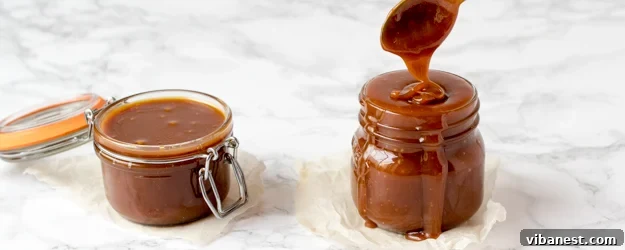
Unlock the Secret to Perfect Homemade Caramel Sauce: A Smooth, Creamy, and Irresistible Recipe
Forget store-bought caramel! Imagine a silky, rich, and incredibly delicious caramel sauce that comes together effortlessly in your kitchen with just three simple ingredients. This comprehensive guide will walk you through the magic of creating a smooth and creamy stovetop caramel sauce that will elevate all your favorite desserts. Prepare to be amazed by how easy it is to achieve gourmet results at home, far surpassing anything you can buy in a jar!
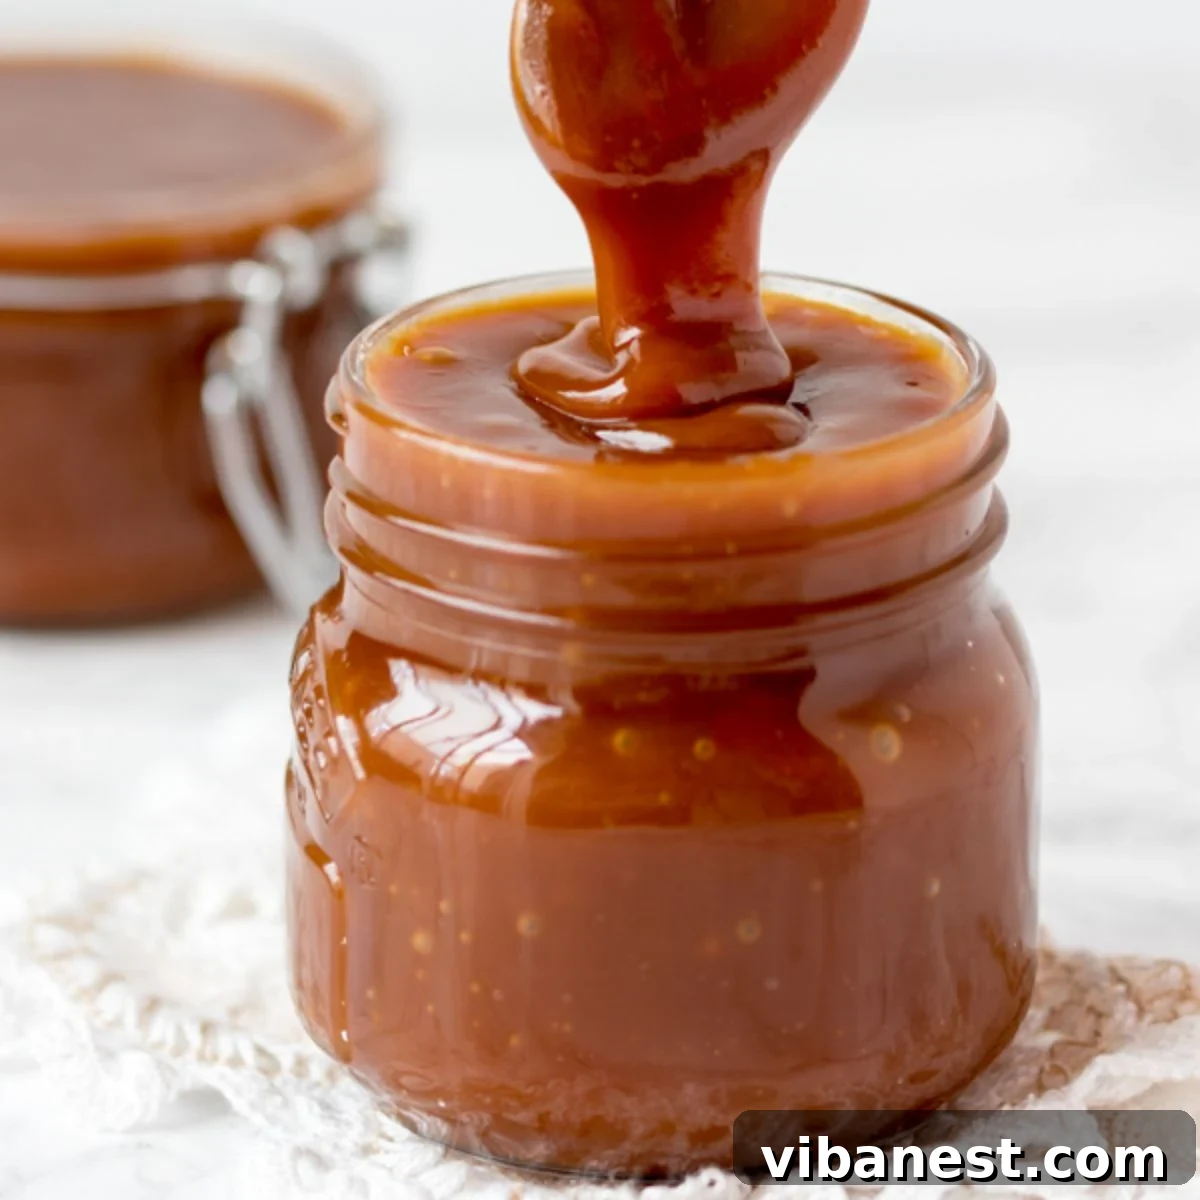
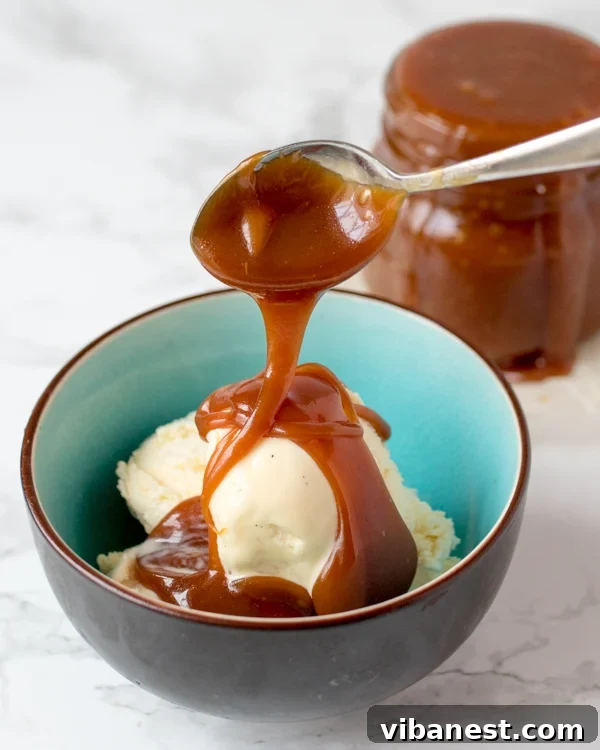
Homemade caramel sauce isn’t just a simple treat; it’s a versatile culinary staple that adds a touch of unparalleled decadence to almost anything. Whether you’re craving something sweet or looking to impress guests, this sauce delivers. Drizzle it generously over a scoop of vanilla bean ice cream, use it to coat crisp taffy apples for a fall festival feel, craft your own delectable caramel-filled candies, or even transform a simple breakfast into a gourmet experience by topping toast with sliced bananas and a luxurious swirl of this golden elixir. Its rich, buttery flavor and velvety texture are simply unmatched by mass-produced alternatives.
The true beauty of this homemade sauce lies in its incredible adaptability across a myriad of desserts. It’s the perfect finishing touch for cozy baked goods like a warm Instant Pot Apple Crisp, enhancing every bite with its sweet, buttery notes. Incorporate it directly into recipes like delightful Caramel Cashew Bars for an added layer of chewiness and intense flavor. Or, take your cheesecakes to the next level – imagine the luxurious complement it provides to an Easy Nutella Salted Caramel Cheesecake. Once you master this incredibly simple recipe, you’ll find countless reasons and excuses to whip up a fresh batch.
Essential Ingredients for Your Luscious Caramel Sauce
Creating this irresistible stovetop caramel requires just three fundamental, readily available ingredients. The quality of these components directly impacts the final taste and texture of your sauce, so choosing wisely will lead to the best results.
- Granulated Sugar: This forms the foundational sweetness and body of your caramel. It’s crucial to ensure your sugar is fresh and free of any large clumps before you begin, as uniformly sized sugar crystals melt more evenly, which is key to preventing potential burning or crystallization during the cooking process.
- Unsalted Butter: Butter provides essential fat content, contributing significantly to the caramel’s smooth, rich, and melt-in-your-mouth texture, as well as its signature buttery flavor. Using unsalted butter allows you complete control over the saltiness, which is especially important if you plan to make a salted caramel variation. If salted butter is your only option, it’s fine to use, but keep in mind that you should then reduce or omit any additional salt in the recipe, as it will inherently add a subtle salty note.
- Heavy Cream: The secret to achieving a truly creamy, decadent, and luxurious caramel sauce is high-quality heavy whipping cream (ideally with at least 36% milk fat). It emulsifies beautifully with the melted sugar and butter, creating that desirable velvety, pourable consistency. Using plain milk or half-and-half will result in a much thinner sauce and may not effectively prevent crystallization, leading to a less stable and less appealing final product. If heavy cream is not available, you can create a makeshift substitute by whisking two tablespoons of cornstarch into one cup of whole milk and letting it sit to thicken slightly; however, for the absolute best and most authentic results, genuine heavy cream is strongly recommended.
How to Craft Perfect Stovetop Caramel: A Detailed Step-by-Step Guide
Don’t be intimidated by the idea of making caramel from scratch; it’s much simpler than you might imagine, and for this foolproof method, you won’t even need a candy thermometer! However, it’s imperative to exercise extreme caution as melted sugar reaches incredibly high temperatures. Always ensure children and pets are kept safely away from the kitchen workspace during this process to prevent any accidents. The key to success is to stay focused and work steadily.
This streamlined recipe comes together beautifully in a single pot, ensuring minimal cleanup once you’re done. Below is a detailed overview of the process. For precise measurements of each ingredient, please refer to the complete recipe card conveniently located at the end of this article.
Phase 1: The Art of Melting Sugar
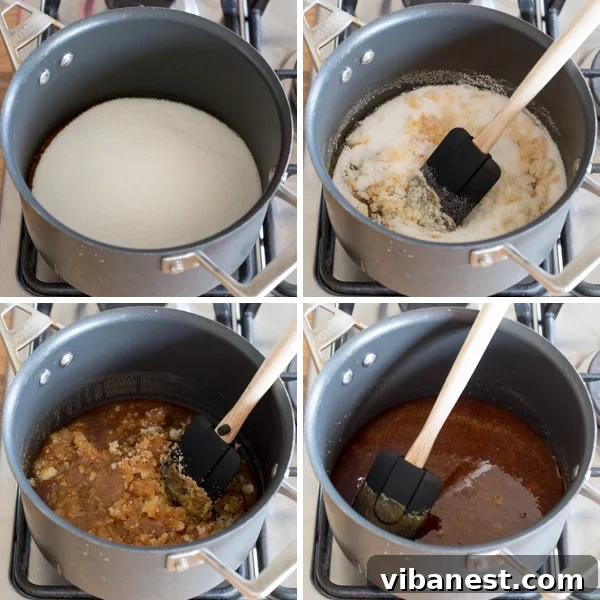
- Prepare the Pan: Begin by placing your granulated sugar evenly in a large, heavy-bottomed saucepan or pot. A heavy bottom is absolutely crucial for even heat distribution, which prevents hot spots and minimizes the risk of scorching.
- Initial Heating: Place the pan over medium heat. At first, the sugar will appear dry and crystalline. Resist the urge to stir constantly at this very initial stage, as it can encourage crystallization.
- Start Stirring: As the edges of the sugar begin to melt and liquefy, creating a clear syrup, it’s time to start stirring. Use a heat-resistant rubber spatula or wooden spoon to stir gently and consistently every few seconds, ensuring the melting is even.
- The Transformation: The sugar will go through several fascinating stages: initially clumpy and wet-looking, then forming larger hardened lumps, and eventually transforming into a beautiful, clear, golden-amber liquid. Continue stirring until every last granule and lump has completely dissolved, yielding a perfectly smooth, clear, and uniformly golden-brown syrup. If at any point it seems to be cooking too quickly or appears to be darkening excessively, immediately reduce the heat to low while continuing to stir. Achieving the right amber color is critical – too light, and the caramel won’t have enough depth of flavor; too dark, and it will taste bitter and burnt.
Phase 2: Incorporating the Richness of Butter
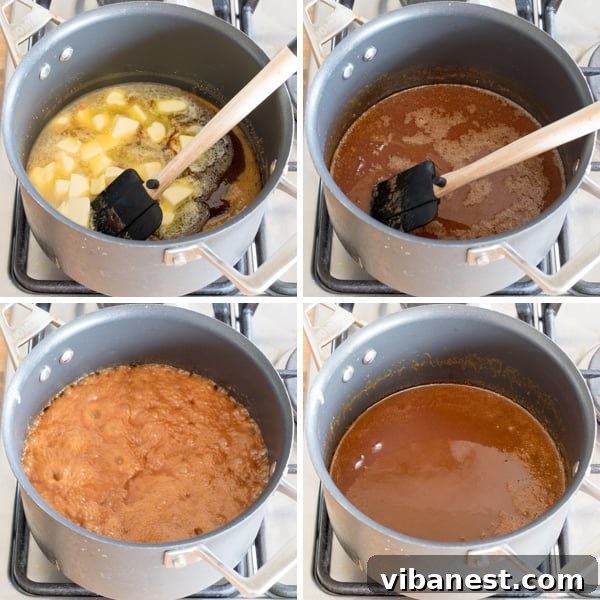
- Add the Butter Cautiously: Once all the sugar has perfectly melted into a clear, vibrant golden liquid, very carefully add the unsalted butter. It’s best if the butter is cut into small chunks for faster melting. Be prepared for a vigorous reaction: the mixture will bubble up dramatically, spit, and release a lot of steam. Add the butter slowly and cautiously, perhaps dropping it in with a long-handled spoon for added safety.
- Stir Until Combined: Stir the butter into the melted sugar constantly for about two minutes. The mixture will become thick and begin to emulsify. Don’t worry if some butter seems to separate or float on top; this is normal at this stage and it will fully combine in the next step.
Phase 3: The Cream for Ultimate Creaminess
- Pour in the Cream Gradually: Now, slowly and gradually pour in the heavy cream while continuously stirring. Again, be ready for significant bubbling and steaming as the cooler cream hits the extremely hot caramel. To minimize the temperature shock and reduce the intensity of the vigorous bubbling, it’s often helpful (though not strictly necessary) to warm your cream slightly in a separate pan or microwave before adding it.
- Achieve Smoothness: Continue stirring until the cream is fully incorporated and the caramel becomes completely smooth, cohesive, and uniformly colored.
- Final Simmer & Cool: Allow the caramel to gently bubble for an additional minute, stirring once or twice to ensure even cooking and prevent any sticking. This short simmering period helps the flavors meld together and allows the sauce to thicken slightly. Remove the pan from the heat and allow the caramel to cool. It will continue to thicken considerably as it cools, developing that perfect pourable consistency.
Caramel Making Pro Tip: Stay Focused and Be Patient!
This recipe is relatively quick to execute, but it absolutely demands your full and undivided attention. Do not, under any circumstances, walk away from the stove once you begin. Sugar can go from perfectly melted to hopelessly burnt in a matter of mere seconds, drastically altering the flavor from sweet to acrid. Constant stirring, vigilant observation of the color, and quick temperature adjustments are essential to achieve that perfect golden hue and avoid a bitter, unusable batch. Your patience and presence will be richly rewarded!
Beyond Basic Caramel: Exciting Flavor Variations to Try
Once you’ve confidently mastered the classic homemade caramel, you’ll undoubtedly be eager to experiment with delightful variations. This base recipe is incredibly versatile and serves as the perfect canvas for exploring new and exciting flavor profiles. Don’t hesitate to get creative!
- Elevate with Salted Caramel: For the ever-popular and utterly irresistible twist, simply stir in half a teaspoon of fine kosher salt or flaky sea salt at the very end of the cooking process, after the cream has been fully incorporated and the sauce is off the heat. The salt beautifully balances the intense sweetness, creating a complex, nuanced, and truly addictive flavor profile. Taste and adjust the amount of salt to your personal preference!
- Infuse with Vanilla: A splash of high-quality vanilla extract (about 1 teaspoon) stirred in just after removing the caramel from the heat can add an extra layer of warmth, depth, and aromatic sweetness, significantly enhancing the caramel’s overall appeal. For an even richer, more profound vanilla presence, consider steeping a split vanilla bean in the warm heavy cream before adding it to the sugar mixture.
- Seasonal Spiced Caramel: Embrace the cozy flavors of autumn or winter with a delightful Pumpkin Spice Caramel Sauce. This variation is especially divine when drizzled generously over seasonal treats like fluffy pancakes, apple pie, or these indulgent Pumpkin Caramel Rice Krispy Treats. You can also experiment with other warm spices like cinnamon, cardamom, nutmeg, or even a tiny hint of ground ginger for a unique and memorable kick. Add a quarter to half a teaspoon of your chosen spice blend with the butter.
- Coffee Caramel Indulgence: For all the coffee lovers out there, a teaspoon of instant espresso powder or a tablespoon of very strong brewed coffee stirred in with the heavy cream creates a sophisticated mocha-caramel fusion that is absolutely divine in coffee drinks or over coffee ice cream.
Creative Ways to Enjoy Your Homemade Caramel
While store-bought options are available, nothing truly compares to the fresh, vibrant taste and velvety texture of homemade caramel sauce. It’s so simple to prepare, yet it feels incredibly luxurious and gourmet. Here are even more fantastic and creative ways to incorporate this liquid gold into your culinary creations:
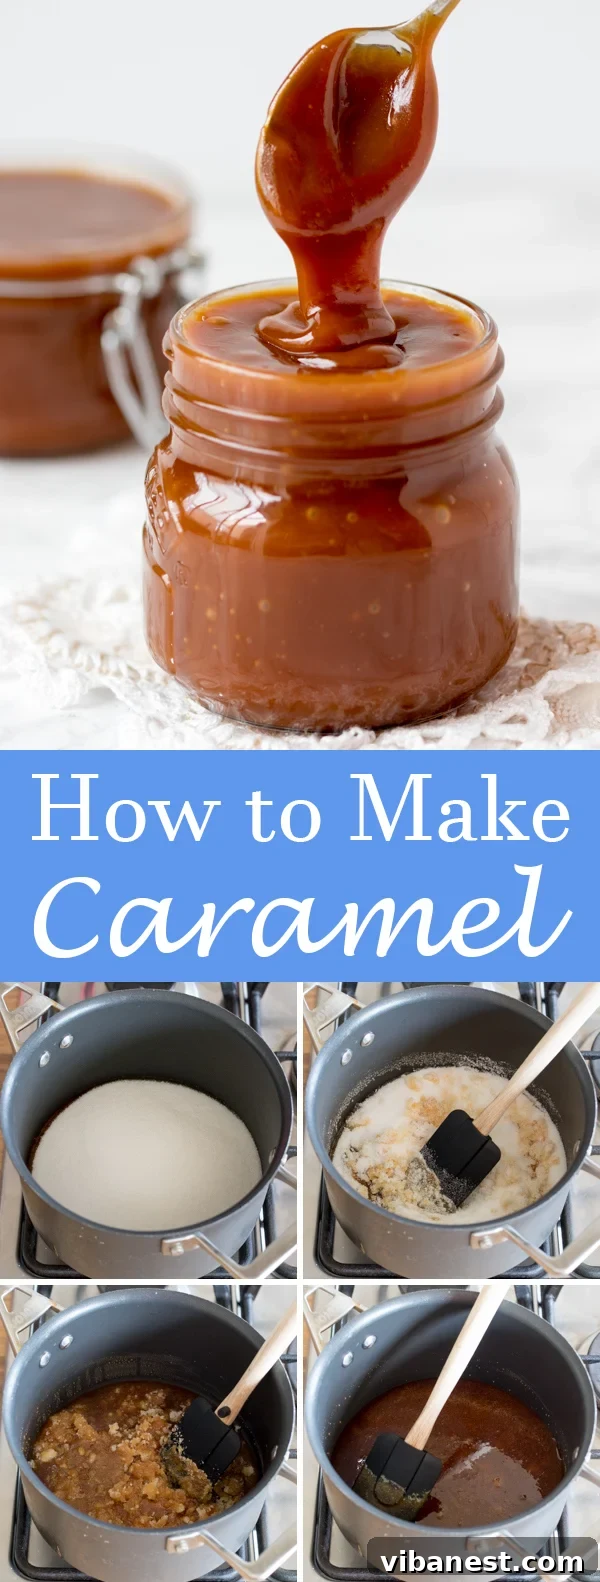
- Dessert Drizzle Perfection: Beyond simply pouring it over a generous scoop of ice cream (which is always an undisputed winner, as seen in the accompanying photos!), use it to elegantly dress up pies, cakes, tarts, puddings, or even fresh fruit salads. It’s an absolutely stellar companion for my warm Instant Pot Apple Crisp.
- Coffee & Beverage Enhancer: Transform your ordinary morning coffee or afternoon latte into a gourmet, coffee-shop-worthy experience. It’s the essential ingredient for replicating your favorite sweet drinks, such as this incredible Starbucks Caramel Frappuccino Copycat right in your own kitchen.
- Baking & Pastry Filling: Elevate your baked goods by using this luscious sauce as a delightful filling for cupcakes, brownies, blondies, or even delicate macarons. It makes a divine and unforgettable layer in cakes, like the famously rich Better Than Sex Cake or a comforting Apple Cinnamon Coffee Cake.
- Fruit & Snack Dipper: Warm the caramel sauce up slightly for an incredible, gooey dip for crisp apple slices, crunchy pretzels, buttery shortbread cookies, or even graham crackers.
- Breakfast Brilliance: Drizzle this glorious caramel over a stack of fluffy pancakes, golden waffles, or classic French toast for an indulgent and unforgettable start to your day. It also pairs wonderfully with yogurt and granola.
Frequently Asked Questions About Homemade Caramel Sauce
Yes, absolutely! This homemade caramel recipe inherently contains no gluten, as granulated sugar, unsalted butter, and heavy cream are naturally gluten-free ingredients. However, if you are preparing this for someone with severe gluten sensitivities or Celiac disease, it’s always a good practice to double-check the labels of your specific ingredients to ensure there are no hidden gluten-containing additives or potential cross-contamination warnings from the manufacturers.
Yes, due to its heavy cream content, homemade caramel sauce must be stored in the refrigerator. Once it has cooled completely to room temperature, transfer it into an airtight container, such as a glass jar with a tight-fitting lid. Refrigeration will cause the caramel to stiffen significantly and become very thick, but this is entirely normal and expected. To restore its luscious, pourable consistency, simply warm the desired portion in the microwave in 5-10 second intervals, stirring well after each interval, or gently reheat it in a small saucepan over very low heat on the stovetop until it reaches your desired fluidity.
Yes, you can absolutely freeze homemade caramel sauce with great success! Once your caramel has cooled completely to room temperature, transfer it to an airtight, freezer-safe container. It’s advisable to avoid using glass jars for freezing, as they can crack or break when frozen liquids expand. The caramel will keep well in the freezer for up to three months without any loss of quality. To thaw, simply transfer the frozen caramel to the refrigerator overnight. Once thawed, you can reheat it gently as described above to restore its perfectly smooth, pourable texture.
Caramel crystallization, where the sugar reverts to its solid, grainy form, is a common frustration for many home cooks. It often happens if even a single sugar crystal clings to the sides of the pot and falls back into the molten sugar, acting as a “seed” that initiates the crystallization process. To prevent this, ensure your pot is perfectly clean before starting, and consider using a wet pastry brush to wash down any sugar crystals clinging to the sides of the pot during the initial melting phase. Also, avoid over-stirring once the sugar has fully melted and turned liquid, as this can introduce air and further encourage crystallization.
Unfortunately, burnt caramel cannot be salvaged. Once sugar burns, it develops a harsh, extremely bitter, and unpleasant taste that will permeate the entire sauce. There is no way to remove this burnt flavor once it’s set in. If you notice a strong burnt smell, see overly dark patches that aren’t a uniform amber, or taste bitterness, it’s always best to discard the batch and start fresh. It’s far better to have a slightly lighter, less intensely flavored caramel than a bitter, unusable one!
Storing and Reheating Your Homemade Caramel Sauce
Proper storage is key to ensuring your delicious homemade caramel remains fresh and ready to enjoy whenever a craving strikes. Once the sauce has cooled completely to room temperature, transfer it into a clean, airtight container. Glass jars with secure, tight-fitting lids, such as mason jars, are excellent and popular choices for refrigeration.
Your homemade caramel sauce will keep beautifully in the refrigerator for up to two weeks, allowing you to enjoy it over an extended period. As it chills, it will naturally thicken and firm up considerably due to the butter and cream content. To return it to its luscious, pourable consistency, simply reheat it gently. For smaller portions, microwave in 5-second bursts, stirring exceptionally well after each interval, until the desired fluidity is achieved. For larger amounts, warm it in a saucepan over very low heat on the stovetop, stirring constantly to prevent scorching. While caramel can be reheated, try to only warm the portion you plan to use immediately to maintain the best quality over time. Excessive reheating can sometimes subtly alter the texture.
More Irresistible Dessert Creations to Explore
Pumpkin Whoopie Pies With Cinnamon Cream Cheese Frosting
Monster Cookie Bars
Print Recipe
Homemade Stovetop Caramel Sauce
5 minutes
15 minutes
20 minutes
Ingredients
- 2 cups granulated sugar
- 12 tbsp unsalted butter (1 ½ sticks), cut into small chunks
- 1 cup heavy cream (can be warmed slightly before adding for best results)
Instructions
-
Melt the Sugar: Place the granulated sugar in a large, heavy-bottomed pan over medium heat. Let the sugar begin to melt around the edges. Once liquefaction starts, gently stir every few seconds with a heat-resistant spatula. The sugar will become clumpy, then turn into a smooth, clear, golden-amber liquid. Stir until all granules are dissolved. Reduce heat if it seems to darken too quickly.
-
Add Butter: Carefully add the small chunks of unsalted butter to the melted sugar. The mixture will bubble and spit vigorously. Stir constantly for about 2 minutes until the butter is mostly incorporated.
-
Incorporate Cream: Slowly pour in the heavy cream while continuously stirring. The caramel will bubble up significantly. Continue stirring until the cream is fully combined and the mixture is smooth and cohesive.
-
Simmer & Cool: Allow the caramel to gently bubble for 1 minute, stirring once or twice. Remove from heat and let it cool completely in the pan. It will thicken as it cools.
-
Store & Serve: Once cooled, pour the caramel into one large or two small sterilized airtight jars. Serve immediately if desired, or cover and refrigerate for up to two weeks. Reheat gently to desired consistency before serving.
Tried this recipe?
Mention @CenterCutCook and tag #CenterCutCook!
If you make this incredible homemade caramel sauce or try any of my other recipes, I would absolutely love to hear from you! Please take a moment to leave a comment below and share your thoughts. Your feedback means the world to me and helps others discover these delicious creations!