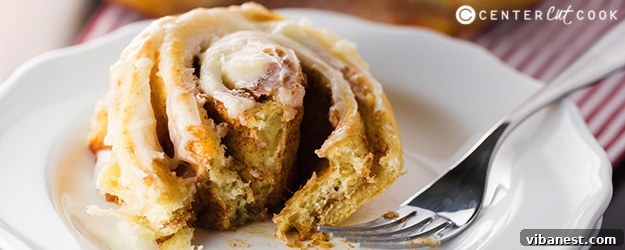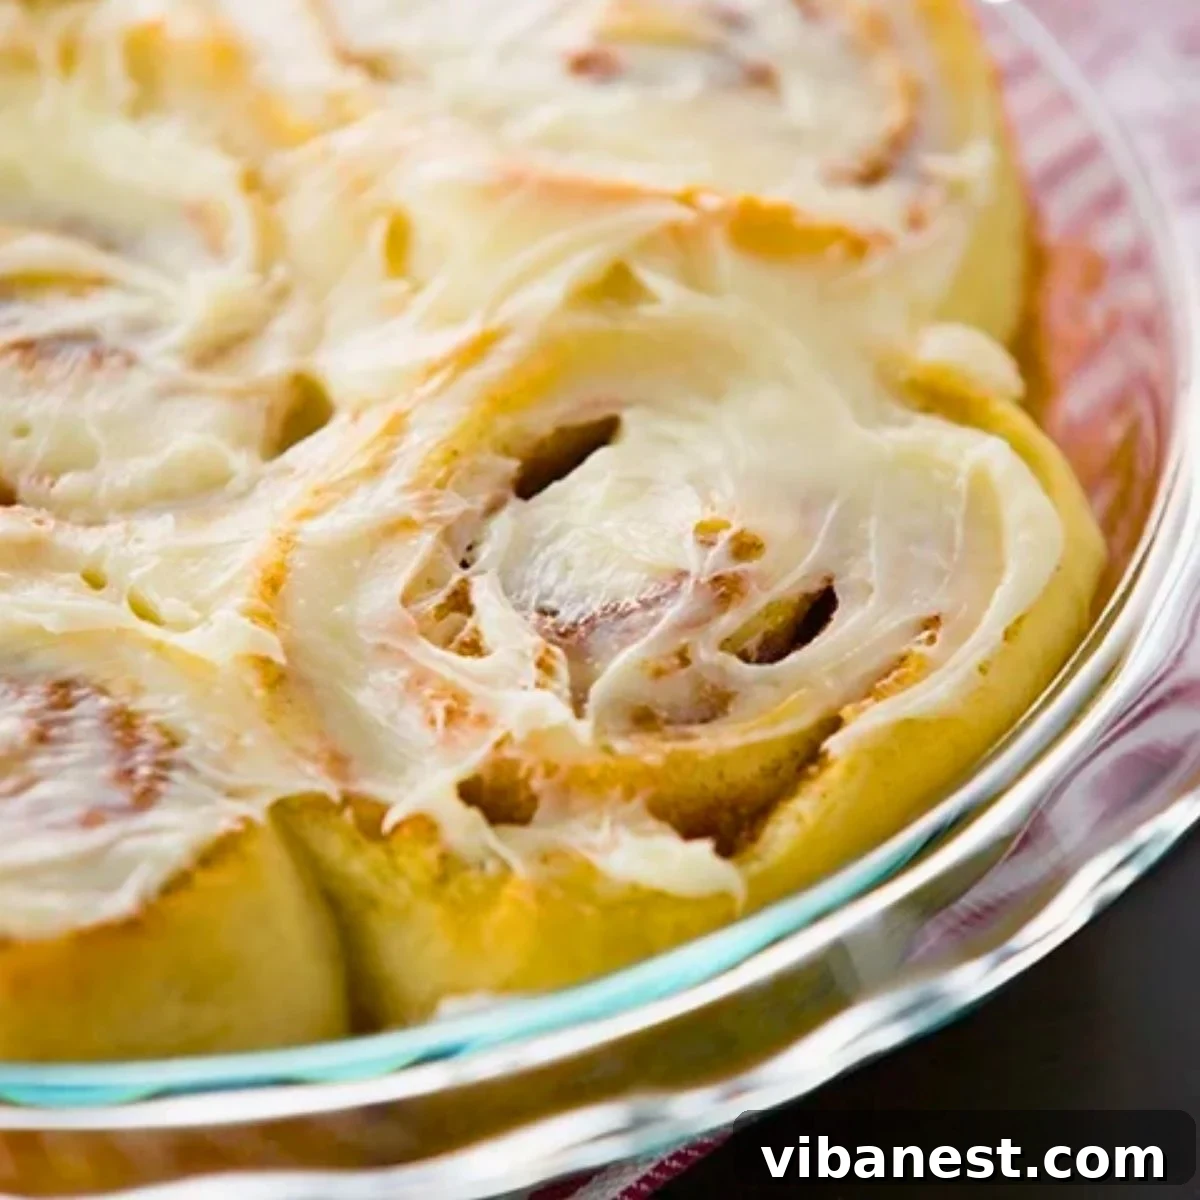
Soft and perfectly sweet Cinnamon Rolls from Scratch with cream cheese frosting. These are the old-fashioned cinnamon rolls my Mom used to make!
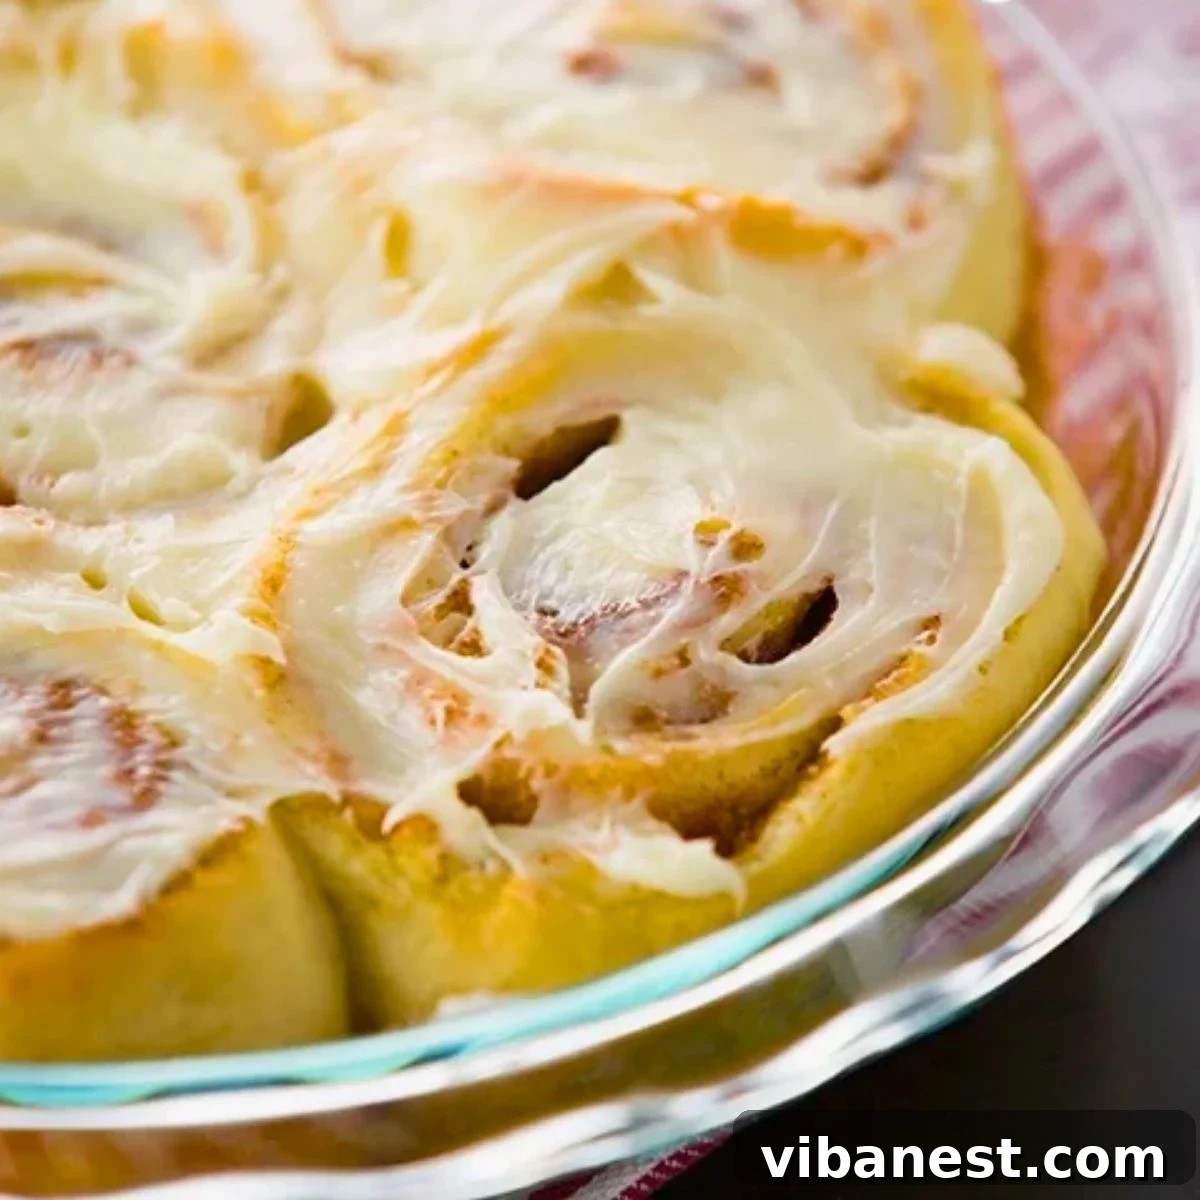
There’s an undeniable magic in a homemade cinnamon roll – a warm, soft, and perfectly sweet pastry generously slathered with rich cream cheese frosting. For many of us, it evokes cherished memories, perhaps of a grandparent’s kitchen or the comfort of a childhood Sunday morning. While quick solutions like our Fast and Easy Cinnamon Rolls offer convenience, there’s truly nothing quite like the traditional, old-fashioned version made from scratch. This recipe, inspired by my Mom’s timeless method, delivers that signature yeasty dough, creating rolls with an exquisite fluffiness and an irresistible depth of flavor that simply can’t be rushed. Get ready to embark on a delightful baking journey that culminates in the ultimate comfort food, guaranteed to fill your home with an aroma as heavenly as the rolls themselves. Prepare yourself, because these homemade cinnamon rolls are utterly delicious; it will be hard to eat just one!
Why Homemade Cinnamon Rolls Are Worth Every Moment
In our fast-paced world, convenience often takes precedence, but some culinary delights are truly worth the extra effort. Making cinnamon rolls from scratch isn’t just about baking; it’s an experience. It’s about the satisfaction of watching dough rise, the comforting scent of cinnamon and sugar filling your kitchen, and the unparalleled taste of a pastry made with love and fresh ingredients. Unlike store-bought alternatives or even many rapid-rise recipes, homemade cinnamon rolls boast a depth of flavor and a tender, airy texture that is simply unmatched. The traditional yeast dough develops character and elasticity, resulting in rolls that are incredibly soft, moist, and wonderfully chewy. Plus, you have complete control over the quality of ingredients, ensuring a wholesome and delicious treat for your family and friends. This isn’t just a recipe; it’s an invitation to create a memorable baking tradition that will be savored by everyone lucky enough to enjoy your freshly baked creations. The process itself, from activating the yeast to pulling golden rolls from the oven, is a therapeutic journey that rewards you with an unmatched sensory experience.
The Heart of the Roll: Crafting the Perfect Yeast Dough
The foundation of these incredible cinnamon rolls lies in their soft, fluffy yeast dough. Don’t be intimidated if you’re new to working with yeast; it’s a straightforward process with just a few key principles to keep in mind. This dough recipe is a beloved family staple, versatile enough for everything from dinner rolls to these sweet treats. Here’s how to ensure your dough turns out perfectly, resulting in that beautiful fluffiness everyone craves:
- Active Dry Yeast vs. Rapid Rise: It’s crucial to use active dry yeast for this recipe. Unlike rapid rise (instant) yeast, active dry yeast needs to be proofed first, confirming its viability and giving your dough a more developed flavor and structure. This initial step ensures your yeast is alive and ready to work its magic. Make sure your yeast is fresh and hasn’t expired; an expired yeast packet is the most common reason for a dough that fails to rise.
- Warm, Not Hot Water: Yeast is a living organism, and temperature is key to its activation. The water should be warm to the touch, ideally between 105°F and 115°F (40°C-46°C). Think of it as bathwater for your hand – comfortably warm, not scalding hot. Water that’s too cold won’t activate the yeast, leaving your dough flat, while water that’s too hot will kill the yeast, preventing any rise at all.
- The Role of Flour: While good quality all-purpose flour works wonderfully, bread flour, with its higher protein content, can provide an even chewier and more structured roll. The extra gluten in bread flour helps trap more air, resulting in an incredibly fluffy and resilient texture. If using all-purpose, ensure it’s unbleached for best results. The “give or take” in the recipe notes emphasizes that flour amounts can vary based on humidity and how accurately you measure, so be prepared to adjust slightly.
- Kneading Until Smooth and Elastic: Proper kneading is essential for developing the gluten in the flour, which gives the dough its elasticity, strength, and ability to hold those precious air pockets. Whether you’re using a stand mixer with a dough hook or kneading by hand, aim for a dough that feels smooth, pliable, and springs back when gently poked. Expect the dough to be slightly sticky; this indicates good hydration and will contribute to a moist final product. Resist the urge to add too much extra flour during kneading, as this can lead to dry and tough rolls.
- Allow Adequate Rise Time: Patience is a virtue in yeast baking. The rising process (fermentation) is where the yeast works its magic, producing carbon dioxide that creates air pockets and develops complex flavors. Do not rush this step! Allow the dough to double in size in a warm, draft-free place. This usually takes 1 to 2 hours for the first rise and another 60 minutes for the second rise after shaping. Under-risen dough will result in dense, heavy rolls, while properly risen dough will yield light and airy ones.
- Scalding the Milk: This traditional step involves heating the milk just until tiny bubbles form around the edge (before it boils). Scalding denatures certain proteins in milk that can interfere with gluten development, ensuring a softer, more consistent dough and improving its shelf life. Make sure to let it cool down to lukewarm temperature (around 100-110°F or 38-43°C) before adding it to the yeast mixture, as hot milk will kill the yeast.
- Melted Shortening: Shortening adds richness and tenderness to the dough, contributing to that melt-in-your-mouth texture that is characteristic of classic cinnamon rolls. Ensure it’s cooled slightly after melting to avoid shocking the yeast or cooking the eggs when added to the mixture. Butter can be used as a substitute, but shortening often yields a slightly lighter and more tender crumb.
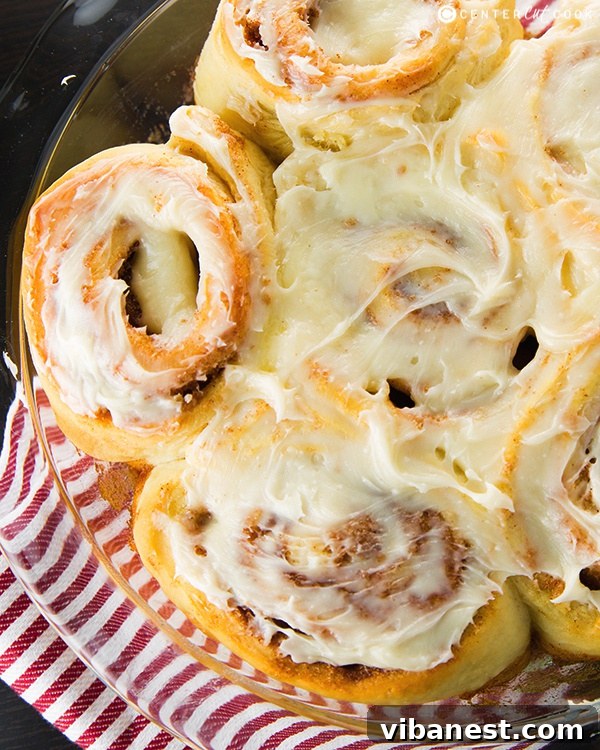
Crafting the Irresistible Filling
While the dough forms the comforting base, the filling is where the “cinnamon” in cinnamon rolls truly shines. It’s a simple yet powerful combination of ingredients that transforms a plain roll into an explosion of spiced sweetness. Achieving that perfectly gooey, aromatic center requires attention to detail. Here’s how to make your filling absolutely irresistible, ensuring every bite is a delightful experience:
- Softened Butter is Key: Begin with softened, room-temperature butter. This isn’t just about spreadability; it allows the butter to meld seamlessly with the sugar and cinnamon, creating a cohesive, buttery layer that will caramelize beautifully during baking. Spread it generously and evenly across your rolled-out dough, leaving a small border to help seal the roll. This buttery layer is what makes the cinnamon sugar stick and contributes immensely to the rich flavor.
- The Perfect Spice Blend: A generous amount of ground cinnamon is non-negotiable. Combined with rich, moist packed brown sugar, it creates that classic, comforting flavor profile we all adore. Ensure your cinnamon is fresh for the most vibrant taste; older spices lose their potency. The balance between sweet and spicy is crucial here.
- The Secret Ingredient: Cornstarch: This might seem like an unusual addition, but a small amount of cornstarch mixed into your brown sugar and cinnamon acts as a binder and thickener. It helps to absorb some of the moisture and melted butter during baking, preventing the filling from completely oozing out of the rolls and instead creating that wonderfully thick, gooey, and caramelized layer we all crave in the center of a perfect cinnamon roll. This is a game-changer for achieving a truly decadent and less messy roll.
- Even Distribution: After spreading the butter, sprinkle the brown sugar and cinnamon mixture evenly over the entire surface, right up to the edges of the butter. Gently press it into the butter to ensure it adheres, preventing it from falling out as you roll the dough. Uniform distribution ensures every part of the roll gets that burst of flavor.
The Secret to Luscious Cream Cheese Frosting
What’s a cinnamon roll without its crown jewel? A thick, tangy, and sweet cream cheese frosting is the essential finishing touch that elevates these rolls from delicious to utterly divine. This basic frosting recipe is perfectly balanced to complement the spiced sweetness of the rolls. Follow these tips and tricks for the best cream cheese frosting, ensuring a smooth, decadent topping:
- Softened Cream Cheese and Butter: This is paramount for a smooth, lump-free frosting. Ensure both your cream cheese and butter are at absolute room temperature. Cold cream cheese or butter will result in a clumpy frosting that’s difficult to spread and lacks that silky texture. Take them out of the fridge at least an hour before you plan to make the frosting, or even longer on a cool day.
- Powdered Sugar (Confectioners’ Sugar): This fine sugar dissolves easily, creating a smooth consistency. For an extra-velvety frosting, you can sift the powdered sugar before adding it, though it’s not strictly necessary if your cream cheese and butter are well-softened and thoroughly beaten. Measuring powdered sugar by weight is ideal, but if using cups, lightly spoon it into the measuring cup and level it off.
- Vanilla Extract for Depth: Don’t skip the vanilla! A good quality pure vanilla extract adds a crucial layer of flavor, enhancing the sweetness and providing a warm aroma that pairs beautifully with the cinnamon. It rounds out the sharp tang of the cream cheese, making the frosting more balanced.
- A Pinch of Salt: Just a small pinch of salt helps to balance the sweetness and brightens all the flavors in the frosting, preventing it from tasting one-dimensional or overly sweet. It’s a subtle addition that makes a big difference.
- Whip Until Light and Fluffy: Using an electric mixer, beat the softened cream cheese and butter together until completely smooth, creamy, and free of any lumps. This step should take a few minutes. Then, gradually add the powdered sugar, vanilla, and salt, starting on low speed to prevent a sugar cloud, then increasing to medium-high. Whip until the frosting is light, fluffy, and easily spreadable. Don’t overmix once the sugar is incorporated, as this can incorporate too much air and change the texture, sometimes making it too soft.
- Customize to Your Liking: If you’re someone who loves an extra generous layer of frosting (and let’s be honest, who isn’t?), feel free to double the recipe. You can also adjust the consistency by adding a tiny splash (a teaspoon at a time) of milk or heavy cream for a thinner glaze, or more powdered sugar for a thicker, stiffer frosting, depending on your preference.
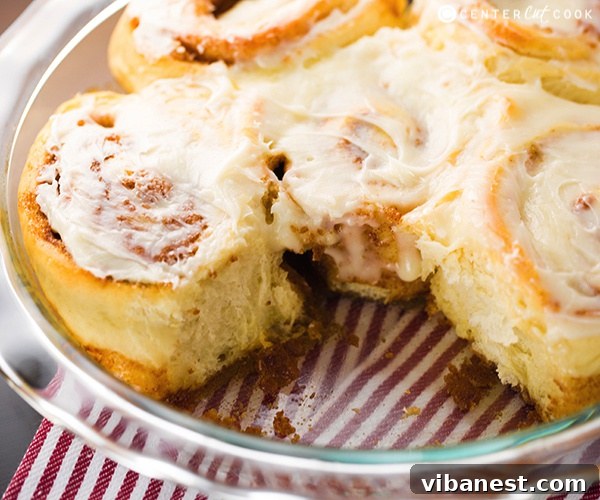
Assembling and Baking Your Masterpiece
With your perfectly risen dough and delectable filling prepared, it’s time to bring these cinnamon rolls to life. The assembly and baking process are crucial for achieving those beautiful, golden-brown rolls with a tender, gooey interior that makes them so irresistible.
- Rolling the Dough: On a lightly floured surface, use a rolling pin to gently roll the punched-down dough into a large, even rectangle, approximately 16” x 22” in size. Aim for consistent thickness across the entire surface to ensure uniform baking and even swirls in your finished rolls. Avoid overworking the dough at this stage.
- Spreading the Filling: Generously spread the softened butter over the entire surface of the dough, leaving a small ½-inch border along one of the long edges. This border will help seal the roll later. Evenly sprinkle your brown sugar, cinnamon, and cornstarch mixture over the butter, gently pressing it in so it adheres well. Ensure the mixture goes right up to the buttered edges for maximum flavor.
- Rolling It Up: Starting from the long side opposite the ½-inch border, carefully and tightly roll the dough into a log. A tight roll is absolutely key to creating those beautiful, defined swirls and preventing the filling from escaping too much during baking. Once rolled, gently pinch the seam along the edge to seal it completely.
- Slicing the Rolls: Using a very sharp, un-serrated knife or, even better, a piece of unflavored dental floss or strong thread, cut the log into 12 even rolls, each approximately 2 inches thick. Dental floss creates clean cuts without squishing the dough, preserving the roll’s delicate shape and layers. Simply slide the floss underneath the log, cross the ends over the top, and pull to slice.
- Choosing Your Baking Dish: You have a few excellent options for baking. A standard 9 x 13-inch casserole dish is perfect for arranging the rolls snugly, allowing them to rise into each other and stay wonderfully moist. Alternatively, two 8-9 inch pie dishes will also work wonderfully if you prefer slightly more separation or are baking a smaller batch. Regardless of your choice, ensure the dish is generously greased to prevent sticking and aid in easy removal.
- The Second Rise: Arrange the cut rolls in your prepared baking dish, leaving a little space between them, as they will expand significantly during this stage. Cover the dish loosely with plastic wrap or a clean kitchen towel and let the rolls rise again in a warm, draft-free spot for another 60 minutes, or until they look noticeably puffy and nearly doubled in size. This second rise is vital for achieving that ultimate light, airy, and fluffy texture in the final product.
- Preheating and Baking: While your rolls are enjoying their final rise, preheat your oven to 350°F (175°C). This ensures the oven is at the correct temperature when the rolls go in, leading to even baking. Bake the rolls for 21-23 minutes, or until they are a beautiful light golden brown on top and cooked through. Be careful not to overbake, as this can dry them out and make them less tender. The internal temperature should be around 200°F (93°C) if you use a thermometer.
- The Irresistible Aroma: As these cinnamon rolls bake, your kitchen will be filled with the most incredible, comforting aroma of warm cinnamon, sweet sugar, and fresh-baked bread. It’s truly one of the best parts of the entire baking process and a promise of the deliciousness to come!
Tips for Success and Troubleshooting
Even seasoned bakers encounter challenges, but with a few pointers, you can tackle any issue and ensure your homemade cinnamon rolls are a triumph every time. Don’t be discouraged by minor setbacks; baking is a journey of learning. Here are some common questions and solutions:
- My Dough Isn’t Rising: This is almost always a yeast issue. Ensure your water temperature is correct (105-115°F/40-46°C) – too hot kills it, too cold doesn’t activate it. Also, check the expiration date on your yeast; old yeast is inactive. If you’re unsure about your yeast, “proof” it first: mix it with the warm water and a pinch of sugar; it should get foamy within 5-10 minutes. If it doesn’t, your yeast is likely dead, and you’ll need a new batch.
- Dough is Too Sticky or Dry: The amount of flour can vary slightly depending on factors like humidity, the type of flour, and how accurately you measure. If your dough is too sticky to handle, add a tablespoon of flour at a time until it’s workable but still tacky. If it’s too dry and stiff, add a teaspoon of warm water or milk until it reaches the right consistency. Always err on the side of slightly stickier dough for a softer, more moist roll.
- Rolls Are Dense/Hard: This can be due to several factors: not enough rise time (first or second rise is crucial), over-kneading (which develops too much gluten, making them tough instead of tender), or overbaking (which dries out the moisture). Ensure your dough doubles in size for both rises and keep a close eye on them in the oven to prevent overbaking.
- Filling Oozing Out Excessively: While some caramelization of the filling is expected and delicious, excessive oozing can be reduced by making sure you roll the dough tightly and pinch the seam securely. The cornstarch in our filling recipe also helps significantly to bind the ingredients and create that gooey center instead of a runny mess at the bottom of your pan.
- Make-Ahead Options: Cinnamon rolls can be prepared in advance, making them perfect for special mornings.
- Overnight Rise (Unbaked): After shaping and placing the rolls in the baking dish, cover tightly with plastic wrap and refrigerate overnight (up to 12-18 hours). In the morning, take them out and let them come to room temperature and finish rising for about 60-90 minutes (this step is crucial to activate the chilled yeast) before baking as directed.
- Freezing Unbaked Rolls: Shape the rolls, place them in a greased, freezer-safe baking dish. Cover tightly with plastic wrap and then foil, and freeze for up to 2-3 weeks. When ready to bake, thaw overnight in the refrigerator. Then, let them rise at room temperature for 1-2 hours before baking.
- Freezing Baked Rolls: Bake the rolls as directed, but don’t frost them. Let them cool completely, then wrap individually in plastic wrap and foil. Freeze for up to 1 month. To reheat, warm in the microwave or a warm oven (covered with foil to prevent drying), then frost.
Serving Suggestions and Variations
These classic homemade cinnamon rolls are a treat unto themselves, but there are countless ways to enjoy and customize them, making them even more special for any occasion:
- Serve Warm: For the ultimate, melt-in-your-mouth experience, serve your cinnamon rolls fresh from the oven. Allow them to cool just enough so the frosting doesn’t completely melt and run off, but still gets wonderfully gooey and combines with the warm roll.
- Pairing Perfection: They are divine with a hot cup of freshly brewed coffee, a tall glass of cold milk, or even a celebratory mimosa or sparkling cider for a special brunch. The richness of the rolls pairs beautifully with a contrasting beverage.
- Add-ins for the Filling: Don’t hesitate to experiment with the filling to suit your taste preferences:
- Nuts: Sprinkle finely chopped pecans or walnuts over the cinnamon sugar mixture before rolling for added crunch, texture, and a nutty flavor that complements the cinnamon beautifully.
- Raisins/Dried Cranberries: For a touch of fruity sweetness and chewiness, add a handful of plump raisins or dried cranberries (or a mix of both) to the filling. Soak dried fruit in warm water or rum for a few minutes before adding for extra plumpness.
- Orange Zest: A teaspoon of finely grated orange zest can brighten the flavor of the filling, adding a subtle citrus note that complements the cinnamon beautifully and adds a refreshing aroma.
- Frosting Flavors: While classic cream cheese frosting is king, you could experiment with other delightful toppings:
- Simple Vanilla Glaze: A mix of powdered sugar, milk, and vanilla for a lighter touch.
- Maple Cream Cheese Frosting: Add a tablespoon or two of pure maple syrup to the cream cheese frosting for a rich, autumnal twist.
- Brown Butter Frosting: Brown butter adds a nutty, caramelized depth that is incredibly decadent.
Storage and Reheating
If by some miracle you have leftover cinnamon rolls (a rare occurrence!), storing them properly will ensure they remain delicious and fresh-tasting for as long as possible. Proper storage also allows you to enjoy that homemade goodness days after baking.
- Room Temperature: Frosted cinnamon rolls are best stored in an airtight container at room temperature for up to 2-3 days. The airtight container prevents them from drying out. If your kitchen is particularly warm or humid, or if you prefer a firmer frosting, consider refrigerating them.
- Refrigeration: If refrigerating, store the cinnamon rolls in an airtight container for up to 5 days. While refrigeration helps preserve freshness, be aware that the dough can sometimes dry out slightly or become a bit firmer in the fridge. Allow them to come to room temperature before reheating for best results.
- Reheating for Freshness: The magic of cinnamon rolls is often best when warm. Luckily, they reheat beautifully!
- Microwave: For a quick reheat of an individual roll, place it on a microwave-safe plate and heat for 15-30 seconds on high, or until warm and soft to the touch. This method is excellent for bringing back that gooey texture and warmth quickly.
- Oven: To reheat a larger batch or achieve a crustier exterior, place rolls (covered loosely with aluminum foil to prevent drying) in a preheated oven at 300°F (150°C) for 10-15 minutes, or until warmed through. If the rolls were unfrosted initially, you could warm them uncovered for the last few minutes to crisp up the tops.
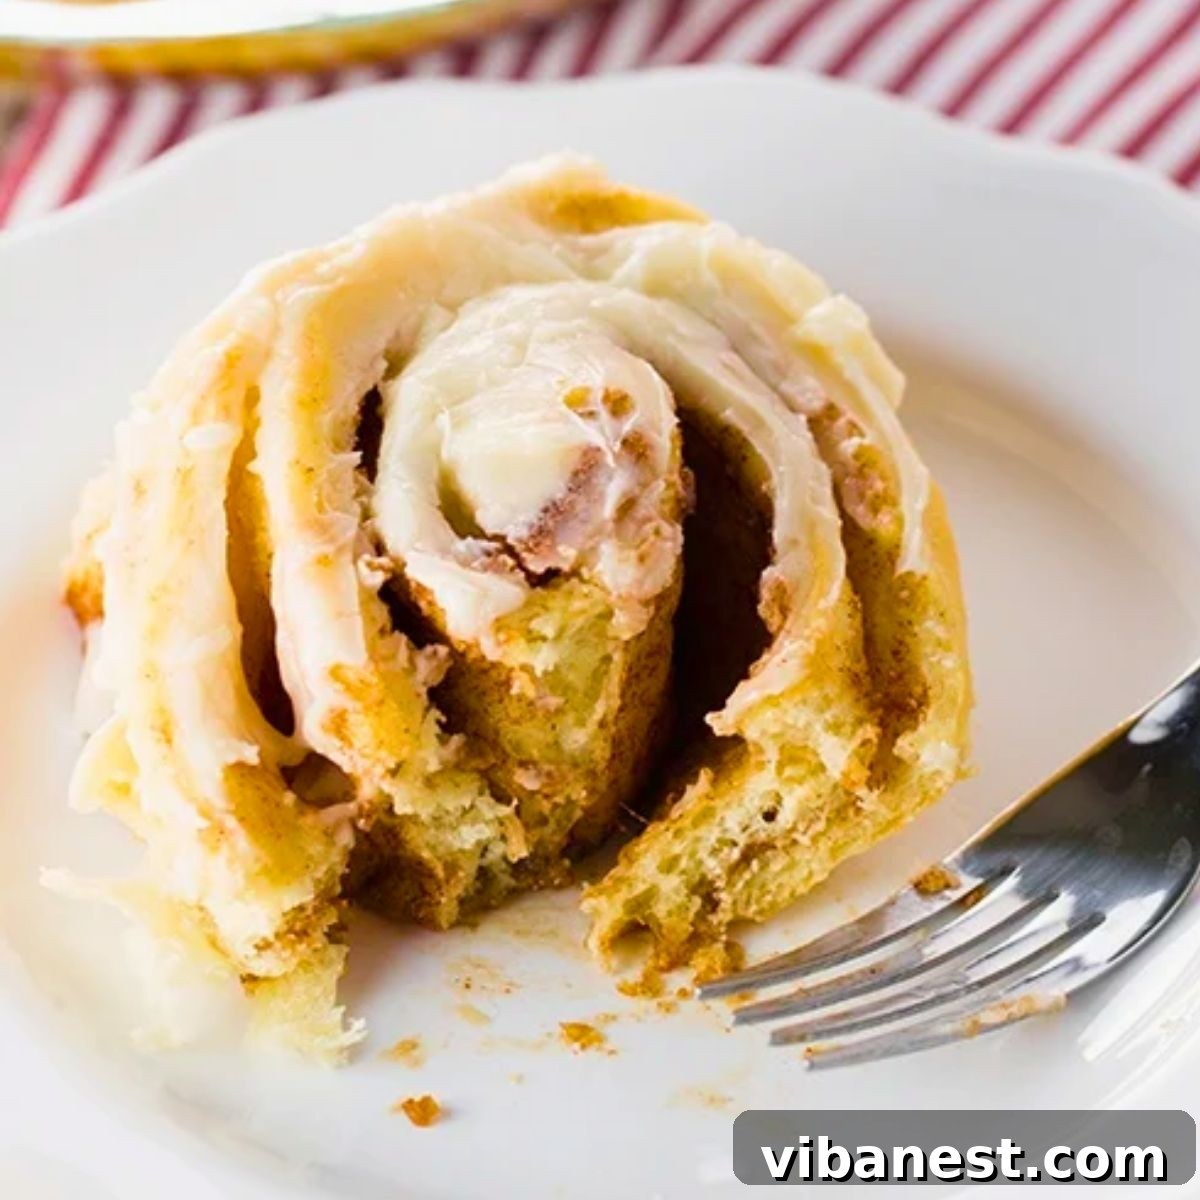
Making cinnamon rolls from scratch is a labor of love, but the reward is truly unmatched. The soft, pillowy dough, the warm, spiced filling, and that dreamy cream cheese frosting combine to create a perfect symphony of flavors and textures. It’s more than just a recipe; it’s an experience that fills your home with warmth, joy, and the most incredible aroma. Whether for a special breakfast, a holiday brunch, or just a comforting treat to brighten your day, these old-fashioned cinnamon rolls are guaranteed to become a cherished favorite in your household. So roll up your sleeves, embrace the process, and prepare to indulge in the best homemade cinnamon rolls you’ve ever tasted. Enjoy every single bite!
Classic Homemade Cinnamon Rolls with Cream Cheese Frosting (Mom’s Recipe)

Pin It
Print Recipe
Soft and perfectly sweet Cinnamon Rolls from Scratch with cream cheese icing. These are the old-fashioned cinnamon rolls my Mom used to make!
30 minutes
21 minutes
3 hours
12 (for 9×13 pan, original was for 56 servings, which is a lot for 12 rolls!)
Ingredients
DOUGH INGREDIENTS
- 2 packages (4 ½ teaspoons) active dry yeast
- ½ cup warm water (105-115°F / 40-46°C)
- 1 tablespoon granulated sugar
- 1 cup scalded milk (heated just before boiling, then cooled to lukewarm)
- ⅓ cup melted shortening (cooled slightly)
- ⅓ cup granulated sugar
- 2 teaspoons salt
- 2 large eggs, beaten
- 5 cups all-purpose or bread flour (approximately, give or take ½ cup)
FILLING INGREDIENTS
- 6 tablespoons unsalted butter, softened
- 1 ½ cups packed light brown sugar
- 2 ½ tablespoons ground cinnamon
- 2 teaspoons cornstarch
FROSTING INGREDIENTS
- 3 ounces cream cheese, softened
- 4 tablespoons unsalted butter, softened
- 1 ½ cups confectioners’ sugar (powdered sugar)
- 1 teaspoon vanilla extract
- Pinch of salt
Instructions
- Activate the Yeast: In the bowl of a stand mixer, combine the active dry yeast, ½ cup warm water, and 1 tablespoon granulated sugar. Stir gently and let it sit for 5-10 minutes until the mixture becomes foamy, indicating the yeast is active.
- Prepare Milk Mixture: In a separate small saucepan, scald the milk (heat until small bubbles form around the edges, do not boil). Remove from heat and let it cool until lukewarm (around 100-110°F / 38-43°C). Stir in the melted shortening, the remaining ⅓ cup granulated sugar, and 2 teaspoons salt.
- Combine Ingredients: Once the milk mixture is lukewarm, add the beaten eggs and the cooled milk mixture to the yeast mixture in the stand mixer. Attach the dough hook. Gradually add the flour, 1 cup at a time, mixing on low speed until the dough starts to come together and pull away from the sides of the bowl. The dough will be sticky. You may need anywhere from 4 ½ to 5 ½ cups of flour depending on humidity and flour type.
- Knead the Dough: Increase the mixer speed to medium-low and knead the dough with the dough hook for about 5-7 minutes, until it is smooth, elastic, and tacky but not overly sticky.
- First Rise: Lightly grease a large bowl. Place the dough in the bowl, turning it once to coat all sides. Cover the bowl tightly with plastic wrap or a clean kitchen towel. Let it rise in a warm, draft-free place for 1 to 2 hours, or until it has doubled in size.
- Prepare for Rolling: Once risen, gently punch down the dough to release the air. Turn it out onto a lightly floured surface and knead it briefly to form a smooth ball.
- Roll Out Dough: Using a rolling pin, roll the dough into a large rectangle, approximately 16 inches by 22 inches in size, ensuring even thickness.
- Spread Butter: Evenly spread the 6 tablespoons of softened butter over the entire surface of the rolled-out dough, leaving a ½-inch border along one of the long edges (this will be the top edge when you start rolling).
- Add Filling: In a small bowl, combine the 1½ cups packed brown sugar, 2½ tablespoons ground cinnamon, and 2 teaspoons cornstarch. Sprinkle this mixture evenly over the buttered dough, gently pressing it in to adhere.
- Roll the Dough: Starting from the long side opposite the ½-inch border, carefully and tightly roll the dough into a firm log. Pinch the seam firmly along the entire length to seal it closed.
- Slice the Rolls: Using a sharp, un-serrated knife or unflavored dental floss, cut the log into 12 even rolls, each approximately 2 inches thick.
- Arrange for Second Rise: Generously grease a 9 x 13-inch baking dish (or two 8-9 inch pie dishes if preferred). Arrange the cut rolls in the prepared pan, leaving a little space between them as they will expand.
- Second Rise: Cover the rolls loosely with a clean kitchen towel or plastic wrap. Let them rise in a warm, draft-free place for another 60 minutes, or until they look noticeably puffy and nearly doubled in size.
- Preheat Oven: While the rolls are completing their second rise, preheat your oven to 350°F (175°C).
- Bake Rolls: Bake for 21-23 minutes, or until the rolls are a beautiful light golden brown on top and cooked through. Be careful not to overbake to keep them moist and tender.
- Prepare Frosting: While the rolls are baking, prepare the frosting: In a medium bowl, beat together the 3 ounces softened cream cheese and 4 tablespoons softened butter with an electric mixer until completely smooth and creamy. Gradually add the 1½ cups confectioners’ sugar, 1 teaspoon vanilla extract, and a pinch of salt. Beat until the frosting is light, fluffy, and easily spreadable.
- Frost and Serve: Once the rolls are out of the oven, allow them to cool in the pan for about 5-10 minutes. Then, generously spread with the prepared cream cheese frosting while they are still warm.
- Serve immediately and enjoy the warm, soft, and utterly delicious homemade cinnamon rolls!
Tried this recipe?
Mention @CenterCutCook and tag #CenterCutCook!