
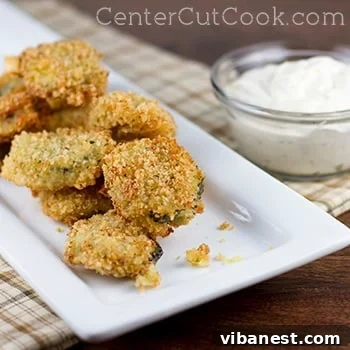
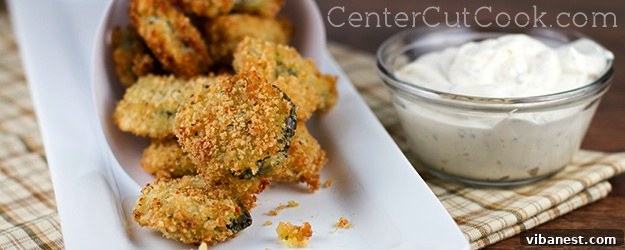
Irresistibly Crispy Fried Pickles: Your New Favorite Snack!
Prepare yourself for an extraordinary culinary revelation: homemade fried pickles. These aren’t just an appetizer; they’re a revelation, a crispy, tangy, and utterly addictive delight that will challenge everything you thought you knew about pickles. Even if you’re not a self-proclaimed pickle fanatic, I guarantee these golden-brown beauties, especially when paired with a creamy, cool homemade ranch dip, will win you over. Forget about mere snacks – these are so good, they might just become the main event!
The Unexpected Dinner Sensation
Confession time: there was a Friday evening not long ago when what started as a simple appetizer morphed into our entire dinner. One bite led to another, and before we knew it, the platter of perfectly fried pickles was nearly empty. The thought of cooking anything else seemed utterly unappealing, almost an insult to the deliciousness we’d just devoured. It’s a testament to their incredible taste and texture that they can single-handedly satisfy a full meal’s craving. I consider myself fortunate to have captured a few photographs before they vanished entirely!
The allure of these fried pickles is truly lasting. My husband still reminisces about them almost daily, often saying, “Man, those fried pickles were really good,” or wishing we had more leftovers. While his enthusiasm is heartwarming, it’s crucial to understand a fundamental truth about fried pickles: they are best enjoyed fresh, just minutes after they’ve emerged from the oil, allowed to cool slightly, and achieved their peak crispness. While we did have a small amount leftover one time, and they were “just okay” the next day, they simply don’t retain that magical, fresh-from-the-fryer crunch. So, for the ultimate experience, plan to serve and devour them immediately.
Beyond the Ordinary: Why Fried Pickles Shine
Many might raise an eyebrow at the concept of “fried pickles,” but I assure you, the process is surprisingly straightforward and far less messy than you might imagine. And let’s be honest, compared to some of the truly outlandish fried creations out there—like deep-fried Twinkies, fried butter, or even deep-fried cupcakes (yes, these culinary oddities genuinely exist, particularly at places like the Iowa State Fair, a mecca for all things fried and on a stick)—fried pickles are practically a gourmet delight. Having lived in Iowa for 4.5 years, I can personally attest to the fair’s inventive fried food culture, and even amidst such competition, fried pickles stand out as a genuinely delicious and accessible treat.
What makes a fried pickle so uniquely appealing? It’s the delightful interplay of textures and flavors. You have the inherent tang and brininess of the dill pickle, which is then enveloped in a light, seasoned batter and a crunchy Panko breading. The hot oil transforms this humble vegetable into a golden-brown, crispy exterior that yields to a tender, slightly warm, and still-tangy interior. The cooling, creamy ranch dip acts as the perfect counterpoint, adding a layer of richness that balances the pickle’s acidity and the fry’s saltiness. It’s a symphony of savory, tangy, and crunchy that makes each bite utterly satisfying.
Mastering the Art of Homemade Fried Pickles
Creating perfect fried pickles at home is an achievable feat, even for novice cooks. The key lies in understanding a few critical steps that ensure maximum crispness and flavor. From selecting the right pickle to maintaining optimal oil temperature, each detail contributes to the final, mouth-watering result. Let’s dive into the specifics, turning skeptics into enthusiasts one crispy bite at a time.
Choosing Your Pickles Wisely
The foundation of any great fried pickle starts with the pickle itself. We recommend using kosher dill burger sliced pickles. These are typically consistent in thickness, which ensures even cooking and prevents some slices from becoming soggy while others are still raw. The burger slices also offer a perfect surface area for the batter and breading to adhere to, creating that satisfying crunch. While spears can also be used, slices generally yield a better texture and are easier to manage for an appetizer.
The Crucial Drying Step
One of the most vital steps, often overlooked, is thoroughly drying your pickle slices. Excess moisture is the enemy of crispiness and proper batter adhesion. After draining the pickle jar, arrange your slices in a single layer on a cookie sheet lined with paper towels. Gently pat them dry with more paper towels. You want them as dry as possible, almost tacky to the touch. This ensures the batter clings effectively and results in a truly crispy exterior, preventing a greasy or soggy outcome.
Crafting the Perfect Batter and Breading
Our batter is a carefully balanced blend designed for flavor and crispiness. The pickle juice adds an extra layer of tangy brine, enhancing the pickle’s natural flavor. Ranch dressing provides a creamy richness and a familiar savory note. A touch of Tabasco sauce introduces a subtle kick, elevating the flavor profile without making it overtly spicy. The egg acts as a binder, while a combination of all-purpose flour and cornstarch creates a light, crisp coating that cooks up beautifully golden. For the breading, Panko breadcrumbs are non-negotiable. Their irregular, flaky texture creates an unparalleled crispiness that regular breadcrumbs simply cannot achieve. Infusing the Panko with a ranch seasoning packet amplifies the savory, herbaceous flavor, perfectly complementing the pickles.
Frying to Golden Perfection
The frying process itself is quick and rewarding. Maintaining the correct oil temperature—around 360-375 degrees Fahrenheit—is crucial. Oil that isn’t hot enough will result in greasy, soggy pickles, while oil that’s too hot will burn the breading before the pickle inside has warmed through. If you don’t have a thermometer, a small drop of batter should sizzle immediately and float to the surface. Fry in small batches to avoid overcrowding the skillet, which can lower the oil temperature and lead to uneven cooking. Each batch should take about 3 minutes, or until both sides are beautifully golden brown and crispy. Once cooked, transfer them to a wire rack set over paper towels to drain any excess oil. This step helps maintain their crispness.
INGREDIENTS
- Vegetable or canola oil, for frying
- 20 ounces (approximately 1 standard jar) of kosher dill burger sliced pickles
- 3/4 cup reserved pickle juice (from the jar)
- 1/2 cup ranch dressing (store-bought or homemade)
- 1/2 teaspoon Tabasco sauce (or your favorite hot sauce, adjust to taste)
- 1 large egg
- 1 cup all-purpose flour
- 1/4 cup cornstarch
- 2 cups Panko bread crumbs
- 1 packet (1 ounce) ranch seasoning mix
- Classic Ranch Dip for serving
DIRECTIONS
- Begin by preparing your pickles: Open the jar of pickles and carefully reserve 3/4 cup of the pickle juice; set this aside for the batter.
- Drain any remaining juice from the pickles. Arrange the pickle slices in a single layer on a baking sheet lined with several layers of paper towels. Using additional paper towels, gently pat the tops of the pickles until they are as dry as possible. This step is critical for ensuring the batter adheres properly and the pickles achieve maximum crispiness.
- In a large mixing bowl, whisk together the reserved pickle juice, ranch dressing, Tabasco sauce, egg, all-purpose flour, and cornstarch. Continue whisking until the mixture is smooth and well combined, with no lumps. This will form your wet batter.
- In a separate shallow dish (a pie plate or a shallow cake pan works perfectly), combine the Panko bread crumbs and the ranch seasoning packet. Stir them together until the seasoning is evenly distributed throughout the breadcrumbs. This will be your dry breading mixture.
- Dip each thoroughly dried pickle slice into the wet batter, allowing any excess batter to drip off. Immediately transfer the battered pickle to the Panko mixture. Press gently to ensure the breadcrumbs completely coat the pickle. Place the coated pickle on a clean plate or baking sheet and continue this process with all remaining pickle slices.
- Prepare for frying: Pour 1 to 1.5 inches of vegetable or canola oil into a large, heavy-bottomed skillet or Dutch oven. Heat the oil over medium-high heat until it reaches approximately 360-375 degrees Fahrenheit. If you don’t have a thermometer, you can test the oil by dropping a tiny pinch of Panko; it should sizzle immediately and float to the top.
- Carefully place a few coated pickles into the hot oil, ensuring not to overcrowd the skillet. Fry the pickles for about 2-3 minutes per side, or until they are a beautiful golden brown and crispy.
- Once cooked, use a slotted spoon or tongs to remove the fried pickles from the oil. Immediately transfer them to a plate lined with paper towels to drain any excess oil.
- Continue cooking the remaining pickles in batches, ensuring the oil temperature remains consistent between batches.
- Serve your hot, crispy fried pickles immediately with a generous side of homemade ranch dip for the ultimate flavor experience. Enjoy!
Tips for the Ultimate Fried Pickle Experience
- Don’t Rush the Drying: This cannot be stressed enough. Dry pickles are crispy pickles. Take your time with this step.
- Monitor Oil Temperature: An oil thermometer is your best friend here. Consistent temperature ensures even cooking and prevents greasiness.
- Batch Fry: Overcrowding the pan lowers the oil temperature, leading to soggy results. Fry in small batches to maintain crispness.
- Serve Immediately: Fried pickles are a dish best served hot and fresh. Their crispy texture diminishes quickly as they cool.
- Homemade Ranch: While store-bought works, a homemade ranch dip truly elevates this appetizer. The fresh herbs and creamy base are unbeatable.
- Consider a Wire Rack: Instead of just paper towels, draining on a wire rack allows air circulation around the pickles, further preventing sogginess.
Variations and Customizations
Once you’ve mastered the classic fried pickle, don’t hesitate to experiment! For a spicier kick, add a pinch of cayenne pepper or a dash of your favorite hot sauce directly into the Panko breading mixture. If you enjoy a different flavor profile, try bread and butter pickles for a sweet and savory contrast. While deep frying yields the best results, you can also explore healthier alternatives like air frying or oven baking for a less indulgent version, though the texture won’t be quite the same. For dipping, consider other sauces like spicy remoulade, honey mustard, or a simple garlic aioli.
Fried pickles are more than just a snack; they are a delightful testament to how simple ingredients can be transformed into something truly spectacular. Whether you’re hosting a game day party, looking for a unique appetizer, or simply craving an unforgettable treat, these crispy, tangy bites are guaranteed to be a crowd-pleaser. So, gather your ingredients, follow these steps, and prepare to embark on a delicious journey that will leave everyone asking for more.
Recipe adapted from
Cuisine at Home April, ’12