
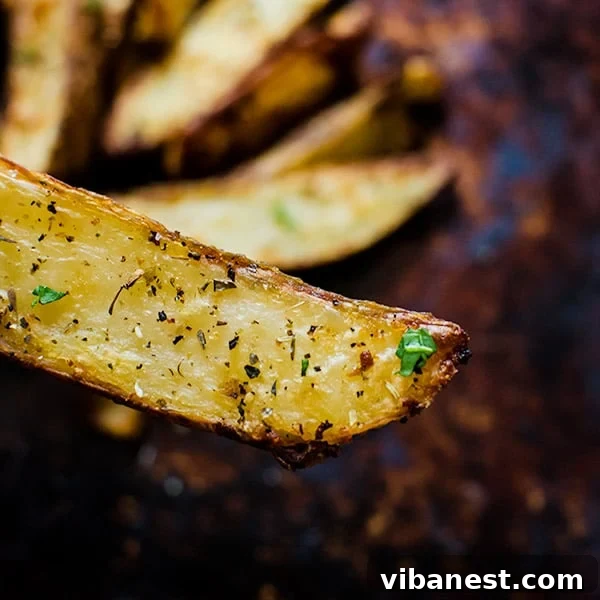

The Ultimate Guide to Crispy Homemade Garlic Potato Wedges
There’s an undeniable charm to the humble potato wedge. It stands as a culinary testament to simple ingredients transformed into something extraordinary. For many, including myself, the ideal potato wedge strikes a delicate balance: a golden-brown, irresistibly crispy exterior that gives way to a light, fluffy, and tender interior. This perfect texture is often more attainable with wedges than with their thinner fry counterparts, making them a fantastic choice for home cooks.
While plain potato wedges are delightful, infusing them with the robust flavor of garlic elevates them to an entirely new level. Garlic has a magical way of enhancing virtually any dish, and potato wedges are no exception. Imagine biting into a perfectly seasoned, garlicky wedge – it’s a sensory experience that’s hard to beat.
If you’ve ever dreamt of crafting the best garlic potato wedges your neighborhood has ever tasted, you’ve come to the right place. I’m excited to share a collection of essential tips and a foolproof recipe that will guide you to potato wedge nirvana.

Secrets to Achieving Potato Wedge Perfection
Crafting the perfect batch of crispy garlic potato wedges isn’t complicated, but it does involve a few critical steps that make all the difference. Mastering these techniques will ensure your wedges are always golden, savory, and perfectly textured.
1. The Right Potato Makes All the Difference
The foundation of any great potato dish begins with selecting the correct variety. For potato wedges, my top recommendation is undoubtedly the humble baking potato, such as a Russet. These potatoes are known for their high starch content, which is precisely what contributes to that desirable fluffy interior once cooked. Their texture acts as a magnificent canvas, readily absorbing and showcasing the flavors of garlic and other seasonings.
Occasionally, I might venture into using Yukon Gold potatoes, primarily for their inherently buttery flavor and slightly creamier texture. However, it’s worth noting that achieving the same level of crispiness with Yukon Golds can be a bit trickier due to their lower starch and higher moisture content. For consistent, show-stopping crispiness and an airy interior, stick with baking potatoes.
2. The Crucial Step: Parboiling for Texture
One of the most vital secrets to superior potato wedges lies in a technique called parboiling. This involves partially boiling the potato wedges before baking them. The benefits are twofold: first, it kickstarts the cooking process, ensuring the interior becomes tender and fluffy. Second, and perhaps more importantly for crispiness, it softens the exterior just enough to create a slightly rough, starchy surface. This textured surface is what will eventually crisp up beautifully in the oven, forming that coveted golden crust.
The ideal parboiling time ranges from 4 to 7 minutes, depending on the thickness of your wedges. You want them to be tender but still quite firm – not soft or mushy. A good test is to gently pierce one with a fork; it should offer slight resistance. Be vigilant, as over-boiling can cause the skins to start peeling off, leading to a less appealing “naked” wedge and a mushy texture. While you could still bake the detached skins for a crispy snack, it defeats the purpose of perfectly intact wedges. Once parboiled, it’s essential to cool them enough to handle and, most importantly, gently but thoroughly pat them as dry as possible. Any excess moisture will hinder crisping.
3. The Art of Seasoning and Coating
Even distribution of oil and spices is paramount for maximum flavor in every bite. The simplest and most effective method is to use a large gallon-sized bag. Place your chosen oil, garlic powder, Italian seasoning, salt, and pepper into the bag. Then, add your dried potato wedges in batches, ensuring not to overcrowd the bag. Seal it, and give it a good shake. This ensures every nook and cranny of each wedge is evenly coated, leading to consistent flavor and a beautiful golden crust.
When it comes to oil, extra virgin olive oil offers a wonderful flavor, but you can also use avocado oil for a higher smoke point. Garlic powder is preferred over fresh minced garlic for this step as it distributes more evenly and won’t burn as easily in the high heat of the oven. However, a sprinkle of fresh parsley or even finely minced fresh garlic added *after* baking can provide a wonderful aromatic finish.
4. Baking to Golden Perfection
With your wedges perfectly coated, the final step is baking. Preheat your oven to a robust 400 degrees Fahrenheit (200 degrees Celsius). A high temperature is key to achieving that desirable crispiness. Line two baking sheets with parchment paper to prevent sticking and simplify cleanup. Arrange the seasoned wedges on the baking sheets in a single layer, ensuring there’s ample space between each piece. Overcrowding the pan will cause the wedges to steam instead of roast, resulting in a soggy, rather than crispy, outcome.
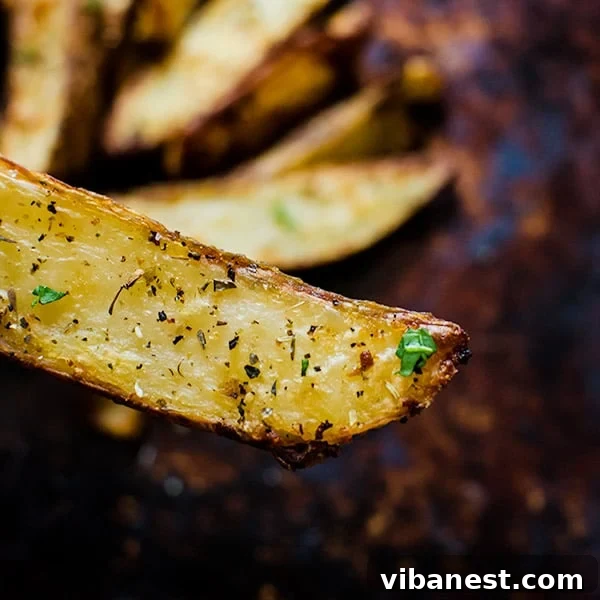
Bake for 40 to 50 minutes, or until the wedges are beautifully golden brown and crispy. Remember to flip them halfway through the baking time to ensure even browning and crispiness on all sides. The aroma filling your kitchen will be a delicious indicator that you’re on the path to garlic potato wedge nirvana.
INGREDIENTS
- 4 large baking potatoes (Russet preferred)
- 2 tablespoons extra virgin olive oil
- 2 teaspoons dried garlic powder
- 1 1/2 teaspoons Italian Seasoning mix
- 1 teaspoon sea salt (or to taste)
- 1/2 teaspoon black pepper (freshly ground, or to taste)
- Optional: Fresh parsley, chopped, for garnish
DIRECTIONS
- Begin by thoroughly washing the outside of your potatoes, scrubbing away any dirt or imperfections. Bring a large pot of heavily salted water to a rolling boil. Preheat your oven to 400°F (200°C). Line two large baking sheets with parchment paper.
- Carefully cut each potato into wedges. A simple method is to first cut the potato in half lengthwise, then cut each half into halves again lengthwise. Repeat this process one more time for each piece, aiming for 8-12 wedges per potato, depending on size. As you cut, place the wedges into a bowl of cold water to prevent browning.
- Add the cut potato wedges to the boiling salted water and parboil for 4 – 7 minutes. The goal is for them to be slightly tender but still firm to the touch. If you notice the potato skins beginning to peel, remove them from the heat immediately. Drain the potatoes well and allow them to cool slightly until they can be handled comfortably. Gently pat them as dry as possible with a clean kitchen towel or paper towels.
- In a large gallon-sized plastic bag, combine the extra virgin olive oil, garlic powder, Italian seasoning, salt, and pepper. Add the dried potato wedges to the bag in batches, if necessary, to avoid overcrowding. Seal the bag securely and shake vigorously until all the wedges are evenly coated with the oil and spice mixture.
- Arrange the coated potato wedges in a single layer on the prepared baking sheets, ensuring there is ample space between each wedge. This critical step promotes even cooking and crispiness.
- Bake for 40 – 50 minutes, or until the wedges are beautifully golden brown and delightfully crispy. Make sure to turn the wedges halfway through the baking process (around the 20-25 minute mark) to ensure even browning on all sides.
- Once baked to perfection, remove the wedges from the oven. Serve immediately, perhaps garnished with fresh chopped parsley if desired, and pair with your favorite dipping sauces.
Why Choose Homemade Garlic Potato Wedges?
Beyond the incredible flavor and texture, there are numerous reasons to embrace homemade potato wedges. For starters, you have complete control over the ingredients, allowing you to avoid artificial additives, excessive sodium, or unhealthy oils often found in pre-packaged or fast-food versions. They are also incredibly cost-effective, turning a few inexpensive potatoes into a satisfying meal or side dish.
Making them at home also means you can customize the flavor profile. Want a little heat? Add some cayenne pepper or smoked paprika. Prefer a different herb? Rosemary or thyme would be excellent additions. The possibilities are endless, making each batch a unique culinary adventure.
Serving Suggestions & Variations
These crispy garlic potato wedges are incredibly versatile. They make an ideal side dish for a wide array of meals, from juicy burgers and grilled steaks to roasted chicken or fish. They also shine as a standout appetizer, perfect for game nights or casual gatherings.
Consider pairing them with a variety of dipping sauces: classic ketchup, a zesty aioli, creamy ranch, spicy sriracha mayo, or even a dollop of sour cream and chives. For a different twist, sprinkle some grated Parmesan cheese over them during the last 10 minutes of baking for cheesy garlic wedges. Or, for an extra aromatic kick, finely mince a clove of fresh garlic and toss it with the hot wedges immediately after they come out of the oven.
Final Thoughts on Your Crispy Wedge Journey
You see, just a few thoughtful steps can transform simple potatoes into a gourmet experience. From selecting the right potato to the meticulous parboiling and careful baking, each stage contributes to the final masterpiece. The reward is a batch of garlic potato wedges that are not only irresistibly crispy on the outside and wonderfully fluffy on the inside but also bursting with savory garlic flavor.
So, gather your ingredients, follow these simple tips, and prepare to embark on a delicious culinary journey. Your friends and family will thank you for these homemade, perfectly seasoned, and incredibly satisfying garlic potato wedges. Get ready to enjoy every single bite!