
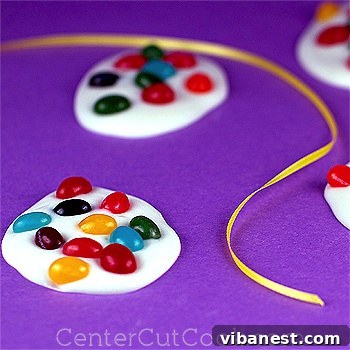
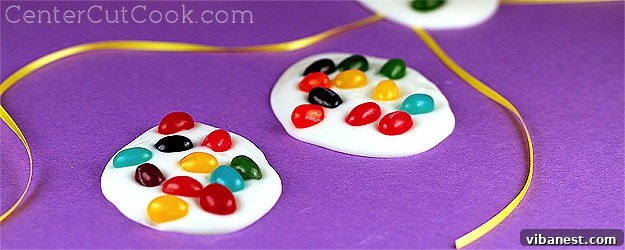
As Easter draws near, the hunt for delightful and easy-to-make treats begins. We all desire something festive, adorable, and, most importantly, simple enough to whip up without a fuss during the bustling holiday season. If you’re searching for that perfect confection to fill Easter baskets, impress guests, or simply enjoy with your family, look no further than this incredibly charming and straightforward Jelly Bean Bark. Inspired by a clever idea from a seasonal cookbook, this recipe has become our go-to for its minimal effort and maximum visual appeal. Imagine, just two ingredients and roughly 20 minutes of your time can yield a batch of these vibrant, egg-shaped delights!
Why Jelly Bean Bark is Your Ultimate Easter Treat
In a world full of complex baking projects, the beauty of Jelly Bean Bark lies in its remarkable simplicity. This isn’t just another dessert; it’s a celebration of ease and joy, making it ideal for a variety of reasons:
- Unbeatable Simplicity: With only two core ingredients—white chocolate and jelly beans—it’s practically foolproof. You don’t need advanced baking skills or exotic tools to achieve stunning results.
- Kid-Friendly Fun: This recipe is a fantastic opportunity to get children involved in the kitchen. They’ll love sprinkling the colorful jelly beans and watching the bark come to life. It’s a sweet activity that yields an even sweeter reward!
- Visually Stunning: The bright, varied colors of jelly beans against a pristine white chocolate base create an eye-catching contrast that perfectly captures the lively spirit of spring and Easter. Each piece is a little work of art.
- Quick to Prepare: From melting the chocolate to setting the bark, the entire process takes less than half an hour. This means more time enjoying the holiday and less time laboring in the kitchen.
- Versatile & Customizable: While perfect for Easter, this bark can be adapted for any occasion by simply changing the color scheme of the jelly beans or using different shaped cutters once set.
- Perfect for Gifting: Homemade Jelly Bean Bark makes for thoughtful and unique Easter basket fillers, hostess gifts, or party favors. Package them in clear bags with a ribbon for a professional touch.
Exploring the World of Jelly Beans: A Sweet Dilemma
It’s been quite some time since jelly beans were a staple in many households, often overshadowed by newer candy innovations. However, a recent stroll down the candy aisle reveals a glorious resurgence and an astonishing array of jelly bean options available today. Gone are the days of just a handful of standard flavors; now, the choices are seemingly endless, offering a delightful challenge for any sweet tooth.
You’ll find the classic, iconic Jelly Belly beans, renowned for their intense, true-to-life flavors. But the innovation doesn’t stop there. Brands like Jolly Rancher and Starburst have joined the jelly bean game, transforming their signature fruit flavors into chewy, bean-shaped treats. Imagine the tangy burst of a Jolly Rancher or the juicy sweetness of a Starburst, all in a tiny jelly bean! What’s particularly exciting for fans is the availability of bags dedicated exclusively to specific colors and flavors, like the beloved red and pink Starburst jelly beans – a personal favorite of many. While the allure of a monochromatic bark made solely with these delectable red and pink beauties is strong, the vibrant mosaic created by a mix of all different colors truly enhances the festive appeal of this Easter bark. Selecting your jelly beans can be an adventure in itself, allowing you to tailor the flavor profile and visual impact of your bark to perfection.
The Art of the Base: White Chocolate vs. Almond Bark
The foundation of any great bark is its chocolate base, and for this recipe, white chocolate or vanilla-flavored almond bark are your ideal choices. While both provide a beautiful white canvas for the colorful jelly beans, understanding their subtle differences can help you achieve the best results.
White Chocolate: True white chocolate contains cocoa butter, sugar, and milk solids. When melted correctly, it offers a creamy, luxurious texture and a rich, sweet flavor. However, white chocolate can be a bit finicky; it’s prone to seizing if overheated or if even a tiny bit of water gets into it. Melting it gently, either in a double boiler or very carefully in a microwave at short intervals, is key to a smooth, pourable consistency.
Vanilla-Flavored Almond Bark: Often called “candy coating” or “confectionery coating,” almond bark is a product made from vegetable fats (like palm kernel oil) instead of cocoa butter. It’s designed to melt smoothly and set firmly, making it incredibly easy to work with for candy making. It’s less prone to seizing than white chocolate and often produces a slightly glossier finish. While it may lack the complex flavor notes of high-quality white chocolate, its ease of use makes it a fantastic option, especially for beginners or when working with children.
Regardless of your choice, ensuring your chocolate is melted to a smooth, consistent, lump-free state is crucial. Avoid overheating at all costs, as scorched chocolate can become grainy and unusable. Low and slow is the mantra for perfect melting.
Crafting Your Easter Egg Bark: A Detailed How-To
Making Jelly Bean Bark is an enjoyable process, and a few careful steps can ensure your creation is as perfect as it is delicious.
Essential Equipment:
- Baking sheet
- Parchment paper (or silicone mat)
- Microwave-safe bowl or double boiler
- Spatula or spoon for stirring
- Squeeze bottle (optional, but highly recommended for precise shaping)
- Extra spoon for smoothing (if not using a squeeze bottle)
Step-by-Step Directions for Perfect Bark:
- Prepare Your Workspace: Lay a sheet of parchment paper or a silicone baking mat onto a baking sheet. This ensures your bark won’t stick and will be easy to remove once set.
- Melt the Chocolate: Carefully melt your white chocolate or almond bark. If using a microwave, heat in 30-second intervals, stirring thoroughly after each, until smooth. Be patient and avoid the temptation to blast it with high heat, which can lead to scorching or seizing. If using a double boiler, place a heatproof bowl over a saucepan of simmering water (ensure the bowl doesn’t touch the water), stirring until melted and smooth.
- Achieve the Perfect Consistency: Once melted, the chocolate should be silky smooth and pourable. If it’s too thick, it might be slightly overheated or the wrong type of chocolate. If it’s too thin, it might not set correctly. The ideal consistency will allow you to easily shape it.
- Shape the Eggs:
- Using a Squeeze Bottle (Recommended): Carefully pour the melted chocolate into a clean, dry squeeze bottle. This tool offers incredible control, allowing you to easily squeeze out egg shapes onto the parchment paper. Aim for pieces approximately 1/4 inch thick – thick enough to hold toppings but thin enough to be easily breakable.
- Using a Spoon: If you don’t have a squeeze bottle, a spoon works perfectly fine. Simply scoop a dollop of chocolate onto the parchment paper and gently spread it with the back of the spoon into an egg shape. You can use the tip of the spoon to refine the edges and smooth the surface.
- Adorn with Jelly Beans: This is the crucial step for adhesion! Immediately after shaping each chocolate egg, liberally sprinkle jelly beans on top. The chocolate needs to still be wet and warm for the jelly beans to adhere properly. Gently press each jelly bean into the chocolate to ensure it’s securely embedded and won’t fall off once the bark is set. Don’t press too hard, or you might push them completely through the thin bark.
- Allow to Set: Once all your chocolate eggs are topped with jelly beans, allow them to set completely. This can be done at room temperature for about 10-15 minutes, or you can speed up the process by placing the baking sheet in the refrigerator for about 5-10 minutes. The bark is ready when it is firm to the touch and easily peels off the parchment paper.
Tips for Perfection and Creative Variations
Elevate your Jelly Bean Bark with these expert tips and imaginative twists:
- Storage Savvy: Store your finished bark in an airtight container at room temperature for up to two weeks, or in the refrigerator if your home is particularly warm. Avoid direct sunlight, which can melt the chocolate.
- Troubleshooting Seized Chocolate: If your white chocolate seizes (becomes thick, lumpy, and grainy) due to overheating or water, sometimes adding a teaspoon of vegetable shortening or coconut oil and stirring vigorously can rescue it.
- Uniform Thickness: Strive for a consistent 1/4-inch thickness for all your bark pieces. This ensures even setting and a pleasant texture when eaten. Too thin, and it might be too fragile; too thick, and it could be overly chewy.
- Beyond Easter Eggs: Don’t limit yourself to egg shapes! You can make this bark in any shape – use cookie cutters to press shapes into partially set bark, or simply spread the chocolate thinly over the entire baking sheet and break it into irregular pieces once set.
- Flavorful Additions: Consider adding a few drops of food-grade essential oils or extracts (like lemon, orange, or even peppermint) to your melted white chocolate for an extra layer of flavor.
- Topping Transformations: While jelly beans are central, feel free to experiment with other festive toppings! Sprinkles, mini chocolate chips, chopped nuts, other small candies, or even edible glitter can add different textures and visual interest.
- Themed Bark: Change up the jelly bean colors and shapes to suit other holidays. Red and green for Christmas, orange and black for Halloween, or pastels for spring – the possibilities are endless!
INGREDIENTS
- 1 bag (approx. 14-16 oz) assorted jelly beans
- 1 package (20-24 oz) white chocolate melting wafers or vanilla flavored almond bark
DIRECTIONS
- Line a baking sheet with parchment paper or a silicone baking mat.
- Melt the white chocolate or almond bark according to package directions. For best results, use a double boiler or microwave in 30-second intervals, stirring well after each, until completely smooth and free of lumps. Be careful not to overheat to prevent seizing.
- Once melted, carefully pour the chocolate into a squeeze bottle (highly recommended for shaping) or use a spoon.
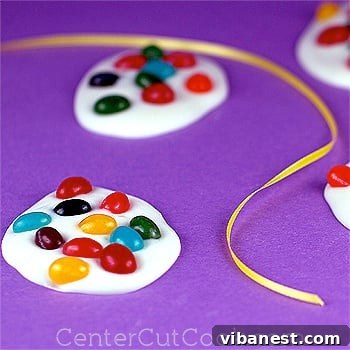
- On the prepared baking sheet, squeeze or spoon out egg shapes, ensuring each piece is about 1/4 inch thick. Use the back of a spoon to gently smooth out the chocolate if necessary.
- Immediately after forming each egg shape, generously sprinkle the jelly beans on top of the still-wet chocolate. Gently press each jelly bean into the chocolate to ensure it adheres well.
- Allow the chocolate bark to set completely at room temperature for 10-15 minutes, or refrigerate for 5-10 minutes to speed up the process, before serving or storing.
Beyond the Bark: Crafting Your Complete Easter Feast
While these delightful Jelly Bean Bark treats are sure to be a highlight, Easter is also a time for a magnificent main course and accompanying sides. If you’re looking to create a memorable holiday meal, consider stepping away from the traditional ham and exploring other equally impressive options. For a truly aromatic and tender centerpiece, we highly recommend this recipe for Roasted Chicken with Lemon and Garlic. It’s an absolutely delicious dish that brings bright, fresh flavors to your table, perfect for a special occasion and surprisingly simple to prepare. Pair it with seasonal vegetables, a fresh salad, and perhaps some fluffy mashed potatoes, and you’ll have a feast that delights every palate. Creating a balanced meal with both savory and sweet elements ensures a truly satisfying Easter celebration.
Embrace the Sweet Simplicity this Easter
This Easter, let the joy of creation be as simple as it is sweet. Jelly Bean Bark offers an unparalleled blend of ease, festive charm, and deliciousness, making it an essential addition to your holiday repertoire. Whether you’re a seasoned baker or a kitchen novice, this recipe is designed for success, bringing bright colors and smiles to everyone who tries it. So gather your ingredients, enlist your little helpers, and embark on this delightful culinary adventure. Happy Easter, and happy barking!
Recipe adapted from
Costco’s 2002 Cookbook