
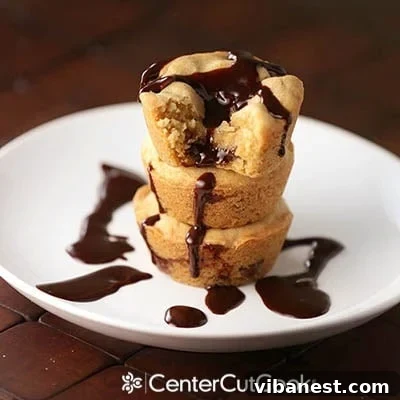
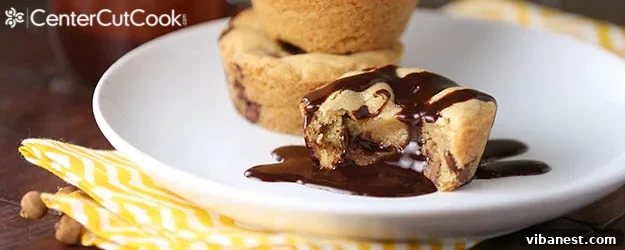
Prepare yourself for a dessert experience that transcends the ordinary: Chocolate Chip Lava Cookies. Imagine sinking your teeth into a perfectly baked, golden-edged chocolate chip cookie, only to discover a warm, rich river of molten fudge oozing from its core. This isn’t just a cookie; it’s a revelation, a gourmet delight that marries the comforting familiarity of a classic treat with the luxurious surprise of a molten center. Paired with a frosty glass of milk, these lava cookies are not merely dessert; they are pure, unadulterated bliss, promising an unforgettable indulgence with every bite.
For those who adore the simple pleasure of a warm chocolate chip cookie but crave an elevated experience, these fudge-filled masterpieces are an absolute dream come true. The concept of a cookie generously oozing with homemade hot fudge might sound like something from a gourmet bakery, but the exciting news is that these incredible molten chocolate cookies are surprisingly simple to create in your own kitchen. Forget complicated techniques; we’re about to unlock the secret to crafting the most irresistible lava cookies you’ve ever tasted, designed to impress and satisfy even the most discerning sweet tooth.
The Inspiration Behind Our Molten Masterpiece
My first encounter with the magic of Chocolate Chip Lava Cookies happened at a restaurant, specifically Red Lobster, and it was love at first sight—or rather, first bite! The sheer delight of that unexpected molten center captivated me completely. I knew instantly that I had to bring that extraordinary experience home and perfect my own version. My goal was to create a recipe that captures the same restaurant-quality indulgence but is accessible and enjoyable for any home baker. This journey led to this perfectly crafted recipe, ensuring you can recreate that sensational “lava” effect whenever a craving strikes.
Crafting the Perfect Cookie Foundation
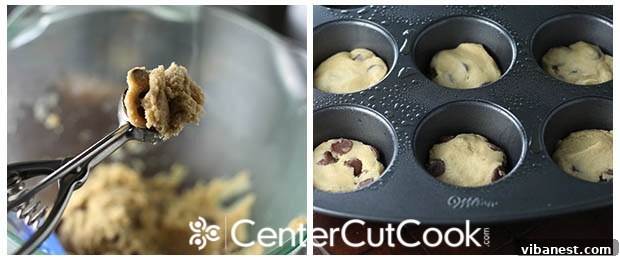
The journey to creating these spectacular molten chocolate chip cookies begins with a truly great cookie dough. While you’ve likely whipped up batches of chocolate chip cookies countless times, the base for these lava cookies is crucial for success. We’ll start by preparing a classic, reliable chocolate chip cookie dough. The key here is not to overmix, which can lead to tough cookies; instead, mix until just combined, ensuring a tender, chewy texture that complements the gooey fudge center beautifully.
Next, we prepare our baking vessel: a standard muffin tin. Lightly spraying it with non-stick cooking spray is essential to ensure easy removal later. For perfectly uniform cookies, a 1-tablespoon cookie scoop is your best friend. It helps measure consistent portions, which is vital for both the bottom and top layers of our lava cookies, leading to a professional-looking and evenly baked result every time. Take a generous scoop of dough and gently flatten it into the bottom of each muffin cup. For your initial batch, aim to make about 10 cookies. This allows room for expansion and ensures you have enough dough for both layers. If you have any extra dough, don’t worry – you can always make additional cookies at the very end.
The Heart of the Lava Cookie: Hot Fudge
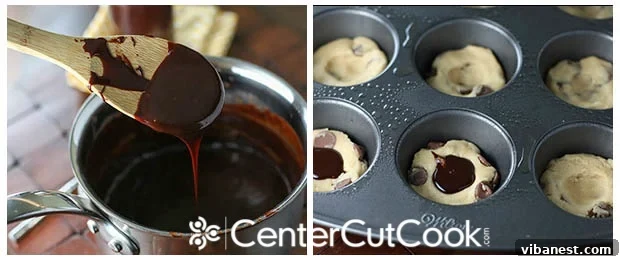
Now, for the star of the show: the rich, flowing hot fudge! You have two excellent options here. You can whip up a batch of Easy Homemade Hot Fudge – a recipe that comes together in about 10 minutes and offers unparalleled flavor and richness. Alternatively, a high-quality store-bought hot fudge works wonderfully for convenience. The trick is to ensure your fudge has cooled slightly and begun to firm up; this makes it much easier to handle and pipe without creating a sticky mess. If it’s too warm, it will be too runny; if it’s too cold, it will be too thick. Aim for a consistency that is spreadable but holds its shape.
Once your fudge is at the ideal temperature, it’s time to create a cozy nest for it within each cookie. Using your thumb, gently press a small indentation into the center of each flattened cookie dough disc in the muffin tin. This creates a perfect pocket for the molten core. To fill these pockets with maximum neatness and control, I highly recommend transferring the cooled hot fudge into a ziplock bag. Snip off a small corner of the bag, and pipe approximately 1/2 to 1 tablespoon of hot fudge into the center of each cookie dough indentation. This piping method is invaluable for keeping your workspace clean and ensuring each lava cookie has a perfectly contained fudge center.

Sealing the Molten Core: The Top Layer
With the delicious hot fudge nestled securely within, it’s time to complete our chocolate chip lava cookies by creating the top layer. Again, grab that trusty 1-tablespoon cookie scoop to measure out another heaping portion of cookie dough for each cookie. Flatten this dough disc just as you did the bottom layer. Carefully place this flattened dough on top of the fudge-filled base, ensuring it completely covers the hot fudge. Gently use your fingertips to press the edges of the top dough layer onto the bottom layer, sealing the fudge inside. Be gentle but firm enough to ensure there are no gaps where the fudge could escape during baking.
This sealing step is critical for preventing any molten fudge from oozing out prematurely while baking, guaranteeing that glorious “lava” effect only when you’re ready to serve. Once you’ve completed all 10 cookies, check your remaining cookie dough. If you have any extra, feel free to prepare additional lava cookies following the same process. I often find I get 11 or even 12 cookies from a single batch of dough, making this recipe wonderfully generous. Starting with 10 initially just ensures you have enough dough for the primary batch.
Baking to Golden Perfection
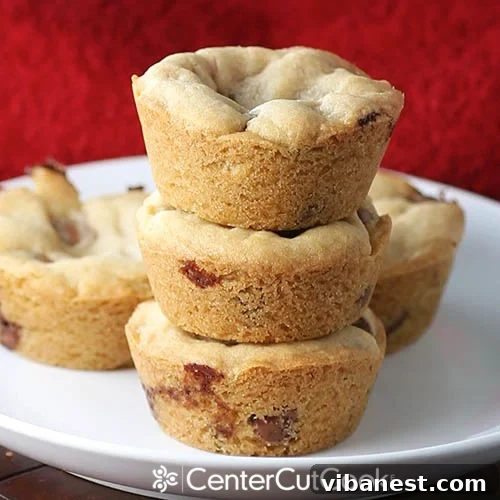
Now, the moment of anticipation! Pop your filled muffin tin into a pre-heated oven set to 350 degrees Fahrenheit (175°C) and bake for approximately 15-20 minutes. Keep a watchful eye on them. You’ll know these delightful chocolate chip lava cookies are perfectly baked when their edges turn a beautiful golden brown and the centers appear set but still slightly soft. Overbaking can lead to a dry cookie and less molten fudge, so err on the side of slightly underbaked for maximum gooeyness. A quick tip: run a knife gently around the edge of each cookie immediately after removing them from the oven. This helps loosen any potential sticking before they fully cool and set, making removal much easier later on.
The Art of Cooling and Reheating for the Ultimate Lava Effect
Once your beautiful lava cookies emerge from the oven, resist the urge to immediately remove them from the muffin tin! This step is critical for success. You absolutely MUST allow them to cool completely in the pan. I cannot stress this enough – trust me on this one. If you attempt to remove them while warm, the fudge will still be very liquid, and the cookie structure will be too fragile, resulting in a hot, gooey mess of broken cookies and spilled fudge. Cooling allows the cookies to firm up and the fudge to set, giving them the structural integrity needed for clean removal.
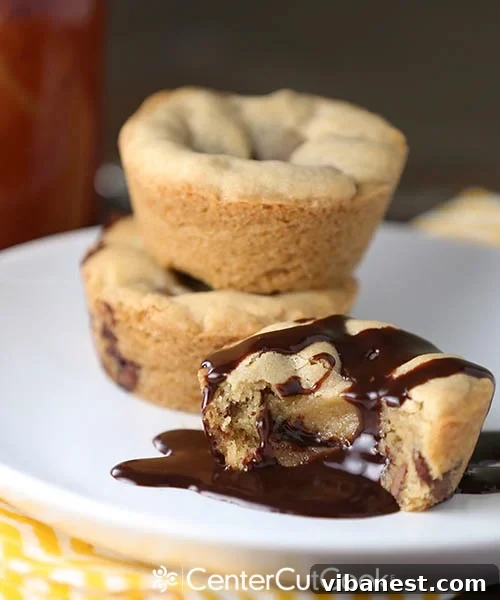
Here’s the clever trick that guarantees that spectacular molten center when you’re ready to serve: Once the chocolate chip lava cookies are completely cool and have been safely removed from the pan, store them until ready to enjoy. When the craving for that oozing fudge strikes, simply pop an individual cookie into the microwave for 20-30 seconds. This brief reheating period is all it takes to transform the set fudge back into a glorious, warm, and melty “lava” river, creating that perfect contrast of warm gooeyness against the soft cookie. It’s an essential step for replicating the ultimate lava cake experience in a cookie format!
Serving Suggestions & The Unforgettable Indulgence
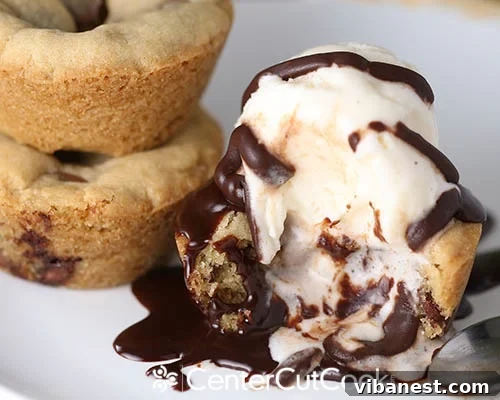
Oh, the possibilities! I simply couldn’t resist serving these incredible Chocolate Chip Lava Cookies with a generous scoop of vanilla bean ice cream, then drizzling even more of that luscious homemade fudge over the top. The combination of warm, gooey cookie, cool creamy ice cream, and extra molten chocolate is simply divine. While these cookies are truly at their best when gently reheated to unleash their lava core, don’t underestimate their deliciousness even when completely cool. The main difference is the fudge will be firm rather than molten, but the flavor remains utterly fantastic. They offer versatility for any occasion!
For those familiar with my Molten Chocolate Lava Cakes, you might be wondering how these lava cookies compare. While the middle portion of these Chocolate Chip Lava Cookies might not be quite as intensely “lava-y” as a dedicated lava cake, they still deliver an incredibly warm, delightfully gooey, and supremely delicious experience. They strike a perfect balance, offering the convenience of a cookie with the luxurious surprise of a molten center, making them a fantastic and slightly less intense alternative to their cake counterpart.
Tips for Success and Variations
To ensure your Chocolate Chip Lava Cookies turn out perfectly every time, here are a few extra tips:
- **Dough Consistency:** If your cookie dough feels too sticky, chill it for 15-20 minutes before handling. If it’s too dry, add a teaspoon of milk at a time until it reaches a manageable consistency.
- **Fudge Control:** For extra neatness, ensure the hot fudge is at room temperature or slightly chilled before piping. This prevents it from being too runny and keeps it contained within the cookie pocket.
- **Sealing is Key:** Spend a moment ensuring the top cookie layer is well-sealed to the bottom layer around the fudge. This is the primary defense against fudge leaks during baking.
- **Don’t Overfill:** While tempting, avoid overfilling the cookies with fudge. Too much can cause the cookie to burst during baking or make it difficult to seal properly.
Feel free to experiment with these delightful lava cookies:
- **Chocolate Variations:** Try dark chocolate chips, white chocolate chips, or a mix for different flavor profiles.
- **Flavored Fudge:** Instead of plain hot fudge, consider a caramel sauce or even a peanut butter fudge for an exciting twist.
- **Add-ins:** A sprinkle of sea salt on top before baking can enhance the chocolate flavor beautifully. You could also mix in chopped nuts (pecans or walnuts) into the cookie dough.
- **Serving Enhancements:** Beyond ice cream, consider a dollop of whipped cream, fresh berries, or a dusting of cocoa powder for an elegant finish.
INGREDIENTS
- 1/2 cup (1 stick) unsalted butter, softened
- 1/2 cup packed light brown sugar
- 1/2 cup granulated sugar
- 1 large egg
- 1/2 tablespoon vanilla extract
- 1 3/4 cups all-purpose flour
- 1/2 teaspoon salt
- 1/2 teaspoon baking soda
- 1 cup milk chocolate chips (or your preferred chocolate)
- 1/2 cup hot fudge, at room temperature (I highly recommend my recipe for Easy Homemade Hot Fudge)
DIRECTIONS
- Pre-heat your oven to 350 degrees F (175°C).
- Spray a 12-cup standard muffin tin generously with non-stick cooking spray.
- In a large bowl with an electric mixer, cream together the softened butter, light brown sugar, and granulated sugar until the mixture is light and fluffy (about 2-3 minutes).
- Beat in the large egg and vanilla extract until well combined and smooth.
- In a separate medium bowl, sift together the all-purpose flour, salt, and baking soda.
- Gradually add the dry ingredients into the wet ingredients, mixing on low speed until just combined. Be careful not to overmix.
- Gently fold in the milk chocolate chips using a spatula.
- Take a heaping tablespoon of cookie dough (a 1-tablespoon cookie scoop works perfectly here) and flatten it slightly. Press this flattened dough into the bottom of each muffin cup, forming a base layer. Initially, create 10 cookie bases.
- Use your thumb or the back of a small spoon to make a small indentation in the center of each cookie dough base; this will be the pocket for the fudge.
- Transfer the room-temperature hot fudge into a ziplock bag and snip off a small corner. Pipe approximately 1 tablespoon of hot fudge into the center of each indentation.
- For the top portion of the cookie, scoop another heaping tablespoon of cookie dough and flatten it as you did for the base. Carefully place this flattened dough on top of the fudge in each muffin cup. Gently press the edges of the top dough layer onto the bottom layer to seal the fudge completely inside.
- If you have any leftover cookie dough after making 10 cookies, you can create additional lava cookies in the same manner.
- Bake for 15-20 minutes, or until the edges of the cookies turn golden brown and the centers are just set.
- Immediately after removing from the oven, run a thin knife around the edge of each cookie to ensure they aren’t sticking to the muffin pan.
- Allow the cookie cups to cool completely in the muffin tin before attempting to remove them. This is crucial for their structural integrity.
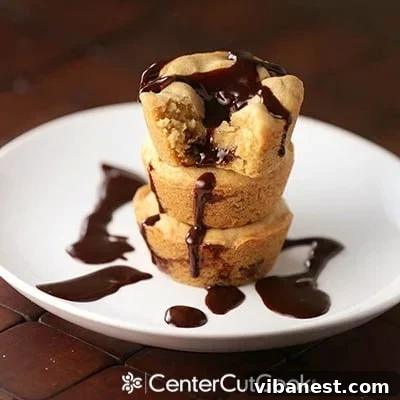
- Right before serving, for that signature lava effect, microwave individual cookies for 20-30 seconds until the fudge center is warm and gooey. Top with a scoop of ice cream and extra hot fudge if desired.
Recipe adapted from
Kevin and Amanda