
Unlock the secrets to baking perfect cookies every single time with these essential tips and clever tricks. From choosing the right cookie sheets and mastering the art of parchment paper to understanding ingredient temperatures and smart scooping techniques, this comprehensive guide will transform your baking experience. Say goodbye to burnt bottoms and uneven batches, and hello to consistently delicious, picture-perfect homemade cookies!

Cookies hold a special place in nearly everyone’s heart. The aroma of freshly baked cookies can evoke feelings of comfort and nostalgia, making them a universally loved treat. However, achieving consistently great results can sometimes feel like a daunting task, even for experienced bakers. Many factors contribute to a cookie’s final texture, spread, and overall perfection, from the ingredients you use to the tools in your kitchen. But don’t worry! I’m here to share some of my tried-and-true, best cookie baking tips and tricks that I’ve gathered over years in the kitchen. My hope is that these insights will not only help you bake more successfully but also make the entire process much more enjoyable and less stressful. While many people ramp up their cookie baking during the festive December season, these fundamental tips are incredibly useful all year long, whether you’re whipping up a quick batch for an after-school snack or preparing a dessert for a special occasion. Before we dive into the specifics, have you explored some of our most cherished cookie recipes?
Our Favorite Cookies:
Perfect Chocolate Chip Cookies
Lofthouse Soft Sugar Cookies Copycat
Giant Monster Cookies
Cookie Sheet Tips: Your Foundation for Flawless Baking
The humble cookie sheet is far more critical to cookie success than many realize. It’s not just a flat surface for your dough; its material, color, and even size play significant roles in how your cookies bake. Investing in at least two decent cookie sheets is a smart move for any home baker, and they don’t have to be top-of-the-line, super expensive fancy ones. I’ve found that some of my favorites cost around $7 each and have served me wonderfully for years. The key is understanding how different materials and features impact your baking.
Cookie Sheet Materials: Understanding the Differences
- Aluminum: The Even Heat Distributor
Aluminum cookie sheets are renowned for their excellent heat conductivity, meaning they distribute heat evenly across the surface. This property helps prevent hot spots that can lead to unevenly baked or burnt cookies. However, bare aluminum isn’t naturally non-stick, so it’s absolutely crucial to use parchment paper or a silicone baking mat when baking on them. This ensures your cookies don’t stick and makes cleanup a breeze. Look for heavy-gauge aluminum for best results, as thinner sheets can warp under high heat. - Non-Stick Coated: My Personal Favorite for Convenience
For sheer convenience, non-stick coated cookie sheets are often my go-to choice. Their primary benefit is, as the name suggests, preventing cookies from sticking to the pan, even without additional lining. This makes removal effortless and simplifies cleanup significantly. When using non-stick pans, it’s important to avoid metal utensils that can scratch the coating, which could eventually compromise its non-stick properties. A good quality non-stick pan, properly cared for, can be a fantastic asset in your cookie baking arsenal. - Stainless Steel: Durable but Requires Lining
Stainless steel cookie sheets are highly durable and resistant to warping and corrosion, making them a long-lasting investment. However, like aluminum, they are not inherently non-stick. Therefore, always use parchment paper, a silicone baking mat, or grease and flour the surface diligently when baking cookies on a stainless steel sheet. While sturdy, stainless steel can sometimes heat up less evenly than aluminum, so rotating your pan halfway through baking can be beneficial for consistent results. - Insulated: Best Avoided for Most Cookies
Insulated cookie sheets feature a layer of air sandwiched between two sheets of metal. This design is intended to prevent burning by slowing down heat transfer to the bottom of your baked goods. While this might sound appealing, it’s generally not ideal for most cookie recipes. The slower, gentler heat can hinder the browning and crisping process that many cookies need, often resulting in pale, softer cookies that lack the desired texture or perfectly golden bottoms. For crispy edges and proper browning, a single-layer sheet is almost always preferred.
The Impact of Cookie Sheet Color
The color of your cookie sheet is more influential than you might think. Darker pans absorb and retain more heat compared to lighter-colored pans. This means that if you’re using super old, well-seasoned, or very dark-colored pans, your cookies are more likely to get dark, crispy, or even burnt bottoms faster. Lighter-colored, reflective pans help prevent over-browning by reflecting heat. If your dark pans are causing issues, it might be worth investing in new, lighter-colored sheets. Alternatively, if you prefer dark pans, consider reducing your oven temperature by 25°F (15°C) or shortening the baking time to compensate.
Size and Spacing: Give Your Cookies Room to Breathe
While the exact dimensions of your cookie sheets might not drastically alter the outcome, how many cookies you bake on a single sheet is paramount. Overcrowding your cookie sheet is one of the most common mistakes bakers make. Cookies spread during the baking process, and they need ample room to do so without touching each other. When cookies are placed too close together, they can meld into one giant blob, but more importantly, they obstruct proper air circulation around each cookie. This leads to uneven baking, with some cookies potentially being underdone in the center and others overdone on the edges. Always allow at least 1-2 inches of space between each cookie dough ball to ensure even heat distribution and beautiful, perfectly shaped results.
Parchment Paper Perfection: An Indispensable Baking Aid
While not strictly a “requirement” for incredible cookies, parchment paper has become an indispensable tool in my kitchen, and for good reason. I didn’t always bake with it, but now I can confidently say I never bake without it. It offers a multitude of benefits that elevate the cookie baking experience from good to absolutely fantastic. Essentially, parchment paper creates a perfect, non-stick surface that improves nearly every aspect of the baking process. It’s a simple addition that yields remarkable results.
The Many Benefits of Baking with Parchment Paper:
- Maintains Cookie Shape and Prevents Spreading: Parchment paper provides a slightly textured surface that subtly grips the cookie dough, helping it to maintain its shape better during baking. This can be particularly beneficial for cookies that tend to spread excessively, helping them achieve a more consistent and attractive form.
- Guaranteed Non-Stick Surface: This is arguably its biggest advantage. Even on non-stick pans, parchment paper offers an extra layer of protection, ensuring that your cookies never stick. This means perfectly intact cookies every time, without the frustration of struggling to remove them from the pan or risking breakage.
- Effortless Cleanup: One of the most beloved aspects of parchment paper is how it simplifies cleanup. Because your cookies never touch the pan directly, there’s no sticky residue or baked-on bits to scrub. A quick wipe of the pans is often all that’s needed, saving you precious time and effort.
- Even Baking and Browning: Parchment paper can contribute to more even baking by creating a consistent surface across the entire pan, which can help prevent hot spots and ensure cookies bake uniformly.
- Versatility Beyond Cookies: Don’t limit parchment paper to just cookies! It’s fantastic for lining loaf pans, cake pans, and even roasting vegetables or fish, making it a true workhorse in the kitchen for easy release and mess-free cooking.
Parchment Paper Substitutes: What to Use in a Pinch
We’ve all been there: halfway through a recipe, only to realize you’re out of a crucial ingredient, or in this case, baking essential like parchment paper. While parchment paper is highly recommended for cookies, there are several viable substitutes you can turn to depending on what you’re baking. Specifically for cookies, if you find yourself without parchment paper, a silicone baking mat is the best alternative, or simply ensure your pan is well-greased. Here are some other suggestions for baking without parchment paper, with notes on their best uses:
- Silicone Baking Mat (Silpat): The Best Reusable Alternative
Silicone baking mats are a fantastic, reusable, and truly non-stick alternative to parchment paper. They are made from food-grade silicone, designed to withstand high temperatures, and provide an excellent surface for baking cookies, pastries, and more. Cookies baked on silicone mats often have a slightly different bottom texture – sometimes a bit softer – but they will never stick. They are durable, easy to clean, and a worthwhile investment for frequent bakers. - Aluminum Foil: A Common Kitchen Staple
Aluminum foil can be used to line cookie sheets, acting as a barrier between the dough and the pan. However, foil itself is not non-stick, so you absolutely *must* spray it generously with a non-stick cooking spray or grease it with butter/shortening before placing your cookie dough. Be aware that foil can sometimes create hot spots, potentially leading to unevenly browned cookie bottoms. Crumpling the foil slightly and then flattening it can help prevent some of these issues and allow for better air circulation. - Cooking Spray or Grease: The Simple Solution
For many recipes, a reliable non-stick cooking spray, or a thin layer of butter or shortening, applied directly to the baking sheet is a perfectly acceptable substitute. Ensure the entire surface where cookies will be placed is thoroughly coated. For an extra layer of non-stick protection, especially for cakes or muffins, you can grease the pan and then lightly dust it with flour or cocoa powder. This method works well for many cookie recipes, though you might find a slight difference in how the cookie bottoms brown compared to using parchment. - Flour or Cocoa Powder: For Specific Recipes
Depending on the specific cookie recipe, a light dusting of flour can prevent sticking, especially for drop cookies. For chocolate-based recipes, using cocoa powder instead of flour can prevent white marks on your finished cookies and complement the flavor. The key here is a *light* dusting. After greasing the pan (with butter or shortening), sprinkle a small amount of flour or cocoa powder, then tap and tilt the pan to coat the entire surface. Shake off any excess thoroughly, as too much powder can affect the taste or texture of your baked goods. - Butter or Shortening: Ideal for Cakes and Cornbread
While butter or shortening is excellent for greasing certain cakes, muffins, or cornbread pans, it can sometimes make cookie bottoms too greasy or crispy, especially if applied too thickly. For cookies, if you’re not using parchment or a silicone mat, a thin layer of cooking spray is generally preferred over solid butter/shortening directly on the pan unless the recipe specifically advises it for browning.
The best parchment paper substitute will ultimately depend on the specific recipe and your desired outcome, but for cookies, a silicone baking mat is your closest match.
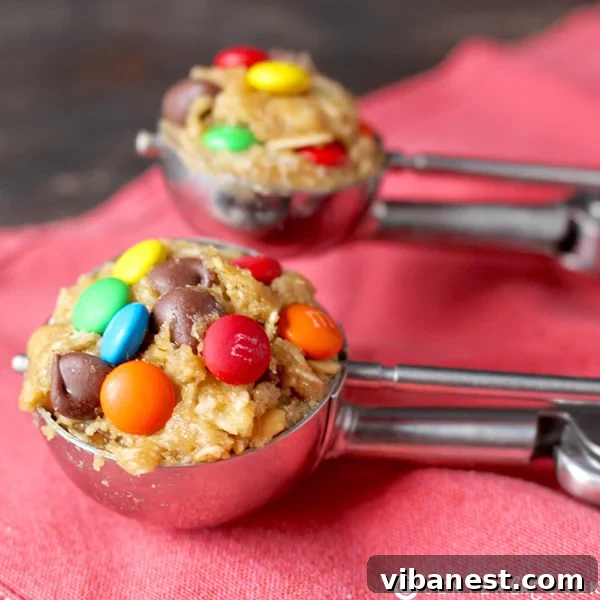
The Secret to Uniformity: Using a Cookie Scoop
For years, I stubbornly baked without a cookie scoop, relying on a regular spoon to portion out my dough. The result? A chaotic mix of sizes. Some cookies would be tiny and over-baked, while others would be giant and under-done in the center. This inconsistency led to frustration and less than perfect batches. The moment I finally invested in a cookie scoop, my cookie baking game was forever changed. It’s an inexpensive tool that offers a world of benefits, guaranteeing beautiful, evenly baked cookies every single time.
Key Benefits of Using a Cookie Scoop:
- Consistent Cookie Size: This is the paramount advantage. A scoop ensures that every single cookie dough portion is the exact same size. This consistency is crucial for uniform baking, as all cookies will finish baking at the same time, preventing the dreaded over-baked tiny cookie or under-baked large one.
- Neat and Clean Handling: Scooping dough is far less messy than using spoons or your hands. It keeps your hands cleaner and minimizes dough residue on your fingers, making for a more pleasant baking experience.
- Efficient and Time-Saving: Portioning dough with a scoop is remarkably faster than trying to eyeball sizes with a spoon. You’ll move through your cookie dough much more quickly, saving valuable time, especially when baking large batches.
- Less Handling of Dough: Minimizing direct contact with the cookie dough is beneficial because the warmth from your hands can melt the butter in the dough prematurely. This can lead to cookies that spread too much and become flat. A scoop allows for quick, minimal handling, keeping the dough at the optimal temperature.
- Professional Appearance: Uniformly sized cookies simply look more appealing and professional. Whether you’re baking for a bake sale, a holiday platter, or just for your family, consistently sized cookies always make a better impression.
Cookie scoops come in various sizes, often labeled by capacity (e.g., 1 tablespoon, 2 tablespoons, 3 tablespoons). Choose a size that matches the cookie size specified in your recipe, or experiment to find your preferred cookie dimensions. Once you start using one, you’ll wonder how you ever baked without it!
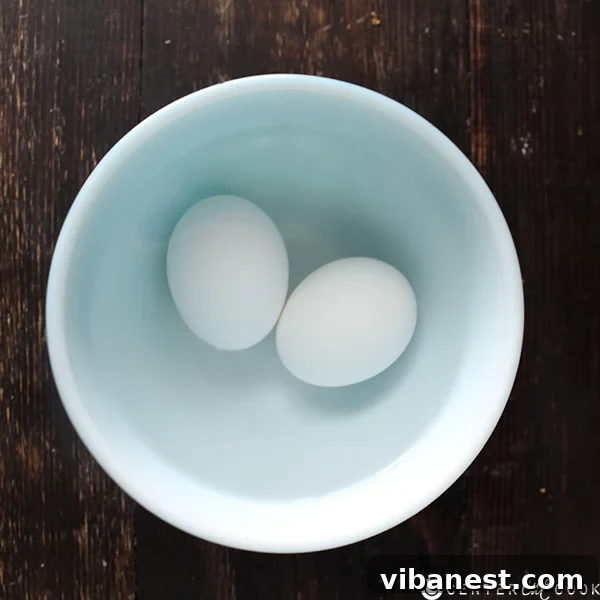
The Importance of Room Temperature Eggs
You’ll frequently notice that many cookie recipes call for room temperature eggs, and this isn’t just a finicky instruction. Bringing your eggs to room temperature offers several significant benefits that directly impact the texture and consistency of your cookies.
Why Room Temperature Eggs Matter:
- Superior Emulsification and Better Incorporation: Ingredients, especially fats and liquids, blend together much more effectively when they are at the same temperature. Cold eggs, when added to creamed butter and sugar, can cause the butter to seize up and become lumpy. Room temperature eggs, on the other hand, emulsify smoothly with the other ingredients, creating a homogeneous, well-blended batter. This leads to a smoother dough and ultimately, a more consistent cookie texture.
- Enhanced Volume and Lighter Texture: Room temperature eggs have a lower viscosity, meaning they are thinner and flow more easily. This property allows them to trap air more effectively when beaten, especially during the creaming process with butter and sugar. The trapped air creates tiny pockets that expand in the oven, contributing to a lighter, softer, and more tender cookie texture and increased volume. Cold eggs, being denser, don’t incorporate air as well, resulting in denser, flatter cookies.
Quick Tip for Warming Eggs:
Life happens, and you might not always remember to take your eggs out of the fridge an hour or two before you plan to bake. Here’s a super quick and easy trick to bring them to room temperature in about 5 minutes: Simply place the cold eggs (still in their shells) in a bowl of hot tap water. Make sure the eggs are fully submerged. While they soak, you can gather and measure your other ingredients. By the time you’re ready to add the eggs to your batter, they will be perfectly at room temperature, ready to work their magic.
Even More Essential Cookie Baking Tips
Beyond the fundamental tools and ingredient temperatures, there are several other critical factors that can significantly impact your cookie baking success. These tips delve into technique, ingredient freshness, and mindful preparation, all contributing to that coveted perfect batch.
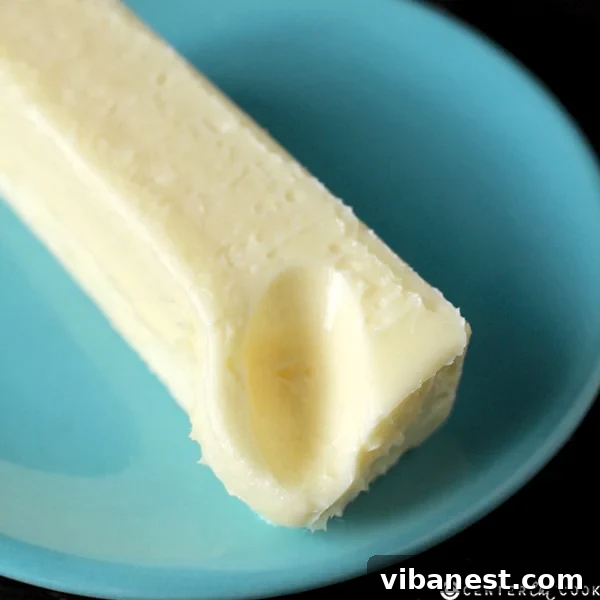
Room Temperature Butter: The Heart of Your Cookies
Just like eggs, room temperature butter is non-negotiable for most cookie recipes – arguably even more so. Butter’s temperature directly affects its ability to cream with sugar, which is a foundational step for many cookie textures. When butter and sugar are properly creamed, tiny air pockets are incorporated into the mixture. These air pockets expand in the oven, giving cookies their light, tender, and slightly chewy texture.
If your butter is too cold, it won’t properly emulsify with the sugar. Instead of creating a fluffy, aerated mixture, you’ll end up with a gritty, dense mixture, and your cookies will be heavy and possibly flat. If your butter is too warm (melted or greasy), it won’t be able to hold those crucial air pockets. The result will be cookies that spread excessively, becoming thin, greasy, and brittle.
My best tip for always having room temperature butter ready is simple: if you bake frequently, always keep a pound of butter out on your counter. It will stay fresh for several days at room temperature and be ready when inspiration strikes. If you find yourself with cold butter and no time to wait, here are a few quick fixes:
- Cut into Small Pieces: Slice the cold butter into small cubes. Spreading it out increases its surface area, allowing it to come to room temperature much faster.
- Gentle Microwave Pulses: Place the butter in the microwave for 5-10 second intervals at 50% power, turning after each burst. Be extremely careful not to melt it; you want it softened, not liquid.
- The “Massage” Method: Place the stick of butter in a sealed plastic baggie and gently massage it with your hands. Your body heat will slowly and evenly soften the butter.
Under Bake the Cookies: Embrace the Gooey Center
This tip might sound counterintuitive, but it’s a game-changer for achieving perfectly chewy and moist cookies. I always recommend baking cookies for the minimum amount of time specified in the recipe, or even a minute or two less. Why? Because cookies continue to “carry-over bake” and harden as they cool on the hot baking sheet and then on the cooling rack. If you wait until they look perfectly done and firm in the oven, they will likely become over-baked, dry, and hard once completely cooled.
Look for visual cues: the edges should be set and lightly golden, but the centers should still look slightly soft, puffy, and possibly a little underdone. If they look completely firm and uniformly browned in the oven, they’re probably already past their prime. You can always pop them back in the oven for another minute or two if they’re too soft, but once they’re over-baked, there’s no going back to that perfectly chewy texture.
Read the Recipe From Start to Finish: Preparation is Key
This may seem like common sense, but it’s a golden rule for successful baking. There’s nothing more frustrating than getting halfway through a recipe only to discover it requires an overnight chill, a specific ingredient you don’t have, or a piece of equipment you’re missing – especially if you planned to bring those cookies to a friend’s gathering that very evening! I’ve learned this lesson the hard way too many times. Taking a mere minute or two to read the entire recipe, from the ingredient list to the last instruction, will save you immense stress and potential baking disasters. It allows you to gather all necessary ingredients and tools, understand the timing, and mentally prepare for each step, making the entire process much smoother and more enjoyable.
Use Fresh Baking Soda and Baking Powder: The Leavening Lifeline
Baking soda and baking powder are the unsung heroes of many cookie recipes, responsible for giving them their lift and tender texture. If you only bake once or twice a year, it’s highly advisable to replace your baking soda and baking powder. While they don’t spoil in the traditional sense, they do lose their potency over time. Both have a relatively short shelf life once opened – typically 6 months to 1 year. If you’re questioning their freshness, it’s always worth replacing them, as they are very inexpensive. Using old, inactive baking soda or powder will result in cookies that are flat, dense, and don’t rise properly.
To quickly test their freshness:
- Baking Soda: Mix a teaspoon with a tablespoon of vinegar. If it fizzes vigorously, it’s still good.
- Baking Powder: Mix a teaspoon with a tablespoon of hot water. If it fizzes, it’s active.
Understanding Your Oven: Your Baking Partner
Your oven is arguably the most important piece of equipment in cookie baking, yet it’s often overlooked. Not all ovens are created equal, and even well-maintained ones can have temperature inconsistencies. An oven thermometer is a small, inexpensive tool that can make a huge difference. Many ovens run hotter or colder than their display indicates, and they often have hot spots. Knowing your oven’s true temperature helps you adjust accordingly. Additionally, avoid opening the oven door too frequently, as this causes significant temperature drops, especially during the crucial initial baking phase, which can impact cookie spread and texture. Rotating your cookie sheets halfway through baking can help mitigate any hot spots and ensure an even bake.
Ingredient Quality Matters: Elevate Your Cookies
While often overlooked in the pursuit of technique, the quality of your ingredients plays a substantial role in the final taste and texture of your cookies. Using high-quality butter, fresh eggs, premium chocolate, and good vanilla extract can truly elevate your homemade cookies from good to extraordinary. High-quality butter has a richer flavor and better fat content, impacting both taste and texture. Pure vanilla extract, as opposed to imitation, offers a depth of flavor that can’t be matched. When choosing chocolate chips or chunks, opt for brands with better cocoa content and fewer fillers for a superior melt and taste. These small upgrades can make a noticeable difference in the deliciousness of your final product.
Cookie Recipes You Need to Try!
Cakey Chocolate Crinkle Cookies
Easy Halloween Spider Cookies
Super Soft Chocolate Chip Cookie Bars
Snickerdoodle Cookie Dough Bites
The Best Cream Cheese Frosting
Chocolate Covered Cherry Cookies
These are my most treasured cookie baking tips and the invaluable lessons I’ve learned and refined throughout my many years in the kitchen. By focusing on these fundamental aspects – from selecting the right tools like cookie sheets and scoops to understanding the nuances of ingredient temperatures and the power of fresh leavening agents – you’re well on your way to baking perfect cookies consistently. Baking is a science, but it’s also an art, and with practice and these insights, you’ll master both. Do you have any favorite cookie baking tips that I might have missed? Share your wisdom in the comments below!