
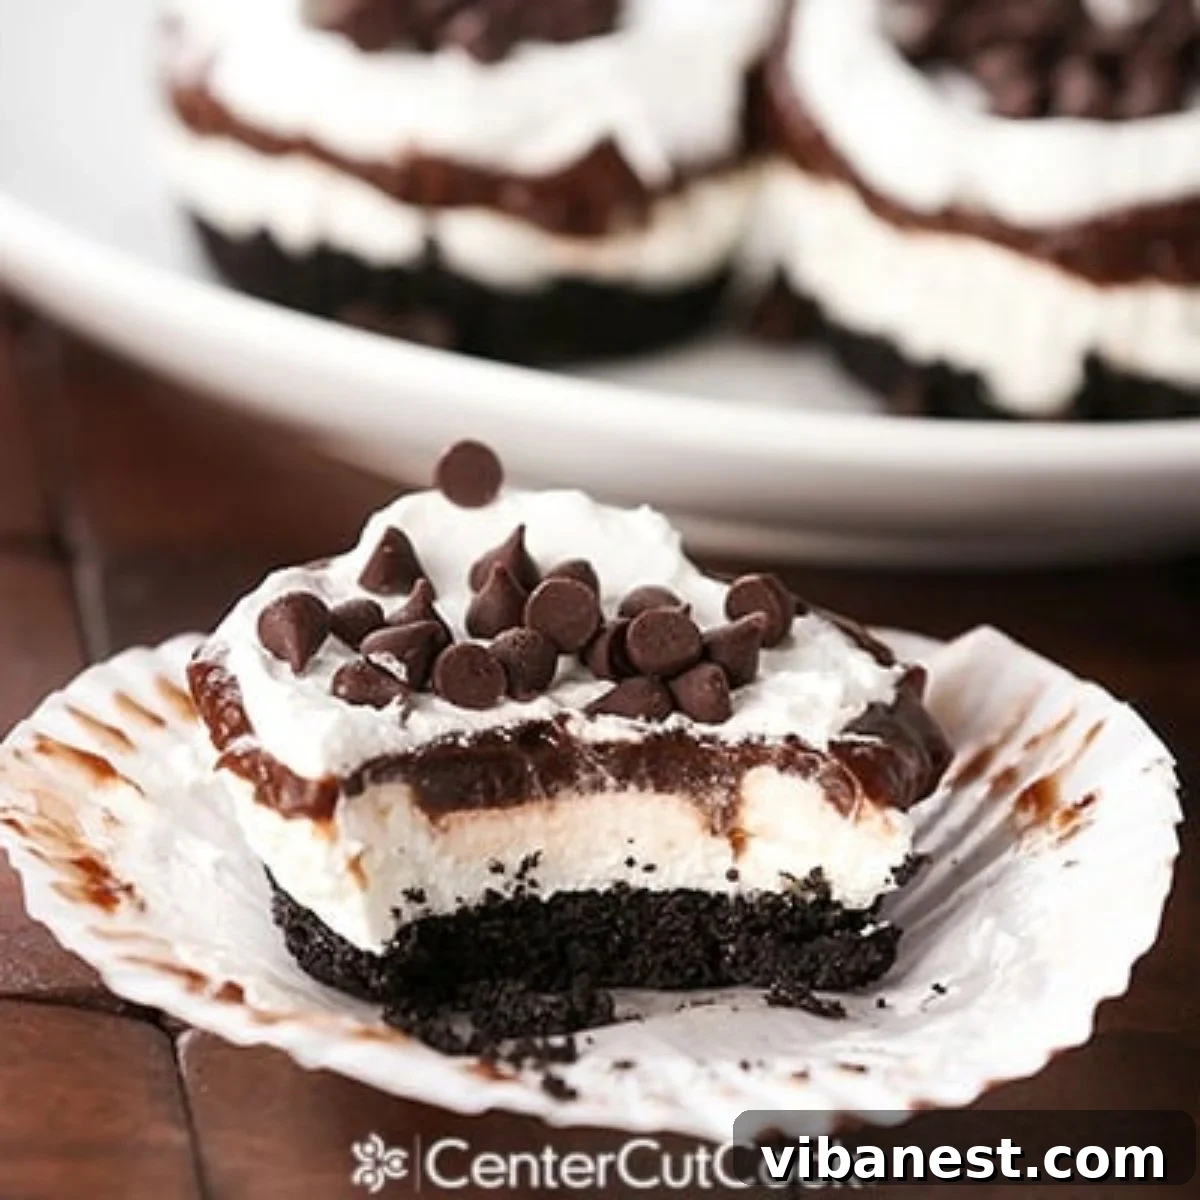
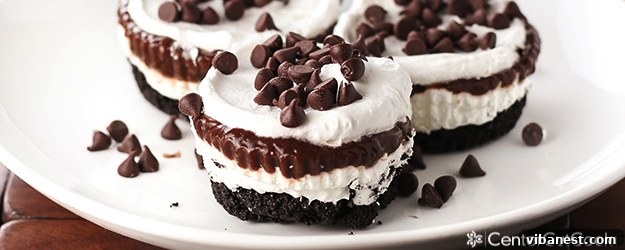
Calling all chocolate enthusiasts! Prepare to be captivated by these extraordinary Chocolate Lasagna Cupcakes. Layers of decadent flavor combine to create a truly irresistible dessert that can effortlessly transform into the ultimate frozen summer delight.
Indulge in Layered Bliss: The Ultimate Chocolate Lasagna Cupcakes Recipe
Few desserts capture hearts quite like Chocolate Lasagna. Its beloved combination of rich chocolate, creamy filling, and a crunchy cookie crust has made it a viral sensation, adored by millions across the globe. Inspired by this timeless classic, we’ve reimagined it into an even more convenient and delightful form: Chocolate Lasagna Cupcakes. These single-serving wonders deliver all the beloved flavors in a perfectly portioned package, ideal for any occasion – from poolside lounging on a scorching July afternoon to a cozy evening gathering in October or March. But wait, there’s more! We’ve also unveiled an incredibly refreshing ice cream variation, destined to become your go-to frozen treat. Are you ready to embark on this delicious journey?
Crafting the Perfect Foundation: Your Oreo Crust
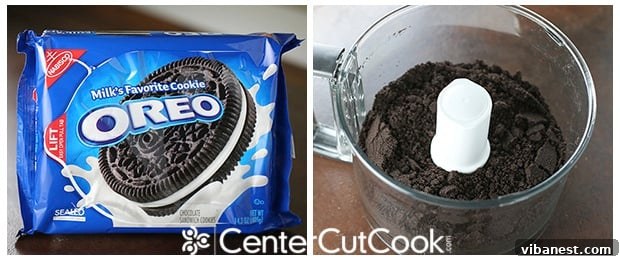
The journey to an unforgettable Chocolate Lasagna Cupcake begins with its foundation: the Oreo crust. For this crucial layer, we insist on using regular, plain-old Oreo cookies – not the Double Stuff variety. This isn’t just a preference; it’s a matter of consistency. When you crush the entire cookie, cream and all, the Double Stuff version tends to yield a crust that is too soft and greasy due to its excessive cream filling. The regular Oreos strike the perfect balance, ensuring a firm, stable, and deliciously crunchy base that holds up beautifully under the subsequent layers. Yes, you read that right: the WHOLE cookie gets crushed! This small detail is key to achieving the ideal texture and flavor profile.
For the most efficient and uniform crumbling, a food processor is your best friend. It transforms the Oreos into fine, consistent crumbs in mere seconds, making this step incredibly easy. If you don’t have a food processor, simply place the cookies in a large zip-top bag and use a rolling pin or the bottom of a heavy glass to crush them until finely ground. Remember, uniformity is important for a cohesive crust.
Yield and Assembly: Mastering the Mini Marvels
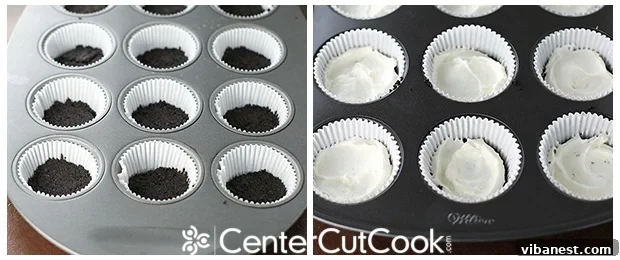
One batch of this recipe generously yields approximately 24 individual Chocolate Lasagna Cupcakes. These perfectly portioned treats are ideal for sharing, making them a fantastic addition to parties, potlucks, or simply as a delightful indulgence for your family. The key to a successful cupcake lies in firmly pressing the Oreo mixture (crushed Oreos combined with melted butter) into the bottom of each muffin cup. This compression is vital to create a sturdy crust that won’t crumble apart when you bite into it. I’ve found that the back of a measuring cup works wonders for achieving that perfect, compact base. Alternatively, your thumb or a small tart tamper can also do the trick. Don’t skip this step; a well-pressed crust is the secret to a professional-looking and tasting cupcake.
Two Paths to Creamy Perfection: Classic or Chilled?
The beauty of these Chocolate Lasagna Cupcakes lies in their versatility, particularly with the creamy middle layer. We’ve explored two equally delicious options: the traditional cream cheese mixture and an innovative vanilla ice cream alternative. The classic version features a delightful blend of softened cream cheese, a touch of sugar, and light, airy Cool Whip, resulting in a rich and tangy layer that perfectly complements the chocolate. However, for those sweltering summer days or simply for an extra frosty treat, the vanilla ice cream option is an absolute game-changer. Imagine the cool, smooth ice cream melting in your mouth, creating a truly refreshing experience. While both versions are undeniably delicious, the ice cream variation truly shines when you crave a perfectly frozen dessert. We’ll provide instructions for both, allowing you to choose the option that best suits your palate and the occasion.
The Decadent Chocolate Pudding Layer
Following our creamy white layer, whether it’s the traditional cream cheese or the refreshing ice cream, comes the star of the show for many: the rich, smooth chocolate pudding. For convenience and consistent results, we opt for instant chocolate pudding. Its ease of preparation allows you to whip up this luscious layer in minutes, ensuring your cupcakes come together without a hitch. While some culinary purists might advocate for homemade pudding, rest assured that instant pudding delivers on flavor and texture in this context. It contributes a wonderfully smooth and intensely chocolatey layer that is essential to the “chocolate lasagna” experience. If you’re an avid scratch baker and prefer to make your own pudding, feel free to do so – just ensure it’s cooled and set before layering.
A Note on Cool Whip: The Light and Stable Topping
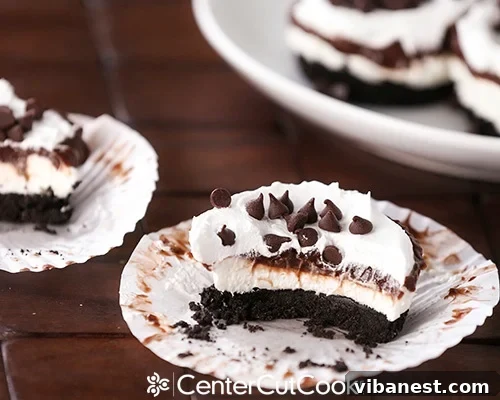
The final creamy flourish for our Chocolate Lasagna Cupcakes is another layer of Cool Whip or a similar whipped topping. For those unfamiliar with Cool Whip, it’s a non-dairy, processed whipped topping known for its remarkable stability. Unlike traditional whipped cream, which can quickly deflate and turn watery, Cool Whip maintains its airy structure and creamy texture for extended periods, making it perfect for layered desserts that require freezing or refrigeration. Its subtle sweetness and light consistency provide a perfect counterpoint to the richer chocolate and cream cheese layers.
If Cool Whip isn’t available in your region or if you prefer a less processed option, you can certainly make a stabilized homemade whipped cream. Recipes typically involve adding a small amount of gelatin or cornstarch to heavy cream before whipping, which helps it hold its shape. While we haven’t tested every stabilized whipped cream recipe with this specific dessert, a quick search online for “stabilized whipped cream recipe” should provide excellent alternatives. The goal is a topping that remains light and fluffy without weeping or deflating.
The Final Touch: Freezing for Perfection
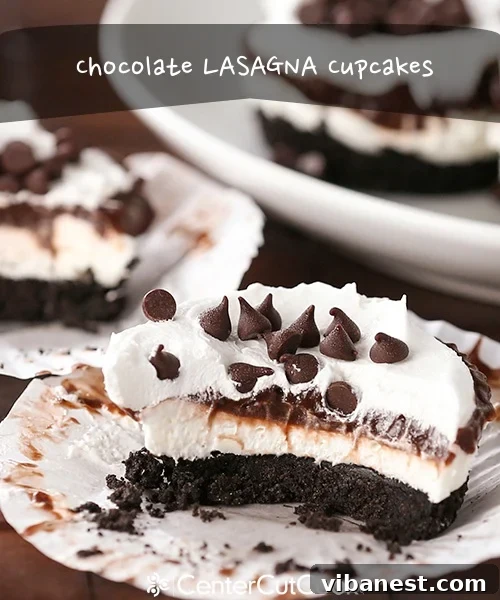
Once your charming Chocolate Lasagna Cupcakes are assembled, crowned with mini chocolate chips, it’s time for the crucial step: freezing. This not only sets the layers but also transforms them into an even more delightful treat. If you’ve opted for the traditional version with the cream cheese layer, a minimum of one hour in the freezer will suffice to firm them up perfectly before serving. However, if you chose the indulgent vanilla ice cream variation, allow them a more generous 3-4 hours in the freezer to achieve that ideal scoopable (or rather, bite-able) frozen consistency.
Here’s an invaluable tip: while my original Chocolate Lasagna recipe often gets stored in the refrigerator, these individual cupcakes truly shine when stored in the freezer, regardless of the creamy layer you choose. Obviously, the ice cream version necessitates freezing to prevent a melty disaster. But even the traditional cream cheese variety benefits immensely from being frozen. The textures become firmer, the layers more distinct, and the overall experience is wonderfully refreshing, especially on a warm day. Frozen is the way to go!
To summarize your storage choices:
- Chocolate Lasagna Cupcakes (traditional cream cheese layer): Store in the refrigerator for softer layers, or in the freezer for a firmer, colder dessert. The frozen version is highly recommended!
- Chocolate Lasagna Cupcakes (vanilla ice cream layer): Absolutely must be stored in the freezer to maintain their integrity and prevent a messy puddle.
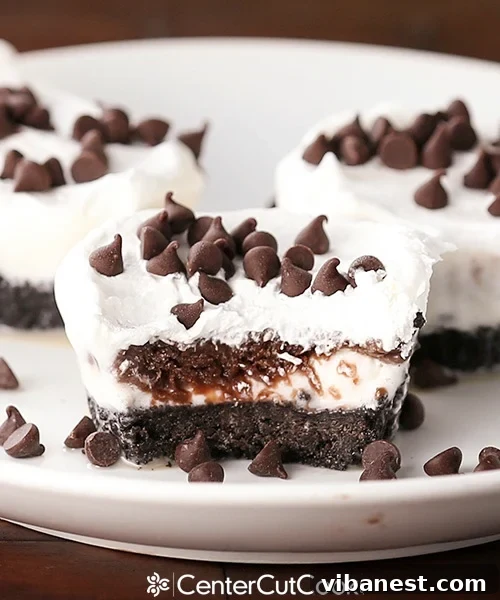
Visually, both versions look remarkably similar, maintaining the iconic layered aesthetic of the classic chocolate lasagna. The true difference reveals itself in the delightful temperature and texture upon your first bite.
Pro Tips for Flawless Chocolate Lasagna Cupcakes
To ensure your Chocolate Lasagna Cupcakes turn out absolutely perfect every time, keep these helpful tips in mind:
- Consistent Scooping: For beautifully even layers, consider using a 1-tablespoon cookie scoop. This handy tool ensures uniform portions for each layer in every cupcake, making the assembly process much cleaner and faster.
- Efficient Oreo Crushing: As mentioned, a food processor is the most efficient tool for turning your regular Oreos into fine crumbs. While a zip-top bag and rolling pin work in a pinch, the food processor provides superior consistency and speed, saving you valuable time. Remember to use the WHOLE cookie – cream and all!
- Softened Ice Cream for Ease: If you opt for the ice cream variation, allow your vanilla ice cream to soften at room temperature for about 10-15 minutes before you begin layering. This makes it significantly easier to scoop, spread, and flatten into an even layer over the Oreo crust, preventing a struggle with rock-hard ice cream.
- Creamy, Lump-Free Cream Cheese: For the traditional cream cheese layer, it’s imperative that your cream cheese is thoroughly softened to room temperature. Attempting to mix cold cream cheese will result in an unpleasantly lumpy and chunky layer. Plan ahead and take it out of the fridge at least an hour before use.
- Make-Ahead Mastery: These cupcakes are fantastic for preparing in advance! They hold up wonderfully in the freezer for several days, making them perfect for entertaining or meal prep. If they’ve been frozen solid, simply let them sit at room temperature for about 10-15 minutes before serving to allow the layers to slightly soften and become more enjoyable.
With these tips, you’re well on your way to creating a batch of Chocolate Lasagna Cupcakes that will impress and delight everyone fortunate enough to try them. Enjoy the process, and savor every decadent bite!
Chocolate Lasagna Cupcakes
Ingredients
- 1 package regular Oreo cookies about 36 cookies, you will use the WHOLE cookie, cream and all.
- 6 tbsp butter melted
- 8 ounce package cream cheese softened
- 1/4 cup granulated sugar
- 12 ounce Cool Whip divided, see note
- 3.9 ounce chocolate instant pudding made according to package directions (you will need two cups of milk).
- 1 cup mini chocolate chips
Instructions
- Crush 36 Oreo’s, cream and all. Use a food processor for the best result. You can also place them in a ziplock bag and crush them with a rolling pin. When the Oreos have turned into fine crumbs, you are done.
- Prepare cupcake tins with paper liners. You will make 24 cupcakes with this recipe.
- Prepare the pudding according to package directions and set aside.
- Transfer the Oreo crumbs to a large bowl. Stir in 6 tablespoons of melted butter and use a fork to incorporate the butter into the cookie crumbs.
- Place a heaping tablespoon of Oreo mixture in each cupcake liner. I used a 1 tablespoon cookie scoop to simplify this process. Firmly press the crumbs into the bottom of each cup.
- Next comes the cream cheese layer. Mix an 8-ounce package of cream cheese with a mixer until it is light and fluffy. Add in 2 tablespoons of milk, 1/4 cup granulated sugar, and mix well. Stir in 1 heaping cup full of Cool Whip *see note above if you don’t know what Cool Whip is, or it’s not available where you live. Place a heaping tablespoon of mixture on top of the Oreo layer. Use a spoon to spread the mixture evenly.
- *Optional – skip the cream cheese layer and use ice cream instead! If you choose to use ice cream, allow it to soften a bit before scooping a heaping tablespoon in place of the cream cheese mixture.
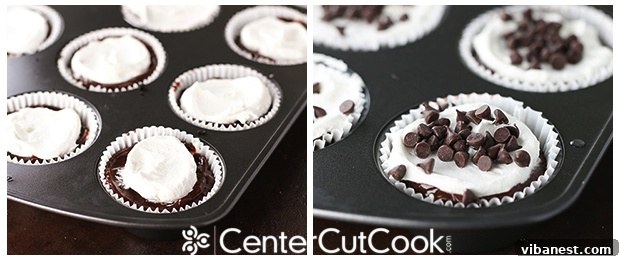
- Pudding Layer – scoop 1 tablespoon of pudding on top of the cream cheese/or ice cream layer. You will have just enough pudding if you use 1 tablespoon for each cupcake. Use a spoon to spread the pudding evenly.
- Place 1 tablespoon Cool Whip on top of each cupcake and use a spoon to spread it out.
- Sprinkle mini chocolate chips on top.
- Place traditional cupcakes in the freezer for at least an hour before serving. If you are making them with ice cream in place of the cream cheese layer, allow them to firm up in the freezer for 3-4 hours.
Notes
Note: All images shown here are copyrighted and may not be used without written permission from CenterCutCook. Unauthorized use of my work is pursued.
Recipe from
CenterCutCook