
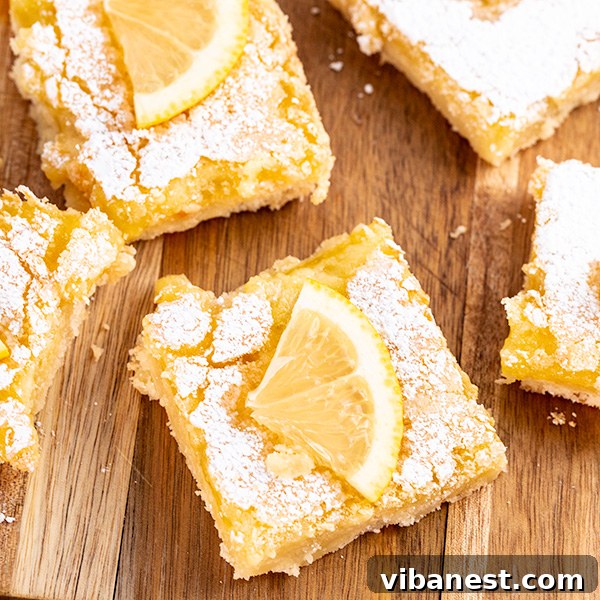
Mama’s Easy Lemon Bars: A Timeless Recipe for Tangy-Sweet Perfection
There are some recipes that transcend mere ingredients, becoming woven into the fabric of family memories and cherished traditions. My Mom’s recipe for classic, easy lemon bars is one such treasure. Delightfully delicious, these bars offer the perfect balance of bright lemon tang and satisfying sweetness, all nestled atop a buttery, tender shortbread crust. For many, the aroma of fresh lemons and baking pastry evokes a sense of nostalgia, a return to simpler times and the warmth of a loved one’s kitchen. This recipe does exactly that for me, carrying forward a culinary legacy that keeps cherished memories alive.
Lemon desserts hold a special place in the hearts of many, from elegant lemon cakes and tarts to comforting lemon meringue pies. But for sheer simplicity and irresistible flavor, these easy lemon bars are unmatched. They come together with surprising speed and grace, presenting a beautiful dessert that’s perfect for any occasion – from elegant baby showers and wedding celebrations to a casual weeknight treat. Their vibrant flavor profile makes them a welcome addition to any gathering, brightening tables and palates alike, no matter the season.
As anyone who has lost a parent can attest, preparing a recipe they once made can be a profoundly moving experience. It’s a way to reconnect with their spirit, to feel their presence in your kitchen, and to share a piece of their love with new generations. My mother’s recipes, particularly these lemon bars, transport me back to those precious moments, reminding me of laughter, warmth, and delicious shared meals. It wasn’t until she passed away that I truly grasped the profound significance and sentimental value these culinary instructions held for me. Family recipes are more than just directions; they are stories, memories, and a tangible link to those we love, ensuring their legacy lives on with every bite.
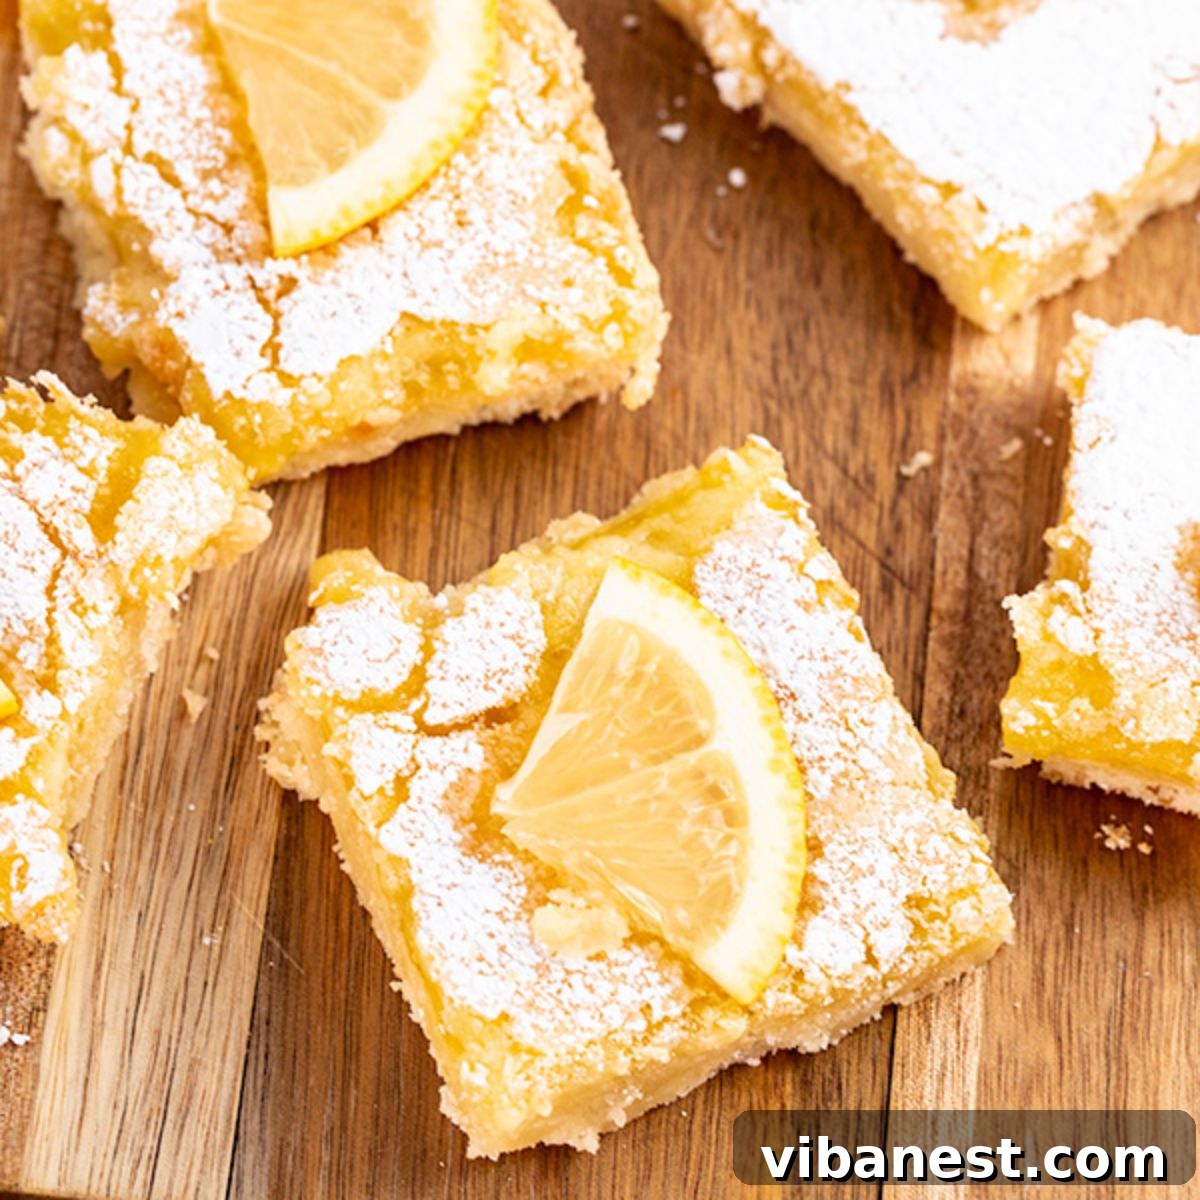
The Perfect Shortbread Crust for Lemon Bars
The foundation of an exceptional lemon bar lies in its crust. While some lemon bar recipes might suggest using a graham cracker crust, which offers a certain sweetness and texture, my mother’s recipe champions a classic shortbread crust. This choice is deliberate, as the rich, buttery, and slightly crumbly texture of a shortbread crust provides a perfect counterpoint to the vibrant, smooth lemon filling, allowing the citrus flavor to truly shine without being overshadowed by overly sweet or spiced notes.
Creating this ideal crust requires just three simple ingredients: unsalted butter, all-purpose flour, and powdered sugar. Optionally, I like to add a tiny pinch of salt to enhance the flavors and balance the sweetness, a trick that elevates the overall taste profile. The process is straightforward: you’ll cream together the softened unsalted butter with the powdered sugar until light and fluffy, then gradually incorporate the all-purpose flour until a soft dough forms. The powdered sugar, as opposed to granulated, contributes to the crust’s tender, melt-in-your-mouth quality.
Once your dough is ready, it’s pressed evenly into a 9×9-inch baking pan. Achieving an even layer is key for uniform baking. You can use the back of a spoon, your fingertips, or even the flat bottom of a glass to gently press the dough firmly across the bottom of the pan and slightly up the edges. This careful preparation ensures a stable base for your lemon filling. After pressing, the crust bakes for approximately 15 minutes, just until it’s lightly golden and fragrant, forming a sturdy yet delicate foundation for the zesty topping. The aroma filling your kitchen at this stage is just a prelude to the deliciousness to come.
Crafting the Zesty Lemon Filling
Once your buttery shortbread crust is pre-baked and still warm, it’s time to prepare the star of the show: the bright and tangy lemon filling. This part of the recipe is just as simple and rewarding as the crust, requiring minimal effort for maximum flavor impact. The magic happens with a harmonious blend of 2 large eggs, granulated sugar, a touch of salt, fresh lemon juice, baking powder, and all-purpose flour.
In a mixing bowl, you’ll gently whisk together the large eggs with the granulated sugar until combined and slightly pale. The sugar not only sweetens the filling but also helps create that signature gooey, jam-like texture when baked. Next, you’ll stir in the fresh lemon juice and a pinch of salt. The baking powder and all-purpose flour are then sifted together in a separate small bowl before being gently folded into the wet ingredients. Sifting prevents lumps and ensures a smooth, consistent filling. This mixture is designed to be pourable, creating a luscious, smooth lemon layer that perfectly complements the rich crust.
The beauty of this recipe is that you spread this vibrant lemon topping directly over the hot crust. Baking the filling on a warm crust helps them meld together seamlessly, creating a unified dessert. The bars then return to the oven for another 20-25 minutes. You’ll know they’re ready when the top is set, slightly puffed, and develops a very light golden-brown hue, indicating that the filling has caramelized just enough at the edges. The aroma of baked lemon will fill your kitchen, signaling that a delectable treat is just moments away.
The Fresh Lemon Juice Advantage: Why It Matters
When you’re baking a dessert where “lemon” is in the title, the quality of your lemon juice is paramount. This isn’t just a suggestion; it’s a fundamental requirement for achieving that truly authentic, bright, and intensely satisfying lemon flavor. While bottled lemon juice might seem like a convenient shortcut, it simply cannot compare to the vibrant, complex notes delivered by freshly squeezed lemons.
Fresh lemons contain essential oils in their zest and juice that contribute a depth of flavor and aromatic brightness that is often lacking in their bottled counterparts. Bottled juices, having been processed, often taste flatter, more acidic, and can sometimes carry an artificial aftertaste that detracts from the delicate balance of tang and sweetness critical to these lemon bars. For a dessert that truly shines, investing a few extra minutes in squeezing fresh lemons is undoubtedly worth it.
You’ll typically need about two large lemons to yield the required 1/3 cup of lemon juice for this recipe. However, it’s always a good practice to purchase three lemons just to be absolutely certain you have enough. Lemons vary in size and juiciness, and having an extra on hand prevents any last-minute scrambling. To get the most juice from your lemons, roll them firmly on a countertop for a few seconds before cutting and squeezing. This helps break down the membranes inside, releasing more juice. You can also briefly microwave them (10-20 seconds) for a similar effect. For an extra punch of lemon flavor, consider finely grating a teaspoon or two of lemon zest into your filling mixture; just be sure to avoid the bitter white pith.
Can You Freeze Lemon Bars? A Guide to Make-Ahead Dessert
Yes, absolutely! Freezing lemon bars is an incredibly convenient way to prepare them in advance for parties, special events, or simply to have a delicious homemade treat readily available. Proper freezing techniques ensure that your lemon bars retain their fresh flavor and delightful texture, allowing you to enjoy them weeks or even months later. Here’s a comprehensive guide to freezing lemon bars like a pro:
- Cool Completely: This first step is non-negotiable. Allow your freshly baked lemon bars to cool entirely at room temperature for at least an hour, then transfer them to the refrigerator to chill for another 1-2 hours until they are firm and cold. Any residual warmth can lead to condensation and ice crystals forming in the freezer, resulting in soggy bars upon thawing. Crucially, do not dust them with powdered sugar if you plan on freezing them. Powdered sugar tends to dissolve and become sticky or soggy when exposed to moisture during freezing and thawing.
- Cut into Individual Servings: It’s best to cut the lemon bars into your desired individual portions (squares, rectangles, or triangles) before freezing. This makes it much easier to thaw and serve exactly what you need, without having to defrost the entire batch. Clean, sharp cuts are easier to achieve when the bars are cold.
- Wrap Individually: For optimal freshness and to prevent freezer burn, wrap each individual lemon bar tightly in plastic wrap. Ensure the plastic wrap adheres closely to all surfaces of the bar, minimizing air exposure. You can then add an additional layer of aluminum foil for extra protection if desired.
- Place in an Airtight Container: Arrange the individually wrapped lemon bars in a single layer within an airtight freezer-safe container or a large, heavy-duty freezer bag. If stacking is necessary, place a sheet of parchment paper between layers to prevent them from sticking together. Remove as much air as possible from freezer bags before sealing.
- Freeze for Long-Term Storage: Properly wrapped and stored, lemon bars can be frozen for up to two to three months without significant loss of quality. Label your container with the date of freezing to keep track of freshness.
To Thaw: When you’re ready to enjoy your frozen lemon bars, simply transfer the desired number of individually wrapped bars from the freezer to the refrigerator. Allow them to thaw slowly for a few hours, or ideally, overnight. Slow thawing helps maintain their texture. Once thawed, you can bring them to room temperature for serving if preferred.
Important Reminder: Only dust the lemon bars with powdered sugar just before you are ready to serve them. This ensures the pristine white finish and prevents it from becoming absorbed or damp, maintaining the perfect presentation and taste.

Pro Tips for Flawless Lemon Bars
Achieving bakery-quality lemon bars at home is entirely within reach with a few expert insights. These tips will help you create a batch that is not only delicious but also beautifully presented and easy to handle:
- Parchment Paper is Your Best Friend: This simple trick makes a world of difference. Always line your 9×9-inch (or 8×8-inch) baking pan with parchment paper, ensuring that the paper hangs over the sides like “slings” or “handles.” After the bars have completely cooled and firmed up, you can easily lift the entire slab of lemon bars out of the pan. This eliminates the struggle of trying to pry them out, prevents sticking, and makes cutting into neat, clean squares or triangles significantly easier. It’s a game-changer for presentation!
- The Art of Cooling: Patience is key when it comes to cooling lemon bars. After they emerge from the oven, allow them to cool at room temperature for about an hour. This initial cooling period lets the filling begin to set. Following this, transfer the pan to the refrigerator and continue cooling for at least another 1-2 hours. Chilling is essential because the lemon filling will firm up considerably as it gets cold, ensuring clean, crisp cuts and a stable bar that holds its shape. Trying to cut warm or even lukewarm lemon bars will result in a messy, sticky situation.
- Powdered Sugar Perfection: Always sprinkle your lemon bars with powdered sugar (also known as confectioners’ sugar) only after they have completely cooled and you are ready to serve them. As mentioned earlier, applying it too soon or before freezing will cause it to melt and disappear, leaving a sticky residue rather than a beautiful, snow-like dusting. Use a fine-mesh sieve or a small sifter for an even, elegant coating.
- Elegant Garnishing Ideas: While a simple dusting of powdered sugar is classic, you can elevate the presentation further. Garnish each bar with a thin wedge of fresh lemon – cut a thin round slice, then quarter it for perfect little triangles. For an extra burst of color and flavor, consider adding a few fresh raspberries or blueberries alongside the lemon wedge. A sprinkle of finely grated lemon zest just before serving also adds a wonderful aromatic touch.
- Choose Your Pan Wisely: For the best results, a glass baking pan is often recommended for lemon bars. Glass conducts heat more gently and evenly than metal, which helps prevent the edges of the crust from over-browning before the center is cooked. If you use a metal pan, you might need to slightly reduce the baking time or temperature to avoid an overly crisp crust.
- Storage Savvy: Store any leftover lemon bars in an airtight container in the refrigerator. They will keep well for up to 3-5 days, though their delicate flavor and texture are best enjoyed within the first 2-3 days. Bring them to room temperature for about 15 minutes before serving for optimal flavor.
- Troubleshooting Common Issues: If your filling is runny, it might be undercooked or have too much lemon juice relative to the other ingredients. Ensure exact measurements and proper baking time. If the crust is too hard, you may have over-baked it or compacted it too much when pressing into the pan.
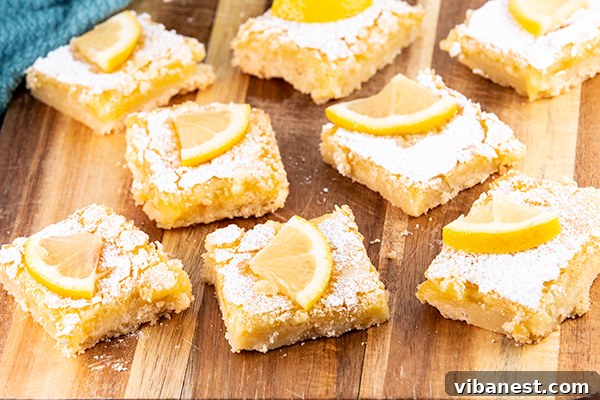
I sincerely hope you enjoy this simple yet profoundly satisfying recipe for Mama’s Classic Lemon Bars. It’s a recipe that has brought so much joy to my family, and I’m delighted to share it with yours. The combination of a rich, buttery shortbread and a perfectly balanced tangy-sweet lemon filling creates a dessert that is both comforting and exhilarating, a true testament to the timeless appeal of citrus-infused treats.
If you find yourself craving more delightful lemon desserts, I highly recommend exploring these other fantastic options:
- Blueberry Lemon Thumbprint Cookies
- Starbucks Lemon Loaf Copycat
- Iced Meyer Lemon Pound Cake
If you try this recipe, and I truly hope that you do, please consider leaving a comment below to share your experience or tagging me on social media. I absolutely love hearing from you and seeing your wonderful creations! Enjoy the process, the aromas, and most importantly, the incredible taste of these homemade lemon bars!

Lemon Bars
These Easy Lemon Bars are everything a lemon bar should be – buttery with the perfect balance of tang and sweetness!
Ingredients
CRUST INGREDIENTS
- ½ Cup Unsalted Butter
- 1 Cup All Purpose Flour
- ¼ Cup Powdered Sugar
- ¼ teaspoon salt (optional)
LEMON FILLING INGREDIENTS
- 2 Large Eggs
- 1 Cup Granulated Sugar
- ¼ Teaspoon Salt
- ⅓ cup fresh lemon juice (from about 2 large lemons)
- ½ Teaspoon Baking Powder
- ⅓ cup all purpose flour
- Additional powdered sugar for garnish
Instructions
CRUST DIRECTIONS
- Preheat oven to 350 degrees F (175°C).
- Line a 9 x 9 or 8×8 glass baking pan with parchment paper, making sure the paper hangs over the sides to create “handles” for easy lifting.
- In a medium bowl, cream together softened butter, all-purpose flour, and powdered sugar until a soft dough forms. Add in a pinch of salt if desired.
- Press the dough evenly into the prepared baking pan. Bake for 15 minutes, or until lightly golden.
LEMON FILLING DIRECTIONS
- While the crust bakes, prepare the filling: In a mixing bowl, beat the eggs, granulated sugar, salt, and fresh lemon juice until well combined.
- In a small separate bowl, whisk together the baking powder and the ⅓ cup all-purpose flour.
- Gradually add the dry mixture to the lemon mixture, whisking until smooth and no lumps remain.
- Carefully pour and spread the lemon filling mixture over the hot, pre-baked crust.
- Return the pan to the oven and bake at 350 degrees F (175°C) for 20-25 minutes, or until the top is lightly browned and the filling is set.
- Allow the lemon bars to cool completely at room temperature for about an hour. Then, transfer to the refrigerator and continue cooling for 1-2 hours until thoroughly chilled and firm.
- Once completely cool, use the parchment paper handles to lift the entire slab of lemon bars out of the pan.
- Dust generously with powdered sugar for garnish just before serving (if not freezing). Cut into squares or triangles and serve.
Tried this recipe?
Mention @CenterCutCook and tag #CenterCutCook!