
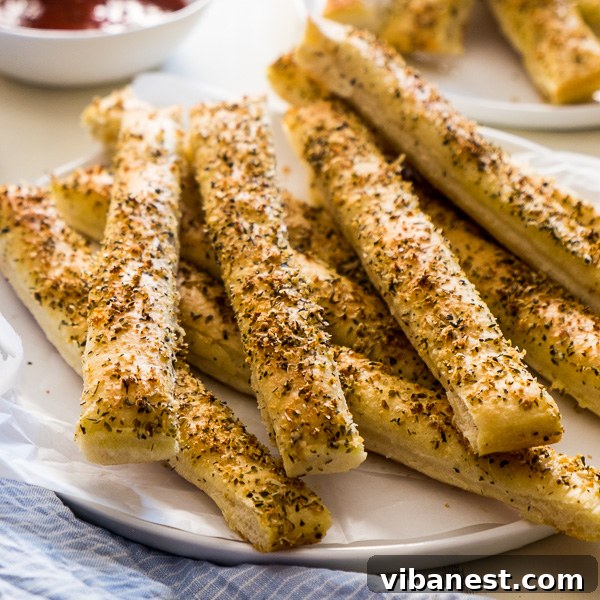
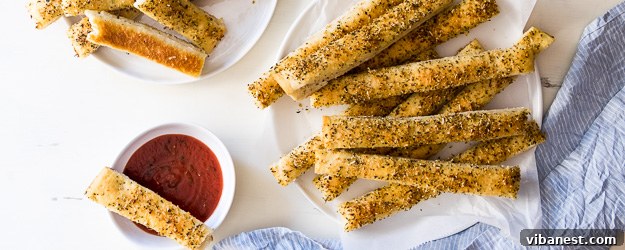
Unlock the Secret: Crafting Perfect Copycat Pizza Hut Breadsticks at Home
There’s an undeniable magic to those warm, garlicky, and perfectly seasoned breadsticks from Pizza Hut. For many, they evoke a sense of nostalgia, a taste of childhood, and the simple joy of a truly delicious side dish. What if we told you that recreating that iconic experience in your own kitchen is not only possible but also surprisingly straightforward? Whether you’re yearning for a trip down memory lane, eager to experiment with your own blend of savory herbs and cheeses, or simply need a quick, crowd-pleasing appetizer for your next gathering, this comprehensive guide and recipe are your ultimate companion.
This recipe isn’t just about imitation; it’s about empowerment. It provides a reliable and flexible framework to fulfill your breadstick dreams, allowing you to customize and perfect them to your heart’s content. Forget about store-bought frozen options or limited delivery menus; with a handful of common ingredients and a little love, you’ll be serving up piping hot, irresistible breadsticks that rival the original.
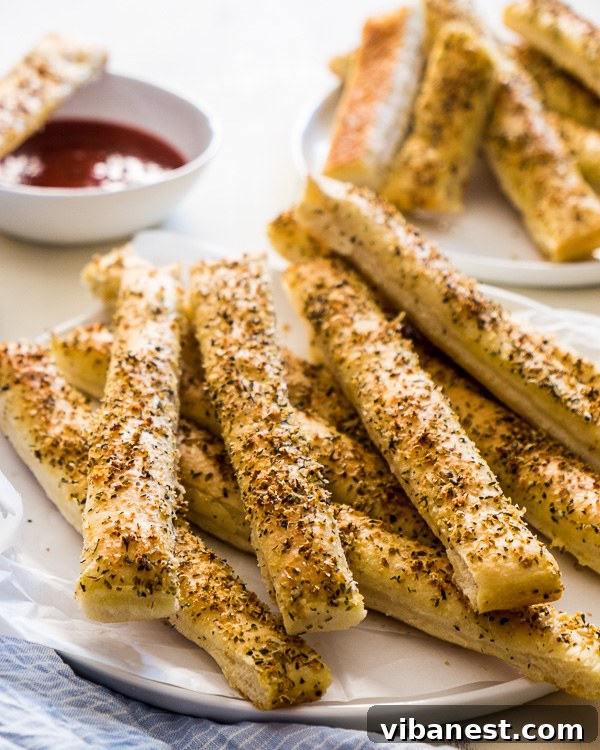
Why Homemade Pizza Hut Breadsticks Are a Game-Changer
Beyond the sheer satisfaction of baking from scratch, making your own Pizza Hut style breadsticks offers a multitude of benefits:
- Unmatched Freshness: There’s nothing quite like breadsticks fresh out of your own oven, still warm and fragrant. The texture is superior, and the flavors are more vibrant.
- Cost-Effective: Ingredients for breadsticks are generally inexpensive, making this a budget-friendly option compared to ordering takeout. You can make a large batch for the price of a small order.
- Customization at Your Fingertips: This recipe is a fantastic starting point, but it’s also a canvas. Adjust the seasoning, add more cheese, experiment with different herbs, or even introduce a touch of spice.
- Quality Ingredients: You control what goes into your food. Use high-quality flour, fresh yeast, and your favorite olive oil for a superior product free from preservatives or artificial flavors.
- A Fun Family Activity: Baking bread can be a wonderfully therapeutic and engaging activity for all ages. Get your family involved in the mixing, kneading, and shaping for a memorable kitchen experience.
- Impress Your Guests: Be ready to hear gasps of delight when you present a platter of these homemade breadsticks. They are guaranteed to be a hit at any party, potluck, or casual get-together.
You’ll need just a few staple ingredients – flour, yeast, salt, herbs, spices, and cheese – plus a dash of enthusiasm. In under an hour and a half, including rising time, you’ll transform these simple components into a culinary masterpiece. And of course, no breadstick experience is complete without the perfect dipping sauce! We’ve included a recipe for a classic tomato-herb sauce that perfectly complements the savory breadsticks. But don’t stop there; these breadsticks also pair wonderfully with creamy ranch dressing, a hearty meaty red spaghetti sauce, or even a simple garlic butter dip.
So, what are you waiting for? It’s breadstick time!
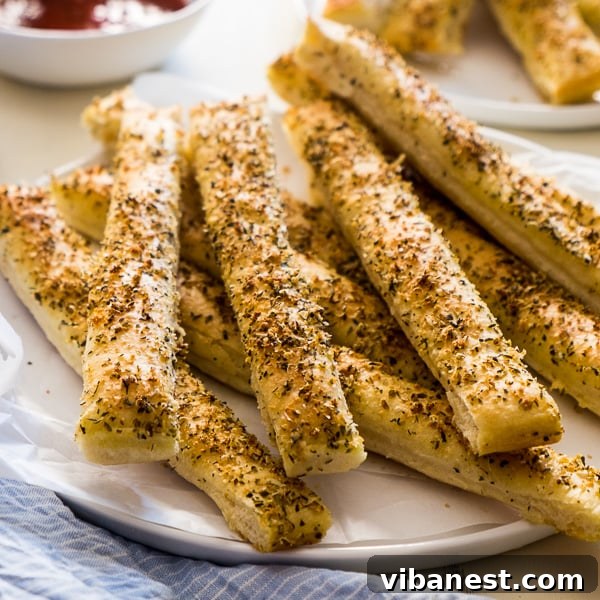
Homemade Pizza Hut Style Breadsticks: The Ultimate Recipe
DOUGH INGREDIENTS
- 4 cups (480 grams) bread flour (The higher protein content of bread flour gives breadsticks a chewier, more authentic texture. All-purpose flour can be used in a pinch, but the result might be slightly less chewy.)
- 2 tablespoons dry milk powder (This ingredient helps tenderize the dough, promotes browning, and adds a subtle richness that enhances the overall flavor.)
- 1 tablespoon granulated sugar (Feeds the yeast, aiding in a quicker rise, and contributes to the golden-brown crust.)
- 1 tablespoon instant yeast (Instant yeast can be mixed directly with dry ingredients, making the process simpler and faster than active dry yeast, which requires proofing.)
- 1/2 teaspoon salt (Essential for flavor and also plays a crucial role in controlling yeast activity and strengthening the gluten structure.)
- 1 and 1/3 cups warm water (Around 105-115°F or 40-46°C is ideal for activating instant yeast without killing it. If the water is too hot, it will kill the yeast; too cold, and the yeast won’t activate effectively.)
- 3 tablespoons olive oil (Adds richness to the dough, contributes to a softer texture, and prevents sticking during rolling.)
DIPPING SAUCE INGREDIENTS
- 1 (15-ounce) can tomato sauce (Plain canned tomato sauce provides a smooth base for a quick and flavorful dipping sauce.)
- 1 teaspoon dried oregano (Adds a classic Italian herb aroma and taste.)
- 1/2 teaspoon dried basil (Complements the oregano and tomato with its sweet, peppery notes.)
- 1/2 teaspoon garlic powder (Provides a concentrated garlic flavor without the sharpness of fresh garlic.)
BREADSTICK TOPPING INGREDIENTS
- 2 tablespoons Parmesan cheese powder (or 1/4 cup freshly grated Parmesan cheese) (A key ingredient for that signature savory, umami flavor and slightly salty crust. Powdered Parmesan adheres best.)
- 1 tablespoon onion powder (Adds a sweet, aromatic depth of flavor that rounds out the savory profile.)
- 1 tablespoon dried oregano (Reinforces the Italian herb theme, offering an earthy and slightly bitter note.)
- 2 teaspoons garlic powder (Intensifies the garlicky taste, which is crucial for authentic copycat breadsticks.)
- 1 teaspoon dried basil (Adds a subtle sweetness and peppery finish to the topping blend.)
- 3/4 teaspoon salt (Enhances all the flavors and provides the perfect amount of seasoning for the crust.)
DIRECTIONS
- In the spacious bowl of a stand mixer, carefully combine the bread flour, dry milk powder, granulated sugar, instant yeast, and salt. Use a spatula or whisk to thoroughly mix these dry ingredients, ensuring they are evenly distributed. This initial step is vital for consistent dough development.
- Attach the dough hook to your stand mixer. With the mixer set to its lowest speed, gradually pour in the warm water. Continue mixing until the ingredients just start to come together and a shaggy dough begins to form. Increase the mixer speed to medium-low and continue kneading for about 5-7 minutes. You’re looking for a soft, pliable dough that is mostly smooth on the surface and elastic to the touch. It should pull away from the sides of the bowl.
- Generously coat a large baking sheet (approximately 12 x 17 inches) with 2 tablespoons of olive oil. Transfer the prepared dough onto the oiled baking sheet. Using your hands or a rolling pin, gently stretch and roll the dough into a uniform 1/4-inch thick rectangle, aiming for a size that fills the baking sheet. If the dough resists stretching into the corners, allow it to rest for 5-10 minutes, then continue stretching. This rest period allows the gluten to relax, making it easier to work with. Once shaped, seal the tray tightly with plastic wrap to prevent the dough from drying out. Place it in a warm, draft-free spot and let it rise until its size has visibly doubled, which typically takes about 1 hour.
- While your dough is happily rising, turn your attention to the delightful dipping sauce. In a small bowl, combine the entire can of tomato sauce with the dried oregano, dried basil, and garlic powder. Stir all the ingredients together until well combined. Set the sauce aside; its flavors will meld beautifully as it rests.
- Next, prepare the flavorful breadstick topping. In another small, separate bowl, combine the Parmesan cheese (powdered or grated), onion powder, dried oregano, garlic powder, dried basil, and salt. Stir vigorously to ensure all the spices and cheese are thoroughly mixed and evenly distributed. This ensures every bite of your breadstick is packed with flavor.
- Preheat your oven to a blazing 500 degrees F (260 degrees C). The high temperature is crucial for achieving that characteristic crispy exterior and soft interior, mimicking commercial ovens. Make sure your oven is fully preheated before the breadsticks go in.
- Once your dough has risen beautifully and doubled in size, carefully remove the plastic wrap. Using a pizza cutter or a sharp knife, slice the dough into 20 equal-sized breadsticks. Try to make clean cuts without tearing the dough. Gently brush the remaining 2 tablespoons of olive oil over the surface of the dough. Be delicate to avoid deflating the dough too much, which can lead to a less airy texture. Finally, generously sprinkle the prepared cheese and herb mixture evenly over all the breadsticks.
- Carefully transfer the baking sheet to your preheated oven. Bake for approximately 10 to 15 minutes, or until the breadsticks achieve a gorgeous golden-brown color on top and are cooked through. Keep a close eye on them, as high-temperature baking can cause them to brown quickly.
- Once baked, remove the breadsticks from the oven and allow them to rest on the baking sheet for about 5 minutes. This brief resting period helps them firm up slightly and makes them easier to handle. After resting, you can easily break them apart with your hands or use a knife if preferred.
- Serve your homemade Pizza Hut style breadsticks warm or at room temperature, accompanied by the delicious dipping sauce you prepared earlier. Enjoy the fruits of your labor!
Tips for Breadstick Perfection: Elevate Your Baking Game
- Water Temperature is Key: Ensure your warm water is between 105-115°F (40-46°C). A kitchen thermometer is invaluable here. Water that’s too hot can kill the yeast, while water that’s too cool won’t activate it effectively, leading to a poor rise.
- Don’t Skimp on the Kneading: Proper kneading develops the gluten, which is essential for the breadsticks’ chewy texture. If using a stand mixer, ensure the dough is smooth and elastic. If kneading by hand, aim for about 8-10 minutes until it passes the windowpane test (you can stretch a small piece thin enough to see light through it without tearing).
- The Perfect Rise Environment: Yeast loves warmth! Find a cozy, draft-free spot for your dough to rise. If your kitchen is cool, you can preheat your oven to its lowest setting for a few minutes, then turn it off and let the dough rise inside (with the oven light on for gentle warmth).
- Even Thickness for Even Baking: When rolling out the dough, strive for a consistent 1/4-inch thickness across the entire rectangle. This ensures all your breadsticks bake evenly and have the same delightful texture. Uneven thickness can lead to some breadsticks being undercooked and others over-baked.
- High Heat is Your Friend: The 500°F (260°C) oven temperature is intentional. It creates a rapid rise and a crispy exterior before the inside overcooks, giving you that signature Pizza Hut breadstick texture. Don’t be tempted to lower the temperature.
- Brush Gently: When applying the olive oil before the topping, use a light touch. Aggressive brushing can deflate the dough, resulting in denser breadsticks.
Troubleshooting Common Breadstick Challenges
- Dough Not Rising: The most common culprits are inactive yeast (check the expiration date), water that was too hot or too cold, or a rising environment that’s too cool. Ensure your yeast is fresh and your water temperature is correct.
- Dense Breadsticks: This often indicates either insufficient kneading (poor gluten development) or the dough didn’t get a proper second rise (was deflated too much before baking). Ensure you knead thoroughly and handle the risen dough gently.
- Dry Breadsticks: Over-baking is the usual suspect. Keep a close eye on your breadsticks during the last few minutes of baking. They should be golden, not dark brown. Ovens vary, so adjust baking time as needed.
- Uneven Browning: This can be due to an uneven oven temperature or inconsistent dough thickness. Rotate your baking sheet halfway through the baking time. Ensure your dough is rolled to an even thickness.
- Topping Falling Off: Make sure you brush the dough with olive oil before sprinkling the topping. The oil helps the cheese and herbs adhere better.
Variations & Customizations: Your Breadsticks, Your Way
While the classic recipe is a winner, feel free to get creative:
- Garlic Butter Supreme: For an extra rich flavor, instead of just olive oil, melt 2-3 tablespoons of butter with a teaspoon of minced fresh garlic or garlic powder. Brush this mixture on the breadsticks before sprinkling the topping.
- Cheesy Garlic Breadsticks: After brushing with olive oil and sprinkling the dry topping mixture, add a layer of shredded mozzarella or a blend of Italian cheeses. This creates a gooey, cheesy treat.
- Herbs in the Dough: Incorporate 1-2 teaspoons of dried Italian seasoning or a mix of dried oregano and basil directly into the dry dough ingredients for a more infused herb flavor.
- Spicy Kick: Add a pinch or two of red pepper flakes to the topping mixture for a subtle warmth, or to the dipping sauce for a bolder spice.
- Rosemary & Sea Salt: For a sophisticated twist, replace some of the dried herbs in the topping with fresh finely chopped rosemary and finish with a sprinkle of flaky sea salt.
Serving Suggestions Beyond Marinara
While the classic tomato-herb dipping sauce is a perfect match, these versatile breadsticks can elevate many meals:
- Pasta Night Essential: Serve them alongside any pasta dish – spaghetti and meatballs, lasagna, or creamy fettuccine alfredo.
- Soup & Salad Companion: They are excellent for dipping into hearty soups like minestrone, tomato soup, or even a creamy broccoli cheddar. Pair them with a fresh green salad for a complete meal.
- Appetizer Platter: Cut them into smaller pieces and serve them as part of an antipasto platter with olives, cheeses, and cured meats.
- Breakfast Sandwich Upgrade: Believe it or not, split leftover breadsticks, toast them lightly, and use them as a base for egg and cheese breakfast sandwiches.
- With Dips Galore: Beyond marinara and ranch, consider hummus, spinach artichoke dip, or even a spicy queso for an adventurous pairing.
Storing and Reheating Your Homemade Breadsticks
If you happen to have any leftovers (a rare occurrence!), they can be stored to enjoy later:
- Storage: Allow the breadsticks to cool completely. Store them in an airtight container or a resealable plastic bag at room temperature for up to 2-3 days. For longer storage, freeze them for up to 1 month.
- Reheating: For best results, reheat breadsticks in a preheated oven or toaster oven at 350°F (175°C) for 5-7 minutes, or until warmed through and slightly crispy. Avoid the microwave, which can make them soft and chewy rather than crusty. If reheating from frozen, allow them to thaw slightly before reheating in the oven, or add a few extra minutes to the baking time.
With this recipe, you now hold the power to bring the beloved taste of Pizza Hut breadsticks right into your home. The aroma that will fill your kitchen is only surpassed by the sheer delight of biting into one of these warm, savory, and perfectly seasoned treats. So gather your ingredients, fire up your oven, and prepare for a truly rewarding baking experience that will impress everyone at your table. Happy baking!
Recipe adapted from
Brown Eyed Baker