
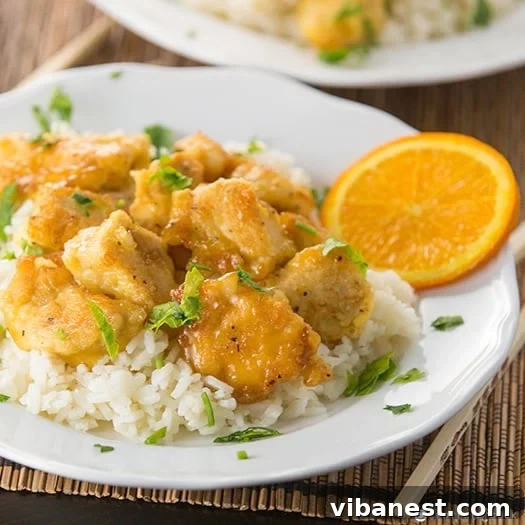
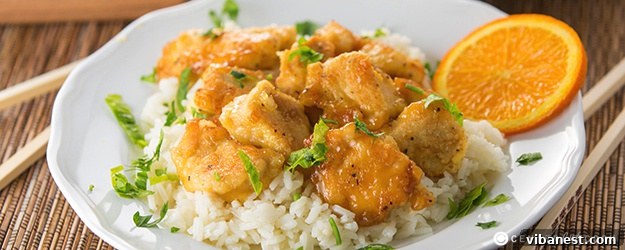
The Best Homemade Orange Chicken Recipe: Sweet, Tangy, and Better Than Takeout
Craving that irresistible sweet and tangy Orange Chicken but want to avoid the typical takeout disappointments? You’ve come to the right place! Just like our immensely popular Sweet and Sour Chicken recipe, this homemade Orange Chicken has become a cherished staple in our household. Forget greasy, overly sweet, or bland versions you might get from chain restaurants (yes, we’re looking at you, Panda Express!). This recipe delivers an explosion of authentic flavor, a satisfying texture, and the undeniable freshness that only a home-cooked meal can provide.
What makes this Orange Chicken truly stand out? It’s our unique cooking method that guarantees perfect results every time. While I’ve experimented with various approaches, including slow cooker versions, I always return to this winning combination: a light pan-fry followed by baking in the oven. This ensures the chicken is beautifully browned and develops a subtle crispness, while remaining incredibly tender and juicy on the inside, all without the hassle and heavy oil of deep-frying.
Why Choose Homemade Orange Chicken Over Takeout?
There are countless reasons to whip up this Orange Chicken in your own kitchen. Beyond the sheer satisfaction of creating something delicious from scratch, homemade offers several significant advantages:
- Superior Flavor & Freshness: You control the ingredients, ensuring the freshest oranges, quality chicken, and premium spices. No mystery ingredients or artificial flavors here!
- Customizable Taste: Adjust the sweetness, tanginess, or spice level to perfectly suit your palate. Want it spicier? Add a pinch of red pepper flakes. Less sweet? Reduce the sugar slightly.
- Healthier Option: By pan-frying lightly and then baking, we significantly reduce the amount of oil compared to traditional deep-fried takeout versions. Plus, you avoid preservatives and excessive sodium often found in restaurant dishes.
- Cost-Effective: Making Orange Chicken at home is far more economical than ordering multiple takeout meals, especially when feeding a family.
- Dietary Control: Easily adapt the recipe for specific dietary needs, such as gluten-free (using gluten-free soy sauce and cornstarch) or dairy-free.
The Magic of the Orange Sauce: Fresh, Zesty, and Irresistible
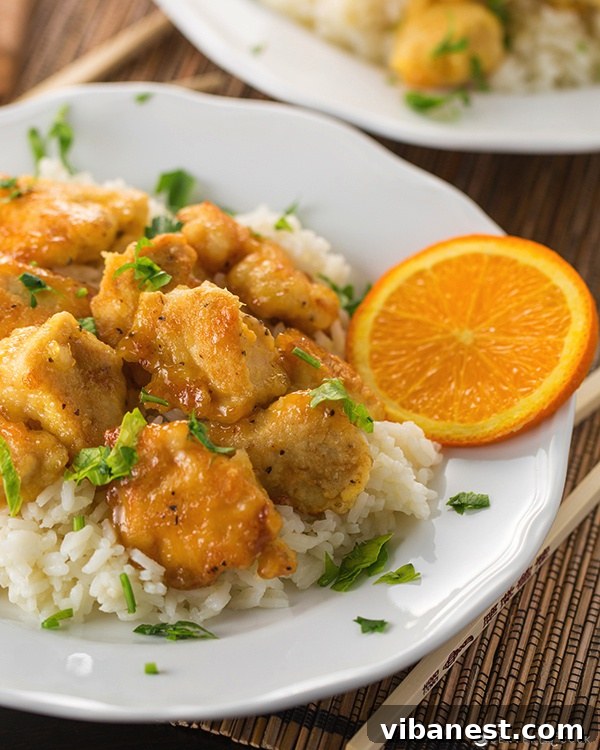
The heart and soul of any great Orange Chicken recipe lie in its sauce. Our signature sauce is a vibrant symphony of flavors – perfectly balanced with sweet, tangy, and savory notes that coat every piece of chicken beautifully. The secret to its incredible citrusy depth? Both fresh orange juice AND orange zest.
While bottled orange juice can be used in a pinch, I highly recommend juicing a fresh orange. The difference in brightness and natural sweetness is truly noticeable. And don’t skip the zest! The outer peel of an orange contains essential oils that pack an aromatic punch, elevating the overall citrus profile of the sauce. If you’re new to zesting fruit, a microplane grater is an invaluable tool that makes the process quick and effortless, yielding fine, fluffy zest without any bitter pith.
Beyond the orange, the sauce incorporates a thoughtful blend of ingredients to create its complex profile: chicken broth for richness, white vinegar for a sharp tang, sugar for sweetness, Worcestershire sauce for umami depth, garlic powder for aromatic warmth, and black pepper for a subtle kick. The cornstarch slurry ensures the sauce thickens to the perfect glossy consistency, clinging to the chicken without being overly gloopy.
The Perfect Cook: Pan-Fry then Bake Method Explained
Our two-step cooking process is the cornerstone of this recipe’s success. Here’s why it works so well:
- Initial Pan-Frying: This crucial first step quickly browns the cornstarch-and-egg-coated chicken pieces, creating a delicate, slightly crispy exterior. It seals in the juices and develops that desirable golden-brown color and texture that deep-frying typically provides, but with significantly less oil. We’re not aiming for fully cooked chicken here, just a beautiful crust.
- Finishing in the Oven: After browning, the chicken is transferred to a baking sheet and tossed with the luscious orange sauce before heading into the oven. This baking phase allows the chicken to cook through gently and evenly, becoming incredibly tender and absorbing all the wonderful flavors of the sauce. It also gives the sauce time to further penetrate the chicken and caramelize slightly, creating that signature sticky glaze. Turning the chicken every 15 minutes ensures even coating and browning on all sides.
This method results in chicken that is perfectly cooked, wonderfully tender on the inside, and beautifully glazed with sauce, mimicking the best qualities of restaurant-style Orange Chicken without the deep-fryer mess or extra calories.
Serving Suggestions: The Perfect Accompaniments
Orange Chicken is incredibly versatile and pairs well with a variety of sides. My go-to serving suggestion is always over a bed of fluffy rice. For an extra boost of flavor that’s subtle yet remarkably noticeable, here’s one of my favorite little tips for cooking rice: use chicken stock in place of water. It infuses the rice with a savory depth that perfectly complements the sweet and tangy chicken.
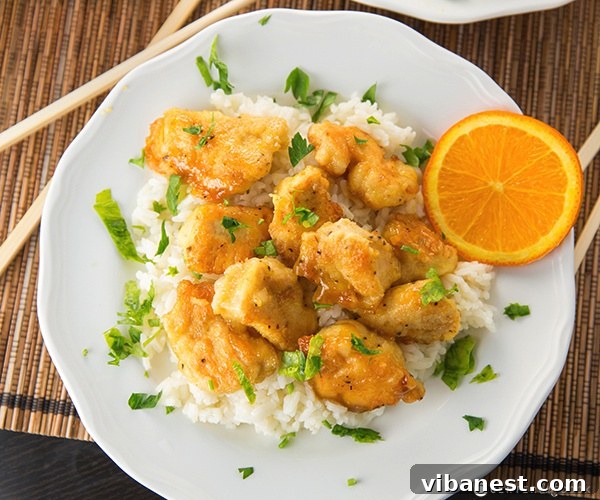
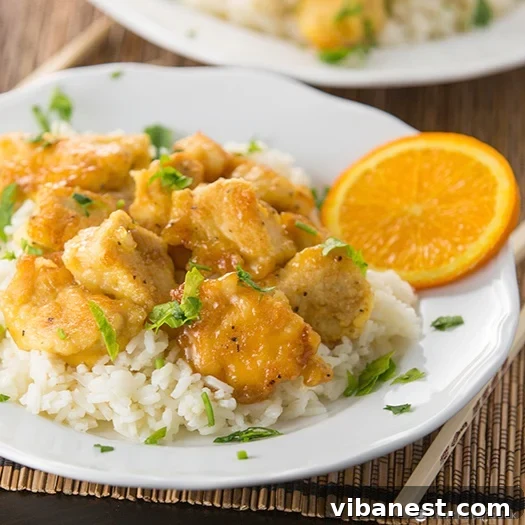
For an elevated presentation, especially if you’re entertaining, be sure to save a few fresh orange slices for garnish, along with a sprinkle of chopped green onions. These not only add visual appeal but also a burst of fresh citrus and herbaceousness. If you’re looking to truly impress, consider serving this Orange Chicken with my highly acclaimed fried rice recipe – it’s a dish that consistently rocks our world and elevates any meal from simple to spectacular! Of course, traditional white or brown rice are always excellent choices too, or even a healthier option like quinoa.
Beyond rice, consider adding a simple side of steamed broccoli, stir-fried snow peas, or asparagus to complete your meal and add some vibrant greens. A light Asian-inspired salad could also be a refreshing contrast to the richness of the chicken.
Tips for Success
- Chicken Prep: Cut chicken into uniform 1-inch chunks for even cooking. Season generously before coating.
- Coating: Ensure each piece of chicken is fully coated in cornstarch and then egg. This creates the base for the crispy exterior.
- Don’t Overcrowd the Skillet: Cook chicken in batches if necessary to ensure even browning. Overcrowding will steam the chicken instead of browning it.
- Sauce Consistency: The cornstarch slurry is key to a perfectly thick sauce. Bring the sauce to a boil before adding the slurry, then reduce heat and simmer until thickened.
- Even Baking: Turn the chicken every 15 minutes during baking to ensure all pieces are evenly coated and absorb the sauce properly.
- Fresh Ingredients: Whenever possible, use fresh orange juice and zest. The difference in flavor is significant.
- Garnish Matters: Don’t underestimate the power of fresh green onions and orange slices for a beautiful presentation and added freshness.
Recipe Variations & Customizations
- Spice It Up: For a spicier kick, add a pinch of red pepper flakes to the sauce or a few slices of fresh chili pepper while simmering.
- Gluten-Free: Easily make this recipe gluten-free by substituting cornstarch with tapioca starch and using a gluten-free Worcestershire sauce and tamari (gluten-free soy sauce) instead of standard chicken broth if it contains gluten.
- Different Proteins: While chicken is classic, you could experiment with pork tenderloin, shrimp, or even firm tofu for a vegetarian option. Adjust cooking times accordingly.
- Vegetable Boost: Add some quick-cooking vegetables like bell peppers, snap peas, or broccoli florets to the baking pan during the last 15-20 minutes of baking for a one-pan meal.
Storage and Reheating
Leftover Orange Chicken stores beautifully in an airtight container in the refrigerator for up to 3-4 days. To reheat, you can use the microwave, but for best results that retain some crispness, gently reheat in a skillet on the stovetop over medium heat until warmed through, or in an oven at 300°F (150°C) for about 10-15 minutes.
CHICKEN INGREDIENTS
- 3 boneless, skinless chicken breasts
- 1 cup corn starch
- 2 eggs, beaten
- Salt, pepper, garlic powder for seasoning the chicken (to taste)
- 1/4 cup vegetable oil (more if needed for pan-frying)
- Green onion for garnish (chopped)
SAUCE INGREDIENTS
- 2 tablespoons corn starch dissolved in 2 tablespoons water (cornstarch slurry)
- 1 1/2 cups chicken broth
- 3/4 cup orange juice (freshly squeezed preferred)
- 1/3 cup white vinegar
- 1/2 cup granulated sugar
- 2 1/2 tablespoons Worcestershire sauce
- 1 tablespoon orange zest
- 1 teaspoon garlic powder
- 1/2 teaspoon coarse black pepper
DIRECTIONS
- Pre-heat your oven to 325°F (160°C). Prepare a large rimmed baking sheet.
- Cut chicken breasts into uniform 1-inch chunks. Season the chicken generously with salt, black pepper, and garlic powder.
- Set up a dredging station: Place corn starch in a shallow dish, and beaten eggs in another. Dip each seasoned chicken piece first into the corn starch, ensuring it’s fully coated, then into the beaten egg.
- In a large skillet, heat 1/4 cup vegetable oil over medium-high heat. Carefully add the coated chicken pieces to the hot oil, ensuring not to overcrowd the pan. Brown each piece on all sides until golden brown, about 2-3 minutes per side. You may need to do this in batches.
- Once browned, transfer the chicken to the prepared large rimmed baking sheet.
- In a small bowl, dissolve 2 tablespoons of corn starch in 2 tablespoons of water to create a slurry. Set aside.
- In a medium saucepan, combine all remaining sauce ingredients: 1 1/2 cups chicken broth, 3/4 cup fresh orange juice, 1/3 cup white vinegar, 1/2 cup granulated sugar, 2 1/2 tablespoons Worcestershire sauce, 1 tablespoon orange zest, 1 teaspoon garlic powder, and 1/2 teaspoon coarse black pepper. Bring the mixture to a boil over medium-high heat.
- Once boiling, stir in the cornstarch slurry. Reduce the heat to low and simmer for a few minutes, stirring constantly, until the sauce begins to thicken and becomes glossy.
- Pour the thickened orange sauce evenly over the browned chicken on the baking sheet. Toss gently to ensure all chicken pieces are well coated.
- Bake in the preheated oven for approximately 50 minutes, making sure to turn the chicken every 15 minutes to ensure even cooking and coating with the sauce.
- Once baked, remove the chicken from the pan. If you desire extra sauce on the side, pour any remaining sauce from the baking sheet into a serving bowl.
- Serve hot over fluffy rice, quinoa, or your favorite fried rice. Garnish with chopped green onions and fresh orange slices. Enjoy your delicious homemade Orange Chicken!
Frequently Asked Questions About Homemade Orange Chicken
Can I use chicken thighs instead of breasts?
Absolutely! Boneless, skinless chicken thighs can be used and often result in even juicier chicken due to their higher fat content. The cooking times will remain similar.
What if my sauce is too thin or too thick?
If your sauce is too thin after simmering, create another small cornstarch slurry (1 tsp cornstarch mixed with 1 tsp cold water) and slowly whisk it into the simmering sauce until it reaches your desired consistency. If it’s too thick, you can thin it out with a tablespoon or two of extra chicken broth or water.
Can I make this recipe spicier?
Yes! To add heat, include 1/4 to 1/2 teaspoon of red pepper flakes to the sauce ingredients before simmering. You can also add a touch of sriracha to the finished dish.
Is it possible to deep-fry the chicken for extra crispiness?
While this recipe focuses on a healthier pan-fry then bake method, you can certainly deep-fry the coated chicken for a traditional crispy texture. Fry in oil at 350°F (175°C) until golden brown and cooked through, then toss with the sauce as directed in the recipe.
Can I prepare the sauce ahead of time?
Yes, the orange sauce can be made a day or two in advance and stored in an airtight container in the refrigerator. Reheat gently on the stovetop before combining with the chicken.
What are good vegetable sides for Orange Chicken?
Steamed broccoli, stir-fried bell peppers and onions, snow peas, asparagus, or a simple side salad with an Asian vinaigrette dressing all pair wonderfully with Orange Chicken.
We’re confident that once you try this recipe, you’ll agree that homemade Orange Chicken far surpasses anything you can get from a restaurant. It’s a flavorful, satisfying, and surprisingly easy meal that’s sure to become a new favorite in your family’s rotation. Happy cooking!
Recipe inspiration from
CenterCutCook