Mastering the Art of Homemade Roasted Bell Peppers: A Flavorful and Cost-Effective Guide
There’s an undeniable magic that happens when fresh bell peppers meet high heat. They transform, their natural sweetness intensifying, developing a rich, smoky depth that elevates countless dishes. From simple weeknight meals to gourmet creations, homemade roasted bell peppers add an incredible burst of flavor that store-bought jars simply can’t match. Imagine tossing them into your favorite pasta, layering them onto a delicious pizza, stirring them into a hearty soup, or tucking them into a warm, gooey panini – the possibilities are endless and always delicious.
Why Roast Your Own Bell Peppers? The Smart Choice for Flavor and Your Wallet
For years, I found myself reaching for those convenient jars of roasted peppers at the grocery store, despite the lingering guilt. The price difference between a single jar and a handful of fresh bell peppers was always astounding, yet the allure of that smoky, sweet flavor was too strong to resist. It felt like an unnecessary splurge, a culinary concession I made far too often. But then, a revelation! I discovered just how incredibly simple and satisfying it is to make your own. Not only does it save a significant amount of money in the long run, but it also gives you complete control over the quality, freshness, and flavor profile. Say goodbye to preservatives and unnecessary additives; hello to pure, unadulterated roasted pepper perfection.
Beyond the cost savings, preparing your own roasted bell peppers offers a superior taste experience. Freshly roasted peppers boast a vibrant flavor and tender texture that jarred versions often lack. You can choose the ripest, most colorful peppers, ensuring the sweetest outcome. Plus, there’s an immense satisfaction that comes from creating such a versatile and flavorful ingredient from scratch. It’s an easy culinary skill that will pay dividends in your kitchen, enhancing everything from quick salads to elaborate entrées.
The Easiest Method: Broiling for Perfect Charred Bell Peppers
While some culinary enthusiasts prefer grilling bell peppers over an open flame or charring them directly on a stovetop burner, I’ve found that using the broiler offers the most hands-off, consistent, and straightforward approach. Technically, this method isn’t traditional “roasting” in the oven sense, but rather “broiling.” However, the result is the same coveted smoky, tender bell pepper. The intense, direct heat of the broiler quickly chars the pepper skin, which is exactly what we want. This charring is key to developing that signature smoky flavor and, crucially, making the skin incredibly easy to remove later.
The beauty of the broiler method lies in its simplicity. You don’t need any special equipment beyond a baking sheet and aluminum foil. It allows for even cooking and charring, requiring minimal intervention once the peppers are under the heat. Just remember to keep a watchful eye, as broilers can vary in intensity, and peppers can go from perfectly charred to burnt in a matter of moments. This method is truly a game-changer for anyone looking to add a gourmet touch to their meals without the fuss.
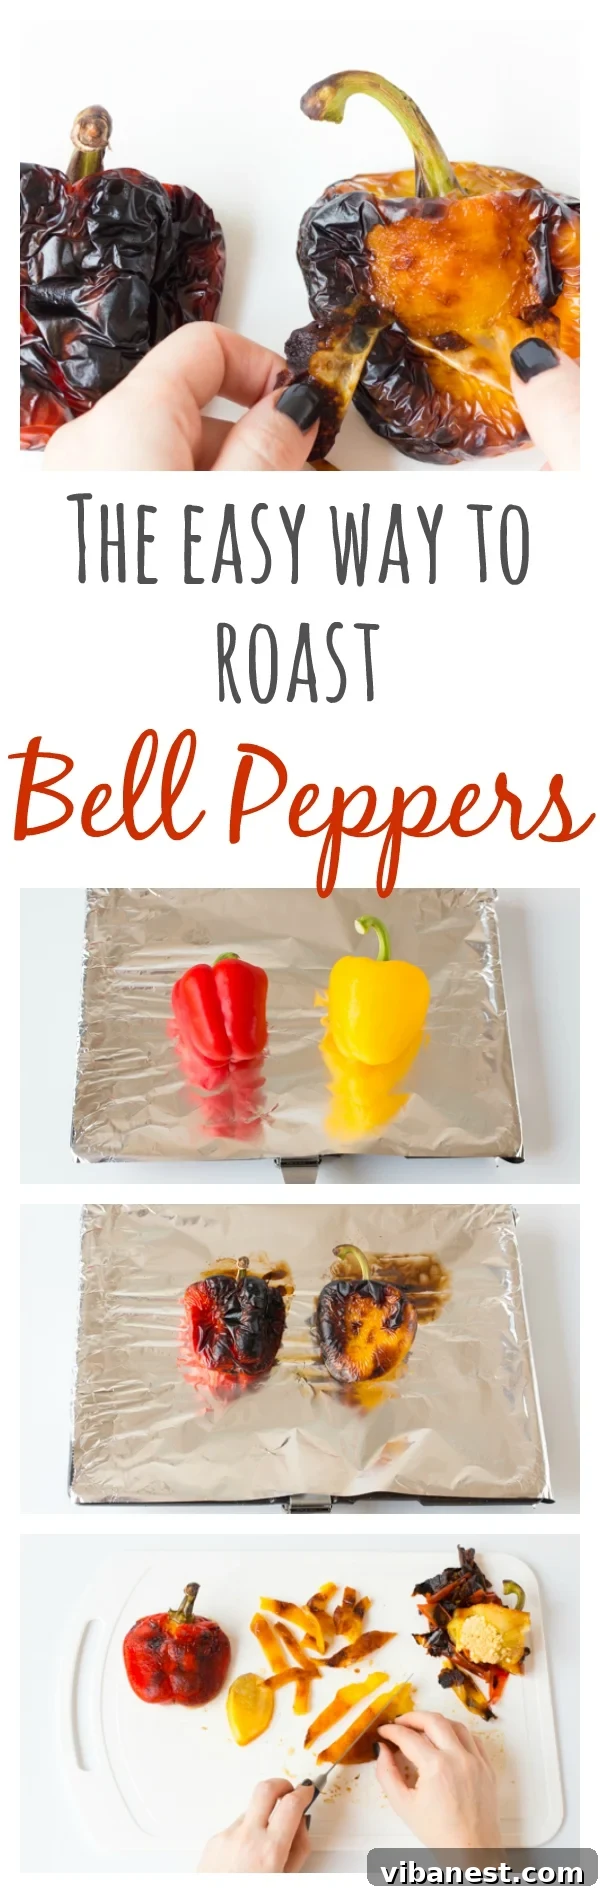
Step-by-Step Guide to Perfectly Roasted Bell Peppers
1. Preparation is Key
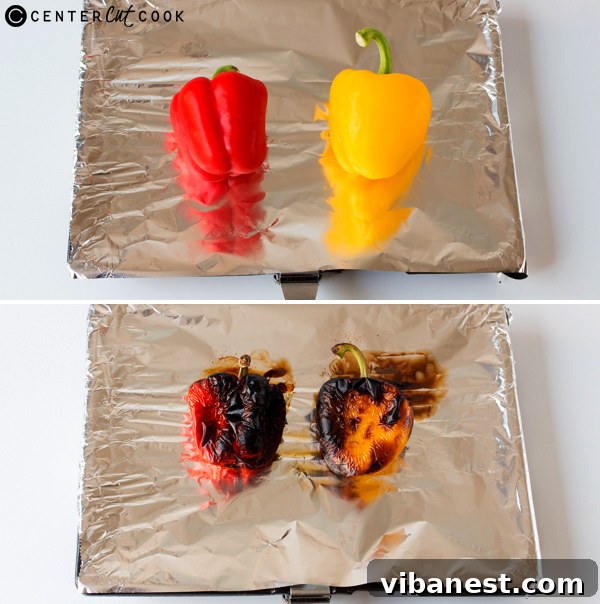
Start by selecting firm, brightly colored bell peppers. Red, yellow, and orange varieties are typically sweeter and roast beautifully. While green bell peppers can be roasted, their slightly more bitter flavor might not be as universally appealing in all dishes. Wash your peppers thoroughly and pat them dry. There’s no need to core or seed them at this stage; we’ll handle that after roasting. Line a sturdy baking sheet with aluminum foil. This step is crucial for easy cleanup, as the charred bits and juices can be quite sticky. Place your peppers directly on the foil-lined sheet, ensuring they are not overcrowded. Give them a little space so the hot air can circulate and char them evenly.
2. Broiling for That Signature Char
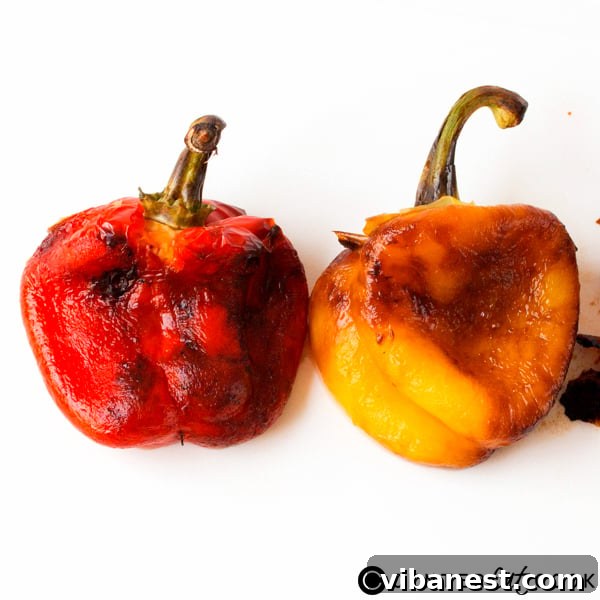
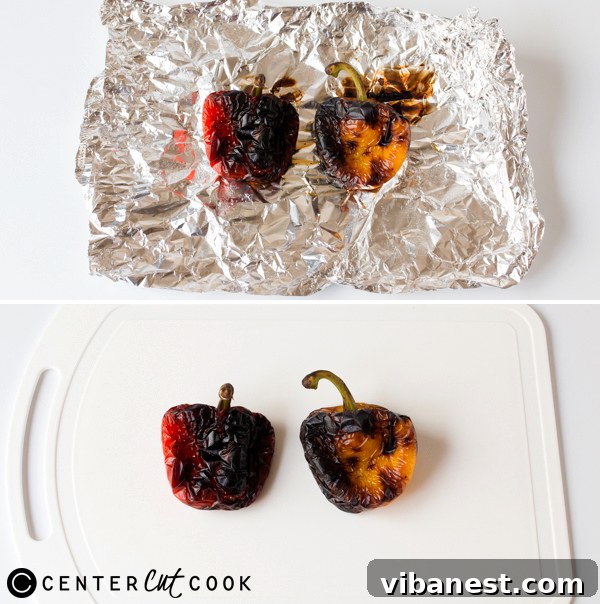
Preheat your broiler to high. Position an oven rack about 4-6 inches from the heat source. Place the baking sheet with the peppers directly under the hot broiler. Allow them to cook, turning them every 5-7 minutes with tongs, until all sides are well charred and blackened. Don’t be afraid of the blackening – this is exactly what you want! The skin should be bubbly and visibly burnt in places. This process can take anywhere from 15 to 25 minutes, depending on the strength of your broiler and the size of your peppers. Keep a close watch to prevent them from becoming completely incinerated, but embrace the char.
3. The Crucial Steaming Process
Once your bell peppers are thoroughly charred on all sides, carefully remove the baking sheet from the oven. Immediately wrap the hot peppers tightly in the same aluminum foil you used for cooking, or transfer them to a bowl and cover tightly with plastic wrap. The goal here is to create a steamy environment. Let the peppers rest and steam for at least 10-15 minutes, or even up to 20 minutes for larger peppers. This steaming period is absolutely vital! As the peppers cool, the trapped moisture works its magic, causing the skins to loosen and practically peel themselves away. This step makes the peeling process incredibly easy and prevents you from struggling with stubborn bits of skin.
4. Peeling, Seeding, and Slicing
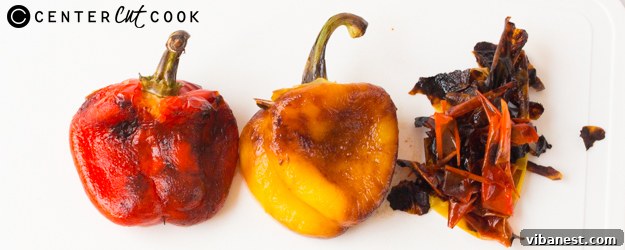
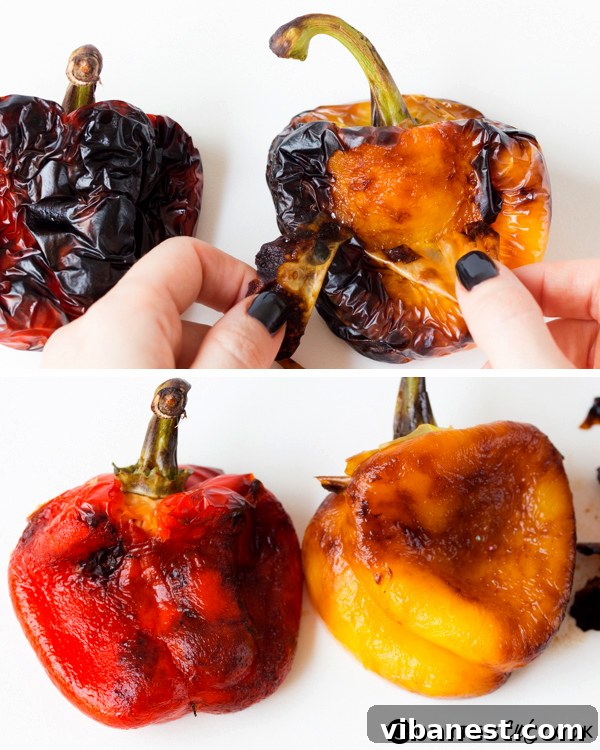
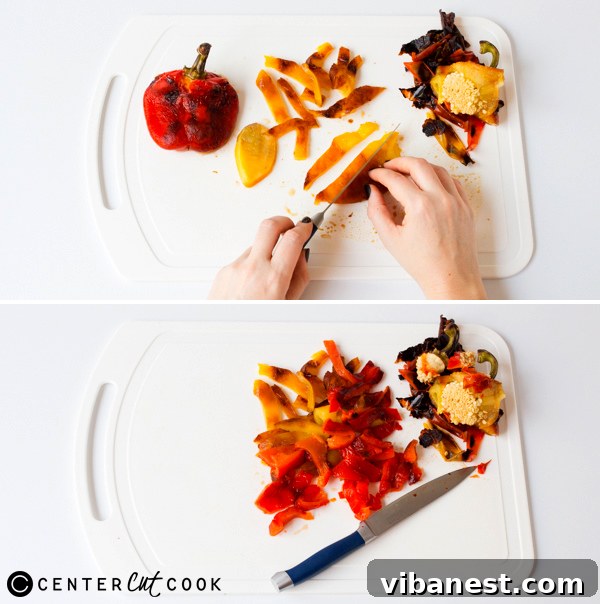
After the resting period, carefully unwrap the foil. The peppers will still be warm but cool enough to handle. Gently peel off the loosened skins with your hands. You’ll find that most of the skin comes off effortlessly. It’s important to remove as much of the skin as possible, as it can have a slightly bitter taste and an unpleasant texture. Don’t worry if a tiny speck or two remains; a little char adds character. At this point, the peppers will be wonderfully soft and quite juicy. You can now cut the peppers in half or quarters, remove the stem, and carefully scoop out the seeds and any white membranes. These parts are also best discarded. The remaining sweet, smoky flesh is now ready to be chopped, sliced, or diced into your desired size, perfectly prepared for incorporation into your favorite recipes.
Tips for Roasting Bell Peppers Like a Pro
- Don’t Overcrowd: Give your peppers space on the baking sheet to ensure proper charring. If they’re too close, they’ll steam instead of char.
- Watch Carefully: Broilers can be unpredictable. Never walk away while peppers are broiling, as they can burn quickly.
- Embrace the Char: The blacker the skin, the easier it is to peel and the deeper the smoky flavor.
- Vary Your Peppers: Experiment with different colors and even types of peppers (like poblano for a mild kick) to expand your culinary repertoire.
- Gloves for Peeling: If your hands are sensitive to heat or capsaicin (especially with hotter peppers), consider wearing thin gloves during the peeling process.
Storing Your Delicious Homemade Roasted Bell Peppers
Once you’ve mastered the art of roasting bell peppers, you’ll want to make them in bigger batches! Proper storage ensures you can enjoy their incredible flavor for longer.
- Short-Term Storage (Refrigerator): Place your peeled, seeded, and sliced roasted bell peppers in an airtight container in the refrigerator. They will keep fresh for 3-5 days. They are perfect for quick additions to salads, sandwiches, or as a vibrant side dish.
- Storing in Oil (Refrigerator): For a slightly longer shelf life and an infusion of extra flavor, you can pack the roasted peppers in a jar and cover them completely with olive oil. Add a clove of garlic or a sprig of fresh rosemary for an aromatic touch. Stored this way in the refrigerator, they can last up to 1-2 weeks. However, always ensure the peppers are fully submerged in oil to prevent spoilage, and use clean utensils to retrieve them.
- Long-Term Storage (Freezer): Roasted bell peppers freeze beautifully. Once they are peeled, seeded, and cut, arrange them in a single layer on a baking sheet and freeze until solid (this prevents them from sticking together). Then transfer the frozen pieces to a freezer-safe bag or airtight container. They will maintain their quality for up to 6 months. Thaw them in the refrigerator overnight or add them directly to hot dishes.
Creative Ways to Use Your Flavorful Roasted Bell Peppers
The versatility of homemade roasted bell peppers is truly remarkable. Once you have a batch ready, a world of culinary possibilities opens up. Their sweet, smoky profile makes them a fantastic addition to almost any meal.
- Pasta Dishes: Chop them and toss with hot pasta, garlic, olive oil, and Parmesan cheese. Blend them into a creamy roasted red pepper sauce for an instant flavor boost to any pasta dish.
- Pizzas and Flatbreads: Layer slices over your homemade or store-bought pizza before baking for a sweet and savory topping. They pair wonderfully with goat cheese, mozzarella, and various meats.
- Soups and Stews: Puree them into tomato soup for a richer, deeper flavor, or dice them and add to chili, stews, or even a classic minestrone for a touch of sweetness and color.
- Sandwiches and Paninis: They are a fantastic filling for sandwiches, especially when combined with cheeses like Havarti, goat cheese, or provolone, and meats like roast beef or chicken. Create a gourmet panini by grilling them with your favorite fillings.
- Salads: Add chopped roasted peppers to green salads, grain salads (like quinoa or couscous), or Mediterranean-inspired chickpea salads for extra flavor and visual appeal.
- Dips and Spreads: The star ingredient in classic dips like Romesco sauce, a vibrant Spanish almond and pepper dip. They can also be blended into hummus or cream cheese spreads.
- Eggs: Fold them into omelets, frittatas, or scrambled eggs for a delightful breakfast or brunch.
- Side Dishes: Simply serve them as a standalone side dish, perhaps drizzled with a balsamic glaze or a sprinkle of fresh herbs.
- Marinades: Puree them with garlic, herbs, and olive oil to create a vibrant marinade for chicken, fish, or vegetables.
Easy Homemade Roasted Bell Peppers Recipe
Yields: Approximately 1 cup of chopped roasted peppers
INGREDIENTS
- 1 large red bell pepper
- 1 large yellow bell pepper
- Optional: A drizzle of olive oil for storage
- Optional: A pinch of salt and pepper to taste
DIRECTIONS
- Prepare Peppers: Preheat your oven’s broiler to high. Line a sturdy baking sheet with aluminum foil for easy cleanup. Wash the red and yellow bell peppers thoroughly and pat them dry. Place them whole on the prepared baking sheet, ensuring they have a little space between them.
- Broil Until Charred: Position the oven rack 4-6 inches from the broiler element. Place the baking sheet with the peppers under the hot broiler. Cook for about 5-7 minutes until the skin on one side is visibly blackened and blistered. Using tongs, carefully turn the peppers to a new side and repeat the process. Continue turning every 5-7 minutes until all sides of both peppers are thoroughly charred and blackened. This charring is essential for flavor and easy peeling. The total broiling time will typically be 15-20 minutes, depending on your broiler’s intensity and pepper size.
- Steam for Easy Peeling: Once all sides are charred, remove the baking sheet from the oven. Immediately and carefully wrap the hot peppers tightly in the same aluminum foil (or transfer them to a bowl and cover tightly with plastic wrap). Allow them to rest and steam for at least 15-20 minutes. This steaming process creates condensation that loosens the skin, making it much easier to remove.
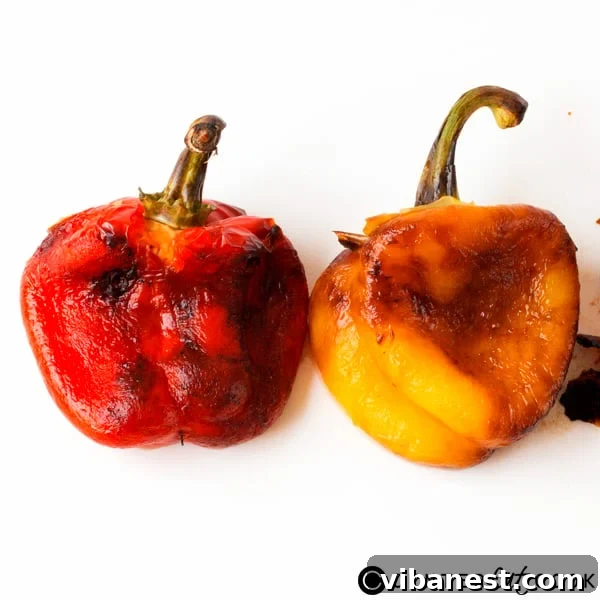
- Peel and Prepare: Once the peppers have cooled slightly but are still warm, unwrap them from the foil. Gently peel off the loosened, charred skins using your hands. Discard the skins. Cut each pepper in half or quarters, remove the stem, and scoop out all the seeds and white membranes. Discard these parts.
- Chop and Use: Chop the peeled and deseeded pepper flesh into thin slices, dice, or leave in larger pieces, as desired for your recipe. Your homemade roasted bell peppers are now ready to be added directly to your meal, stored for later use, or seasoned lightly with a drizzle of olive oil, salt, and pepper for an immediate snack or side.
Embracing the simplicity of roasting your own bell peppers will undoubtedly transform your cooking. It’s an easy technique that yields a profound depth of flavor, proving that some of the best culinary experiences come from scratch. So, next time you’re at the grocery store, grab a few extra bell peppers and get ready to unlock a world of smoky, sweet deliciousness in your own kitchen. Happy roasting!