
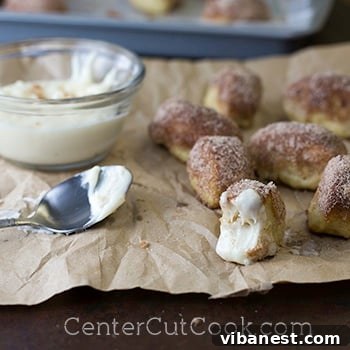
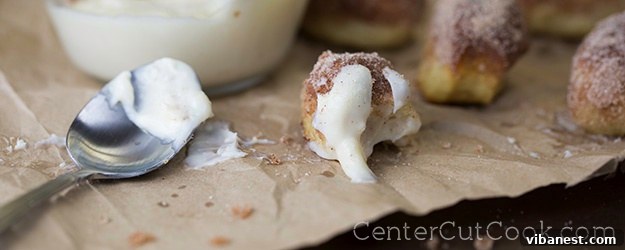
Homemade Cinnamon Sugar Pretzel Bites: Your New Favorite Sweet Treat
There’s something uniquely comforting about a warm, soft pretzel, isn’t there? For many, it’s a nostalgic trip back to mall visits, amusement parks, or even simple high school dates. My husband, Ryan, and I recently found ourselves sharing one of those sweet nostalgic moments, standing in line for an Auntie Anne’s cinnamon sugar pretzel – a treat we hadn’t indulged in for years. Despite the myriad of new flavors and dips available, our hearts (and taste buds) led us straight back to our tried-and-true favorite: the classic cinnamon sugar pretzel. This simple pleasure, a staple from our early dating days, reminded me just how special this particular sweet and salty combination truly is.
While I’m no stranger to crafting homemade pretzels, with a popular recipe for Buttery Mini Soft Pretzel Bites already under my belt, I realized I’d never ventured into the delightful world of the cinnamon sugar variation. That mall trip sparked an immediate craving and an inspiration. “Cinnamon Sugar Pretzel Bites” quickly earned a top spot on my ever-growing list of recipes to conquer. And let me tell you, the journey to perfecting these bites has been nothing short of delicious!
Why Recreate Mall-Style Pretzel Bites at Home?
Beyond the pure joy of baking, there are countless reasons to whip up a batch of these glorious cinnamon sugar pretzel bites in your own kitchen. First and foremost, freshness is king. Imagine soft, chewy pretzels, still warm from the oven, generously coated in a shimmering layer of cinnamon sugar. The aroma alone is worth the effort! Secondly, homemade treats offer a level of control over ingredients, ensuring you know exactly what goes into every bite. You can choose high-quality ingredients and even adjust the sweetness to your preference. Plus, it’s a fantastic, engaging activity for families or a relaxing weekend project. Making pretzels from scratch is not just about the food; it’s about the experience, the pride of creating something delicious with your own hands. You’ll not only save a trip to the mall but also create cherished memories while enjoying a truly superior, fresh-baked product that far surpasses any store-bought version. Say goodbye to stale, overpriced mall snacks and hello to gourmet quality right in your home!
The Journey to Perfect Pretzel Bites: A Step-by-Step Guide
Crafting these delectable cinnamon sugar pretzel bites is a rewarding process, building on the fundamentals of classic pretzel making with a sweet twist. We’ll start with a simple dough, give it its characteristic pretzel chew, and then shower it with the irresistible cinnamon-sugar coating before pairing it with an essential cream cheese glaze. This comprehensive guide will walk you through each stage, ensuring you achieve bakery-quality results right in your own kitchen. Get ready to impress your family and friends with these irresistible treats!
Crafting the Ideal Pretzel Dough
The foundation of any great pretzel is its dough, and ours is wonderfully straightforward, requiring just a few basic pantry staples. You’ll begin by combining all-purpose flour, a touch of salt to balance the sweetness and enhance overall flavor, granulated sugar to aid in browning and provide a hint of sweetness to the dough itself, and instant yeast for that perfect light and airy rise. The final ingredient is warm water, which is crucial for activating the instant yeast. Ensure the water is warm, not hot, to prevent killing the yeast. The key here is proper kneading – whether by hand, stand mixer, or food processor – until your dough becomes wonderfully smooth and elastic. This development of gluten ensures a tender, yet chewy interior, characteristic of a perfect pretzel. Once kneaded to perfection, form the dough into a cohesive ball, place it in a lightly floured bowl, cover it with plastic wrap or a clean kitchen towel, and allow it to rise in a warm spot for approximately 30 minutes. This short rest period is crucial, letting the yeast work its magic and creating a lighter, more manageable dough for the next step of shaping.
Shaping Your Delicious Bites with Precision
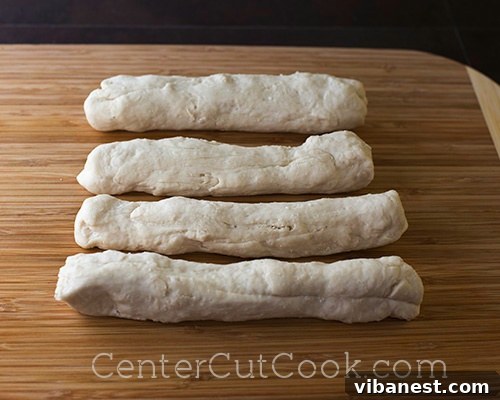
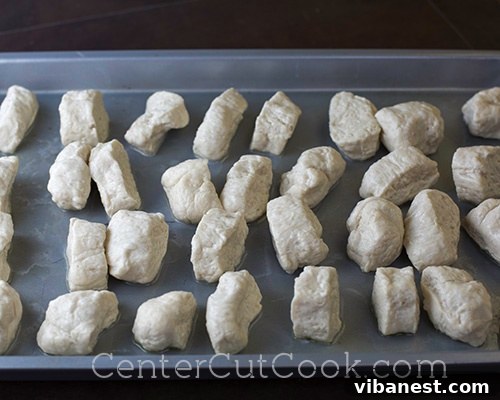
With your dough beautifully risen and slightly puffed, it’s time for the fun part: shaping! Gently knead the dough for about 30 seconds to a minute to release any large air bubbles and create a uniform texture. Then, divide the dough into four equal sections. This division helps maintain consistency and makes the shaping process more manageable. Take each section and, on a lightly floured surface, roll it out evenly into a long, uniform rope. Aim for each rope to be about 8 inches in length and roughly an inch thick. Don’t worry about absolute perfection; a little rustic charm is part of the homemade appeal! The most important thing is to try and keep the thickness as even as possible across the entire length of each rope to ensure uniform cooking later on. This image demonstrates the ideal length and thickness before you make your cuts:
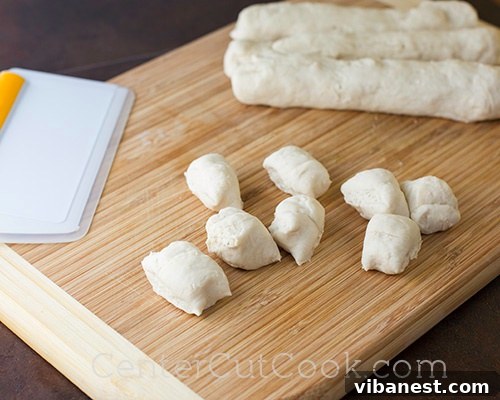
Now, transform those neatly rolled ropes into individual, irresistible pretzel bites! Carefully cut each of the four ropes into eight equal pieces using a sharp knife or a pastry cutter. This precise cutting technique will yield a total of 32 perfectly portioned pretzel bites, each ready for their essential alkaline bath. While aiming for roughly even sizes is ideal for consistent baking, remember that slight variations only add to their charming homemade character. Lay them out on a clean surface or a separate plate, preparing for the next crucial step in their transformation from simple dough to authentic pretzel perfection.
The Essential Baking Soda Bath: Unlocking True Pretzel Flavor
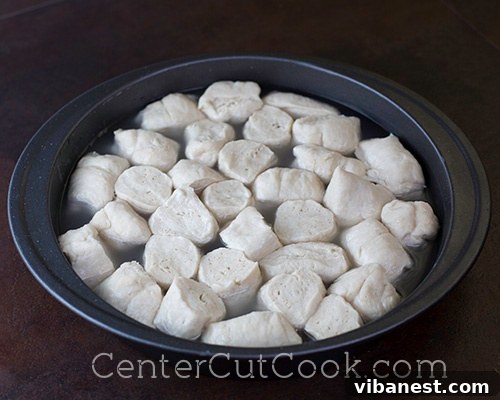
This step is, arguably, one of the most vital in achieving that signature pretzel taste, color, and texture. The baking soda bath is what gives pretzels their distinct crisp crust and deeper, rich brown color, a result of the Maillard reaction. This chemical process is responsible for that unique pretzel aroma and flavor profile that makes them so beloved. Do not, under any circumstances, skip this crucial step! To prepare, combine one cup of very hot water with two tablespoons of baking soda in a shallow dish that is wide enough to accommodate several pretzel bites at once. Whisk it thoroughly until the baking soda is completely dissolved – you shouldn’t see any undissolved granules at the bottom. A shallow cake pan or a wide bowl works perfectly for this purpose. Carefully place all the pretzel bites into this alkaline solution, working in batches if necessary to avoid overcrowding. Allow them to soak for approximately one minute on one side, then gently flip them over and let the other side bathe for another minute. This brief immersion is enough to create the necessary surface change without saturating the dough and making it mushy. As you can see in the image below, the process is simple but incredibly effective in laying the groundwork for that authentic pretzel experience.
Achieving Golden Perfection in the Oven
Once your pretzel bites have enjoyed their essential baking soda spa, it’s time to arrange them for their transformation in the oven. Lightly grease a baking sheet or line it with parchment paper for easy cleanup, then carefully transfer each pretzel bite onto the sheet. Ensure they have a little space between them – ideally about half an inch to an inch – to prevent them from sticking together and to promote even browning on all sides. As I mentioned before, don’t strive for absolute perfection in their shape; handmade charm is what we’re going for, and slight imperfections add character! After arranging all the bites, let them rest on the baking sheet for about 5 minutes. This brief pause allows the dough to relax slightly before hitting the intense heat. In the meantime, preheat your oven to a high temperature of 475 degrees Fahrenheit (245°C). The high heat is crucial for achieving that beautiful golden-brown exterior and perfectly soft, chewy interior in a remarkably short amount of time. Bake for just 10-11 minutes, or until they reach that enticing deep golden hue. Keep a close eye on them, as ovens can vary, and they cook quickly at this high temperature! You’ll be amazed at how quickly they achieve that signature pretzel look.
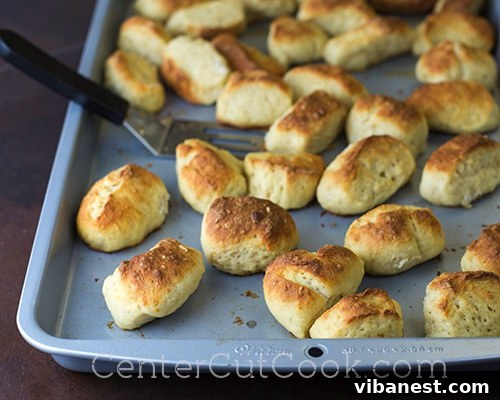
Pulling these golden nuggets from the oven is a truly satisfying moment. The air in your kitchen will be filled with their irresistible aroma, a delicious promise of the sweet and savory delight to come. The goal is a beautiful, evenly browned exterior, indicating they are perfectly cooked through, with a delightful crispness on the outside and a tender chewiness within. They will be piping hot, so allow them to cool just slightly on the baking sheet for a few minutes before moving them to a cooling rack or directly to the final, most delicious coating step. This brief cooling period helps them set up and makes them easier to handle. These perfectly baked pretzel bites are now ready to receive their sweet, aromatic finish!
The Irresistible Cinnamon Sugar Coating: Sweet Perfection
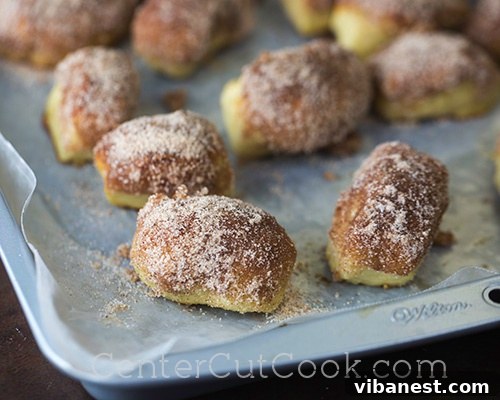
This is the magical step where our pretzel bites transform from savory and chewy to spectacularly sweet and fragrant! The combination of warm, melted butter and aromatic cinnamon sugar is what truly makes these bites sing, mimicking that beloved mall-pretzel flavor. Begin by melting about 4 tablespoons of unsalted butter. A quick 30 seconds to a minute in the microwave usually does the trick perfectly, ensuring it’s fully liquid but not burnt. In a separate small bowl, whisk together 1/2 cup of granulated sugar with 1 teaspoon of ground cinnamon. The aroma of this mixture alone is enough to get your mouth watering, instantly evoking cozy, comforting feelings! Line a clean baking sheet or a large plate with wax paper or parchment paper for easy cleanup and to prevent the coated pretzels from sticking. Now, for the fun part: take each warm pretzel bite – they should still be warm enough for the butter to adhere well – dip one side generously into the melted butter, allowing any excess to drip off briefly. Immediately after buttering, press that buttery side into the cinnamon sugar mixture, gently turning and tossing to ensure a good, even coating. This dual-dipping process is crucial, as the butter acts as the perfect adhesive for the sugar. Ensure a generous coating, as this is where all that fantastic, sweet-spiced flavor comes from. The result is a glistening, sweet crust that’s utterly irresistible. Mmmmm, mmmm indeed, prepare for pure delight!
The Heavenly Cream Cheese Glaze: The Perfect Accompaniment
While the cinnamon sugar coating is undeniably delicious on its own, a creamy, tangy dip elevates these pretzel bites to an entirely new level of indulgence. This cream cheese glaze isn’t just an accessory; it’s a necessity, providing the perfect counterpoint to the pretzels’ sweetness and creating a truly balanced flavor profile! It adds a wonderful smooth, rich texture and a hint of tanginess that perfectly complements every bite, cutting through the sweetness and adding a layer of sophisticated flavor. You’ll need just a few simple ingredients, all at room temperature for optimal blending: 2 ounces of softened cream cheese, 1 tablespoon of softened unsalted butter, about 1/2 cup of confectioners’ sugar (also known as powdered sugar), and 1-2 tablespoons of milk. The milk is your secret weapon here, allowing you to adjust the consistency of the glaze to your liking – from a thick, spreadable frosting to a thinner, pourable glaze perfect for dipping. Using your electric mixer (a hand mixer or stand mixer works best for this), cream together the softened butter and cream cheese until they are light, fluffy, and completely smooth. Gradually add in the confectioners’ sugar, mixing on low speed until fully incorporated and smooth, free of any lumps. Finally, slowly drizzle in the milk, adding it one tablespoon at a time, and mixing until you reach your desired pourable or dippable consistency. This glaze comes together quickly and easily, but its impact on the overall pretzel experience is immense, transforming a great snack into an extraordinary dessert.
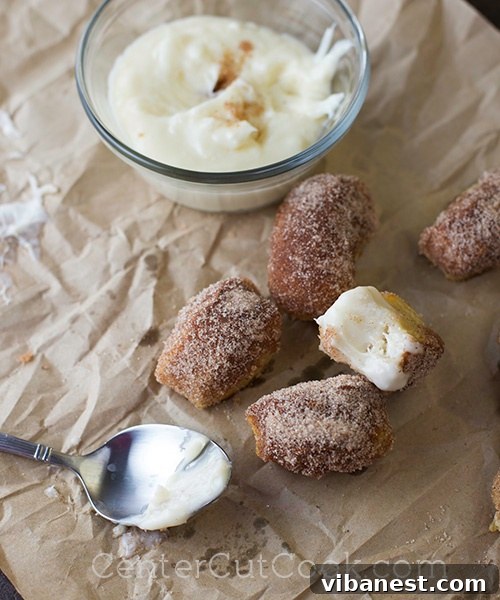
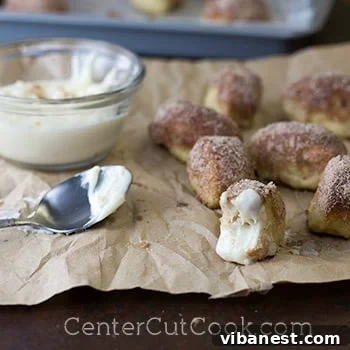
The final result of your efforts is truly spectacular! From this single recipe, you’ll yield approximately 32 delightful pretzel bites – a perfect batch for sharing with loved ones, bringing to a gathering, or simply savoring over a couple of days (if they last that long!). Be warned, though: the heavenly cream cheese dip tends to disappear even quicker than the pretzels themselves! If you find yourself, like me, reaching for a generous amount of glaze with each pretzel bite (and who wouldn’t, it’s that good?), I highly recommend doubling the recipe for the cream cheese dip to ensure an ample supply for every single bite. Each bite offers a harmonious blend of soft, incredibly chewy texture, balanced sweetness from the cinnamon sugar, and a delightful hint of saltiness from the pretzel dough, all perfectly complemented by the cool, tangy, and rich cream cheese glaze. These aren’t just snacks; they’re an experience – a nostalgic trip reimagined in your own kitchen. Get ready to enjoy the ultimate homemade cinnamon sugar pretzel bites, a truly satisfying treat that will become a cherished recipe in your repertoire!
Tips for Pretzel Perfection
To ensure your homemade Cinnamon Sugar Pretzel Bites turn out perfectly every time, keep these expert tips in mind:
- Don’t Skip the Baking Soda Bath: This step is non-negotiable for achieving the classic pretzel crust, flavor, and rich golden-brown color. The alkaline solution reacts with the dough, creating that distinct texture and taste.
- Warm Water is Key for Yeast: When mixing your dough, ensure your water for the yeast is comfortably warm (around 105-115°F or 40-46°C). Too hot water will kill the yeast, preventing your dough from rising, while too cold water won’t activate it properly, leading to a dense dough.
- Achieve Proper Dough Consistency: Knead the dough until it is smooth and elastic. This development of gluten is what gives pretzels their signature chewiness. It should bounce back slightly when poked.
- Uniform Shaping Matters: Try to make your dough ropes and bites as uniform in size as possible. This ensures they bake evenly, preventing some from being undercooked while others are overdone.
- High Heat, Quick Bake: Pretzel bites cook rapidly at high temperatures. Keep a close eye on them, especially during the last few minutes, to prevent over-browning. Ovens can vary, so adjust baking time as needed.
- Serve Warm for Best Experience: While still delicious cooled, these cinnamon sugar pretzel bites are absolutely best served warm, fresh from being coated. The warmth enhances the butter and cinnamon sugar flavors.
- Adjust Dip Consistency to Your Liking: When making the cream cheese glaze, add milk gradually, one tablespoon at a time, to achieve your preferred thickness. Want it thicker for a richer coating? Use less milk. Prefer a thinner, more pourable glaze for easy dipping? Add a little more until it’s just right.
- Storage: Store any leftover pretzel bites in an airtight container at room temperature for up to 2 days, or in the refrigerator for up to 4 days. Reheat briefly in the microwave or oven for best texture.
Creative Variations & Serving Suggestions
While the classic cinnamon sugar and cream cheese glaze combination is an absolute winner, don’t hesitate to get creative and experiment with your pretzel bites!
- Savory Swaps: For a delightful savory twist, simply skip the cinnamon sugar coating entirely. After the baking soda bath and baking, brush the warm pretzels with melted butter and then sprinkle generously with garlic powder and parmesan cheese, or an “everything bagel” seasoning blend. Serve these savory bites with a warm cheese dip, a tangy mustard, or a marinara sauce.
- Chocolate Drizzle: For an extra layer of decadence, after coating the pretzels in cinnamon sugar, drizzle them with melted chocolate – milk, dark, or white chocolate all work beautifully. A sprinkle of sea salt on top of the chocolate can elevate the flavor even further.
- Caramel Dip: A rich, warm caramel dip or a luscious salted caramel sauce would also be an incredible pairing for these sweet bites, adding another dimension of flavor and texture.
- Ice Cream Topping: Crumble cooled cinnamon sugar pretzel bites over scoops of vanilla ice cream, or even a coffee-flavored ice cream, for a delightful texture and flavor contrast that makes for a fantastic dessert.
- Seasonal Spices: During the fall months, embrace the season by adding a pinch of nutmeg, ground cloves, or allspice to your cinnamon sugar mixture for a pumpkin spice-inspired flavor that pairs perfectly with a warm mug of cider.
- Fruit Dipping: Serve the cream cheese glaze with fresh fruit alongside the pretzels for a balanced snack platter.
Recipe: Homemade Cinnamon Sugar Pretzel Bites
PRETZEL DOUGH INGREDIENTS
- 2 1/2 cups all-purpose flour
- 1 teaspoon table salt
- 2 teaspoons granulated sugar
- 2 1/4 teaspoons instant yeast
- 1 cup warm water (105-115°F / 40-46°C)
TOPPING INGREDIENTS
- 1 cup very hot water
- 2 tablespoons baking soda
- 4 tablespoons unsalted butter, melted
- 1/2 cup granulated sugar
- 1 teaspoon ground cinnamon
CREAM CHEESE GLAZE INGREDIENTS
- 2 ounces cream cheese, softened
- 1 tablespoon unsalted butter, softened
- 1/2 cup confectioners’ sugar
- 1-2 tablespoons milk, as needed for desired consistency
DIRECTIONS
- In the bowl of your stand mixer fitted with the dough hook attachment (or a large bowl if mixing by hand), combine the all-purpose flour, salt, granulated sugar, and instant yeast. Add in 1 cup of warm water and mix on low speed until a shaggy dough forms. Increase speed to medium and knead until the dough is smooth, elastic, and pulls away from the sides of the bowl, about 5-7 minutes. If mixing by hand, combine ingredients then turn out onto a lightly floured surface and knead for 8-10 minutes.
- Lightly flour the bottom of a clean bowl. Place the kneaded dough in the bowl, cover it tightly with plastic wrap or a clean kitchen towel, and let it rise in a warm spot for about 30 minutes, or until it has slightly puffed up.
- Gently knead the risen dough for 30 seconds to 1 minute to release any large air bubbles. Divide the dough into 4 equal sections. On a lightly floured surface, roll each section into a long, uniform strip, approximately 8 inches long and about 1 inch wide.
- Using a sharp knife or a pastry cutter, carefully cut each 8-inch strip into 8 equal pieces, resulting in a total of 32 pretzel bites. Arrange them on a clean surface.
- Preheat your oven to 475°F (245°C). Line a large baking sheet with parchment paper or grease it lightly.
- In a shallow dish (such as a pie plate or a shallow cake pan), combine 1 cup of very hot water with 2 tablespoons of baking soda. Whisk well until the baking soda is completely dissolved.
- Carefully place a batch of pretzel bites into the baking soda mixture. Allow them to soak for one minute on one side, then gently flip them over and let the other side soak for another minute. Using a slotted spoon, remove the bites, allowing any excess water to drip off, and arrange them on the prepared baking sheet, ensuring they are not touching each other to allow for even browning. Repeat with any remaining pretzel bites.
- Allow the pretzel bites to rest on the baking sheet for about 5 minutes before transferring them to the oven. This helps them maintain their shape and promotes a better crust.
- Transfer the baking sheet to the preheated oven and bake for 10-11 minutes, or until the pretzel bites are beautifully golden brown and cooked through. Keep an eye on them as they bake quickly.
- While the pretzel bites are baking, prepare your delicious coating. Melt 4 tablespoons of unsalted butter in a microwave-safe bowl (about 30-60 seconds in the microwave). In a separate small bowl, combine 1/2 cup granulated sugar with 1 teaspoon ground cinnamon. Stir thoroughly to mix the spices evenly.
- Once the pretzel bites are out of the oven, immediately begin coating them while they are still warm. Dip each warm pretzel bite into the melted butter (one side or all over, as preferred), then immediately transfer it to the cinnamon sugar mixture and toss or gently press to coat thoroughly and evenly. Place the coated bites on a clean plate or another baking sheet lined with wax paper.
- To make the heavenly cream cheese glaze: In a medium bowl with an electric mixer, cream together the softened cream cheese and softened butter until smooth and fluffy. Gradually add in the confectioners’ sugar, mixing on low speed until completely smooth and free of lumps. Finally, add 1-2 tablespoons of milk, one tablespoon at a time, mixing until you reach your desired consistency – a smooth, pourable glaze or a slightly thicker frosting.
- Serve the warm cinnamon sugar pretzel bites immediately with the creamy homemade cream cheese glaze on the side for dipping. Enjoy this irresistible sweet and salty treat!
Recipe adapted from
CenterCutCook