
The Ultimate Guide to Mason Jar Salads: Fresh, Healthy & Convenient Meal Prep
In our fast-paced lives, finding time for healthy eating can be a constant challenge. That’s where mason jar salads come to the rescue! Far from a fleeting trend, these ingenious culinary creations have firmly established themselves as a cornerstone of smart meal prepping. They offer a delightful combination of convenience, freshness, and endless versatility, making them an indispensable tool for anyone looking to eat better without sacrificing precious time.
Imagine a vibrant, perfectly portioned salad, layered with all your favorite ingredients, just waiting in your fridge. Grab it as you head out the door for work, a picnic, or a busy day of errands, and you have a nutritious, delicious meal ready in an instant. No more soggy greens, no more forgotten dressing, just pure, wholesome goodness, exactly when you need it.
Why Mason Jar Salads Are a Game-Changer for Healthy Eating
Mason jar salads aren’t just aesthetically pleasing; they’re incredibly practical. Their unique design and strategic layering unlock a host of benefits that make healthy meal prep not only possible but enjoyable:
- Unmatched Freshness: The airtight seal of a mason jar, combined with the proper layering technique, keeps your ingredients remarkably fresh for up to 3-5 days. Say goodbye to wilted lettuce and mushy vegetables!
- Effortless Meal Prep: Dedicate an hour or two on a Sunday, and you can prepare several nutritious lunches or dinners for the entire week. This batch cooking strategy saves you valuable time during busy weekdays.
- Perfect Portion Control: Each jar holds a single, balanced serving, making it easier to manage calorie intake and ensure you’re getting a complete, satisfying meal without overeating.
- Endless Versatility: From hearty grain bowls to light and refreshing green salads, the possibilities are limitless. You can customize each jar to suit your dietary preferences, seasonal ingredients, and flavor cravings.
- Eco-Friendly & Budget-Friendly: Reusable mason jars reduce the need for single-use plastic containers. By buying ingredients in bulk and preparing meals at home, you’ll also save money compared to eating out.
- Portable & Convenient: Their sturdy, spill-proof design makes them ideal for packing in lunchboxes, backpacks, or coolers. Enjoy a healthy meal anywhere, anytime.
The Secret to Success: Mastering the Art of Layering Your Salad
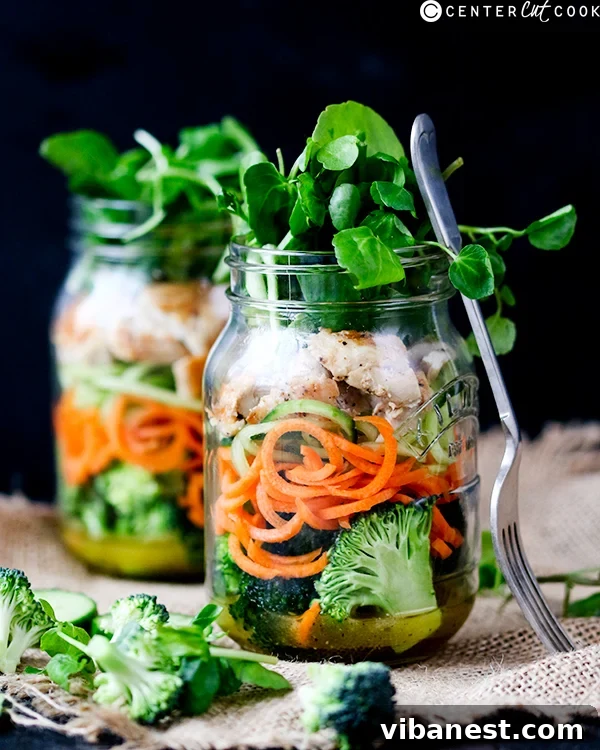
The magic of a mason jar salad lies entirely in its layering. This isn’t just about making it look pretty (though it certainly does!); it’s a science designed to keep every component fresh, crisp, and delicious until you’re ready to eat. Follow these essential steps for perfectly layered salads every time:
Layer 1: The Foundation – Dressing
Always, always start with your dressing at the very bottom of the jar. This acts as a protective barrier, preventing the more delicate ingredients from becoming soggy. Aim for about 2-4 tablespoons, depending on your jar size and personal preference. You can use vinaigrettes, creamy dressings, or even just a squeeze of lemon juice with a drizzle of olive oil.
Layer 2: Hardy Heroes – Grains, Legumes & Hard Vegetables
Next up are your “hardy” ingredients – those that can sit in the dressing without getting mushy. This layer is crucial for adding substance, fiber, and nutrients to your salad. Think about ingredients like:
- Cooked Grains: Quinoa, farro, couscous, brown rice, or pasta.
- Legumes: Chickpeas, black beans, kidney beans, lentils.
- Hard Vegetables: Carrots (sliced, shredded, or matchsticks), cucumbers, bell peppers, broccoli florets, cauliflower florets, celery, radishes, corn kernels.
- Pickled Items: Olives, artichoke hearts, pickled onions.
These ingredients act as a buffer between the dressing and the more delicate layers above.
Layer 3: Powerhouse Proteins
This layer provides the staying power and makes your salad a complete meal. Proteins can be added cooked and cooled. Choose from a variety of options:
- Cooked Meats: Grilled chicken, shredded turkey, steak strips, cooked shrimp.
- Fish: Canned tuna, canned salmon, smoked salmon.
- Plant-Based Proteins: Tofu (baked or grilled), tempeh, edamame, hard-boiled eggs.
- Cheese: Cubed cheddar, feta crumbles, mozzarella balls.
Layer 4: Tender Tastes – Softer Vegetables & Fruits
Now it’s time for ingredients that are a bit more delicate but still hold their own without direct contact with the dressing. These add texture, color, and additional nutrients:
- Cherry tomatoes (whole or halved).
- Avocado (add right before eating to prevent browning, or toss with lemon juice if prepping ahead).
- Mushrooms.
- Soft fruits like berries, grapes, or mandarin oranges.
- Cooked sweet potato cubes.
Layer 5: The Crisp Crown – Leafy Greens & Crunchies
Finally, the star of any salad – your leafy greens and any last-minute additions that provide a delightful crunch. These should always be placed at the very top, as far away from the dressing as possible, to ensure they remain crisp and vibrant.
- Leafy Greens: Romaine, spinach, mixed greens, kale, arugula, watercress.
- Crunchy Toppings: Nuts (almonds, walnuts, pecans), seeds (sunflower, pumpkin, chia), croutons (add just before eating for ultimate crunch), crispy fried onions.
- Fresh Herbs: Cilantro, parsley, basil.
Beyond the Jar: How to Enjoy Your Mason Jar Salad
When it’s time to eat, you have a couple of options:
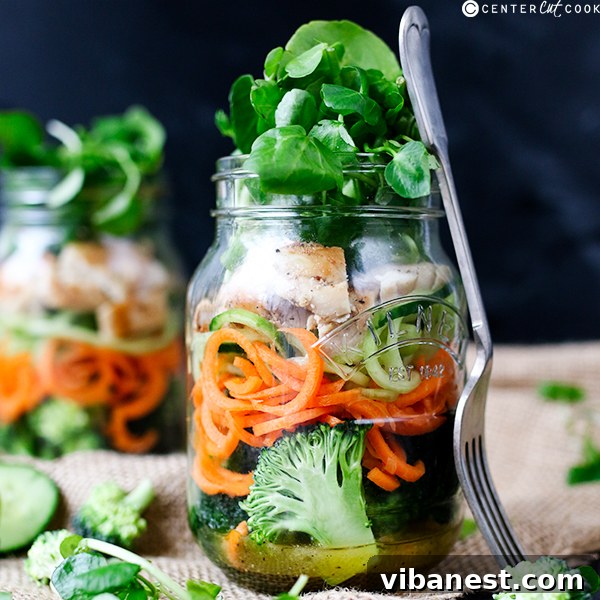
- The Pour-Out Method (Recommended): This is generally the best way to enjoy your mason jar salad. Simply invert the jar over a bowl. The greens will come out first, forming a perfect base, followed by the proteins and vegetables, and finally, the dressing will drizzle over everything. This ensures an even coating of dressing and a well-mixed salad.
- Eating Directly from the Jar: While possible, it can be a little awkward, especially with larger ingredients. If you choose this method, give the jar a good shake to distribute the dressing before digging in. It works best for salads with smaller, easily spoonable components.
Endless Possibilities: Creative Mason Jar Salad Combinations
The beauty of mason jar salads lies in their adaptability. You can truly add whatever you like, creating bespoke meals that cater to your taste and nutritional needs. Don’t be afraid to get creative!
Mediterranean Delight
Dressing: Lemon-Herb Vinaigrette (olive oil, lemon juice, oregano, garlic, salt, pepper)
Layer 2: Cooked quinoa, chickpeas
Layer 3: Crumbled feta cheese
Layer 4: Cherry tomatoes, cucumber, red onion, Kalamata olives
Layer 5: Mixed greens, fresh parsley
Southwest Fiesta
Dressing: Creamy Cilantro-Lime Dressing (Greek yogurt, lime juice, cilantro, cumin, chili powder)
Layer 2: Black beans, corn, cooked brown rice
Layer 3: Grilled chicken strips or seasoned ground turkey
Layer 4: Diced bell peppers, avocado (add just before eating)
Layer 5: Romaine lettuce, crushed tortilla chips
Asian Noodle Salad
Dressing: Peanut Dressing (peanut butter, soy sauce, rice vinegar, ginger, sesame oil, honey)
Layer 2: Cooked rice noodles or soba noodles, edamame
Layer 3: Shredded cooked chicken or baked tofu
Layer 4: Shredded carrots, thinly sliced bell peppers, bean sprouts
Layer 5: Spinach or napa cabbage, chopped peanuts, fresh cilantro
Berry & Nut Bliss
Dressing: Poppy Seed Dressing
Layer 2: Cooked farro or bulgur wheat
Layer 3: Goat cheese crumbles or grilled halloumi
Layer 4: Fresh strawberries, blueberries, or raspberries, cucumber
Layer 5: Baby spinach or arugula, candied pecans or walnuts
These are just a few ideas to spark your imagination. The key is to think about complementary flavors and textures and adhere to the layering principles.
Essential Tips for Perfect Mason Jar Salads
To ensure your mason jar salad experience is consistently excellent, keep these additional tips in mind:
- Choose the Right Jar: Standard wide-mouth quart (32 oz) mason jars are ideal for full-sized meal salads, offering plenty of space for layers. Pint (16 oz) jars work well for side salads or smaller appetites.
- Ingredient Prep is Key: Wash, chop, and cook all your ingredients thoroughly before assembling. This is where most of your prep time will go, making assembly a breeze.
- Dry Your Greens: Ensure your leafy greens are completely dry before adding them to the jar. Excess moisture can lead to premature wilting. A salad spinner is a great investment.
- Don’t Overfill: Leave a little space at the top of the jar for easy shaking and to prevent crushing the top layers.
- Seal Tightly: Always use a two-piece lid (flat lid and screw band) and ensure it’s securely tightened to maintain freshness and prevent leaks.
- Store Properly: Keep your assembled mason jar salads refrigerated until you’re ready to eat.
- Get Creative with Dressings: Experiment with different vinaigrettes, creamy dressings, or even simple lemon-tahini sauces. Making your own dressings allows you to control ingredients and customize flavors.
- Mix Textures: A truly satisfying salad has a variety of textures – creamy, crunchy, tender, chewy. Plan your layers to include a good mix.
Featured Recipe: Tangy Honey Mustard Chicken & Veggie Mason Jar Salad
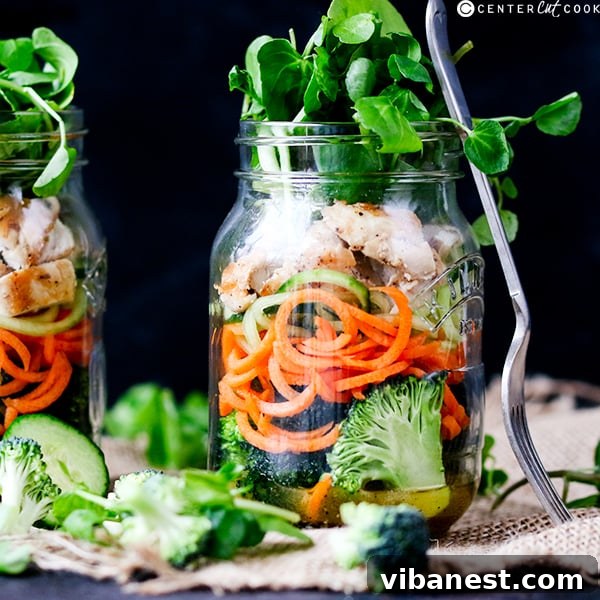
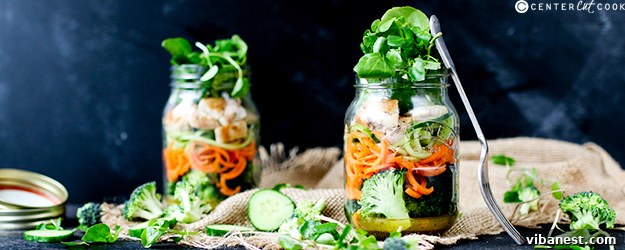
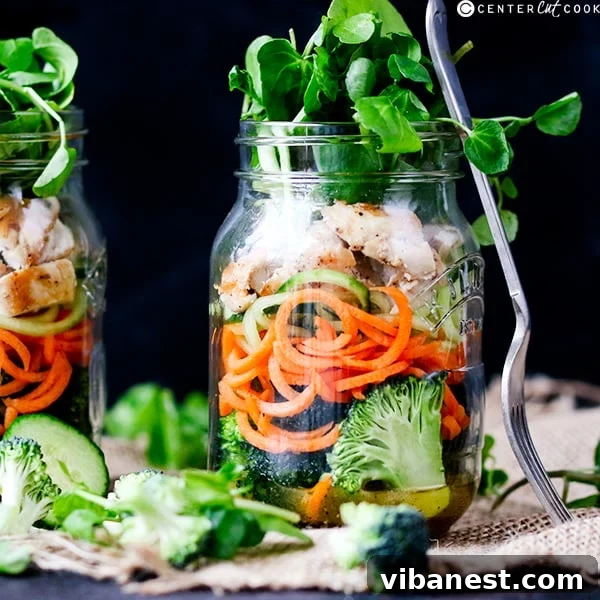
To get you started, here’s a simple yet incredibly flavorful recipe that perfectly illustrates the mason jar salad concept. This chicken and vegetable salad, brightened by a zesty honey-mustard vinaigrette, is a fantastic option for a healthy, portable lunch.
Prep and Cook Times
INGREDIENTS for the Salad
- 1 cup of small broccoli florets, blanched if preferred
- 2 medium carrots, peeled and sliced into thin matchsticks or spiralized
- 1/3 of a large cucumber, sliced into thin matchsticks or spiralized
- 1 cooked chicken breast, chopped or shredded
- 1 + 1/2 cups watercress salad (or your favorite mixed greens)
For the HONEY MUSTARD VINAIGRETTE
- 5 tbsp extra virgin olive oil
- 2 tsp white wine vinegar (or apple cider vinegar)
- 1 tsp mustard powder (for a stronger kick) or 2 tsp Dijon mustard (for creamier texture)
- 3 tsp honey (adjust to your sweetness preference)
- Pinch of sea salt and freshly ground black pepper, to taste
DIRECTIONS for Assembly
- Begin by preparing the vinaigrette. In a small bowl, whisk together the olive oil, white wine vinegar, mustard powder (or Dijon mustard), honey, salt, and pepper until all ingredients are well combined and the dressing is emulsified.
- Carefully pour half of the prepared vinaigrette into the bottom of each of your two 16oz wide-mouth mason jars.
- Next, divide the small broccoli florets evenly between the two mason jars, layering them directly on top of the dressing.
- Add the prepared carrot and cucumber matchsticks (or spiralized pieces) into the mason jars, creating the next distinct layer.
- Evenly distribute the chopped or shredded cooked chicken breast over the carrot and cucumber layer in both jars.
- Finally, gently place the watercress salad on top of the chicken layer in each jar. Make sure the greens are as far from the dressing as possible.
- Place the lids securely on the mason jars.
- These delicious salads can be enjoyed immediately, or they can be refrigerated for up to 3 days, making them perfect for your weekly meal prep!
Conclusion: Simplify Your Healthy Eating Journey with Mason Jar Salads
Mason jar salads are more than just a passing food trend; they are a sustainable, enjoyable, and incredibly effective strategy for maintaining a healthy diet in a busy world. By understanding the principles of proper layering and embracing the vast array of ingredient possibilities, you can transform your meal prep routine into an exciting culinary adventure.
Say goodbye to boring, soggy lunches and hello to vibrant, fresh, and perfectly portable meals. Start experimenting with your favorite ingredients, master the layering technique, and discover the unparalleled convenience of mason jar salads. Your taste buds and your schedule will thank you!