
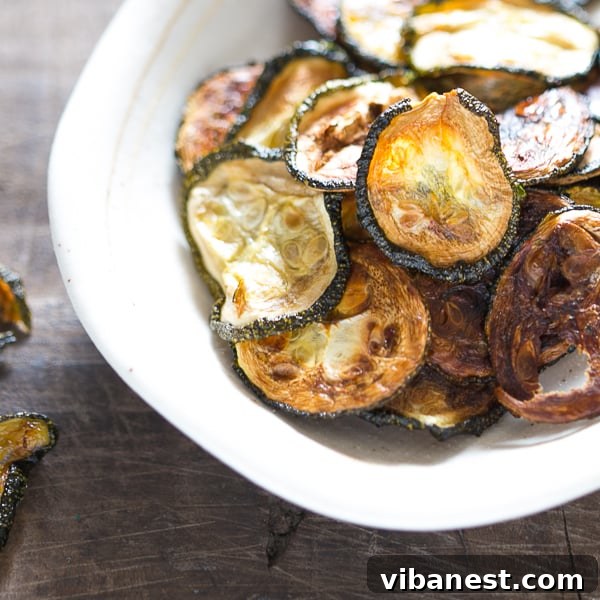
Forget the cookie season for a moment and prepare to be utterly amazed by a snack that redefines healthy indulgence: Baked Zucchini Chips. While the festive period often brings cravings for sugary treats, these savory, crispy delights offer a refreshing and guilt-free alternative. Imagine a snack that satisfies your crunch cravings without derailing your health goals – that’s precisely what these incredibly simple, low-carb, vegetarian, and low-calorie zucchini chips deliver. They are everything you need a healthy snack to be, bursting with flavor and wholesome goodness.
Why Choose Baked Zucchini Chips for Your Healthy Snacking?
In a world where processed snacks often dominate supermarket aisles, finding genuinely healthy and delicious options can be a challenge. Zucchini chips stand out as a beacon of wholesome snacking, proving that healthy doesn’t have to mean bland or boring. Zucchini itself is a nutritional powerhouse, rich in essential vitamins like A and C, important minerals such as potassium, and beneficial fiber. All of this comes with a remarkably low calorie and carbohydrate count.
This makes them an ideal choice for anyone following specific dietary plans like keto, paleo, or vegetarian diets, or simply for those looking to incorporate more fresh vegetables into their daily routine. Unlike many store-bought chips that are often laden with unhealthy fats, excessive sodium, and artificial ingredients, these homemade zucchini chips offer pure, unadulterated goodness. By making them yourself, you control every ingredient, ensuring a clean, wholesome, and incredibly satisfying snack that allows you to snack smarter, not harder.
Astonishingly Easy: The Three-Ingredient Healthy Snack
One of the most appealing aspects of this recipe is its astonishing simplicity. You might be surprised to learn that achieving perfectly crispy, flavorful zucchini chips requires just three core ingredients: fresh zucchini, a touch of good quality olive oil, and a sprinkle of salt. The preparation process is so straightforward that even novice cooks will feel confident in the kitchen. In fact, the hands-on time barely scrapes past 10 minutes, leaving the oven to do most of the magic. This minimal effort for maximum flavor makes baked zucchini chips a go-to recipe for busy weeknights, effortless meal prep, or those sudden, irresistible snack attacks. It truly is one of the easiest and healthiest snacks you’ll ever make.
Mastering the Slice: The Key to Perfect Crispiness
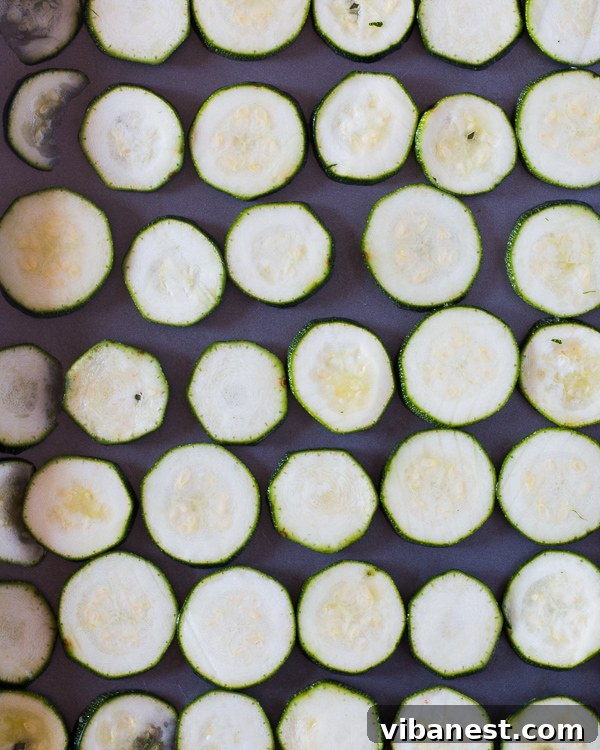
The secret to uniformly crispy zucchini chips lies in consistent slicing, a step that cannot be overstated. While a sharp chef’s knife can get the job done with careful precision, a mandoline slicer is truly your best friend here. It ensures every single slice is perfectly even in thickness, which is paramount for uniform baking and achieving that desired crunch across all your chips. Through extensive trial and error, we’ve discovered that a 1/4-inch (approximately 0.6 cm) thickness yields the absolute ideal result.
Slices thinner than 1/4 inch tend to burn quickly in the oven and become overly brittle, lacking the pleasant bite of a chip. Conversely, thicker slices struggle significantly to crisp up properly, often resulting in a rather soggy or chewy texture that is far from satisfying. Investing in a reliable mandoline, or at least taking extra time and care with a sharp knife, will pay dividends in the final texture of your chips. Aim for slices that are not only uniform in thickness but also as consistent in diameter as possible for the best, most evenly baked outcome.
Preparing for Perfection: Drying and Seasoning Your Zucchini
Zucchini, like many other fresh vegetables, contains a significant amount of water. This natural moisture is the arch-nemesis of crispiness when it comes to baking chips. Therefore, after meticulously slicing your zucchini, a crucial step is to thoroughly dab them with paper towels. Press gently but firmly on both sides of each slice to extract as much excess liquid as possible. This simple yet vital action prevents your chips from steaming in the oven, instead allowing them to dehydrate and achieve that satisfying crunch we all crave.
Once dried, it’s time to infuse them with flavor. A light toss in good quality olive oil ensures a beautiful golden-brown finish as they bake and helps the salt adhere evenly. Speaking of salt, a generous sprinkle of fine sea salt is usually all you need to enhance the natural sweetness and savory notes of the zucchini. However, this is also where you can get creative and personalize your chips! Think garlic powder, onion powder, smoked paprika for a hint of warmth, nutritional yeast for a cheesy flavor profile, or a pinch of chili flakes for a subtle kick. Ensure each slice is lightly coated but not drenched in oil, to avoid greasiness and promote optimal crisping.
Baking to Golden Crispiness: The Art of Slow Dehydration
With your perfectly sliced and seasoned zucchini ready, carefully arrange them in a single layer on baking sheets lined with parchment paper. It is absolutely vital that the slices do not overlap at all. Overlapping prevents proper air circulation around each chip, leading to uneven baking, steamed patches, and ultimately, soggy spots. Give each individual chip its own ample space to breathe and crisp up uniformly.
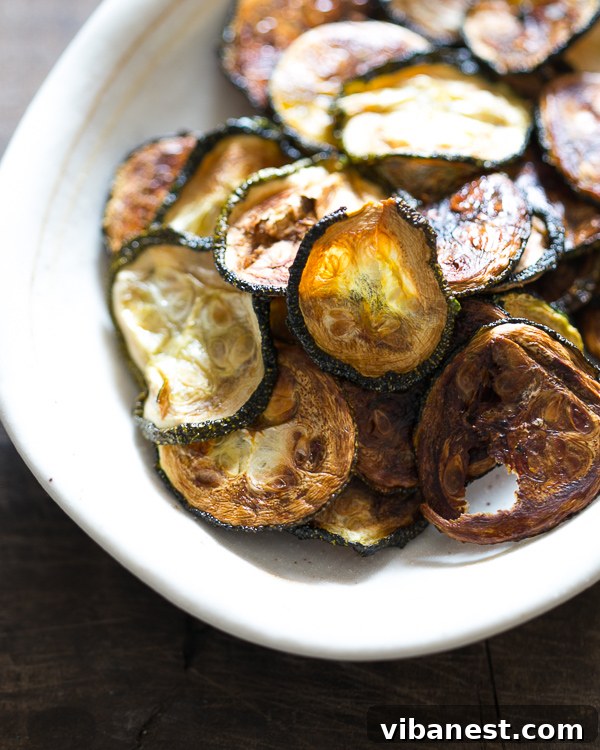
Preheat your oven to a relatively low temperature, specifically around 235 degrees Fahrenheit (113 degrees Celsius). The key to achieving perfectly baked zucchini chips isn’t high heat that rapidly cooks the exterior, but rather a slow, gradual dehydration process. This gentle heat allows the moisture to evaporate steadily, leaving behind a wonderfully crispy texture. Bake them for approximately 90 minutes, or until they turn a beautiful, deep golden brown and feel firm and crisp to the touch. Keep a watchful eye on them, especially towards the end of the baking time, as oven temperatures can vary slightly. If you notice some chips browning faster than others, you can rotate the trays or even remove the done ones earlier to prevent burning. The patience required for this slow bake is truly rewarded with an irresistible, satisfying crunch.
Cooling and Storing for Maximum Crunch
Once your perfectly golden and crispy zucchini chips emerge from the oven, resist the urge to immediately devour them all. While incredibly tempting, allowing the baked zucchini chips to cool completely on the baking sheet or a wire rack is an absolutely essential step for achieving and maintaining their maximum crispiness. As they cool, any trace of remaining moisture continues to evaporate, and their delicate structure sets, enhancing their crunch further. Rushing this step by removing them too soon might result in a slightly chewier or less satisfying texture.
Once thoroughly cooled to room temperature, transfer your delightful chips to an airtight container. Stored properly, away from humidity, they will maintain their incredible crunch and freshness for up to five days. However, given their deliciousness and addictive quality, it’s highly unlikely they will last that long in most households!
Serving Suggestions and Flavorful Variations
These baked zucchini chips are fantastic on their own, offering a pure, savory vegetable experience, but they also serve as an incredibly versatile canvas for culinary creativity. For a Mediterranean twist, sprinkle them with dried oregano and a dash of fresh lemon zest before baking. If you crave a cheesy flavor without the dairy, a generous dusting of nutritional yeast works wonders, providing a savory, umami-rich profile. Spice lovers can easily add a pinch of cayenne pepper, a blend of chili powder and cumin, or a touch of smoked paprika for added depth.
They are also excellent when served with a variety of dips: try them with a creamy Greek yogurt dip infused with fresh herbs like dill and mint, a spicy homemade salsa, a classic chickpea hummus, or even a tangy marinara sauce. Use them as a healthy, low-carb alternative to traditional tortilla chips with your favorite guacamole or avocado dip. For an added crunch and burst of flavor, crumble them over fresh salads or alongside a bowl of hot soup. The possibilities are truly endless, making these wholesome chips a versatile staple for any discerning snack enthusiast.
Troubleshooting Common Issues for Perfect Results
Even with a simple recipe, sometimes things don’t go exactly as planned. Here are a few common issues you might encounter when baking zucchini chips and how to troubleshoot them to ensure perfect results every time:
- Soggy Chips: This is the most common complaint and is usually due to insufficient moisture removal before baking, or if the slices were cut too thick. Ensure you press out as much water as possible from the zucchini slices with paper towels, and always adhere to the recommended 1/4-inch thickness. An oven that’s not hot enough or a baking sheet that is too crowded can also contribute to sogginess by preventing proper dehydration.
- Burnt Chips: If your chips are burning before they crisp up, they might be sliced too thin, or your oven temperature could be running too high. Double-check your mandoline setting or knife precision to ensure a consistent 1/4-inch thickness. It’s also a good idea to calibrate your oven or use an oven thermometer to verify the temperature. Thinner chips will naturally require a slightly shorter baking time, so monitor them closely, especially towards the end.
- Lack of Flavor: Don’t be shy with the salt! Zucchini has a mild flavor, so it benefits greatly from proper seasoning. Also, consider experimenting with the suggested seasoning variations (garlic powder, nutritional yeast, herbs) to find your perfect flavor profile. Using a good quality olive oil also makes a subtle but noticeable difference in the overall taste.
- Uneven Browning: This can frequently happen if the zucchini slices overlap on the baking sheet, preventing even heat distribution, or if your oven has hot spots. Always ensure even spacing between each chip. If your oven tends to brown unevenly, rotate your baking sheets halfway through the cooking time for consistently golden and crispy results across all your chips.
Embrace the Healthier Crunch!
In conclusion, these baked zucchini chips are more than just a snack; they’re a testament to how incredibly satisfying, delicious, and genuinely healthy eating can be. With minimal ingredients, straightforward steps, and endless customization options, they are destined to become a firm favorite in your kitchen and a regular feature in your healthy eating routine. So, next time you’re reaching for a bag of greasy, processed store-bought chips, consider this wholesome, homemade alternative. Give this recipe a try, experiment with your favorite seasonings, and prepare to be delighted by the crisp, savory perfection of baked zucchini chips. Your taste buds and your body will undoubtedly thank you for making such a smart and delicious choice!

Baked Zucchini Chips: The Ultimate Healthy Snack Recipe
INGREDIENTS
- 2-3 Medium Zucchinis (about 1.5 – 2 lbs)
- 3 tablespoons Extra Virgin Olive Oil
- 1/2 teaspoon Fine Sea Salt (or to taste)
- Optional Seasonings: 1/2 tsp garlic powder, 1/4 tsp smoked paprika, 2 tbsp nutritional yeast
DIRECTIONS
- Pre-heat oven to 235 degrees F (113 degrees C). Line two large baking sheets with parchment paper to prevent sticking and ensure easy cleanup.
- Using a mandoline slicer set at 1/4th inch (0.6 cm) thickness, carefully slice the zucchinis into uniform rounds. This ensures even baking and consistent crispiness.
- Lay the zucchini slices out on a clean kitchen towel or several layers of paper towels. Gently but firmly dab them to remove as much excess moisture as possible. This step is crucial for achieving crispy chips.
- In a large bowl, toss the dried zucchini slices with olive oil and salt (and any optional seasonings you choose). Ensure each slice is lightly coated but not drenched.
- Arrange the seasoned zucchini slices in a single layer on the prepared baking sheets, making sure they do not overlap. Overlapping will prevent them from crisping up properly. You may need to use more than two baking sheets depending on the size of your zucchinis.
- Bake for 90 minutes. After 45 minutes, you may want to rotate the baking sheets for even browning. The chips should be golden brown and feel firm and crisp to the touch when done. Baking time can vary slightly depending on your oven and zucchini moisture content.
- Once baked, remove the chips from the oven and let them cool completely on the baking sheets or a wire rack. As they cool, they will become even crispier.
- Store any leftover baked zucchini chips in an airtight container at room temperature for up to five days. Enjoy as a healthy snack, side dish, or salad topping!