
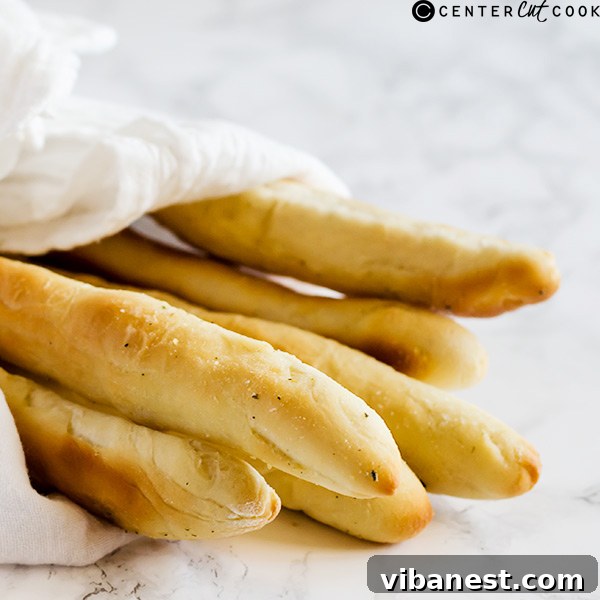
Ultimate Olive Garden Garlic Butter Breadsticks: Your Homemade Copycat Recipe
There’s something truly magical about Olive Garden’s garlic butter breadsticks. They arrive warm, perfectly golden, infused with an irresistible garlic and butter aroma, and just the right amount of salt. They have that perfect chewiness that makes you reach for “just one more” until suddenly, the basket is empty, and you’re still wondering how you have room for a massive bowl of pasta. For years, these complimentary breadsticks have been a cornerstone of the Olive Garden experience, often cited as a primary reason for repeat visits. That signature buttery-garlicky flavor is hard to beat, and for many, it’s the highlight of the meal.
If you’re anything like me, the craving for those soft, savory breadsticks doesn’t just strike when you’re at the restaurant. It can hit at any time, especially when you’re planning a cozy Italian dinner at home. That’s why I embarked on a mission to create the perfect Olive Garden copycat garlic butter breadsticks recipe that captures all the magic of the original, right in your own kitchen. And the best part? It’s much easier than you might think, even if you’re new to baking yeast breads.
Why Make Your Own Olive Garden Breadsticks at Home?
Beyond satisfying those persistent cravings, there are numerous benefits to mastering this homemade breadstick recipe. Firstly, it’s incredibly cost-effective. While Olive Garden’s breadsticks are free with a meal, enjoying them frequently can add up. Making them at home means you can have an endless supply for a fraction of the price. Secondly, you have complete control over the ingredients. You can choose high-quality butter, fresh flour, and adjust the salt or garlic to your personal preference. This is particularly appealing for those with dietary considerations or who prefer to know exactly what goes into their food.
Moreover, baking bread, even something as simple as these breadsticks, offers immense satisfaction. There’s a unique joy in transforming a few basic ingredients into something warm, fragrant, and delicious from scratch. It’s a rewarding culinary experience that builds confidence in the kitchen and fills your home with an intoxicating aroma. This recipe is an ideal starting point for anyone looking to dip their toes into the world of yeast baking, proving that delicious bread doesn’t have to be complicated.
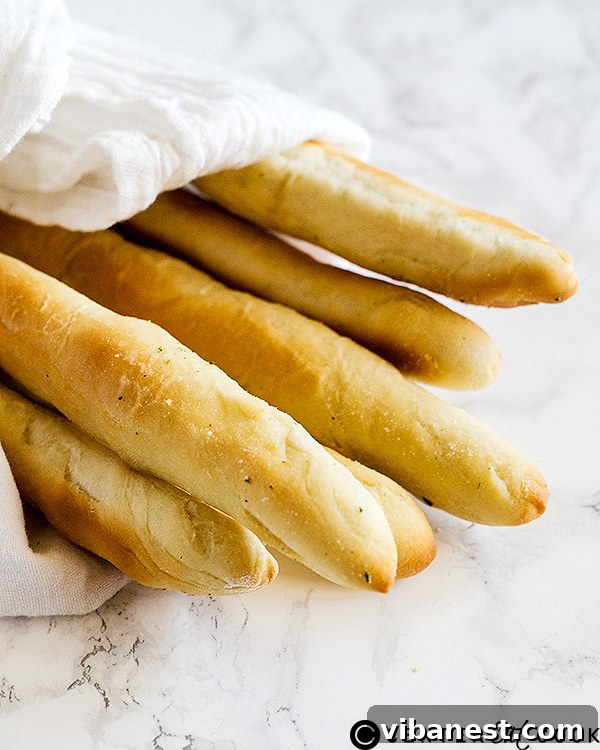
The Secret to Perfect Garlic Butter Breadsticks: Understanding Yeast
The foundation of these light and airy breadsticks lies in active dry yeast. For beginners, working with yeast can seem intimidating, but it’s quite straightforward once you understand a few key principles. Yeast is a living organism, and like all living things, it needs the right environment to thrive. Warm water (not hot, not cold) and a touch of sugar provide the ideal conditions for it to “proof” or activate. When you combine yeast with warm water and sugar, it should foam up within a few minutes, creating a thick, yeasty-smelling layer on top. This foam is a clear indicator that your yeast is alive and ready to make your breadsticks rise beautifully.
If your yeast doesn’t foam, it’s likely “dead” or inactive. Don’t worry, this happens to the best of us! It simply means you need to get a fresh packet of yeast and start this initial step again. The good news is that you haven’t wasted any other ingredients yet, making it a low-stakes learning experience. Once your yeast is active, the rest of the process is a simple matter of mixing, kneading, and waiting.
Mastering the Dough: Kneading and Rising
After activating your yeast, you’ll combine it with flour, sugar, and salt. A stand mixer with a dough hook makes kneading a breeze, but you can certainly do it by hand if you prefer a bit of a workout. Kneading is crucial because it develops the gluten in the flour, which gives the bread its structure and chewiness. You’ll want to knead the dough for about 8 minutes until it’s smooth, elastic, and springs back when gently poked.
Then comes the part that often tests a baker’s patience: the rise. After kneading, the dough needs to rest in a warm, draft-free place until it has doubled in size. This process typically takes about an hour, but it can vary depending on the temperature and humidity of your kitchen. The warmer the environment, the faster the rise. While waiting can be tough, this resting period allows the yeast to work its magic, creating air pockets that contribute to the breadsticks’ signature light and fluffy texture. Resist the urge to rush it; a properly risen dough is key to tender, flavorful breadsticks.
Make-Ahead & Freezing Tips for Weeknight Convenience
One of the best aspects of this Olive Garden breadstick copycat recipe is how adaptable it is to your schedule. While the waiting periods might seem long, there are clever ways to incorporate them into your busy week, ensuring you can enjoy fresh breadsticks even on a weeknight. This flexibility makes them a perfect addition to your meal prep routine.
Option 1: Overnight Refrigeration. If you’re planning a dinner for the evening, you can start the dough in the morning. After the first knead, instead of letting it rise at room temperature, place the greased dough ball in a greased bowl, cover it tightly with plastic wrap, and refrigerate it for up to 8 hours. The cold temperature slows down the yeast activity, allowing for a slow, flavorful rise. When you get home from work, take the dough out about 15-20 minutes before you’re ready to shape it, letting it come closer to room temperature. Then proceed with shaping and the second rise.
Option 2: Freeze Unbaked Breadsticks. This is my personal favorite for maximum flexibility. Prepare the dough all the way up to step 8 in the directions, where the breadsticks have been shaped and are ready for their second rise. Instead of letting them rise, place them on a lightly floured baking sheet and freeze them until solid (about 1-2 hours). Once frozen, transfer the unbaked breadsticks to an airtight freezer-safe bag or container. They can be stored in the freezer for up to 2-3 months. When you’re ready to bake, simply remove the desired number of breadsticks from the freezer, place them on a baking sheet, and let them thaw and proof at room temperature for about 30-45 minutes (or until visibly puffy) while your oven preheats. Then bake as directed.
Option 3: Freeze Baked Breadsticks. You can also bake the breadsticks fully, allow them to cool completely, and then freeze them in an airtight container. To reheat, simply pop them into a preheated 350°F (175°C) oven for about 5-8 minutes until warmed through and slightly crisp. You can then brush them with the garlic butter mixture after reheating.
These make-ahead options mean you can always have delicious, warm garlic butter breadsticks on hand, ready to elevate any meal from a simple pasta dish to a hearty soup and salad spread. The convenience is unmatched, and the taste is always fresh.
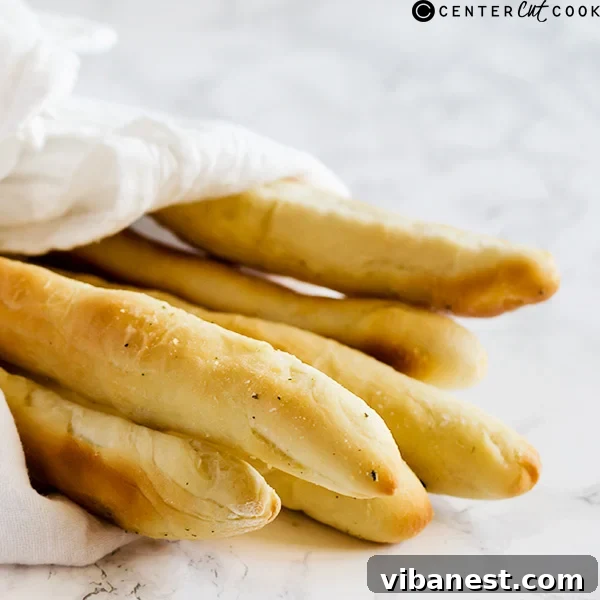
Olive Garden Copycat Garlic Butter Breadsticks Recipe
Recreate the iconic Olive Garden experience at home with these easy-to-make, incredibly delicious garlic butter breadsticks. They’re soft, fluffy, and loaded with that signature buttery-garlicky flavor everyone loves. Perfect for dipping into soup, pairing with pasta, or just enjoying on their own!
INGREDIENTS
- 2 1/4 teaspoons (1 packet) active dry yeast
- 1 1/4 cups, plus 1 tablespoon warm water (around 105-115°F / 40-46°C)
- 2 1/2 tablespoons granulated sugar, divided
- 4 1/2 cups all-purpose flour, plus extra for dusting
- 1 tablespoon, plus 1 teaspoon fine sea salt, divided
- 1/2 cup (1 stick) unsalted butter, melted, divided
- 1 1/2 teaspoons garlic powder
- 1 teaspoon dried oregano
DIRECTIONS
- Proof the Yeast: In a small bowl, combine the active dry yeast, 1 1/4 cups warm water, and 1/2 tablespoon of the sugar. Gently stir to combine. Let it sit undisturbed for 5-10 minutes. The mixture should become foamy and bubbly on top, indicating the yeast is active and alive. If no foam appears, your yeast is likely inactive; discard and start again with fresh yeast.
- Combine Dry Ingredients: In the bowl of your stand mixer (or a large mixing bowl if kneading by hand), add the all-purpose flour, the remaining 2 tablespoons of sugar, and 1 tablespoon of the fine sea salt. Whisk briefly to combine these dry ingredients evenly.
- Add Wet Ingredients: Take 2 tablespoons of the melted butter and stir it into the proofed yeast mixture. Pour this entire yeast-butter mixture into the flour mixture in your stand mixer.
- Mix the Dough: Using a spoon or spatula, mix the ingredients together until they begin to come together and form a shaggy ball. Once it starts to form a mass, attach the dough hook to your stand mixer and knead on medium-low speed for approximately 8 minutes. If kneading by hand, turn the dough out onto a lightly floured surface and knead vigorously for 10-12 minutes until smooth and elastic.
- First Rise: Remove the dough from the mixer and shape it into a smooth ball. Lightly grease your mixing bowl with a tiny bit of oil or cooking spray. Place the dough ball back into the greased bowl, turning it once to coat the entire surface. Cover the bowl tightly with plastic wrap or a clean kitchen towel. Place it in a warm, draft-free place to rise for 1 hour, or until it has visibly doubled in size.
- Make-Ahead Tip: For a slower rise, you can refrigerate the covered dough for 8-12 hours after kneading. Just allow it to come closer to room temperature for about 15-20 minutes before proceeding with shaping.
- Shape the Breadsticks: Gently deflate the risen dough by punching it down. Turn the dough out onto a lightly floured surface. Using a sharp knife or a dough scraper, evenly divide the dough into 16 equal pieces. Roll each piece into a rope, aiming for about 8 inches in length. Don’t worry if they aren’t perfectly uniform; homemade charm is part of the appeal!
- Second Rise & Preheat: Place the shaped breadsticks onto lightly floured (or parchment-lined) baking pans, leaving some space between each. Cover them loosely with plastic wrap or a kitchen towel and allow them to rise for another 30 minutes. During this time, preheat your oven to 400°F (200°C).
- Freezing Unbaked Breadsticks: At this stage, you can also freeze the shaped breadsticks. Place them on a baking sheet and freeze until solid. Once frozen, transfer them to an airtight container or freezer bag for up to 2-3 months. Thaw and proof at room temperature for 30-45 minutes before baking.
- First Bake: Bake the breadsticks in the preheated oven for 6 minutes. They will be pale but slightly set.
- Prepare Garlic Butter Topping: While the breadsticks are having their first bake, prepare the flavorful topping. In a small bowl, combine the remaining 1/2 stick (4 tablespoons) of melted butter, 1 1/2 teaspoons garlic powder, 1 teaspoon dried oregano, and 1 teaspoon of fine sea salt. Stir well to combine.
- Second Bake & Finish: After the initial 6 minutes, remove the breadsticks from the oven. Generously brush each breadstick with a portion of the prepared garlic butter mixture. Return them to the oven and bake for another 5-6 minutes, or until they are golden brown on top.
- Serve: Once baked, remove the breadsticks from the oven. For an extra boost of flavor and shine, immediately brush them with any remaining garlic butter mixture. Serve warm, but allow them to cool for a few minutes so the butter has a chance to soak in and they are not too hot to handle. Enjoy your homemade Olive Garden copycat garlic butter breadsticks!
Troubleshooting Common Breadstick Issues
Baking is a science, and sometimes things don’t go exactly as planned. Here are a few common issues you might encounter and how to fix them:
- Dense/Hard Breadsticks: This is often due to inactive yeast, insufficient kneading, or not allowing enough time for the dough to rise properly. Ensure your yeast is active, knead until the dough is elastic, and let it double in size during the first rise.
- Tough Breadsticks: Over-kneading can lead to tough breadsticks. While kneading is important, excessive kneading can overdevelop the gluten, resulting in a chewy, tough texture.
- Breadsticks Don’t Rise: The culprit here is almost always inactive yeast or a too-cold environment. Make sure your water temperature is correct for proofing, and place the dough in a warm spot for rising.
- Dry Breadsticks: This could be due to too much flour added during kneading or shaping, or over-baking. Use flour sparingly when dusting, and keep an eye on the baking time to prevent them from drying out.
Serving Suggestions & Variations
These garlic butter breadsticks are incredibly versatile and pair well with a multitude of dishes beyond just pasta. Serve them alongside a hearty minestrone soup, a crisp garden salad with Italian dressing, or even a classic chicken Alfredo. They’re also fantastic for dipping into marinara sauce, a creamy artichoke dip, or simply enjoyed on their own as a savory snack.
Want to add your own twist? Here are a few variations:
- Parmesan Garlic Breadsticks: Sprinkle grated Parmesan cheese over the breadsticks after brushing with garlic butter and before the second bake for a cheesy, savory crust.
- Herby Breadsticks: Add a pinch of dried basil, parsley, or Italian seasoning to your garlic butter mixture for an extra layer of herbal flavor.
- Spicy Kick: A tiny pinch of red pepper flakes in the garlic butter can add a subtle warmth if you enjoy a little heat.
- Everything Bagel Seasoning: For a unique twist, sprinkle some everything bagel seasoning on top of the buttered breadsticks before baking for an extra textural and flavor boost.
Making these Olive Garden copycat garlic butter breadsticks at home is not just about recreating a restaurant favorite; it’s about bringing joy and deliciousness to your own table with a simple, satisfying baking project. The aroma alone will transport you, and the taste will convince you that homemade is always best. So gather your ingredients, follow these steps, and get ready to enjoy endless baskets of warm, garlicky, buttery goodness!