
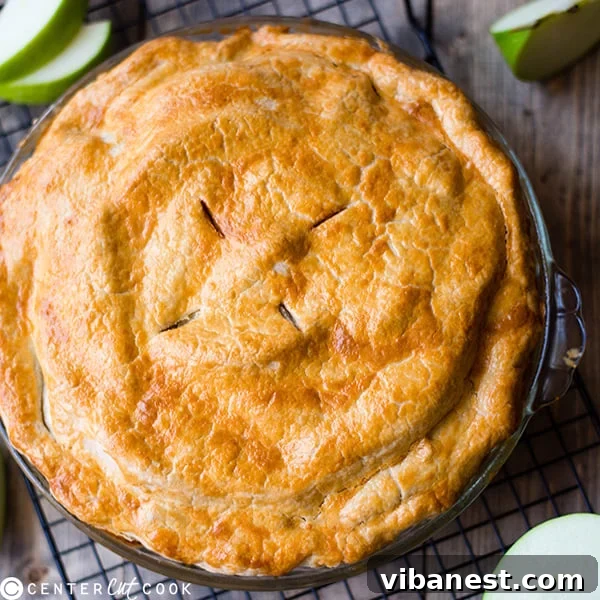
The Ultimate Homemade Apple Pie Recipe: A Timeless Classic
As the vibrant hues of autumn paint the landscape and the cozy chill of winter approaches, our thoughts often drift to the comforting aromas of holiday baking. While pumpkin spice undeniably dominates the seasonal spotlight, there’s an undeniable magic in a perfectly baked homemade apple pie that captivates hearts and tantalizes taste buds. This year, let’s rediscover the delightful simplicity and profound satisfaction of a classic apple pie – a dessert that truly embodies warmth, tradition, and pure indulgence.
Forget the fleeting trends; the humble apple, in all its crisp glory, deserves its moment in the culinary sun. Apples, with their versatile sweetness and subtle tartness, transform into something truly extraordinary when nestled under a golden, flaky crust. This recipe isn’t just about making an apple pie; it’s about crafting an experience, a memory, and a dish that will be requested year after year at your family gatherings.
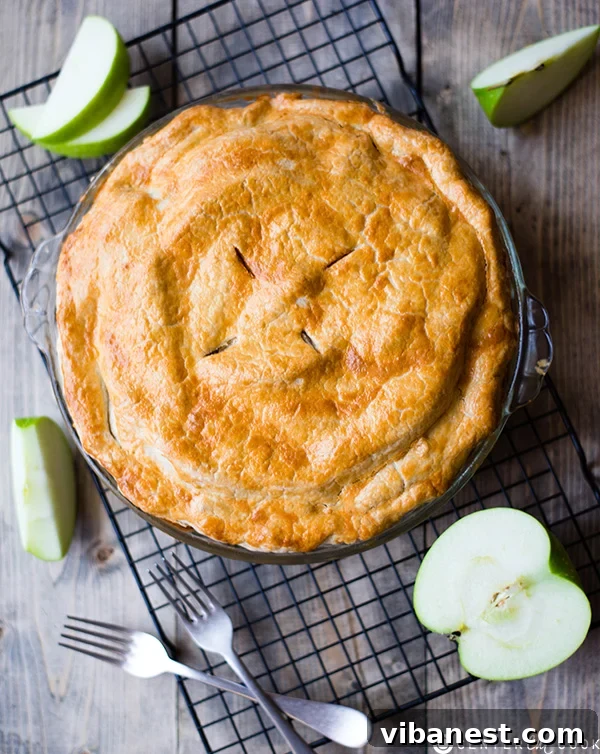
The Journey to Apple Pie Perfection: A Labor of Love
Developing what I consider the ultimate homemade apple pie recipe was a journey filled with delightful trials and delicious errors. It wasn’t a one-and-done affair; rather, it involved numerous attempts to fine-tune every single element, from the texture of the filling to the crispness of the crust. Through extensive experimentation, I discovered that creating a truly exceptional apple pie requires a delicate balance of science and artistry. Each iteration brought me closer to understanding the nuances of achieving that perfect blend of sweetness, spice, and tender-yet-firm apple slices.
Some of the most crucial lessons learned during this perfecting process revolved around seemingly small details that make an enormous difference. For instance, achieving a beautifully golden, uniformly baked top crust that’s both visually appealing and deliciously crisp requires specific techniques and careful monitoring. The precise combination of spices and the right amount of liquid are essential to prevent a bland or watery filling. Furthermore, understanding the importance of allowing the pie to rest after baking is paramount for the juices to thicken, ensuring every slice holds its shape without collapsing into a gooey mess.
Perhaps one of the most vital discoveries was the critical role of apple selection and, even more specifically, how thick to slice your apples. Too thin, and they turn to mush; too thick, and they remain hard and undercooked. This recipe meticulously outlines all these perfected steps, so you can bypass the trial-and-error phase and jump straight to baking a masterpiece. And yes, while tasting half a dozen apple pies might sound like arduous work, I assure you, it was a sacrifice I was more than willing to make for the sake of culinary excellence!
What Makes This Apple Pie Recipe Stand Out?
This isn’t just another apple pie recipe; it’s *the* recipe you’ll turn to repeatedly. It consistently delivers a luxuriously sweet yet perfectly balanced flavor profile that never overwhelms the natural taste of the apples. The apples themselves are a revelation: perfectly layered, tender but still holding their distinct shape – absolutely no mushiness here! This is achieved by carefully selecting the right apple variety and preparing them with precision. The result is a filling that boasts incredible depth and texture, a delightful contrast to the beautifully crafted, golden-brown crust.
Picture this: a rich, buttery, flaky crust that shatters with every forkful, giving way to a warm, aromatic filling bursting with notes of cinnamon, nutmeg, and a subtle hint of citrus. It’s a sensory symphony that evokes cherished memories and creates new ones. This pie is more than just a dessert; it’s a centerpiece, a conversation starter, and a heartwarming symbol of home and togetherness. It’s robust enough to stand proudly on any holiday table, yet comforting enough to be enjoyed on a quiet weeknight. Prepare to be showered with compliments, because this recipe consistently produces a pie that looks as incredible as it tastes.
Deep Dive into Key Ingredients for the Perfect Pie
Success in baking often comes down to understanding your ingredients. For this ultimate apple pie, each component plays a crucial role in achieving that sought-after flavor and texture:
The Apples: Granny Smith’s Superiority
We specifically call for six Granny Smith apples, peeled, cored, and, most importantly, sliced evenly into 1/4-inch slices. Granny Smith apples are the star here for a reason: their firm texture allows them to hold their shape beautifully during baking, preventing the dreaded mushy filling. Their characteristic tartness also provides a critical counterbalance to the sweetness of the sugar, resulting in a perfectly balanced flavor profile that is neither too sweet nor too sharp. The uniformity of the 1/4-inch slices ensures even cooking and a delightful, consistent texture throughout the pie.
Sweetness and Brightness: Sugar and Lemon
The 1 1/4 cup sugar provides the necessary sweetness, caramelizing slightly during baking to create that rich, inviting pie filling. But sugar alone isn’t enough; the 1/2 fresh lemon (both zest and juice) is a game-changer. Lemon zest adds a bright, aromatic lift that enhances the apple’s natural flavor, while the juice not only prevents the apples from browning but also cuts through the richness and adds a touch of acidity, making the pie taste incredibly fresh and vibrant.
The Spice Blend: A Symphony of Warmth
Our carefully selected spice blend is the heart of the pie’s comforting aroma and taste. 1/2 tsp. ground cinnamon, 1/4 tsp. allspice, and 1/4 ground nutmeg come together to create a classic, warm, and inviting fragrance. Cinnamon is the dominant note, while allspice and nutmeg add layers of complexity and depth, elevating the overall flavor. A small but mighty 1/8 tsp. pure vanilla extract further rounds out the spices, adding a hint of creamy sweetness that ties everything together beautifully.
The Foundation: Pie Crust and Egg Wash
This recipe assumes you’ll use a high-quality un-baked pie crust (top and bottom). Whether homemade or store-bought, ensure it’s a good quality dough that will yield a flaky texture. The final touch before baking is the egg wash, made with 1 egg yolk and 1 tbsp. heavy whipping cream. This mixture brushed over the top crust isn’t just for aesthetics; it promotes a beautiful, glossy, golden-brown finish and contributes to that desirable crisp texture.
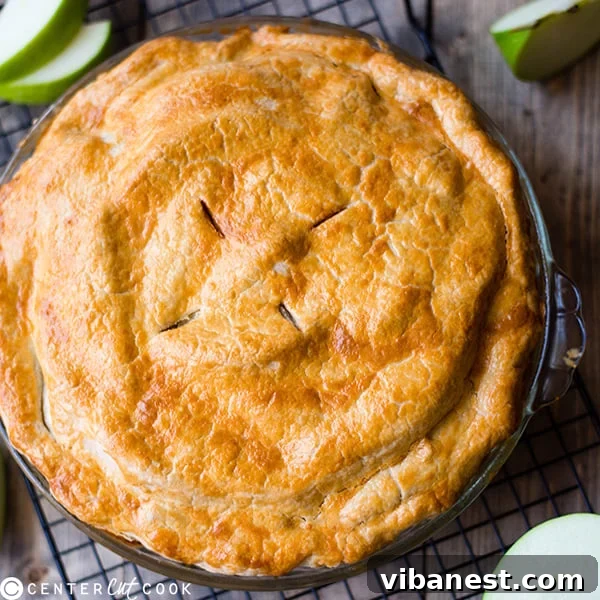
INGREDIENTS
- 6 Granny Smith apples, peeled, cored and sliced evenly into 1/4-inch slices
- 1 1/4 cup sugar
- 1/2 fresh lemon (zest and juice)
- 1/2 tsp. ground cinnamon
- 1/4 tsp. allspice
- 1/4 ground nutmeg
- 1/8 tsp. pure vanilla extract
- 1 pie crust top and bottom, un-baked
- 1 egg yolk
- 1 tbsp. heavy whipping cream
DIRECTIONS
- Prepare Your Workspace and Preheat Oven: Begin by preheating your oven to a precise 375 degrees Fahrenheit (190 degrees Celsius). This ensures the oven is at the correct temperature when your pie is ready to bake, which is crucial for achieving a perfectly crisp crust from the outset.
- Season the Apples: In a generously sized mixing bowl, combine all your carefully sliced apple pieces. Now, evenly sprinkle the sugar, lemon zest, freshly squeezed lemon juice, ground cinnamon, allspice, nutmeg, and pure vanilla extract over the apples. Using a spatula or your hands, gently toss and stir the apple slices to ensure every piece is thoroughly coated with the aromatic spice and sugar mixture. Set this bowl aside while you prepare your pie crust; this resting time allows the apples to release some of their natural juices, intensifying the flavor.
- Prepare the Bottom Crust: On a lightly floured surface, take one half of your unbaked pie dough and roll it out carefully. Aim for a circular shape approximately 12 inches (30 cm) in diameter. Gently transfer this rolled-out dough into a 9-inch (23 cm) pie dish. Allow the edges of the dough to overhang the rim of the pie dish by about 1-2 inches (2.5-5 cm). To make transferring easier and prevent tearing, you can either gently fold the dough into quarters and unfold it in the dish, or roll it loosely onto your rolling pin and then unroll it over the pie plate.
- Fill the Pie: Now, retrieve your seasoned apple slices. Begin layering them into the prepared pie crust, building a slight mound in the center. This mounding accounts for the natural shrinkage of the apples during baking and ensures a full, attractive pie. Once all apples are in place, you’ll notice a pool of delicious cinnamon-sugar juices at the bottom of the apple mixing bowl. Pour approximately half of these flavorful juices directly over the layered apples in the pie crust; discard the remaining juices to prevent a soggy bottom.
- Place the Top Crust and Seal: Roll out the second half of your pie dough to an approximate 10-inch (25 cm) diameter. Carefully transfer this top crust over the mounded apple filling, allowing its edges to slightly overhang the pie plate. Using a sharp knife or kitchen shears, trim the overhanging dough to leave a consistent 1-inch (2.5 cm) border. Now, gently roll the bottom and top crusts together, folding them inwards against the rim of the pie plate to create a sturdy seal. Crimp this newly formed, thicker edge either by artfully pinching it with your fingers or by pressing down firmly all around with the tines of a fork. This step is crucial for sealing the pie and preventing the filling from bubbling out during baking.
- Apply Egg Wash and Vent: In a small bowl, whisk together the single egg yolk with the tablespoon of heavy whipping cream until well combined. Using a pastry brush, generously brush this egg wash mixture evenly over the entire surface of the top pie crust. This creates that beautiful golden-brown, glossy finish. Finally, using a sharp knife, carefully slice 4-6 small, ¾-inch (2 cm) slits in the top crust. These vents are essential for allowing steam to escape during baking, preventing the crust from puffing up or cracking unevenly.
- Bake to Golden Perfection: Place the pie in your preheated 375-degree Fahrenheit (190°C) oven. Bake for an initial 15-20 minutes, or until you observe the crust beginning to turn a light golden-brown. This initial high heat helps set the crust quickly. Then, reduce the oven temperature to 350 degrees Fahrenheit (175°C) and continue baking for an additional 45-60 minutes. The pie is fully cooked when the top crust is a deep golden-brown, and you can see the juices actively bubbling through the slits, or even hear them gently bubbling from within the pie. If the crust starts browning too quickly, you can loosely tent the pie with aluminum foil.
- Cool Completely and Chill: This is arguably the most important step for a perfectly set pie. Once removed from the oven, immediately transfer the hot pie to a wire cooling rack. Allow it to cool completely at room temperature, which can take several hours. Once cooled, transfer the pie to the refrigerator and chill for at least one full hour. This chilling period is absolutely vital as it allows the fruit juices to thicken and set, ensuring clean, firm slices when you cut into it. Patience here will be rewarded!
Tips for Apple Pie Success and Serving Suggestions
Don’t Rush the Cooling Process
We cannot stress this enough: the cooling and chilling phase is non-negotiable. Cutting into a warm apple pie prematurely will result in a runny, unset filling. Allow the pie to cool completely on a rack for several hours, then refrigerate for at least an hour. This patience ensures a beautifully structured slice where the juices have thickened to a perfect consistency.
Prevent Over-Browning of Crust
If you notice your pie crust browning too quickly during the longer baking phase, simply create a loose “tent” with aluminum foil over the pie. This will shield the crust from direct heat, allowing the apples to finish cooking without burning the edges.
The Magic of Even Slices
As mentioned, uniform apple slices are key to even cooking. Investing in an apple peeler/corer/slicer or simply using a sharp knife and a steady hand will make a world of difference in the final texture of your filling. Consistency is truly your friend here.
Serving Suggestions
While this homemade apple pie is absolutely divine on its own, it truly shines when paired with certain accompaniments. A generous scoop of premium vanilla bean ice cream melting over a warm slice of pie is a classic for a reason. Alternatively, a dollop of freshly whipped cream adds a luxurious lightness and subtle sweetness. For an extra touch of decadence, a drizzle of warm caramel sauce elevates the experience even further. Enjoy your masterpiece!