
Indulge in the Ultimate Dessert Trend: Homemade Churro Ice Cream Bowls
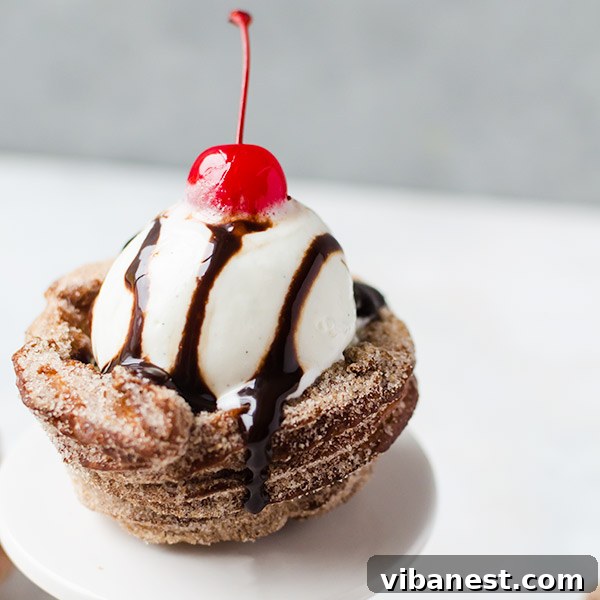
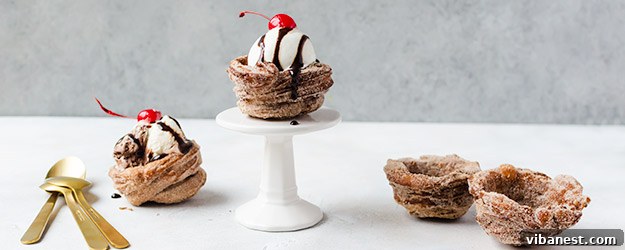
The culinary world is a whirlwind of innovation, constantly introducing delightful new trends that captivate our taste buds. Among these fleeting crazes, one particular dessert sensation has truly stood the test of time in my heart (and stomach!): the glorious **Churro Ice Cream Bowl**. From the moment I first saw these crispy, cinnamon-sugar creations cradling scoops of melting ice cream in a myriad of viral videos, I knew I had to try them. And let me tell you, succumbing to this irresistible treat was one of the best decisions ever.
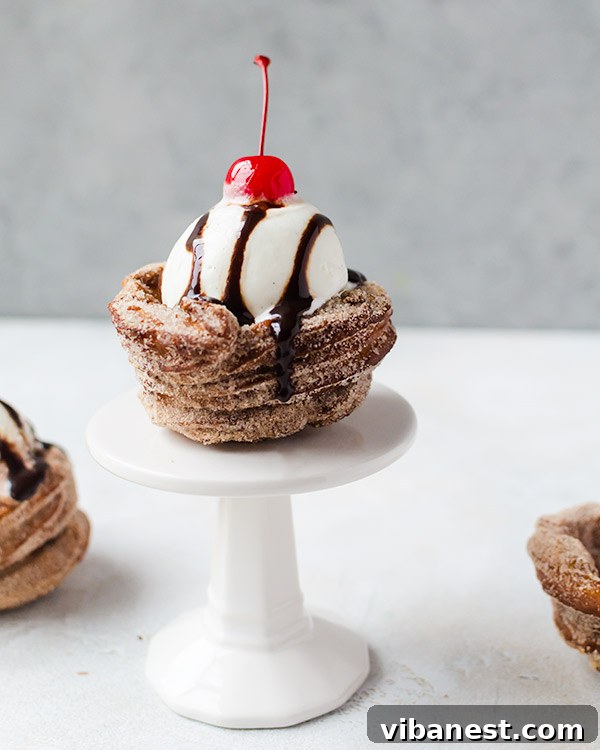
These aren’t just any dessert; they are a symphony of textures and flavors. Imagine: a warm, freshly fried churro, perfectly crisp on the outside and tender on the inside, generously coated in aromatic cinnamon sugar. Now, picture that churro expertly shaped into a charming bowl, ready to hold your favorite scoop of creamy, cold ice cream. The slight warmth of the churro gently kisses the ice cream, creating a delightful melt that adds to the magic. It’s a combination that dreams are made of, a true masterpiece for dessert lovers.
Why Homemade Churro Ice Cream Bowls Are a Game Changer
While many food trends can be overly complicated or merely visually appealing without delivering on taste, churro ice cream bowls are the real deal. They are as every bit amazing as they look, offering a unique dessert experience that elevates both churros and ice cream. The beauty of making them at home lies in the unparalleled freshness and the ability to customize every aspect to your liking. Forget soggy, store-bought churros; this recipe guarantees a crisp, sweet, and cinnamony delight that will impress anyone.
Making churro bowls from scratch is not only a fun and rewarding kitchen project but also ensures you get them at their absolute peak: still slightly warm from the fryer, perfectly coated, and ready to embrace your chosen ice cream. This freshness is key to their extraordinary appeal, allowing the contrasting temperatures and textures to truly shine. Plus, it’s an excellent way to surprise family and friends with a gourmet-level dessert that looks incredibly fancy but is surprisingly achievable.
The Art of the Churro Dough: Mastering the Pâte à Choux
The foundation of any great churro bowl is, of course, the churro itself. The dough, known as *pâte à choux*, is a relatively simple yet versatile pastry base. It’s the same dough used for eclairs and cream puffs, but for churros, it’s deep-fried to achieve that signature crispy exterior. Understanding the process is crucial for success.
The initial steps involve heating water, butter, and sugar to a boil, then quickly incorporating flour and salt to create a thick, pliable dough. This cooking process gelatinizes the starches in the flour, which helps create the crisp texture we crave. After a brief cooling period, eggs are beaten in one by one. This is perhaps the most critical step, as the eggs add richness and provide the necessary moisture and structure to allow the dough to puff up beautifully when fried. The final dough should be smooth, thick, and able to hold its shape when piped.
Tips for Success: Crafting Your Perfect Churro Bowls
Achieving churro bowl perfection is simpler than you might think, especially with a few key tips in mind. This recipe is wonderfully flexible, allowing you to easily double or halve the ingredients depending on how many delightful bowls you wish to create. However, a crucial aspect of batch frying is maintaining the structure of the bowls.
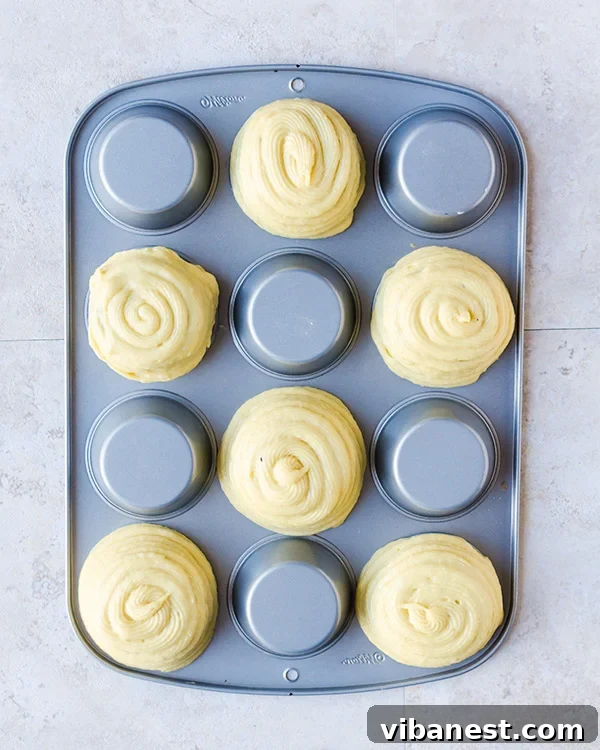
- Piping with Precision: When piping the dough into your muffin tin, use a star tip for that classic churro ridged texture. Start from the bottom of the well and spiral upwards to create an even, sturdy bowl shape. Make sure to lightly grease the muffin wells thoroughly to prevent sticking.
- The Freezing Advantage: Freezing the piped churro dough for at least two hours (or even overnight) is non-negotiable. This step solidifies the dough, allowing it to hold its bowl shape perfectly during the frying process. Without adequate freezing, your churros might collapse or lose their form in the hot oil.
- Batch Frying Strategy: If you’re doubling the recipe or making a large batch, it’s vital to only take one or two frozen churro bowls out of the freezer at a time for frying. This prevents the remaining dough from thawing, which could compromise their shape and texture. Remember to pipe the churros into every other muffin tin well to ensure adequate space and prevent them from merging.
- Oil Temperature is Key: Maintaining the correct oil temperature (375°F / 190°C) is paramount. Too cool, and your churros will absorb too much oil and become greasy; too hot, and they’ll brown too quickly on the outside, leaving the inside undercooked. A good deep-fry thermometer is your best friend here.
- Cinnamon Sugar Coating: Immediately after frying, while the churros are still warm, toss them generously in the cinnamon sugar mixture. The warmth helps the sugar adhere beautifully, creating that iconic sweet, spicy crust.
The Freshness Factor: Why Immediate Enjoyment is Best
While I wish these incredible churro ice cream bowls could last forever, they truly are at their best when served immediately after frying and coating. The characteristic crispness of a fresh churro begins to diminish over time as it’s exposed to air and moisture, leading to a softer, chewier texture. If you absolutely must save them, I recommend storing them in an airtight container for no longer than three days. However, be prepared for a slight loss in that coveted crunch. For the ultimate experience, plan to enjoy them as soon as they’re ready!
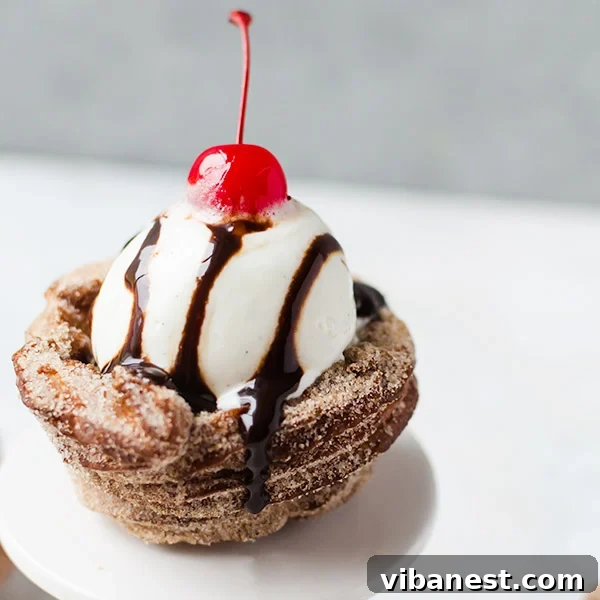
Churro Ice Cream Bowls: The Ultimate Recipe
Get ready to create your own irresistible churro ice cream bowls with this easy-to-follow recipe. Perfect for impressing guests or simply treating yourself to a delightful dessert!
INGREDIENTS
- 1/2 cup water
- 4 tablespoons unsalted butter
- 1 tablespoon brown sugar
- 1/2 cup all-purpose flour
- 1/4 teaspoon salt
- 1 teaspoon vanilla extract
- 2 large eggs
- 1/2 cup granulated sugar
- 1 1/2 tablespoons ground cinnamon
- Vegetable oil (or other neutral oil) for frying
- Your favorite ice cream and toppings for serving
DIRECTIONS
- Prepare the Dough Base: In a large, heavy-bottomed saucepan, combine the water, unsalted butter, and brown sugar. Heat over medium-high heat, stirring occasionally, until the mixture comes to a rolling boil and the butter is fully melted.
- Incorporate Flour: Remove the saucepan from the heat. Immediately add the all-purpose flour and salt all at once. Stir vigorously with a wooden spoon or spatula until the mixture forms a smooth, thick ball of dough that pulls away from the sides of the pan. Continue to stir for another minute off the heat to cook out some of the moisture.
- Cool and Add Eggs: Transfer the dough to a mixing bowl and allow it to cool for about 5 minutes. This is crucial to prevent the eggs from scrambling. Once slightly cooled, stir in the vanilla extract. Add one large egg and beat vigorously (a stand mixer with a paddle attachment or hand mixer works well here) until the egg is completely incorporated and the dough is smooth. The dough may look separated at first, but keep mixing. Repeat with the second egg, beating until thoroughly combined and the dough is thick and glossy.
- Pipe the Dough: Fit a large piping bag with a star tip (such as an Ateco 826 or Wilton 1M). Transfer the churro dough into the piping bag.
- Prepare Muffin Tin: Lightly grease the bottom and sides of every other well in a standard muffin tin. Thorough greasing is essential for easy removal after freezing.
- Form the Bowls: Carefully pipe the dough into the greased muffin wells. For a sturdy bowl, start piping from the center of the bottom and spiral outwards and upwards to create a bowl shape, ensuring the sides are thick enough to hold their form.
- Freeze for Structure: Place the muffin tin with the piped churro dough into the freezer for at least two hours, or until completely solid. This freezing step is vital for the churro bowls to maintain their shape during frying. Once frozen solid, gently loosen the churros from the muffin tin (a small offset spatula can help) and place them back into the freezer on a parchment-lined tray until ready to fry. Keeping them frozen prevents them from thawing and collapsing.
- Heat the Frying Oil: In a large, heavy-bottomed saucepan or deep fryer, heat at least four inches of vegetable oil (or your preferred neutral frying oil) to 375 degrees F (190°C). Use a candy or deep-fry thermometer to monitor the temperature accurately. Line a wire rack with paper towels and place it near your frying station for draining.
- Fry the Churro Bowls: Carefully take one or two frozen churro bowls from the freezer at a time. Gently lower them into the hot oil using tongs. Fry for approximately 2-4 minutes per side, turning occasionally, until they achieve a beautiful golden-brown color and are crisp all over. Do not overcrowd the pan, as this will lower the oil temperature and result in greasy churros.
- Drain and Coat: Once fried, carefully remove the churro bowls from the oil and place them on the prepared wire rack to drain any excess oil. While still warm, immediately toss them in the cinnamon sugar mixture until thoroughly coated.
- Serve Immediately: Fill your freshly coated, still-warm churro bowls with scoops of your favorite ice cream and any desired toppings. Serve and enjoy this decadent dessert without delay!
Customization and Serving Ideas
The beauty of churro ice cream bowls lies not only in their delightful crunch and flavor but also in their incredible versatility. Once you have your warm, cinnamon-sugared bowls, the possibilities for customization are endless.
- Ice Cream Flavors: Don’t limit yourself to vanilla! Experiment with chocolate, salted caramel, coffee, strawberry, mint chip, or even exotic fruit sorbets for a refreshing twist.
- Toppings Galore:
- Sauces: Drizzle with warm chocolate fudge, caramel sauce, strawberry sauce, or even dulce de leche.
- Crunchy Bits: Add chopped nuts (pecans, walnuts, peanuts), crushed cookies, granola, or more cinnamon sugar.
- Freshness: Top with fresh berries (strawberries, raspberries, blueberries), sliced bananas, or whipped cream.
- Extras: A sprinkle of colorful sprinkles, mini chocolate chips, or a maraschino cherry can add a fun touch.
- Beyond Ice Cream: While ice cream is the classic pairing, these bowls can also hold other delightful fillings like fruit compotes, yogurt parfaits, or even a dollop of whipped cream with a sprinkle of chocolate shavings for a lighter option.
Troubleshooting Common Churro Bowl Issues
Even experienced bakers can sometimes run into snags. Here are a few common issues and how to address them:
- Churros are Greasy: This usually means your oil wasn’t hot enough (below 375°F). The dough absorbed too much oil instead of frying crisp. Ensure your oil reaches the correct temperature and doesn’t drop too much when adding churros. Don’t overcrowd the fryer.
- Churros are Soft/Chewy, Not Crispy: Again, oil temperature can be a factor. Also, ensure you cook the flour mixture sufficiently in step 2 to develop the starch properly. Inadequate frying time can also lead to a soft interior.
- Churros Lose Their Shape During Frying: This is almost always due to insufficient freezing. The dough must be completely solid before hitting the hot oil. Ensure they are frozen for at least 2 hours. If frying in batches, keep the unfried bowls in the freezer.
- Dough is Too Stiff/Too Runny: If too stiff, you might have overcooked the flour mixture or added too little egg. If too runny, you might have added too much egg or not cooked the flour mixture enough. Adjusting the flour cooking time and careful egg incorporation are key.
Conclusion: Your New Go-To Dessert
The **Churro Ice Cream Bowl** is more than just a dessert; it’s an experience. The delightful contrast of warm, crispy, cinnamon-spiced churro with cold, creamy ice cream is simply unparalleled. While food trends come and go, this indulgent creation has earned its place as a timeless treat that brings joy with every spoonful. Whether you’re a seasoned baker or a curious beginner, this comprehensive guide provides everything you need to successfully craft these delectable bowls in your own kitchen.
So, don’t wait any longer! Gather your ingredients, follow these steps, and prepare to be amazed by the magic of homemade churro ice cream bowls. They are guaranteed to become a cherished favorite for special occasions or simply when you’re craving something truly extraordinary. Happy baking and happy eating!