
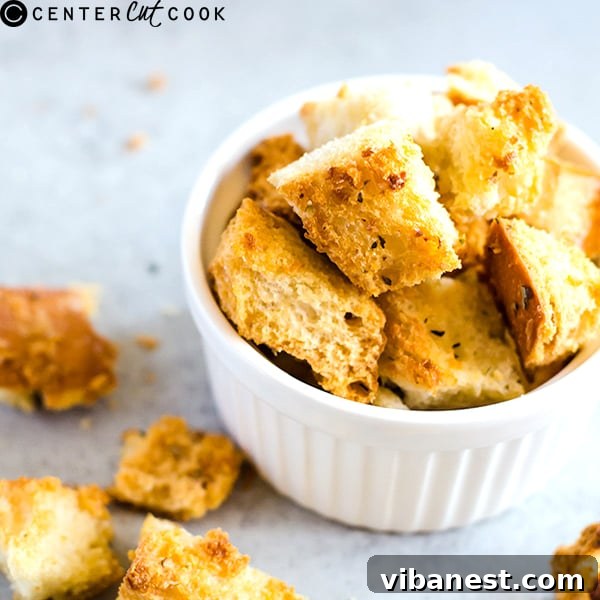

Mastering Homemade Croutons: Your Ultimate Guide to Crunchy Perfection
There’s an undeniable magic to the humble crouton. Often overlooked, these crispy, golden cubes of bread can transform a simple salad, elevate a comforting soup, or even serve as a delightful snack on their own. For many, the best part of a fresh, crisp salad is undoubtedly the burst of flavor and satisfying crunch that a well-made crouton provides. While store-bought varieties offer convenience, they often fall short in terms of freshness, texture, and customizable flavor. If you’ve only ever experienced the standard restaurant or supermarket crouton, prepare to have your culinary world expanded. Learning how to make croutons at home is not only incredibly simple but also remarkably rewarding, allowing you to create a truly superior product that will impress every palate.
For years, I relied on pre-packaged croutons, never quite finding that perfect balance of crispness and rich flavor. My perception completely changed after encountering homemade croutons made by a friend who infused hers with an abundance of fresh garlic and aromatic herbs. That experience was a revelation, prompting me to finally embark on my own journey to craft the perfect crouton. What I discovered was a surprisingly easy process that yields spectacular results every time. In this comprehensive guide, we’ll delve into all the secrets to creating crispy, flavorful homemade croutons that will elevate any meal.
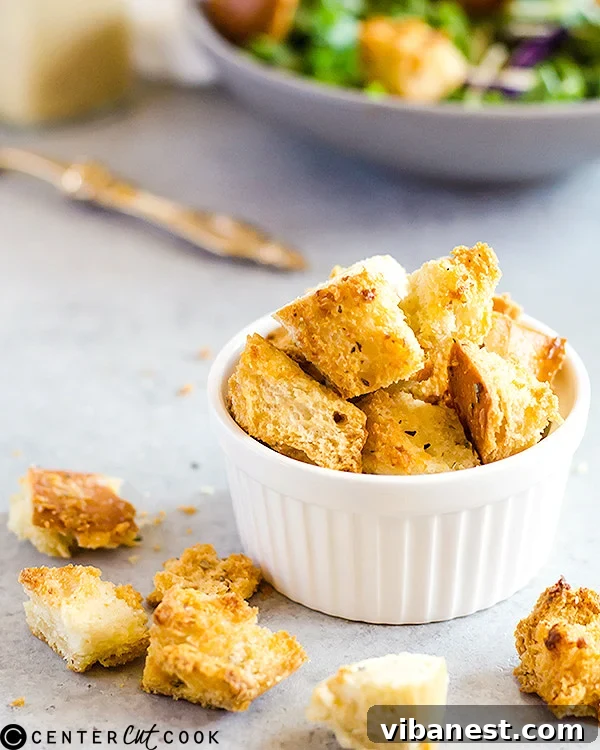
Why Homemade Croutons Are a Game-Changer
Beyond the sheer satisfaction of creating something delicious from scratch, there are numerous compelling reasons to choose homemade croutons over their store-bought counterparts:
- Unmatched Freshness and Flavor: Store-bought croutons often contain preservatives and artificial flavors. Homemade versions, on the other hand, burst with the natural goodness of fresh bread, high-quality oil, and vibrant seasonings. You control every ingredient, ensuring a superior taste.
- Perfect Texture Every Time: Say goodbye to rock-hard, tooth-shattering croutons or soggy, unsatisfying ones. With homemade croutons, you can achieve your desired level of crispness – from lightly toasted to deeply golden and crunchy.
- Incredible Versatility and Customization: This is where homemade croutons truly shine. The possibilities for flavor combinations are endless. Whether you crave savory garlic and herb, spicy chili-lime, or even sweet cinnamon-sugar croutons for desserts, you can tailor them precisely to your dish and personal preferences.
- Cost-Effective and Reduces Food Waste: Have a loaf of bread that’s a day or two past its prime? Don’t toss it! Stale bread is actually ideal for making croutons, transforming what might otherwise be discarded into a gourmet ingredient. This makes homemade croutons an economical choice and a great way to minimize food waste.
- Healthier Choice: By making them yourself, you avoid the excessive sodium, unhealthy fats, and artificial additives often found in commercial products. You can choose healthier oils and control salt levels, making them a better option for your diet.
Choosing the Best Bread for Croutons
The foundation of any great crouton is, of course, the bread. While nearly any bread can be turned into croutons, some varieties truly excel. The key is to select a bread that is slightly stale. This isn’t because you want it hard as a rock, but rather because bread that has lost a bit of its moisture will crisp up more effectively and evenly in the oven, preventing a chewy or gummy interior. Forget the soft, pre-sliced sandwich loaves; their texture is too delicate and they tend to absorb too much oil, resulting in a less desirable final product.
For optimal results, head to your local bakery or the artisan bread section of your grocery store. Ideal choices include:
- Baguette: Its slender shape and crusty exterior make it perfect for uniformly sized, extra-crispy croutons.
- Ciabatta: With its open, airy crumb and chewy crust, ciabatta croutons offer a delightful textural contrast.
- Italian or French Loaf: A classic choice, these loaves provide a good balance of crust and soft interior, crisping beautifully.
- Sourdough: For a tangy flavor profile, sourdough bread makes excellent croutons that add an extra dimension to savory dishes.
- Artisan or Day-Old Bread: Don’t feel the need to splurge on expensive bread. A perfectly good loaf from your local grocery store, especially one that’s a day or two old, will transform into delicious croutons. I often use an affordable Italian loaf, and the results are just as fantastic as with a premium bread.
Once you’ve chosen your bread, the next step is preparation. For consistent cooking and texture, aim to cut your bread into relatively uniform cubes, ideally about ½ to ¾ inch in size. This ensures that all the pieces toast evenly without some burning while others remain soft. If you prefer a rustic look, tearing the bread into irregular pieces also works and can add a charming, homemade appeal.
Selecting the Perfect Fat for Flavor and Crispness
The type of fat you use plays a crucial role not only in the crispness of your croutons but also in their overall flavor profile. The two most popular choices are extra virgin olive oil and butter, each bringing its unique characteristics to the table.
- Extra Virgin Olive Oil: This is my go-to for most savory croutons, especially those destined for salads. Its robust, fruity notes complement fresh greens and vegetables beautifully. For a lighter touch, you could use a milder olive oil. Olive oil helps achieve a wonderfully crisp texture and carries the flavors of herbs and garlic exceptionally well.
- Butter: For a richer, more indulgent crouton, butter is an excellent choice. It creates a golden-brown, nutty flavor that is particularly well-suited for soups like French onion or creamy tomato. Unsalted butter allows you to control the salt content precisely, but salted butter can be used if you adjust your seasoning accordingly. Clarified butter (ghee) is another option, offering a higher smoke point and a pure butter flavor without the milk solids that can sometimes burn.
While olive oil and butter are staples, don’t hesitate to experiment. Avocado oil, with its neutral flavor and high smoke point, can be a good alternative for those seeking a less pronounced oil flavor. Coconut oil, surprisingly, can be fantastic for sweet croutons, imparting a subtle tropical note that pairs wonderfully with cinnamon and sugar. However, I generally advise against using highly refined vegetable or canola oils, as they lack the distinctive flavor that contributes to a truly delicious homemade crouton.
Unleashing Flavor: Seasonings and Herbs
This is where you can truly unleash your creativity and customize your croutons to perfectly match any dish. While simple salt and pepper are always a good starting point, a medley of herbs and spices can transform your croutons from ordinary to extraordinary. My personal favorites are garlic and herb croutons, a classic for a reason, but the possibilities are limited only by your imagination.
Essential Flavor Enhancers:
- Garlic: If using fresh garlic, preparation is paramount. It must be finely diced, minced, or even grated into an almost paste-like consistency. A microplane (the same tool you use for zesting citrus) or a garlic press works wonders here. Larger pieces of garlic will inevitably burn during baking, resulting in a bitter, acrid taste that will ruin your croutons. For convenience, garlic powder can be used, but fresh garlic offers an unparalleled aroma and flavor.
- Herbs:
- Fresh Herbs: Rosemary, thyme, oregano, and finely chopped parsley are excellent choices. They release their essential oils when heated, infusing the croutons with vibrant, fresh flavors. Add them towards the end of the oil infusion or directly to the bread before baking.
- Dried Herbs: An Italian herb mix, herbes de Provence, or individual dried herbs like oregano, basil, or marjoram are convenient and potent. Dried herbs benefit from being gently warmed in the oil to release their aromatic compounds.
- Salt and Pepper: Always use good quality salt, such as sea salt or kosher salt, and freshly ground black pepper for the best flavor. Season generously, as bread tends to absorb a lot of seasoning.
- Spices: A pinch of paprika or smoked paprika can add color and a subtle smoky depth. A dash of cayenne pepper or red chili flakes can introduce a delightful kick. Onion powder is another great savory addition.
- Umami Boosters: A sprinkle of nutritional yeast can add a cheesy, umami depth, while finely grated Parmesan or Pecorino Romano cheese can be added during the last few minutes of baking or immediately after they come out of the oven for a crispy, cheesy coating.
Sweet Variations:
Don’t limit croutons to savory dishes! For a unique dessert topping or a surprising breakfast addition, try a sweet version:
- Cinnamon Sugar: Combine melted butter or coconut oil with cinnamon and sugar. These sweet croutons are delightful on fruit salads, yogurt parfaits, or even as a crunchy topping for ice cream.
- Vanilla and Nutmeg: A touch of vanilla extract (added to the oil) and a sprinkle of nutmeg can elevate sweet croutons even further.

The Art of Baking Perfect Croutons
Once you’ve selected your bread, fat, and seasonings, the actual process of making croutons is surprisingly quick and straightforward. In just about 15 minutes, with most of that being hands-off baking time, you can have a batch of perfectly golden, crunchy croutons ready to enjoy. This makes them an ideal last-minute addition to dinner prep, baking while your main course finishes cooking.
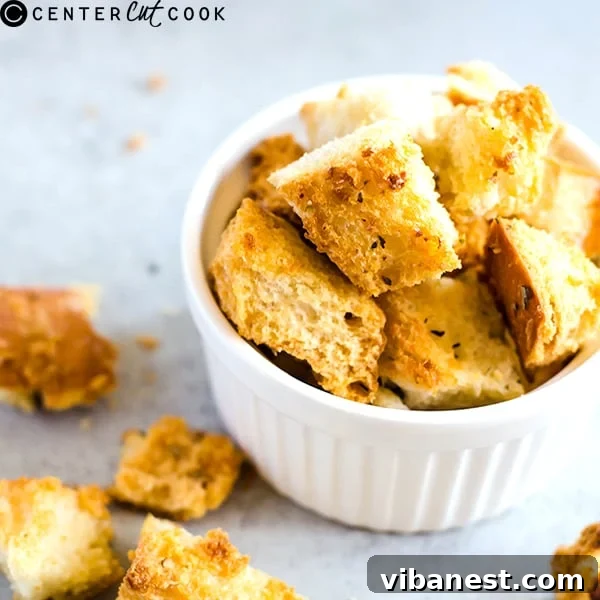
INGREDIENTS
- 1 loaf of your favorite artisan or day-old bread (baguette, ciabatta, Italian loaf recommended)
- 1/4 cup extra virgin olive oil (or unsalted butter, melted)
- 2 cloves fresh garlic, finely minced or pressed (optional, but highly recommended)
- 1/4 teaspoon sea salt (or to taste)
- 1 1/4 teaspoon Italian herbs mix (optional, or a mix of dried oregano, basil, thyme)
- Freshly ground black pepper, to taste (optional)
DIRECTIONS
- Prepare the Bread: Begin by cutting your chosen bread into uniform cubes, approximately ½ to ¾ inch in size. Consistency in size is important for even toasting. You can also tear small pieces with your hands for a more rustic appearance. Spread the bread cubes out on a clean surface or a large baking sheet and allow them to air dry slightly while you prepare the other ingredients.
- Preheat Your Oven: Preheat your oven to 375 degrees F (190 degrees C). Preheating is crucial for achieving immediate crispness and even baking.
- Infuse the Oil (Garlic & Herbs): If you are using fresh garlic, grate it with a microplane or push it through a garlic press into a microwave-safe bowl with your olive oil or melted butter. If using dried herbs, add half of them to the oil now. Heat the oil mixture in the microwave for 30-40 seconds. You want the oil to get warm and fragrant, which helps infuse the flavors of garlic and herbs more quickly, but do not let it get so hot that it starts to cook or burn the garlic. The oil should smell intensely aromatic when removed from the microwave. Alternatively, you can gently heat the oil and garlic in a small saucepan over low heat for 2-3 minutes until fragrant.
- Prepare Baking Sheet and Coat Bread: Line a large baking sheet with aluminum foil or parchment paper for easy cleanup. Lightly brush the lined sheet with a small amount of the garlic-infused oil. Spread the bread cubes evenly over the prepared baking sheet in a single layer, ensuring they are not overcrowded. Brush or drizzle almost all of the remaining oil over the bread cubes, reserving about 1-2 teaspoons for the second half of baking. Sprinkle generously with salt and the first half of your Italian seasoning (if using), and add freshly ground black pepper if desired. Gently toss the bread cubes on the sheet to ensure they are well coated.
- First Bake and Turn: Place the baking sheet in the preheated oven and bake for 5 minutes. After 5 minutes, carefully remove the baking sheet from the oven. Using a spatula or tongs, gently turn and redistribute the bread cubes to ensure even browning. Brush with the remaining infused oil and sprinkle with the rest of your Italian seasoning or any additional desired spices.
- Second Bake and Finish: Return the baking sheet to the oven and continue baking for another 5-7 minutes. Keep a close eye on them, as baking times can vary slightly depending on your oven and the type of bread. The croutons should be hardened, golden brown, and delightfully crisp. If you prefer darker, extra-crispy croutons, you can bake for an additional 3-5 minutes, but watch carefully to prevent burning.
- Cool and Serve: Once golden and crisp, remove the croutons from the oven. Allow them to cool completely on the baking sheet at room temperature. As they cool, they will become even crispier. Serve warm, or at room temperature, on top of your favorite soups, salads, chili, stews, or even as a savory snack on their own.
Creative Ways to Enjoy Your Homemade Croutons
The beauty of homemade croutons lies in their versatility. While they are a classic companion to salads and soups, their potential extends far beyond these traditional pairings:
- Classic Salad Enhancer: The perfect addition to a crisp Caesar salad, a vibrant garden salad, or a hearty panzanella (bread salad).
- Soup and Stew Topping: Elevate creamy tomato soup, hearty lentil soup, robust French onion soup, or a comforting bowl of chili with a sprinkle of crunchy croutons.
- Breakfast and Brunch: Crush them lightly and sprinkle over avocado toast, use them as a crunchy topping for scrambled eggs, or even in a savory bread pudding. Sweet croutons are wonderful with yogurt, fruit salads, or even alongside pancakes.
- Savory Snack: Enjoy them plain, as a delightful crunchy snack on their own, or serve them with dips like hummus or tapenade.
- Casseroles and Bakes: Add a layer of crushed or whole croutons to the top of mac and cheese, gratins, or other savory casseroles during the last few minutes of baking for an irresistible crunchy crust.
- Roasted Vegetables: Toss a handful of croutons with roasted Brussels sprouts, green beans, or asparagus for added texture and flavor.
Storing Your Perfect Homemade Croutons
To maintain their exquisite crispness, proper storage is essential. Once your croutons have completely cooled to room temperature, transfer them to an airtight container. This will protect them from moisture and keep them fresh and crunchy for up to 1-2 weeks when stored at room temperature. Avoid storing them in the refrigerator, as the moisture can make them soft. If your croutons lose a bit of their crispness over time, a quick refresh in a 300°F (150°C) oven for 5-7 minutes will bring them back to life.
Conclusion
Making your own croutons is a simple yet incredibly rewarding culinary endeavor that offers superior flavor, texture, and customization compared to any store-bought alternative. From selecting the perfect loaf of bread to infusing your chosen fat with aromatic herbs and spices, every step of the process allows you to tailor these crispy delights to your exact preferences. Not only do homemade croutons elevate your salads, soups, and other dishes to new heights, but they also offer a fantastic way to minimize food waste by giving day-old bread a delicious second life. So, next time you’re contemplating a dish that could use a touch of crunch and flavor, don’t hesitate to whip up a batch of these golden gems. You’ll be amazed at how easy it is to achieve crunchy perfection in your own kitchen. Experiment with different breads, fats, and seasonings, and discover your signature crouton recipe today!
Recipe adapted from
The Kitchn