
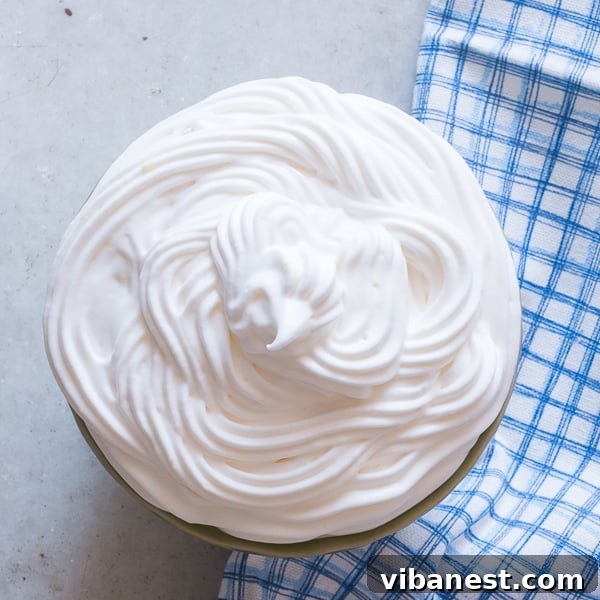
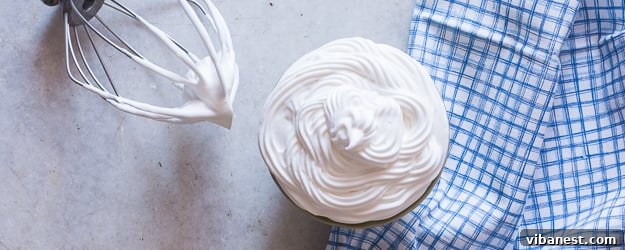
How to Make Perfect, Stable Whipped Cream Every Single Time
Imagine a cloud-like topping, impossibly light yet rich, that elevates any dessert from good to absolutely unforgettable. That’s the magic of homemade whipped cream! Far superior to anything you can buy in a can, making your own whipped cream is surprisingly simple, requires minimal ingredients, and takes just minutes. Forget complicated techniques or special equipment; with a few insider tips, you’ll be whipping up airy, stable peaks that hold their shape beautifully, every single time.
Whether you’re topping a classic apple pie, dressing up a bowl of fresh berries, or adding a luxurious swirl to your morning coffee, perfectly whipped cream is a game-changer. This comprehensive guide will walk you through the foolproof steps, revealing the secrets to achieving that ideal texture and stability. Say goodbye to runny, deflated cream and hello to confectionery perfection!
Why Homemade Whipped Cream is Always Best
While store-bought options offer convenience, they often fall short in flavor, texture, and ingredient quality. Homemade whipped cream, on the other hand, boasts:
- Superior Freshness: Made with real cream and your chosen sweetener, it tastes incomparably fresh and vibrant.
- Control Over Ingredients: You decide the type of cream, the precise amount of sugar, and any additional flavorings, ensuring it perfectly complements your dish and meets your dietary preferences.
- Better Texture: Light, airy, and truly melt-in-your-mouth, without the sometimes-gummy or artificial feel often found in aerosol cans or pre-made tubs.
- Impressive Presentation: Beautifully piped or simply spooned, it adds an elegant, gourmet touch to any dessert, making it look as good as it tastes.
The Golden Rules for Foolproof Whipped Cream
Achieving consistently perfect whipped cream isn’t about guesswork; it’s about following a few fundamental principles. Master these, and you’ll never face a whipped cream disappointment again. These simple thumb rules are the backbone of stable, delicious results.
1. The Chill Factor: Essential for Stability
This is perhaps the most critical rule: everything must be cold. And we mean really, really cold. Whipping cream works by trapping air bubbles within its fat molecules. When cream and equipment are thoroughly chilled, the fat molecules are firmer and can hold those air bubbles more effectively, leading to a stable, voluminous, and long-lasting result. Warm cream, on the other hand, struggles to hold air and often results in a soupy, deflated mess.
- Your Bowl: Opt for a metal or glass bowl, as these materials retain cold temperatures better than plastic. Place your mixing bowl in the freezer for at least 15-20 minutes before you plan to start whipping. The colder the bowl, the better the initial conditions for your cream, helping it to whip up faster and more effectively.
- Your Whisks/Attachments: Don’t forget your whisk attachment (for a stand mixer) or your hand mixer beaters! These also need to be thoroughly chilled. Pop them into the freezer alongside your bowl for the same duration. Cold beaters prevent any warmth from transferring to the cream, maintaining that crucial low temperature throughout the whipping process.
- The Cream Itself: Your carton of heavy whipping cream should come straight from the coldest part of your refrigerator, or even better, spend an extra 10-15 minutes in the freezer just before you begin. The colder the cream, the faster it whips and the more stable it becomes. A super-cold starting point is your biggest ally against runny, deflated whipped cream.
2. Choose the Right Cream: Fat Content Matters
Not all creams are created equal when it comes to whipping. For stable, voluminous whipped cream, you absolutely need a high fat content. Look for labels that clearly state “Heavy Whipping Cream” or “Whipping Cream” with a fat percentage typically between 30% and 36%. In some regions, “Heavy Cream” is used interchangeably with “Heavy Whipping Cream” and typically has a minimum of 36% milk fat.
- Heavy Whipping Cream (36%+ fat): This is your ultimate choice. Its higher fat content means it whips up the fastest, holds its shape the best, and is less likely to collapse or weep. It yields the most luxurious and stable results.
- Whipping Cream (30-35% fat): Also a good option, it will whip up nicely but might be slightly less stable and take a little longer to reach stiff peaks compared to heavy whipping cream. It’s still perfectly suitable for most applications.
- Avoid These: Do NOT use light cream, half-and-half, whole milk, or any low-fat dairy alternatives. These products have insufficient fat content and simply will not whip into stable peaks, no matter how cold they are or how long you beat them. They lack the necessary fat globules to trap and hold air.
3. High Speed is Your Friend: Whip Vigorously!
Once your cream and equipment are chilled and ready, it’s time to whip! Don’t be shy; start and stay on high speed. Whipped cream needs a lot of air incorporated quickly to create its signature airy, voluminous texture. Whipping on a lower speed prolongs the process unnecessarily and can actually make it harder to achieve stiff peaks, as the cream may warm up before enough air is incorporated. A powerful stand mixer or a robust electric hand mixer will make this step incredibly quick, often reaching stiff peaks in just one to three minutes.
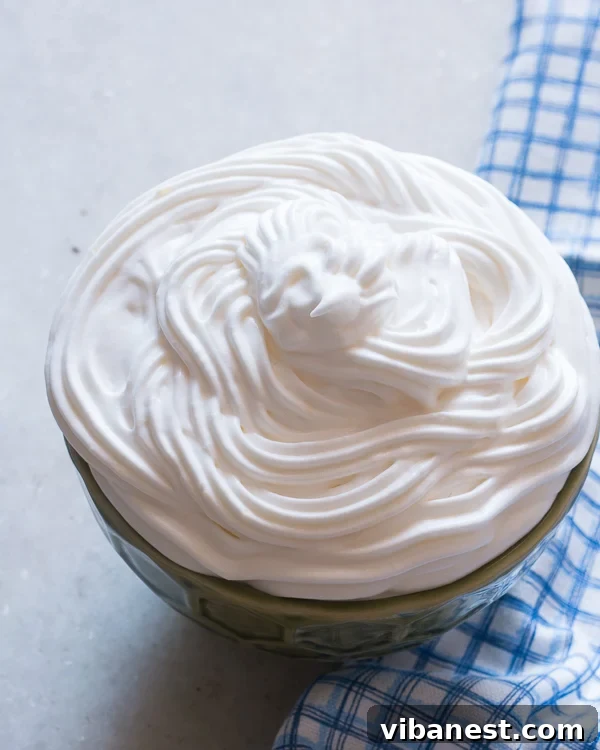
4. Know When to Stop: The Perfect Peak
This is arguably the trickiest part, but it’s absolutely crucial for perfect whipped cream. Whipped cream can go from perfect to over-whipped (or even butter!) in a matter of mere seconds. Keep a very close eye on your cream as it transforms:
- Soft Peaks: The cream is thickened but still relatively loose. When you lift the whisk, the peaks barely hold their shape and gently flop over. This consistency is ideal for very light toppings where you want a softer, more fluid consistency, like stirring into coffee.
- Medium Peaks: The cream holds its shape better, and the peaks curl slightly at the tip when you lift the whisk. This is a versatile stage, great for dolloping on pies or fruit, offering a good balance of airiness and structure.
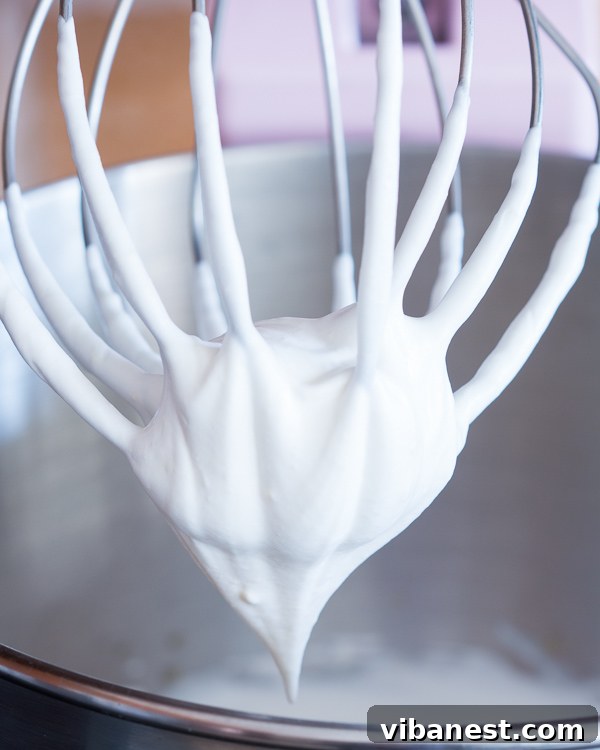
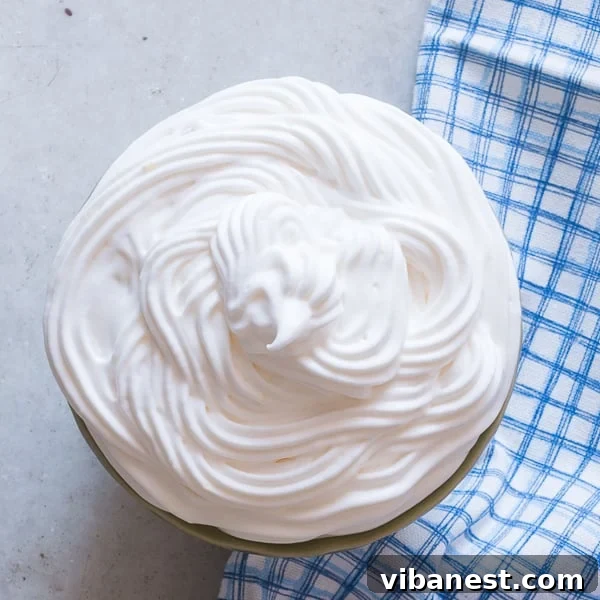
- Stiff Peaks: When you lift the whisk, the cream forms distinct, sharp peaks that stand straight up without drooping. This is the ideal consistency for piping, spreading, and general stability. The cream will look thick, smooth, and cohesive. Stop immediately when you reach this stage.
Warning: If you continue to beat past stiff peaks, the fat molecules will begin to clump together, expelling liquid (buttermilk), and your cream will quickly turn into grainy, then eventually solid butter. There’s no turning back once it’s over-whipped, so err on the side of stopping early if you’re unsure, or taste-test and observe frequently as you approach the stiff peak stage.
5. Sweetener Savvy: Less is Often More
With whipped cream, a little sweetener goes a long way. The natural richness of the cream is often enough to balance a small amount of sugar. You can adjust the sweetness to your personal preference, but starting with a conservative amount (like 1-2 tablespoons per cup of cream) is always wise. You can always add more if needed.
- Powdered Sugar (Confectioners’ Sugar): This is the preferred choice for most bakers. Its very fine texture dissolves easily and quickly, preventing a grainy mouthfeel. Furthermore, powdered sugar typically contains a small amount of cornstarch, which can subtly contribute to greater stability in your finished whipped cream.
- Granulated Sugar: Can be used, but ensure it’s superfine or very fine granulated sugar to help it dissolve quicker and avoid a gritty or grainy texture. If using regular granulated sugar, add it earlier in the whipping process, allowing more time for it to dissolve completely.
- Liquid Sweeteners: Maple syrup, honey, or agave nectar can be used for alternative flavors, but add them sparingly. They can sometimes thin out the cream, so use a slightly smaller amount (e.g., 1-2 teaspoons per cup) than you would powdered sugar, and add them towards the end of the whipping process.
Add your chosen sweetener (and any flavorings) once the cream has started to thicken slightly, usually at the soft peak stage. This ensures even distribution without inhibiting the initial whipping process. Taste and adjust as needed!
Essential Equipment for Whipping Cream
While you can make whipped cream with just a whisk and some elbow grease, having the right tools makes the process infinitely easier, faster, and more consistent.
- Stand Mixer with Whisk Attachment: The ultimate tool for hands-free whipping. Its powerful motor and continuous motion ensure rapid air incorporation, making light work of the process.
- Electric Hand Mixer: A great alternative if you don’t have a stand mixer. Provides excellent results, though you’ll need to hold it. Choose one with multiple speed settings for best control.
- Large Mixing Bowl: Crucial for preventing splatters, especially when whipping on high speed. Make sure it’s deep enough to contain the expanding volume of cream. As mentioned, metal or glass are best for chilling.
- Balloon Whisk: If you’re going old-school or don’t have an electric mixer, a large balloon whisk is your best bet. Be prepared for an arm workout, but it’s definitely achievable with patience and a very cold bowl/cream.
Flavor Variations and Customization
While classic vanilla is always a winner, don’t hesitate to experiment with other flavors to complement your desserts or beverages. The possibilities are endless!
- Vanilla Extract: The standard for a reason. Always use good quality pure vanilla extract for the best, most aromatic flavor.
- Almond Extract: Wonderful with fruit tarts, cherry pies, or anything that benefits from a subtle nutty aroma. Use sparingly, as it’s potent.
- Cocoa Powder: Sift in a tablespoon or two of unsweetened cocoa powder along with the sugar for a rich chocolate whipped cream, perfect for brownies, chocolate cake, or hot chocolate.
- Coffee/Espresso Powder: A pinch can deepen chocolate flavors or create a lovely coffee-flavored cream for tiramisu or coffee-based desserts.
- Citrus Zest: Finely grated lemon, orange, or lime zest adds a bright, refreshing note that pairs beautifully with fruit-based desserts or lighter cakes.
- Liqueurs: A tablespoon of Grand Marnier, Kahlua, rum, bourbon, or an almond liqueur can add a sophisticated adult twist. Add at the very end of whipping to retain maximum flavor.
- Spices: A dash of cinnamon, nutmeg, pumpkin spice, or cardamom can be delightful for seasonal treats like pumpkin pie or apple crisp.
Common Troubleshooting Tips
Even with the best intentions and following the rules, sometimes things don’t go exactly as planned. Here are solutions to common whipped cream woes, so you can whip with confidence:
- Cream Won’t Thicken:
- Is it cold enough? This is the most common culprit. Re-chill your bowl, whisks, and cream in the freezer for another 10-15 minutes and try again.
- Is it the right cream? Double-check the label for “heavy whipping cream” or similar. Lower fat creams (like half-and-half or light cream) simply won’t whip.
- Are you whipping fast enough? Ensure your mixer is on high speed to incorporate enough air quickly.
- Is there too much liquid? Sometimes adding too much liquid flavoring can thin it out.
- Cream is Grainy or Separating: You’ve likely over-whipped it. Unfortunately, once the fat molecules have clumped and started to separate from the liquid, it’s very difficult to reverse. Your best bet is to embrace it and continue beating to make butter, or simply start over with fresh, cold cream.
- Cream Deflates Quickly: This usually points back to one of three issues: insufficient chilling (warm cream), using a cream with too low a fat content, or being under-whipped (not quite reaching stiff peaks). Ensure you hit that stiff peak stage for maximum stability.
Storage and Re-Whipping
Homemade whipped cream is undeniably best enjoyed fresh, but you can certainly prepare it ahead of time. Store leftover whipped cream in an airtight container in the refrigerator for up to 2-3 days. It may lose a little volume over time and might separate slightly, but generally holds up well if properly whipped to stiff peaks initially.
If your whipped cream has slightly deflated or become a bit soft in the fridge, you can often give it a quick re-whip. Spoon it back into a chilled mixing bowl and beat it for 15-30 seconds on high speed with your hand mixer to bring back some of its fluffiness and volume. Be very careful not to over-whip it into butter during this re-whipping process!
Perfect Pairings: Serving Suggestions
The versatility of whipped cream is endless, making it the ultimate accompaniment to almost any sweet treat. Here are just a few ideas to inspire you:
- Desserts: Elevate classic pies (apple, pumpkin, pecan), rich chocolate cakes, delicate cheesecakes, individual cupcakes, luscious trifles, creamy puddings, or decadent brownies.
- Fruit: A simple dollop on fresh berries (strawberries, raspberries, blueberries), sliced peaches, grilled pineapple, or a vibrant fruit salad is heavenly and refreshing.
- Beverages: Swirl a generous amount into rich hot chocolate, a cozy coffee, refreshing milkshakes, or even a healthy smoothie for an extra touch of indulgence.
- Breakfast/Brunch: Transform your morning with whipped cream served alongside fluffy pancakes, crisp waffles, or golden French toast for a truly special breakfast experience.
INGREDIENTS
- 1 cup (240ml) Heavy Whipping Cream (ensure it’s 36% fat or higher, and extra cold)
- 3 tablespoons Powdered Sugar (Confectioners’ Sugar), or adjust to your taste preference
- 1/2 teaspoon Pure Vanilla Extract, or any other preferred flavoring (e.g., almond extract, cocoa powder)
DIRECTIONS
- Chill Everything Thoroughly: Begin by ensuring your mixing bowl (preferably metal or glass for optimal cold retention) and your whisk attachment (for a stand mixer) or hand mixer beaters are thoroughly chilled. Place them in the freezer for at least 15-20 minutes. Simultaneously, place your carton of heavy whipping cream in the freezer for 10-15 minutes to get it extra cold. This crucial initial chilling is the foundation for consistently stable and perfect results.
- Combine Ingredients: Once all your equipment and cream are perfectly chilled, pour the extra-cold heavy whipping cream into the chilled mixing bowl. Add the powdered sugar and vanilla extract (or your chosen flavoring). If you’re using a stand mixer, attach the whisk. If you’re using a hand mixer, ensure your beaters are securely attached.
- Whip to Stiff Peaks: Start beating the mixture on high speed. Initially, the cream will appear foamy and bubbly. Continue whipping, and it will gradually begin to thicken, first forming soft peaks (where the cream barely holds its shape), then medium peaks (where the peaks curl slightly). Continue whipping until distinct, firm, and stiff peaks form when you lift the whisk. The cream should look smooth, thick, and hold its shape perfectly. This process typically takes between 1-3 minutes, depending on the power of your mixer and the initial coldness of your ingredients.
- Stop Immediately: As soon as you achieve stiff peaks, stop whipping without delay. Over-whipping can very quickly cause your beautifully whipped cream to separate and turn into grainy butter, which cannot be reversed.
- Serve Immediately: For the absolute best texture and freshness, serve your homemade whipped cream right away to enjoy its peak airiness and flavor. If you’re not serving it immediately, transfer it to an airtight container and store it in the refrigerator for up to 2-3 days. A quick re-whip may be needed before serving if it has slightly deflated.
And there you have it – your comprehensive guide to mastering homemade whipped cream! By following these simple yet crucial rules, you’ll consistently create the most ethereal, light-as-a-feather, and perfectly stable whipped cream imaginable. Go forth and elevate your desserts to new heights, delighting everyone with this easy, homemade luxury!