

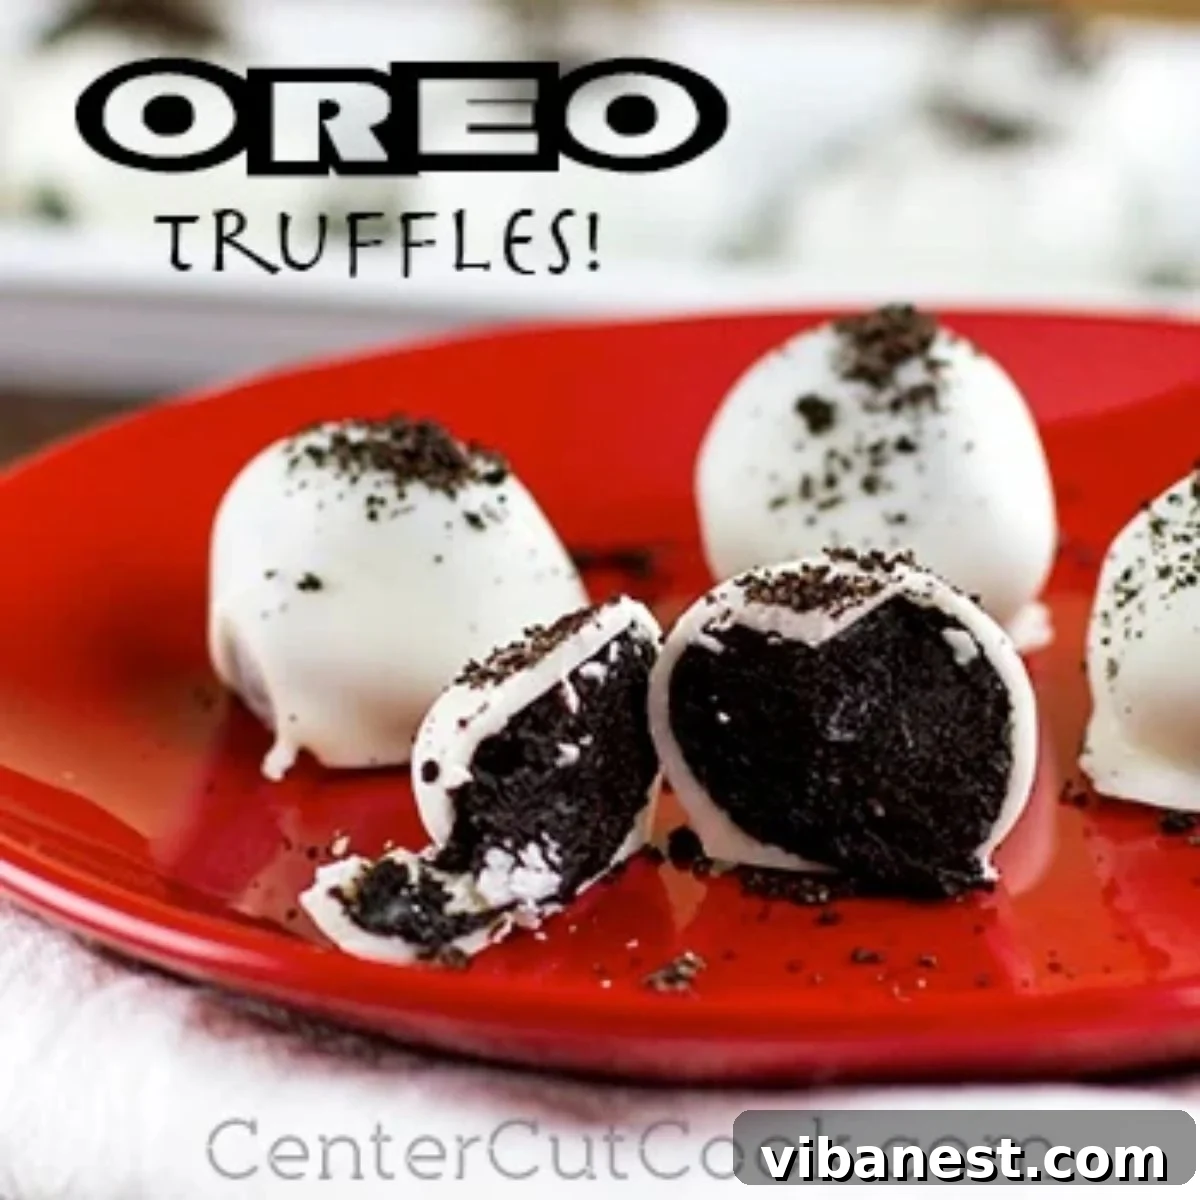
Experience the magic of simplicity with these incredibly easy 3-Ingredient Oreo Truffles – a delightful no-bake treat crafted from classic Oreo cookies, rich cream cheese, and a smooth almond bark coating. Prepare to indulge in a dessert that’s as effortless to make as it is delicious to devour!
In the bustling world of desserts, few recipes offer the perfect blend of ease, elegance, and sheer deliciousness quite like Oreo Truffles. Imagine a luxurious bite-sized treat that requires no baking, minimal ingredients, and delivers maximum flavor. This isn’t just a dream; it’s the reality of these remarkable truffles. Ideal for anyone, from novice bakers to seasoned dessert enthusiasts, they promise a foolproof path to confectionary bliss.
Whether you’re planning for holiday gatherings, searching for the perfect homemade gift, or simply craving a quick and satisfying dessert, these Oreo Truffles fit the bill beautifully. Each batch yields approximately 36 decadent truffles, making them perfect for sharing or stocking up for future cravings. For larger events or extensive gift-giving during the festive season, consider doubling the recipe – they’re always a crowd-pleaser!
Why Everyone Loves Easy Oreo Truffles
There’s an undeniable charm to desserts that don’t demand hours in the kitchen, especially when they taste like they did. Oreo Truffles embody this charm, making them a beloved staple for countless occasions. Their universal appeal stems from several key factors:
- Unbeatable Simplicity: With just three core ingredients, this recipe strips away complexity, proving that gourmet flavors don’t require an extensive pantry or intricate techniques.
- No-Bake Convenience: Forget preheating ovens or waiting for cakes to rise. These truffles come together with simple mixing and chilling, making them ideal for hot weather or when oven space is limited.
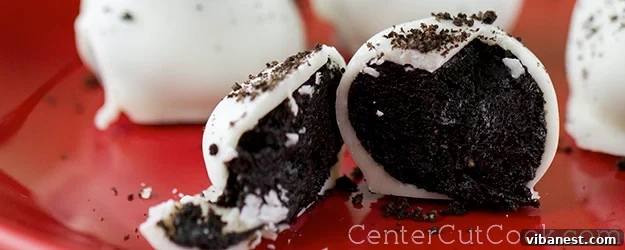
- Irresistible Flavor Combination: The iconic chocolatey crunch of Oreo cookies perfectly blends with the tangy smoothness of cream cheese, creating a rich and satisfying interior. The outer coating adds a delightful textural contrast and another layer of sweetness.
- Versatility: While delicious as is, Oreo Truffles are a fantastic canvas for customization. From different Oreo flavors to various coatings and garnishes, they can be easily adapted to suit any taste or theme.
- Perfect for Gifting: Their small, uniform size and attractive appearance make them a wonderful edible gift. Package them in decorative boxes or bags, and you have a thoughtful, homemade present that’s sure to impress during holidays or special occasions.
These reasons combine to make Oreo Truffles not just a dessert, but a delightful experience that brings joy to both the maker and the eater.
Gathering Your Simple Oreo Truffle Ingredients
The beauty of these truffles lies in their minimalist ingredient list. High-quality components are key to achieving the best flavor and texture. Here’s a closer look at what you’ll need:
- Cream Cheese: You’ll need one 8-ounce package of full-fat cream cheese, softened to room temperature. The “softened” part is crucial here; cold cream cheese will make mixing difficult and result in lumps. Full-fat cream cheese provides the best richness and creamy texture, making the truffles delightfully smooth. Ensure it’s unwrapped and left on the counter for at least 30-60 minutes before you begin.
- Oreo Cookies: One standard package of Oreo Cookies, typically around 15 ounces or about 36 cookies. You’ll want to crush these finely. While classic Oreos are the standard, feel free to experiment with different flavors like Golden Oreos, Mint Oreos, or Peanut Butter Oreos for exciting variations. Make sure to scrape out the cream filling for some variations if you prefer, but for this recipe, the entire cookie is used.
- Almond Bark (or Melting Wafers): One 24-ounce package. Almond bark is a confectionary coating that melts smoothly and sets quickly, providing a crisp shell. It’s available in vanilla (white) and chocolate flavors. You can also use candy melts or even high-quality chocolate chips (which might require a touch of shortening or coconut oil to achieve a smooth dipping consistency).
That’s it! Just three straightforward ingredients standing between you and a batch of irresistible homemade truffles.
Step-by-Step Guide: How to Make Oreo Truffles
Crafting these delicious truffles is a fun and straightforward process. Follow these detailed steps to ensure perfectly formed and flavored treats every time:
- Crush the Oreos to Fine Crumbs: The first step is to transform your Oreo cookies into fine crumbs. The easiest method is to use a food processor. Simply place the entire package of cookies (no need to remove the cream filling!) into the processor and pulse until a fine, sand-like consistency is achieved. If you don’t have a food processor, a heavy-duty ziplock bag and a rolling pin work just as well. Place the cookies in the bag, seal it, and crush them until they are uniformly fine.
- Reserve Garnish: Before combining with cream cheese, set aside about 1 to 2 tablespoons of the finely crushed Oreo crumbs. These will be used later as a delightful garnish to sprinkle on top of your dipped truffles, adding both visual appeal and extra Oreo crunch.
- Combine with Softened Cream Cheese: In a large mixing bowl, add the remaining crushed Oreos and the softened cream cheese. Using an electric mixer (handheld or stand mixer) on low speed, mix until the two ingredients are thoroughly combined and the mixture is smooth and uniform. Be careful not to overmix; just combine until no streaks of cream cheese remain. The mixture should be firm enough to roll.
- Shape the Truffles: Now for the fun part – shaping! Using a tablespoon or a small cookie scoop, portion out the mixture. Roll each portion between your palms to form smooth, round balls, about 1 inch in diameter. This recipe typically yields 36-40 truffles. Place the formed truffles on a baking sheet lined with parchment paper or wax paper.
- Chill to Firm Up: This is a critical step for easy dipping. Place the baking sheet with the rolled truffles into the refrigerator for at least one hour. Alternatively, for a quicker firm-up, pop them into the freezer for about 20-30 minutes. The colder and firmer the truffles are, the easier they will be to dip without falling apart or melting the coating.
- Melt the Almond Bark: While your truffles are chilling, prepare your almond bark. Follow the package directions for melting. This usually involves melting in a microwave-safe bowl in 30-second intervals, stirring in between, until smooth and completely melted. Alternatively, you can use a double boiler method over simmering water. Ensure no water gets into the melting bark, as this can cause it to seize.
- Dip Each Truffle: Once the truffles are firm and the almond bark is melted and smooth, it’s time to dip. Using two forks or a dipping tool, carefully drop one truffle into the melted bark. Roll it gently to coat completely. Lift the truffle out, tapping the fork against the side of the bowl to allow any excess coating to drip off.
- Garnish Immediately: As soon as you dip each truffle and place it back on the parchment-lined baking sheet, immediately sprinkle it with the reserved crushed Oreo crumbs. The coating sets quickly, so it’s important to garnish while the bark is still wet and sticky.
- Allow to Set Completely: Once all truffles are dipped and garnished, allow them to set. This can be done at room temperature (which might take 30 minutes to an hour, depending on your environment) or by placing them back into the refrigerator for about 15-20 minutes for a faster set. They are ready when the coating is firm to the touch.
And there you have it – a batch of homemade, professional-looking Oreo Truffles ready to be enjoyed!
Creative Variations and Customization Ideas
While the classic 3-ingredient Oreo Truffle is undeniably delicious, its simple base makes it a fantastic starting point for endless creativity. Don’t be afraid to experiment and personalize your truffles to suit any occasion or preference:
- Different Oreo Flavors: The market offers a delightful array of Oreo flavors. Try Golden Oreos for a vanilla truffle base, Mint Oreos for a refreshing twist (especially around holidays), Peanut Butter Oreos for a nutty depth, or even seasonal flavors like Pumpkin Spice or Red Velvet. Each variation offers a unique flavor profile that keeps things exciting.
- Alternative Coatings: Instead of vanilla almond bark, consider:
- Dark or Milk Chocolate: For a richer, more traditional chocolate flavor, melt down your favorite chocolate chips or baking bars. Add a teaspoon of coconut oil or shortening to help thin the chocolate for a smoother dip.
- White Chocolate: A creamy white chocolate coating offers a beautiful contrast and a different sweetness.
- Colored Candy Melts: For themed parties or holidays, use colored candy melts (red, green, blue, pink) to match your event’s palette.
- Drizzle Effect: After dipping in one color, let it set, then drizzle another melted coating (e.g., white chocolate over dark chocolate, or vice versa) for an elegant finish.
- Exciting Garnishes: Beyond crushed Oreos, the possibilities are vast:
- Sprinkles: Rainbow sprinkles for birthdays, holiday-themed sprinkles for festive occasions, or sophisticated gold/silver edible glitter for an elegant touch.
- Chopped Nuts: Finely chopped pecans, walnuts, or peanuts add a lovely crunch and earthy flavor.
- Crushed Candy: Around Christmas, crushed candy canes provide a peppermint kick. Other crushed candies like toffee bits or mini M&M’s also work well.
- Coconut Flakes: Toasted or untoasted coconut adds a tropical note and texture.
- Sea Salt Flakes: A tiny sprinkle of flaky sea salt on chocolate-coated truffles beautifully enhances the chocolate flavor.
- Add Flavor Extracts: Incorporate a few drops of your favorite extract into the Oreo and cream cheese mixture for an added layer of flavor. Peppermint extract is fantastic for winter holidays, almond extract adds a sophisticated touch, or a little vanilla extract can boost the overall flavor. Start with a quarter teaspoon and add more to taste.
With these variations, your 3-Ingredient Oreo Truffles can be transformed into a bespoke dessert masterpiece for any occasion!
Perfect for Any Occasion: Gifting & Serving Suggestions
Oreo Truffles are not just a treat for your taste buds; they’re also a fantastic choice for spreading joy, thanks to their elegant appearance and universal appeal. Here’s how to best serve and gift these delightful confections:
- Elegant Gifting: For holidays, birthdays, or thank-you gifts, place truffles in small, decorative boxes lined with tissue paper or parchment. Consider adding mini cupcake liners to each truffle for extra presentation and to prevent sticking. Tie with a festive ribbon, and you have a thoughtful, homemade present that looks as impressive as it tastes.
- Party Platters: Arrange a colorful assortment of truffles (especially if you’ve made different variations or used colored coatings/sprinkles) on a dessert platter. They make a striking centerpiece and are easy for guests to pick up and enjoy.
- Coffee & Tea Pairings: These truffles are a perfect accompaniment to a hot cup of coffee, tea, or even a glass of cold milk. Their richness complements warm beverages beautifully.
- Dessert Bar Addition: If you’re hosting a larger event with a dessert bar, Oreo Truffles are an essential component. They offer a unique texture and flavor alongside cakes, cookies, and pies.
- Children’s Parties: Kids adore Oreo Truffles! Their bite-sized nature and familiar flavor make them a hit. You can even involve younger helpers in the rolling and garnishing steps.
No matter the occasion, these simple yet sophisticated truffles are guaranteed to be a hit and leave a lasting sweet impression.
Storing and Freezing Oreo Truffles for Future Indulgence
One of the many advantages of Oreo Truffles is their excellent shelf life and freezer-friendliness, making them an ideal make-ahead treat, especially during busy holiday seasons. Planning ahead means less stress and more deliciousness when you need it!
Storage in the Refrigerator:
Once your Oreo Truffles have fully set, store them in an airtight container in the refrigerator. Layer them with parchment paper between each layer to prevent sticking. They will stay fresh and delicious for up to 1-2 weeks. Always keep them chilled, as the cream cheese filling will soften at room temperature, affecting their texture and stability.
Freezing Oreo Truffles:
Freezing these truffles is incredibly simple and highly recommended for long-term storage or preparing for future events. Here’s a detailed guide:
- Prepare and Set Truffles: Ensure your Oreo Truffles are completely made and the coating has fully set. Garnish them before freezing if desired.
- Pre-Freeze on a Baking Sheet: Arrange the set truffles in a single layer on a baking sheet lined with parchment paper. Make sure they are not touching each other to prevent them from freezing together.
- Flash Freeze: Place the baking sheet with truffles into the freezer for 30 minutes to an hour, or until they are completely solid. This “flash freezing” step ensures they don’t stick together when transferred to a storage container.
- Transfer to Storage: Once the truffles are completely frozen, transfer them from the baking sheet into a freezer-safe airtight container or a heavy-duty freezer bag. Removing as much air as possible from the bag can help prevent freezer burn.
- Freeze for Longer Term: Label the container with the date. The frozen truffles can be stored in the freezer for up to three months without any significant loss of quality or flavor.
Thawing Frozen Truffles:
When you’re ready to enjoy your frozen Oreo Truffles, the thawing process is just as easy:
- Simply remove the desired number of truffles from the freezer and transfer them to the refrigerator.
- Allow them to thaw slowly in the refrigerator for a few hours or overnight.
- Avoid thawing at room temperature for too long, as this can cause condensation on the coating and make them sticky or sweat.
- Once thawed, they will be ready to serve and enjoy, tasting just as fresh as the day they were made!
Having a stash of frozen Oreo Truffles is a brilliant way to ensure you always have a delightful treat on hand for unexpected guests, last-minute cravings, or when you just need a little sweet pick-me-up.

Frequently Asked Questions About Oreo Truffles
Got questions about making these irresistible treats? Here are some common queries and their answers to help you perfect your Oreo Truffles:
- Can I use low-fat cream cheese?
While you technically can, it’s highly recommended to use full-fat cream cheese for the best results. Low-fat versions have higher water content, which can make the truffle mixture too soft and difficult to roll, and may affect the overall texture and richness.
- What if my truffle mixture is too soft to roll?
This can happen if your cream cheese was too warm or if your Oreos weren’t crushed finely enough. Try placing the mixture in the refrigerator for 15-30 minutes to firm it up. If it’s still too soft, you can add a few more tablespoons of finely crushed Oreos (or even some powdered sugar) to absorb excess moisture and achieve a firmer consistency.
- How do I get my almond bark/chocolate to melt smoothly?
When melting, whether in the microwave or a double boiler, use low heat and stir frequently. If microwaving, do it in 30-second bursts, stirring vigorously after each interval. Overheating can cause chocolate or almond bark to seize and become thick or lumpy. If it seems too thick, a tiny bit of shortening or coconut oil (1/2 teaspoon at a time) can help thin it out.
- Why won’t my garnish stick to the truffles?
The coating sets very quickly, especially if the truffles were well-chilled. You need to sprinkle the garnish immediately after dipping each truffle, while the coating is still wet and sticky. If you wait, it will dry, and the garnish won’t adhere.
- Can I make these ahead of time?
Absolutely! Oreo Truffles are fantastic for making ahead. They store well in the refrigerator for up to two weeks in an airtight container, and they can be frozen for up to three months. This makes them perfect for holiday baking or party prep.
- Are there any gluten-free options for Oreo Truffles?
Yes! Nabisco offers Gluten-Free Oreo cookies, which can be used as a direct substitute in this recipe. Ensure your almond bark or chocolate coating is also gluten-free if catering to strict dietary needs.
- Can I use an alternative to almond bark?
Yes, you can use melting wafers (often found in craft stores or baking sections), candy melts, or even good quality chocolate chips. If using chocolate chips, you might want to add a small amount of shortening or coconut oil (about 1 teaspoon per cup of chocolate chips) when melting to achieve a smoother, thinner consistency for dipping.
Hopefully, these answers help you confidently create perfect batches of Oreo Truffles!
More Irresistible No-Bake Treats to Explore
If you’ve fallen in love with the ease and deliciousness of these no-bake Oreo Truffles, you’re in for a treat! The world of no-bake desserts is vast and full of delightful surprises that require minimal effort but deliver maximum satisfaction. Here are a few more easy no-bake recipes you might enjoy:
- No-Bake Cheesecake Bites
- Easy No-Bake Cookies
- No-Bake Oreo Pie Cups
- Oreo Cheesecake Fudge
These recipes prove that you don’t need an oven to create amazing desserts. They’re perfect for satisfying your sweet tooth quickly or for entertaining with minimal fuss. Enjoy exploring these effortless culinary creations!
Oreo Truffles
These 3-Ingredient Oreo Truffles are the ultimate easy no-bake treat, perfect for holidays, gifts, or a quick indulgence!
Yields: 36-40 truffles
Ingredients
- 8 ounces full-fat cream cheese, softened to room temperature
- 1 standard package (about 15 ounces or 36 cookies) Oreo Cookies, finely crushed, divided
- 24 ounces almond bark (vanilla or chocolate), or preferred melting chocolate/candy melts
Instructions
- Crush all 36 Oreo cookies into a fine crumb using a food processor or by placing them in a ziplock bag and crushing with a rolling pin.
- Reserve 1-2 tablespoons of the crushed Oreos for garnish later.
- In a large bowl, combine the remaining crushed Oreos with the softened cream cheese. Mix with an electric mixer until thoroughly combined and smooth.
- Using a tablespoon, scoop out portions of the mixture and roll into smooth, 1-inch balls. Place them on a baking sheet lined with parchment paper.
- Refrigerate the truffles for at least 1 hour (or freeze for 20-30 minutes) until firm.
- Melt the almond bark (or chosen coating) according to package directions until smooth.
- Dip each firm truffle into the melted bark, using two forks to coat evenly. Tap off any excess coating.
- Immediately after dipping each truffle, sprinkle with the reserved crushed Oreos for garnish.
- Place dipped truffles back on the parchment-lined baking sheet and allow to set completely at room temperature or in the refrigerator for about 15-20 minutes.
Recipe adapted from Kraft Foods
We hope you enjoy making and sharing these incredibly delicious 3-Ingredient Oreo Truffles. Their simplicity, versatility, and irresistible taste make them a fantastic addition to any dessert repertoire. Whether for a quick snack, a festive gathering, or a thoughtful gift, these truffles are sure to bring smiles. Don’t forget to get creative with your flavors and garnishes!
Happy baking (or rather, no-baking)!