
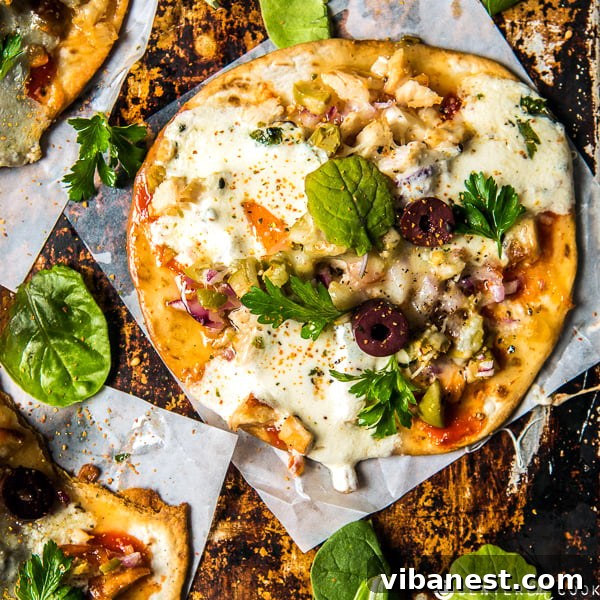
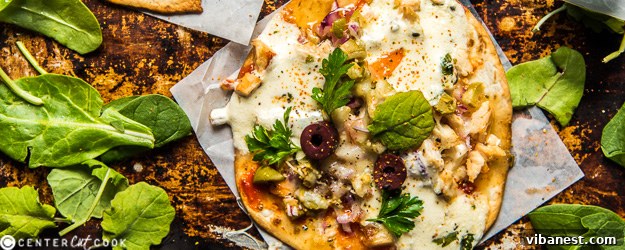
Transform Leftovers into Delicious 10-Minute Tortilla Pizzas
Ever opened your refrigerator to find a sparse collection of ingredients – a few lonely tortillas, remnants of last night’s roast chicken, and an assortment of antipasto? This common culinary dilemma often leads to uninspired meals or a last-minute takeaway order. But what if we told you these seemingly disparate items could be the foundation for an incredibly quick, satisfying, and utterly delicious meal? Welcome to the ingenious world of 10-Minute Tortilla Mini Pizzas!
This brilliant recipe was born out of necessity and a touch of post-Thanksgiving fridge emptiness. After the festive feasting subsided, the fridge looked rather bleak. Yet, the sight of thin flour tortillas alongside various savory leftovers sparked an “aha!” moment. With the perfect ready-made thin crusts and a treasure trove of toppings waiting, why not embark on a pizza adventure?
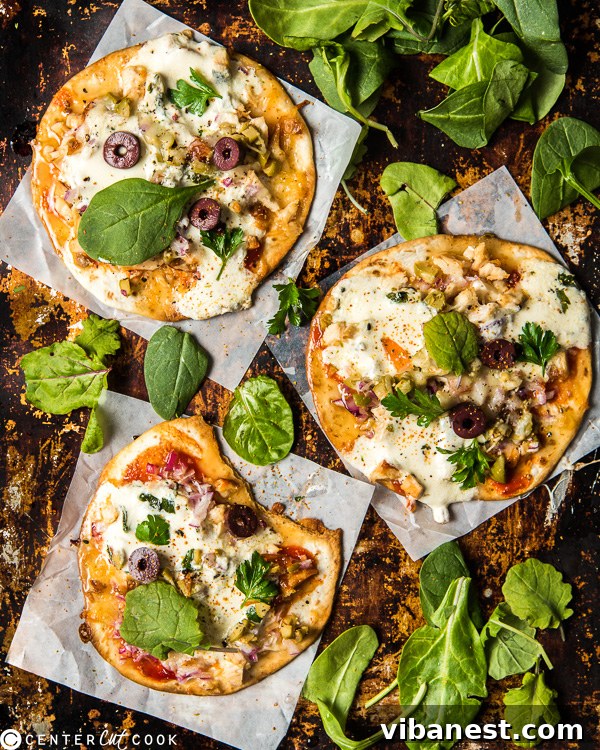
The result was nothing short of surprising. These tortilla pizzas didn’t just meet expectations; they exceeded them. The humble flour tortillas transformed in the oven, emerging wonderfully crispy and golden, perfectly mimicking the coveted thin crust of a gourmet pizza. The combination of simple ingredients, when baked to perfection, created a flavor profile that was both comforting and exciting.
The Magic of Simplicity: Elevating Your Tortilla Pizza Game
One of the most appealing aspects of these tortilla pizzas is their adaptability and the sheer speed with which they come together. Forget elaborate homemade dough or waiting for delivery; these mini marvels are your go-to solution for a fast and flavorful meal. While we had run out of traditional pizza sauce, a simple brush of ketchup on the tortillas proved to be an excellent, tangy alternative. This highlights the flexibility of the recipe – feel free to get creative with your sauce base!
The beauty of this dish lies in its embrace of whatever you have on hand. Your choice of toppings can be as random or as curated as you like. However, just like with a classic Neapolitan pizza, a fundamental rule applies: less is more. Avoid the temptation to pile a small mountain of ingredients onto each tortilla. An overloaded pizza will steam rather than crisp, leading to a soggy crust and unevenly cooked toppings. A light hand ensures every component gets a chance to shine and the tortilla maintains its delightful crunch.
The Golden Rule of Cheese: Go Generous!
While restraint is key with other toppings, when it comes to cheese, the opposite holds true: DO add plenty of cheese! Cheese provides the creamy, melty foundation that makes any pizza irresistible. A memorable experience at a French restaurant, where they used both fresh mozzarella balls and a mix of shredded cheese on a veggie pizza, taught a valuable lesson. That particular pizza, despite being meat-free, was incredibly delicious, largely due to the thoughtful combination of cheeses.
If you’re aiming to make your tortilla pizza taste extra special with minimal other toppings, try combining different types of cheese. Fresh mozzarella balls offer a rich, milky creaminess and a beautiful stretch, while shredded mixed cheese (like a blend of cheddar and Monterey Jack) provides that classic, golden, bubbly crust. This dual-cheese approach creates a luxurious texture and a depth of flavor that elevates your mini pizza from simple snack to gourmet delight.
Beyond Weeknights: Tortilla Pizzas as the Ultimate Party Food
Beyond being a fantastic solution for a quick weeknight dinner, these mini tortilla pizzas are also a perfect choice for entertaining. Imagine hosting a casual get-together where the food is both impressive and incredibly easy to manage. These pizzas fit the bill perfectly. They demand minimal effort and preparation time, yet they deliver maximum satisfaction.
You can easily prep all your ingredients ahead of time – chop your meats, onions, and olives, grate your cheese, and have your sauces ready. When your guests arrive, or when you’re ready to eat, the assembly and cooking process is incredibly swift, taking only five to eight minutes in the oven. Their individual size makes them inherently easy to serve and eat with your hands, eliminating the need for plates and cutlery for a more relaxed dining experience. A platter of these crispy, cheesy mini pizzas will undoubtedly make everyone happy with minimal fuss!
Crafting Your Crispy Masterpiece: Tips for Success
To ensure your tortilla pizzas reach their full crispy potential, pay attention to these small but crucial details:
- The Right Tortilla: Smaller flour tortillas (taco or taquito sized) work best. Their size makes them ideal for individual portions and ensures they crisp up quickly and evenly.
- Thin Oil Layer: A thin layer of olive oil on the baking tray is crucial. It helps the tortillas crisp up beautifully and prevents sticking. Do NOT line your baking tray with aluminum foil; this can trap moisture and prevent the tortillas from achieving that desirable crispness.
- Even Topping Distribution: Remember the “less is more” rule. Spread your sauce and toppings thinly and evenly across the tortilla. This ensures everything cooks through and the crust remains firm.
- Preheat or Not? While preheating the oven is generally recommended for consistent baking, these quick pizzas are forgiving. You don’t need to wait for the oven to reach full temperature before popping them in. They’ll start baking as the oven warms up, usually taking 5 to 8 minutes in total. Keep an eye on them, as oven temperatures can vary.
- The Resting Period: Just like a traditional pizza, allowing your tortilla pizzas to rest for 2 to 3 minutes after baking is beneficial. This allows the melted cheese to set slightly, preventing it from sliding off and making for a more enjoyable bite.
Embrace the freedom and creativity that tortilla pizzas offer. They are a testament to how simple ingredients can yield extraordinary results with just a little imagination and a few minutes of your time. Say goodbye to dinner dilemmas and hello to a new favorite!

INGREDIENTS
- 1 tablespoon Olive oil (for baking tray)
- 4 small flour tortillas (taco or taquito sized, about 6-inch diameter)
- 4 tablespoons ketchup (or your preferred pizza sauce/pesto)
- 1 cup cooked meat (such as leftover roast chicken, shredded beef, or canned tuna, flaked)
- 4 tablespoons finely chopped red onion
- 12 fresh mozzarella balls (small bocconcini, about 1-inch diameter)
- 4 tablespoons shredded mixed cheese (cheddar, Monterey Jack, or Italian blend)
- 4 olives, pitted and thinly sliced
- Fresh basil leaves, chopped parsley, or a small green salad for garnish (optional)
- Pinch of red pepper flakes (optional, for a kick)
DIRECTIONS
- Preheat your oven to 350°F (175°C). While the oven heats, you can begin preparing your pizzas.
- Lightly spread a thin, even layer of olive oil on a baking tray. Ensure the entire surface where the tortillas will sit is coated. (Important: Do not line the baking tray with aluminum foil, as this can prevent the tortillas from becoming crispy).
- Carefully place the four flour tortillas on the prepared baking tray, ensuring they do not overlap.
- On each tortilla, spread approximately 1 tablespoon of ketchup evenly across the surface, leaving a small border for the crust.
- Distribute the cooked meat evenly among the four tortillas, followed by about 1 tablespoon of finely chopped red onion on each.
- Arrange 3 fresh mozzarella balls on top of the other ingredients on each tortilla, then sprinkle 1 tablespoon of shredded mixed cheese over everything. Finally, garnish each mini pizza with a few olive slices.
- Place the baking tray into the preheated oven. Bake for approximately 5 to 8 minutes, or until the cheese is thoroughly melted and bubbly, and the edges of the tortillas have turned golden brown and crispy. Baking time may vary slightly depending on your oven’s efficiency.
- Once baked, carefully remove the tray from the oven. Allow the mini pizzas to rest on the tray for 2 to 3 minutes before serving. This brief resting period helps the cheese set beautifully.
- Garnish with fresh basil leaves, chopped parsley, or serve alongside a simple green salad for a complete meal. Serve immediately and enjoy your quick, homemade delight!