
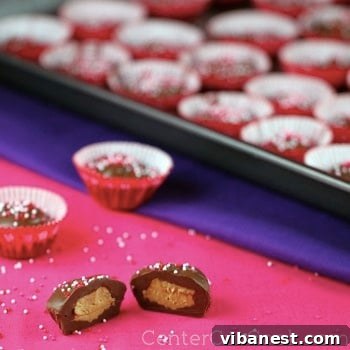
Indulge in Homemade Peanut Butter Cups: The Ultimate Easy Recipe for Chocolate and Peanut Butter Lovers
There’s an undeniable magic in homemade treats, especially when they replicate a beloved classic with superior flavor and freshness. Forget the often-disappointing store-bought versions; imagine sinking your teeth into a rich, creamy chocolate shell that gives way to a decadent, salty-sweet peanut butter filling, melting luxuriously in your mouth. This year, for Valentine’s Day, I aimed to create something truly memorable and heartfelt for my husband. As I shared in my recent Dipped Chocolate Chip Cookies post, I’ve been delighting him with a small, thoughtful gift each day leading up to the holiday. Among his absolute favorite candies are peanut butter cups, and rather than simply grabbing a generic bag from the store, I decided to embark on a delightful culinary adventure to craft my very own homemade version. The outcome? Pure bliss, and a recipe so remarkably simple, you’ll wonder why you ever settled for anything less.
My journey with homemade peanut butter cups isn’t new; I’ve experimented with various recipes in the past. However, many of those attempts fell short of capturing the true essence of this iconic treat. Often, recipes would merely blend peanut butter into the chocolate itself, completely missing the captivating charm of that distinct, creamy peanut butter center. For me, a significant part of the joy in a peanut butter cup lies in that delightful surprise – the moment you bite through the chocolate and discover a luscious, soft pocket of pure peanut butter goodness. This new recipe, which I’ve meticulously refined and perfected, delivers precisely that experience. It is incredibly straightforward to follow, yet the final product is nothing short of extraordinary – far surpassing the taste and texture of any commercially produced counterpart. Moreover, its versatility shines; swap out the sprinkles, and these delectable peanut butter cups become perfect for any time of the year, offering a customizable treat for every season and celebration. This recipe generously yields three dozen mini cups, ensuring you’ll have plenty to savor yourself and, hopefully, an abundance to share with friends and family!
The Unbeatable Advantages of Crafting Your Own Peanut Butter Cups
The appeal of homemade treats extends far beyond just satisfying a craving for something sweet. When you choose to make your own peanut butter cups, you unlock a multitude of benefits that elevate the entire experience:
- Superior Flavor Profile: Our recipe utilizes high-quality ingredients, resulting in a depth of flavor that mass-produced candies simply cannot replicate. The perfect harmony of rich, sweet chocolate and a distinct, salty peanut butter filling creates an exquisite taste sensation that is truly unparalleled.
- Achieve Perfect Texture: Experience the delightful contrast between a delicately crisp chocolate shell and a wonderfully smooth, creamy, melt-in-your-mouth peanut butter core. It’s a symphony of textures that commercial versions often struggle to achieve.
- Complete Ingredient Control: One of the greatest advantages is knowing precisely what goes into your treats. You can avoid artificial flavors, unnecessary preservatives, and questionable additives, ensuring pure, wholesome deliciousness. This is especially valuable for those with dietary preferences or concerns.
- Endless Customization Potential: This recipe serves as a fantastic foundation for your culinary creativity. Whether you wish to introduce a hint of spice, experiment with different types of chocolate, or incorporate chopped nuts into the filling, the possibilities are boundless. This adaptability makes them ideal for any occasion or to suit specific personal tastes.
- A Heartfelt and Thoughtful Gift: A batch of homemade peanut butter cups is undeniably a deeply cherished present. Be it for Valentine’s Day, birthdays, festive holidays, or simply as a gesture of appreciation, a gift crafted with your own hands conveys an extra layer of love, care, and thoughtfulness that resonates deeply with the recipient.
- Economical and Rewarding: Crafting your own confections often proves to be more cost-effective than repeatedly purchasing premium chocolates from specialty stores. Considering the generous yield of this recipe, it’s a budget-friendly way to enjoy gourmet-quality treats, while also providing the immense satisfaction of creating something delicious from scratch.
This recipe is designed to produce three dozen mini peanut butter cups, which is a perfect quantity for both sharing and indulging. Be prepared, however, for them to disappear surprisingly quickly once their irresistible charm is discovered by your friends and family!
Selecting the Perfect Ingredients for Unforgettable Peanut Butter Cups
The journey to crafting the ultimate homemade peanut butter cup begins with a careful selection of ingredients. Each component plays a vital role in achieving that coveted balance of flavor, sweetness, and texture. Let’s explore what makes our chosen ingredients so crucial:
- Creamy Peanut Butter (Divided): We specifically recommend creamy peanut butter for its ability to create a consistently silky-smooth filling and integrate seamlessly with the chocolate mixture. Natural peanut butter, while delicious on its own, can sometimes separate or have an oilier consistency that might not yield the desired texture for the filling. The classic creamy variety provides the best results here. Dividing the peanut butter allows us to create both the distinct, luscious core and contribute to the overall richness of the chocolate shell.
- Softened Butter: A small but mighty addition, softened butter introduces a subtle richness and contributes significantly to the melt-in-your-mouth quality of the peanut butter filling. It’s crucial that the butter is at room temperature and softened for effortless blending into a smooth, cohesive mixture.
- Confectioners’ Sugar: Also widely known as powdered sugar, this ingredient is absolutely essential for achieving the perfectly smooth consistency and balanced sweetness of our peanut butter filling. Its ultra-fine texture ensures it dissolves completely, preventing any undesirable grittiness in the final product.
- Sea Salt (1/2 teaspoon): This is not just an ingredient; it’s a flavor enhancer that truly transforms the peanut butter cups. While regular table salt can be used in a pinch, sea salt, particularly a fine-grain variety, offers a more complex, nuanced salinity. This depth of saltiness perfectly cuts through the sweetness of both the chocolate and the peanut butter, making the peanut butter flavor pop and creating a beautifully balanced taste experience. Do not underestimate its importance – it makes a distinct, noticeable difference in the overall deliciousness!
- Semisweet Chocolate Chips (12 oz bag): Semisweet chocolate is chosen for its ideal balance – it’s neither overly bitter nor excessively sweet. This allows the inherent deliciousness of the peanut butter filling to truly shine without being overshadowed. High-quality semisweet chocolate chips melt smoothly and contribute to a beautifully structured and flavorful outer shell.
- Hershey’s Candy Bars (4 x 1.55 oz, broken into pieces): The inclusion of classic Hershey’s milk chocolate bars in the melting chocolate mixture might seem unconventional, but it’s a clever trick! These bars introduce a familiar, creamy sweetness and help achieve an ideal, pourable consistency for the chocolate shell, making it both incredibly flavorful and easy to work with. Remember to break them into smaller pieces to facilitate even and quick melting.
- Mini Cupcake Liners: These small liners are absolutely fundamental for shaping your individual peanut butter cups. Opt for the mini size to create those classic, delightful bite-sized treats that are so reminiscent of the original.
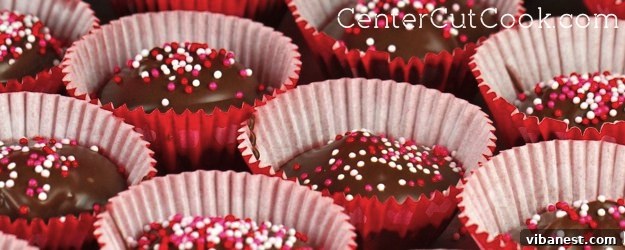
- Sprinkles (Optional): While entirely optional, sprinkles are a wonderful way to add a festive touch and a pop of color to your homemade treats. Choose colors that align with the occasion – vibrant red and pink for Valentine’s Day, soft pastels for Easter, or a classic rainbow mix for an everyday celebration.
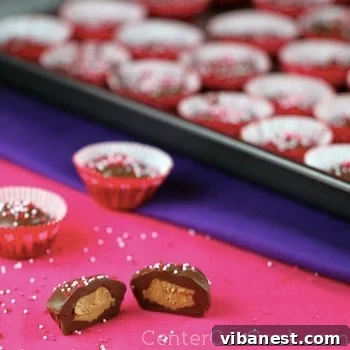
INGREDIENTS
- 1 cup creamy peanut butter – divided
- 1 1/2 tablespoons unsalted butter, softened
- 1/2 cup confectioners’ sugar
- 1/2 teaspoon sea salt
- 12 ounce bag semisweet chocolate chips
- 4 Hershey’s candy bars (1.55 ounces each), broken into pieces
- Mini cupcake liners (approximately 36-40 needed)
- Sprinkles (optional, for decorative finish)
DIRECTIONS: Crafting Your Perfect Homemade Peanut Butter Cups
- Prepare the Luscious Peanut Butter Filling: In the clean bowl of your stand mixer fitted with the paddle attachment (or a large mixing bowl with a hand mixer), combine 1/2 cup of the creamy peanut butter, the softened 1 1/2 tablespoons of butter, 1/2 cup of confectioners’ sugar, and 1/2 teaspoon of sea salt. Beat these ingredients together on medium speed until the mixture is beautifully light, fluffy, and thoroughly combined, forming a smooth and pliable dough-like consistency. This will be the irresistible core of your peanut butter cups. Set this prepared filling aside.
- Gently Melt the Rich Chocolate Mixture: In a separate, generously sized microwave-safe bowl, combine the entire 12-ounce bag of semisweet chocolate chips, the broken pieces of the four Hershey’s candy bars, and the remaining 1/2 cup of creamy peanut butter. Begin the melting process in the microwave. It’s crucial to melt chocolate slowly and gently to prevent it from seizing. Start by heating the mixture for 1 minute at 50% power. After the initial minute, remove the bowl and stir the mixture thoroughly with a spatula, even if it doesn’t look fully melted. Continue heating in short 20-second increments at 50% power, stirring diligently after each interval, until all the chocolate and peanut butter are completely melted and have achieved a smooth, glossy, uniform consistency. Avoid overheating.
- Prepare Your Baking Surface: Line a standard baking sheet with either parchment paper or wax paper. This crucial step will prevent your finished peanut butter cups from sticking and make them incredibly easy to remove and handle once set.
- Form the Essential Chocolate Base Layer: Arrange your mini cupcake liners neatly on the prepared baking sheet. Using a small spoon, or for enhanced precision and cleaner application, a squeeze bottle with a narrow tip, fill the bottom of each mini cupcake liner with approximately 2 teaspoons of the melted chocolate mixture. The goal is to create a thin, solid base layer that covers the entire bottom of the liner.
- Assemble the Layers: Add the Peanut Butter Core & Top Chocolate: Now, carefully take your prepared peanut butter filling from step 1. Using a small spoon (about 1/2 teaspoon measure), scoop and gently place a dollop of this creamy peanut butter mixture directly into the center of each chocolate-filled cup. Lightly flatten the peanut butter mound with the back of the spoon to create an even layer. Once the peanut butter core is perfectly positioned, spoon an additional generous teaspoon or two of the melted chocolate mixture over the top, ensuring the peanut butter layer is completely covered and encapsulated within the chocolate. If you desire to add sprinkles, do so immediately while the top chocolate layer is still warm and wet, allowing them to adhere beautifully.
- Chill to Perfection: Once all your homemade peanut butter cups are meticulously assembled and decorated, carefully transfer the entire baking tray into the refrigerator. Allow them to chill undisturbed for approximately 30 minutes, or until the chocolate has completely firmed up and is solid to the touch. Once thoroughly set, they are ready to be carefully peeled from their liners and joyfully devoured!
Unleash Your Creativity: Customizing Your Homemade Peanut Butter Cups
One of the most exciting and rewarding aspects of crafting your own peanut butter cups is the boundless potential for personalization and customization. While this recipe is absolutely perfect as written, don’t hesitate to let your culinary imagination soar and experiment with various enhancements:
- Seasonal and Holiday Themes: As previously highlighted, sprinkles are your ultimate tool for festive customization! For vibrant Christmas treats, incorporate red and green sprinkles. For spooky Halloween fun, opt for orange and black. For joyous birthdays, a classic rainbow mix is always a hit. You can also further enhance the theme by selecting cupcake liners with specific holiday or celebratory designs.
- Chocolate Varieties and Blends: Don’t feel confined to semisweet chocolate. For a sweeter, milder cup, experiment with creamy milk chocolate. If you prefer a more intense, less sugary profile, high-quality dark chocolate (60% cocoa or higher) is an excellent choice. For a visually striking and uniquely flavored alternative, white chocolate can be used for the shell. You can even combine different types of chocolate for a nuanced flavor.
- Aromatic Flavor Boosters: A tiny drop of pure vanilla extract or almond extract can be folded into the peanut butter filling to introduce an extra layer of fragrant depth. For those who enjoy a subtle warmth or a surprising kick, a very small pinch of cayenne pepper mixed into the chocolate can create a wonderfully intriguing flavor contrast.
- Crunchy Additions: For enthusiasts who adore an extra textural element, finely chop some roasted peanuts, pretzels, or other complementary nuts (such as pecans or walnuts) and gently fold them into the peanut butter filling. Alternatively, sprinkle them generously on top of the melted chocolate layer before it sets for a delightful crunch.
- Elegant Swirls and Drizzles: Instead of, or in addition to, sprinkles, consider adding an elegant touch by drizzling contrasting melted white chocolate, dark chocolate, or colorful candy melts over the tops of your set peanut butter cups. This creates beautiful patterns and an extra layer of visual appeal.
Optimal Storage and Thoughtful Gifting Ideas for Your Delectable Creations
Once your magnificent homemade peanut butter cups are perfectly set and ready, it’s time to consider the best ways to store them to maintain their freshness and how to present them as thoughtful gifts.
- Storage Guidelines: To preserve their optimal freshness and firm texture, these homemade peanut butter cups are best stored in an airtight container within the refrigerator. Under these conditions, they will retain their exquisite taste and quality for up to two weeks. For longer-term storage, they can be safely frozen for up to 2-3 months. If freezing, arrange them in a single layer in an airtight container or freezer bag, with parchment paper between layers to prevent sticking. When ready to enjoy, simply allow them to thaw slightly at room temperature before indulging.
- Creative Gifting Ideas: Homemade gifts are always treasured and convey a personal touch that store-bought items simply cannot match. Arrange your beautifully crafted peanut butter cups in charming decorative cupcake boxes, elegant small tins, or transparent cellophane bags tied with a pretty ribbon or rustic twine. They make exceptional party favors, sophisticated hostess gifts, or a heartwarming surprise for teachers, colleagues, and cherished friends. For special occasions like Valentine’s Day, imagine a heart-shaped box overflowing with these homemade beauties – it’s an undeniable gesture of affection that is sure to leave a lasting impression!
Troubleshooting Tips for Achieving Perfect Peanut Butter Cups Every Time
Even the most straightforward recipes can occasionally present minor hurdles. Here are some practical troubleshooting tips to ensure your homemade peanut butter cups consistently turn out flawlessly:
- Preventing Chocolate Seizing: If your chocolate mixture suddenly becomes thick, lumpy, or develops a grainy texture while melting, it likely means it got too hot or came into contact with a tiny amount of water (even a drop of steam can cause this). To effectively prevent seizing, always melt chocolate slowly and gently, using short heating increments and stirring very frequently. If it does seize, sometimes incorporating a teaspoon of vegetable oil or shortening can help to smooth it out, but prevention through careful, slow melting is always the most reliable strategy.
- Addressing a Crumbly Peanut Butter Filling: If, after mixing, your peanut butter filling mixture appears too dry, stiff, or crumbly to handle easily, simply add another small pat (approximately 1/2 teaspoon) of softened butter. Continue mixing until it achieves a smooth, pliable, and easily workable consistency.
- Managing an Overly Soft Peanut Butter Filling: Conversely, if your peanut butter filling seems too soft or sticky to form into neat portions, place the bowl in the refrigerator for 10-15 minutes. This brief chilling period will help it firm up to a more manageable consistency before you begin placing it into the chocolate cups.
- Ensuring Even Layers: Patience is truly a virtue when assembling these treats. Make sure each layer of chocolate is set just enough before carefully adding the peanut butter filling. Avoid overfilling the mini cupcake liners, as this can lead to messy or uneven layers. A steady hand and a light touch will yield perfectly structured cups.
This recipe offers more than just a delicious treat; it’s an invitation to savor the creative process, to infuse your culinary creations with a personal touch, and to forge wonderful memories in the kitchen. So go ahead, confidently whip up a batch (or perhaps even two!) of these incredible homemade peanut butter cups. Your taste buds, and everyone you choose to share them with, will undoubtedly thank you profusely!
Recipe adapted from
Taste of Home