
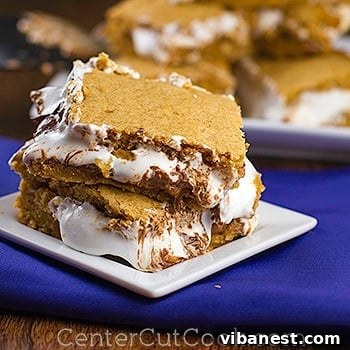
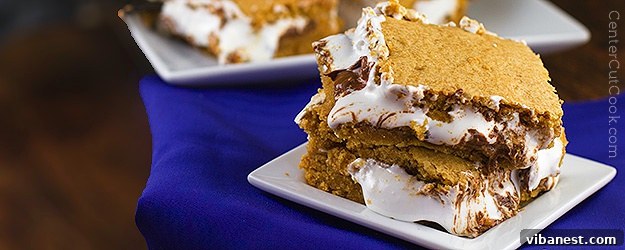
Indulge in the Ultimate Peanut Butter S’mores Cookie Bars: A Nostalgic Treat Reimagined
Over recent years, the humble s’more has transcended its traditional role as a simple campfire treat, blossoming into a widespread culinary sensation. This beloved combination of toasted marshmallow, melted chocolate, and crunchy graham cracker has captured the imagination of bakers and dessert enthusiasts alike, leading to an explosion of creative s’mores-inspired confections. Have you noticed the incredible array? We’re talking about everything from gourmet s’mores cupcakes and decadent s’mores brownies to innovative s’mores ice cream and, of course, the hugely popular Peanut Butter S’mores Cookies that delighted palates just last year. What’s not to adore? The magical trinity of gooey marshmallows, rich chocolate, and crispy graham crackers creates an experience that is simply unparalleled. And when you introduce the creamy, irresistible flavor of peanut butter into this delightful mix, you unlock a whole new level of dessert perfection.
However, amidst this wave of s’mores innovation, not all creations are equally praise-worthy. Allow me to offer a piece of advice: perhaps steer clear of the S’mores Pop-Tarts. While the idea might sound appealing in theory, especially to those nostalgic for childhood breakfast cereals, its execution often leaves much to be desired. It begs the question, who truly envisioned this as a breakfast item? “Breakfast!” indeed. To compound the culinary confusion, the packaging boldly advertises these Pop-Tarts as a good source of 8 essential vitamins and minerals, seemingly attempting to rationalize the consumption of chocolate and marshmallows first thing in the morning. It’s a curious marketing strategy for a treat that undeniably belongs in the dessert category.
A Sweet Confession: Dessert for Breakfast, Anyone?
Despite my critical stance on certain breakfast choices, I must now admit my own moment of delicious transgression. It is with a touch of playful shame that I confess to having enjoyed these very Peanut Butter S’mores Cookie Bars for breakfast, not just once, but on two consecutive mornings. The allure of a homemade dessert waiting in the kitchen often proves too strong to resist, especially when the morning hunger pangs strike. Please tell me I’m not alone in this delightful, albeit unconventional, habit? It seems to be an unwritten rule that any leftover dessert in the house must experience at least one breakfast outing before it makes its final exit. Ah, the sweet, sweet shame!
The Evolution of S’mores: From Campfire to Culinary Star
The journey of the s’more from a simple, rustic campfire staple to a sophisticated dessert icon is a testament to its enduring appeal. What began as a spontaneous treat enjoyed under the stars has now become a versatile flavor profile, inspiring countless bakers and chefs. The fundamental joy of s’mores – the warmth, the sweetness, the varied textures – translates beautifully into different forms. This evolution reflects a collective desire to recreate that nostalgic feeling in more accessible and diverse ways. Whether it’s a gourmet pastry, a rich ice cream flavor, or a delightful cookie bar, the essence of s’mores continues to captivate, offering comfort and indulgence in every bite. This culinary transformation means you no longer need a roaring fire to experience the magic; you can now enjoy these beloved flavors right in your own kitchen.
The Ultimate Pairing: Why Peanut Butter and S’mores Are a Match Made in Heaven
My initial encounter with a variation of these delectable cookie bars came courtesy of my friend Lisa, whose version, though wonderful, did not feature peanut butter. As a fervent peanut butter aficionado, I couldn’t help but envision the magnificent synergy that would unfold by introducing it. The decision to incorporate peanut butter into the s’mores flavor combination was truly a stroke of genius. The creamy, slightly salty, and rich depth of peanut butter creates an extraordinary counterbalance to the intense sweetness of the marshmallow and the comforting familiarity of milk chocolate. It adds a sophisticated layer of flavor and a delightful textural contrast, transforming the classic into something profoundly new and exciting. It’s everything you love about s’mores, elevated to a whole new dimension, in a convenient cookie bar form, and blessed with the irresistible magic of peanut butter. Prepare to be utterly captivated; you’ll undoubtedly be asking for “s’more” (and yes, that pun was absolutely intended!).
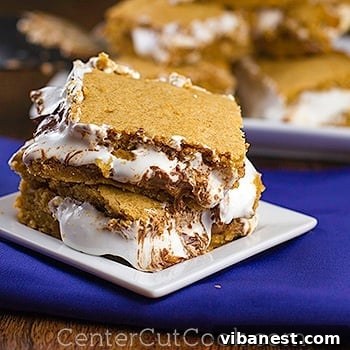
Recipe: Irresistible Peanut Butter S’mores Cookie Bars
INGREDIENTS
- 1/2 cup (1 stick) unsalted butter, softened to room temperature
- 1/3 cup light brown sugar, firmly packed
- 1/2 cup granulated sugar
- 1 large egg, at room temperature
- 1 teaspoon pure vanilla extract
- 1 1/3 cups all-purpose flour
- 3/4 cup finely crushed graham cracker crumbs (approximately 8-10 full graham cracker sheets)
- 1 teaspoon baking powder
- 1/4 teaspoon salt
- 4 regular sized Hershey’s milk chocolate candy bars (or 2 king-sized bars), broken into individual pieces
- 1/3 cup creamy peanut butter (do not use natural, oily peanut butter for best texture)
- 7 ounces marshmallow creme (found in a jar, typically near the marshmallows in the baking aisle)
DIRECTIONS
- Prepare Your Baking Environment: Begin by preheating your oven to 350°F (175°C). Line an 8-inch square baking pan with aluminum foil, ensuring that the foil extends over the edges of the pan. These “handles” will make it incredibly easy to lift the finished bars out later. Lightly spray the foil-lined pan with a non-stick cooking spray to prevent any sticking.
- Combine Dry Ingredients: In a medium-sized mixing bowl, thoroughly whisk together the all-purpose flour, finely crushed graham cracker crumbs, baking powder, and salt. Set this mixture aside.
- Cream Wet Ingredients: In a large mixing bowl, using an electric mixer, cream together the softened butter, light brown sugar, and granulated sugar. Beat on medium speed for about 3 minutes, or until the mixture becomes wonderfully light and fluffy. Next, add the egg and vanilla extract, beating until they are fully incorporated and the mixture is smooth.
- Form the Cookie Dough: Gradually add the dry ingredients mixture to the wet ingredients. Mix on a low speed until everything is just combined and a soft, cohesive dough forms. Be careful not to overmix, as this can result in tough bars.
- Create the Base Layer: Divide the prepared cookie dough roughly in half. Press one half of the dough evenly into the bottom of your prepared 8-inch baking pan. Use your fingers or the back of a spoon to ensure it’s a smooth, consistent layer.
- Add Peanut Butter and Chocolate: Carefully spread the 1/3 cup of creamy peanut butter over the pressed dough layer. Take your time to distribute it evenly. Then, arrange the broken pieces of Hershey’s milk chocolate candy bars in a single, even layer directly over the peanut butter.
- Apply Marshmallow Creme: This step can be a bit tricky due to the stickiness of marshmallow creme. For the easiest application, place several dollops of marshmallow creme across the chocolate layer. Then, using a spatula or the back of a spoon (which you might lightly grease with cooking spray or butter if it’s too sticky), gently spread the creme out to form a continuous, even layer over the chocolate.
- The Top Dough Layer: Take the remaining half of the cookie dough and form it into a ball. On a lightly floured surface or, even better, between two sheets of parchment paper, use a rolling pin to carefully roll and shape the dough into an 8-inch square. This method prevents the dough from sticking to the marshmallow creme and ensures an even top layer. Carefully transfer the shaped dough square and place it on top of the marshmallow creme layer.
- Bake to Golden Perfection: Place the baking pan into your preheated oven. Bake for approximately 33-35 minutes, or until the top layer of dough is lightly golden brown and the edges appear set. The internal layers will be wonderfully gooey.
- Cool, Cut, and Serve: It is crucial to allow the bars to cool almost completely in the pan before attempting to cut them. This allows the marshmallow and chocolate layers to set properly, ensuring clean, neat slices. Once cooled, use the foil “handles” to lift the entire slab of bars out of the pan. Cut into desired pieces and serve. These bars are truly best enjoyed slightly warm; if needed, a quick 10-15 second warm-up in the microwave per bar will bring back that delightful gooey texture.
Expert Tips for Baking Flawless Peanut Butter S’mores Cookie Bars
While this recipe is designed to be straightforward, a few key tips can elevate your baking experience and guarantee truly perfect results every time:
- Achieving Fine Graham Cracker Crumbs: The texture of your base layer greatly depends on the fineness of your graham cracker crumbs. For the best consistency, pulse whole graham cracker sheets in a food processor until they resemble fine sand. Alternatively, place them in a sturdy zip-top bag and crush them thoroughly with a rolling pin.
- The Importance of Softened Butter: Ensuring your butter is at true room temperature is vital for a light and fluffy cookie dough. Cold butter won’t cream properly with the sugars, leading to a denser bar. If you’re short on time, cut the butter into cubes and let it sit for about 15-20 minutes, or microwave in 5-second bursts, being careful not to melt it.
- Mastering Marshmallow Creme: Marshmallow creme is notoriously sticky. A trick to spreading it more easily is to lightly spray your spatula or the back of your spoon with cooking spray before spreading. You can also briefly immerse the sealed jar of marshmallow creme in a bowl of warm water for a few minutes to make it slightly more pliable, but avoid making it too runny.
- Don’t Skip Rolling the Top Dough: This step is non-negotiable for success. Trying to press the remaining dough directly onto the sticky marshmallow creme will result in a messy, uneven layer and frustration. Rolling the dough between two sheets of parchment paper (or on a lightly floured surface) makes it easy to create an even square that can be gently placed on top.
- Patience is a Virtue (Especially for Cooling): It’s incredibly tempting to cut into these bars as soon as they emerge from the oven, but resisting this urge is crucial for clean, beautiful slices. The marshmallow and chocolate need ample time to cool and set. Cutting too soon will yield a delicious but extremely messy outcome. Aim for almost complete cooling, typically 1-2 hours at room temperature.
- Ensure Even Baking: Oven temperatures can vary. If you suspect your oven has hot spots, consider rotating the baking pan halfway through the baking time to ensure uniform browning and doneness.
Customizing Your Peanut Butter S’mores Bars: Creative Variations
While the original recipe for these Peanut Butter S’mores Cookie Bars is phenomenal, don’t hesitate to unleash your inner baker and personalize them with exciting variations:
- Explore Chocolate Varieties: Instead of just milk chocolate, consider using a mix of milk and semi-sweet chocolate chips, or even chopped dark chocolate for a richer, less sweet profile. White chocolate chips or chopped white chocolate bars could also offer a delightful contrast.
- Add More Nutty Goodness: For an extra layer of flavor and crunch, sprinkle some chopped roasted peanuts, almonds, or even pecans over the chocolate layer before adding the marshmallow creme.
- Spiced Graham Crackers: Elevate the base by using cinnamon graham crackers. The subtle spice will add a warm, comforting note that beautifully complements the chocolate and peanut butter.
- Toasted Marshmallow Topping: If you prefer a more traditional toasted marshmallow experience, you can replace the marshmallow creme with a layer of mini marshmallows. Add them during the last 5-10 minutes of baking, or after the bars are mostly baked, then pop them under the broiler for a minute or two (watching very carefully!) until golden brown.
- A Drizzle Finish: Once the bars have cooled, enhance their visual appeal and flavor by drizzling melted chocolate, extra peanut butter, or even a caramel sauce over the top.
Serving and Storage Suggestions for Maximum Enjoyment
These Peanut Butter S’mores Cookie Bars are truly a versatile treat, perfect for any occasion. They are, without a doubt, at their absolute best when served slightly warm, allowing the chocolate to be perfectly melted and the marshmallow creme gloriously gooey. If you’ve stored them and want to recapture that fresh-from-the-oven magic, a quick 10-15 second warm-up in the microwave per bar will do the trick, transforming them into a soft, melt-in-your-mouth delight. Serve them alongside a cold glass of milk, a scoop of vanilla ice cream, or a warm cup of coffee for the ultimate indulgent experience.
For storage, these bars will keep beautifully in an airtight container at room temperature for up to 3-4 days. If you prefer a firmer texture or need to extend their shelf life, they can be stored in the refrigerator. Just remember to allow them to come to room temperature, or give them a gentle warm-up, before serving to ensure the best flavor and texture. For longer storage, these bars also freeze exceptionally well. Simply wrap individual bars tightly in plastic wrap, then an additional layer of aluminum foil, and store them in the freezer for up to 2-3 months. When ready to enjoy, thaw them at room temperature or gently reheat.
This delectable recipe was lovingly adapted from
Lovin’ from the Oven, a true gem in the world of home baking, inspiring countless sweet creations.