
Irresistible Chocolate Oreo Cupcakes with Dreamy Cookies & Cream Frosting
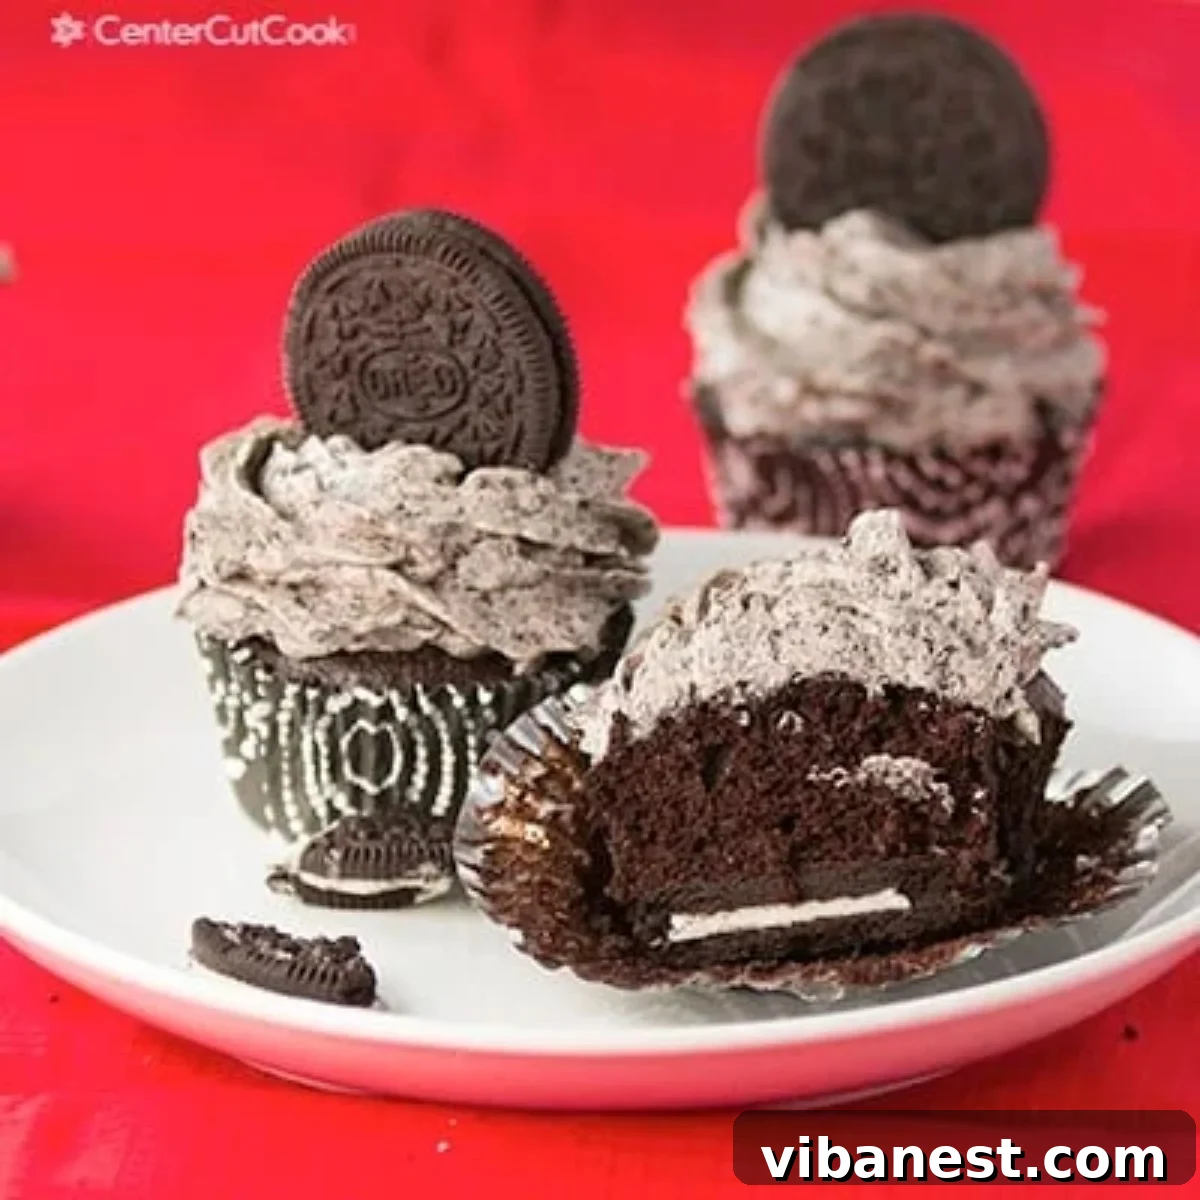
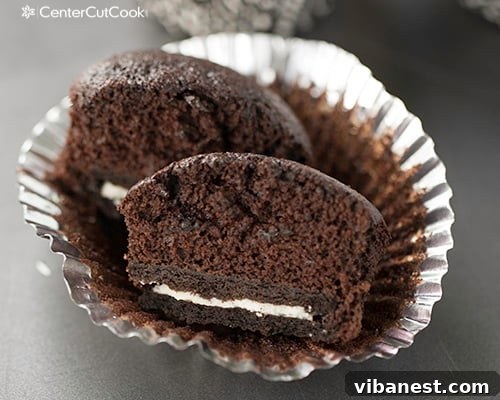
Prepare to embark on a sweet adventure with these incredible Chocolate Oreo Cupcakes featuring luscious Cookies & Cream Frosting! Imagine biting into a moist, rich chocolate cupcake to discover a delightful surprise at the bottom: a whole, crunchy Oreo cookie. This isn’t just a cupcake; it’s an experience, a symphony of textures and flavors that will tantalize your taste buds and bring a smile to anyone’s face, especially if you have a soft spot for the iconic Oreo.
Few treats hold a place in our hearts quite like the Oreo. For many, it’s the quintessential cookie – a perfect balance of crisp chocolatey wafers and sweet cream filling. Whether you’re a twist-it, dunk-it, or eat-it-whole kind of person, the Oreo offers a nostalgic taste of childhood joy. My personal ritual involves a tall glass of cold milk, transforming the sturdy biscuit into a deliciously soggy, melt-in-your-mouth delight. It’s this profound adoration for Oreos that sparked the inspiration for these extraordinary cupcakes, taking a beloved cookie and embedding it into a truly unforgettable dessert.
The Quest for the Ultimate Oreo Cupcake Experience
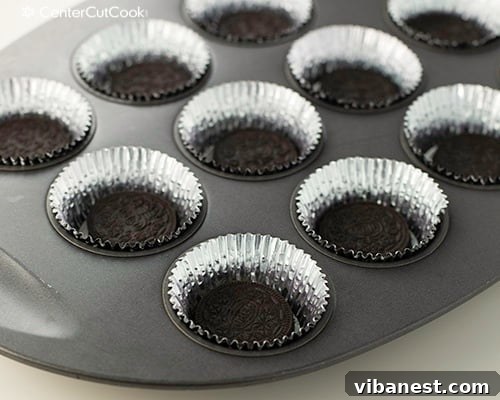
Creating the perfect Oreo cupcake wasn’t an accident; it was a journey of delicious experimentation. The goal was simple: combine the magic of Oreos with a classic chocolate cupcake. But where to put the Oreo? This seemingly small decision had a huge impact on the final product. I began by placing an Oreo cookie directly into the bottom of each cupcake liner before pouring in the rich chocolate batter. This method promised a solid, surprise foundation.
Naturally, the opposite approach also needed testing. I tried pouring the batter first, then gently pressing an Oreo onto the surface, allowing it to bake on top. While both methods yielded tasty results, one clearly stood out. It’s these kinds of culinary investigations that truly define a great recipe, ensuring you get nothing but the best, without having to go through the trial and error yourself. Consider this my gift to your sweet tooth!
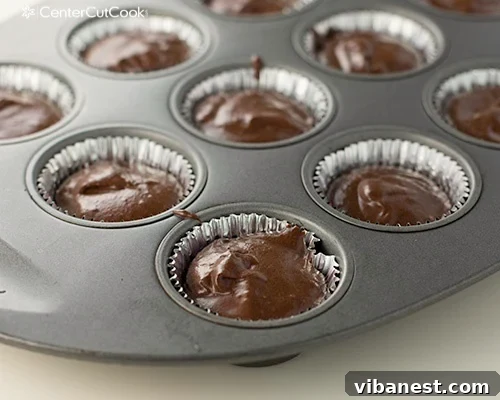
The verdict? Placing the Oreo at the bottom of the cupcake liner before baking proved to be the winning strategy. Not only does it create an incredibly satisfying textural contrast with the soft cake, but it also offers a delightful “discovery” moment. Imagine taking a bite and finding that perfectly baked Oreo nestled at the base – it’s a playful surprise that consistently elicits gasps of joy. Children, especially, are enchanted by this hidden treat, but honestly, who wouldn’t be? It elevates a simple cupcake into something truly special and memorable.
Crafting the Dreamy Cookies & Cream Frosting
A cupcake, no matter how delicious, feels incomplete without its crown of frosting. For these chocolate Oreo delights, the choice was obvious and effortless: a rich, creamy cookies and cream frosting. This particular frosting isn’t your average buttercream; it boasts a unique stovetop beginning that sets it apart. The process starts by cooking flour and milk together into a thick paste, which then cools completely before being whipped with butter and sugar.
This method might sound unconventional, but trust me, the results are extraordinary. The cooked flour and milk create a stable base that allows for a frosting that is incredibly light, airy, and fluffy – almost like whipped cream, but with a richer flavor and superior stability. It’s delightfully less sweet than traditional buttercreams, allowing the true essence of the Oreos to shine through. Once this magnificent base is achieved, crushed Oreo cookies are folded in, infusing every swirl with those familiar, irresistible chocolatey crumbs and creamy bits. The combination of the smooth, fluffy frosting with the textural crunch of the crushed Oreos is simply divine, perfectly complementing the rich chocolate cupcake and its hidden cookie treasure.
Mastering the Art of Cupcake Decoration
While the taste of these Chocolate Oreo Cupcakes is undeniably the star, presenting them beautifully adds to the overall indulgence. You don’t need to be a professional baker to achieve stunning results. Even a simple knife can be used to spread the frosting, but if you’re looking to elevate your presentation, a few basic tools and techniques can make a world of difference. The key is confidence and a willingness to experiment; remember, if you make a mistake, you can always scrape off the frosting and try again!
For those who desire a more polished look, there are two easy and accessible options. The first involves a simple Ziploc bag: fill it with frosting, snip a small corner, and pipe the frosting in a circular motion, starting from the outside edge of the cupcake and spiraling inwards, or by working from the center outwards. This creates a neat, classic dome or swirl. The second option, for a slightly more professional touch, is to invest in an inexpensive cupcake decorating set. Many starter kits are available for under $10 at stores like Target or online retailers like Amazon. I personally recommend a star tip, such as the Wilton 1M, which creates beautiful, elegant swirls with minimal effort. To use it, place the tip in the center of the cupcake, apply steady pressure, and move it clockwise in a circular motion, slowly building a delightful peak. With a little practice, you’ll be frosting like a pro in no time, turning each cupcake into a miniature work of art.
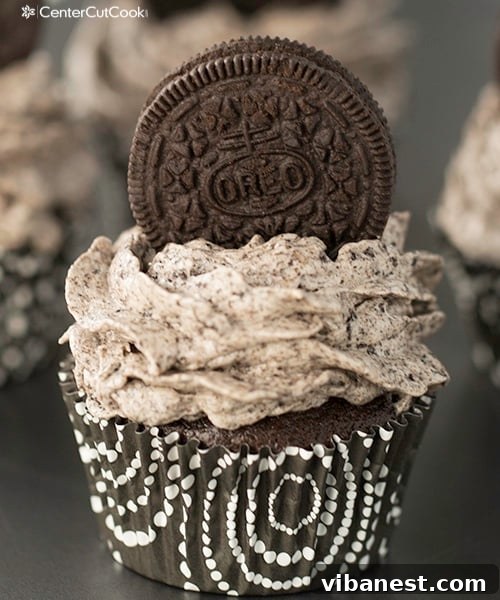
And for that final, irresistible touch? I like to crown each cupcake with an additional whole Oreo cookie. It’s not just for aesthetics; it’s a clear visual cue to the deliciousness within and adds another layer of Oreo goodness. The “cute factor” is undeniable, making these cupcakes perfect for parties, celebrations, or simply as a special treat to brighten any day. The result is a stunning dessert that is as visually appealing as it is delicious – a true showstopper that will leave everyone asking for the recipe.
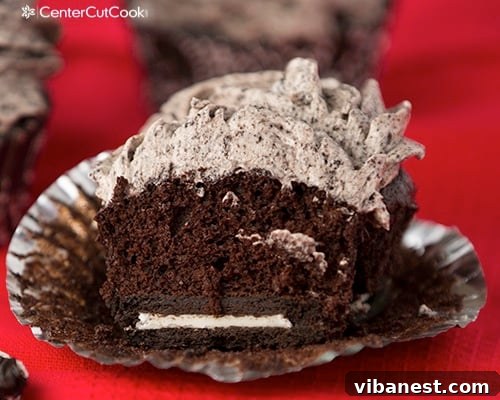
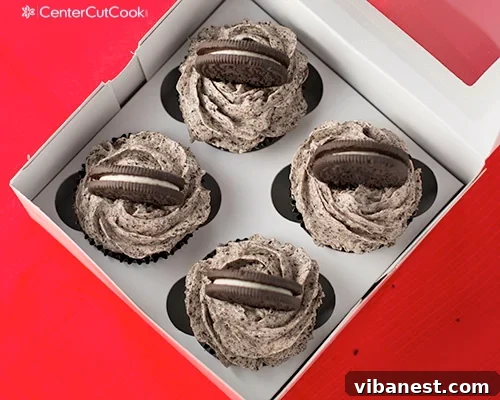
From a single batch, you can expect around 18 magnificent Chocolate Oreo Cupcakes with Cookies & Cream Frosting. That’s more than enough to satisfy your household and still have plenty to share with friends, family, or colleagues. These cupcakes aren’t just a dessert; they’re a celebration of flavor, texture, and the sheer joy that comes from homemade baking. They’re perfect for birthdays, potlucks, special occasions, or simply as a weekend baking project to treat yourself and your loved ones.
Tips for Baking Success and Common Questions
Achieving bakery-quality cupcakes at home is easier than you think, especially with a few insider tips. This recipe calls for bread flour, which contributes to a lighter, less dense cupcake texture – a hallmark of truly exceptional baked goods. If bread flour isn’t readily available, all-purpose flour can be substituted, though be aware that your cupcakes might turn out slightly denser. Both options will yield delicious results, but for that extra touch of lightness, bread flour is recommended.
Regarding our star ingredient, the Oreos: if you plan to garnish each of your 18 cupcakes with an additional whole Oreo on top, you’ll need approximately two standard packages of cookies. If you opt out of the garnish, one 15.5-ounce package should be sufficient for the cookies baked into the cupcakes and crushed into the frosting. Always check your package sizes to ensure you have enough!
A little baking humor: It happens to the best of us! Even experienced bakers sometimes overlook an ingredient. On one occasion, while making these very cupcakes, I realized halfway through that I had completely forgotten to add the oil! The beauty of baking is that it’s often forgiving, but a good practice is to measure out all your ingredients before you start mixing (mise en place) to prevent such oops moments. Double-checking your recipe steps can save you time and ensure perfect results every time.
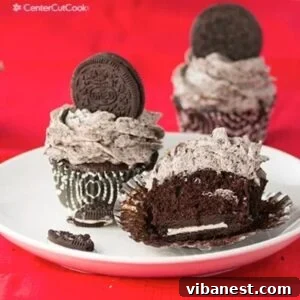
Chocolate Oreo Cupcakes with Cookies & Cream Frosting
These decadent Chocolate Oreo Cupcakes feature a surprise Oreo cookie baked into the bottom of each cupcake, topped with a luscious Cookies & Cream Frosting.
Prep Time: 10 minutes
Cook Time: 18 minutes
Total Time: 28 minutes
Ingredients
- 3 oz bittersweet chocolate (I used Ghirardelli 60% cacao), chopped
- 1/3 cup unsweetened cocoa powder (Dutch processed cocoa powder is recommended if available)
- 3/4 cup hot water
- 3/4 cup bread flour (you may substitute all-purpose flour, but cupcakes will be slightly denser)
- 3/4 cup sugar
- 1/2 tsp table salt
- 1/2 tsp baking soda
- 6 tbsp vegetable oil
- 2 large eggs
- 2 tsp vanilla extract
- 2 tsp white vinegar
- 36 Oreo cookies (approximately 2 per cupcake: one for the cupcake itself and one for garnish)
Frosting Ingredients
- 5 tbsp all-purpose flour
- 1 cup milk (I used 1%)
- 1 1/2 tsp vanilla extract
- 1 cup butter, softened
- 1 cup granulated sugar
- 1 cup crushed Oreos
Instructions
- Preheat your oven to 350 degrees Fahrenheit (175°C). Line two cupcake pans with 18 paper liners.
- In a large bowl, combine chopped bittersweet chocolate, cocoa powder, and 3/4 cup hot water. Whisk until the mixture is smooth and all of the chocolate has melted. Place this mixture in the refrigerator to chill for about 20 minutes.
- In a separate large bowl, combine flour, sugar, salt, and baking soda.
- Once the chocolate mixture has cooled, whisk in 6 tablespoons vegetable oil, 2 large eggs, 2 teaspoons vinegar, and 2 teaspoons vanilla extract.
- Combine the dry ingredients with the wet ingredients and whisk until all components are thoroughly incorporated.
- Place one whole Oreo cookie at the bottom of each prepared cupcake liner.
- Pour batter over each cookie, filling each cupcake liner approximately 3/4 of the way full. You should yield about 18 cupcakes.
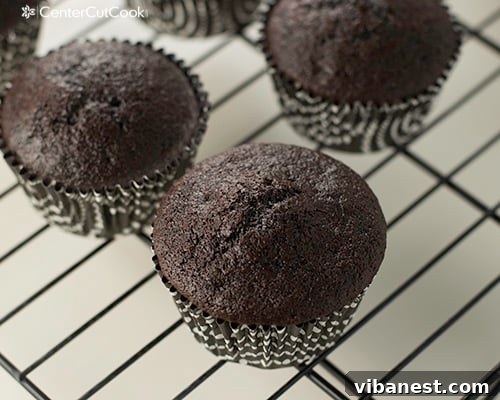
- Bake for 17-18 minutes, or until a toothpick inserted into the center of a cupcake comes out clean. Allow to cool completely on a wire rack.
- While the cupcakes are baking, prepare the frosting. In a small saucepan, combine 5 tablespoons flour with 1 cup cold milk. Stir and whisk the mixture constantly over medium-low heat until it becomes very thick, resembling a paste. Place this mixture in the refrigerator or freezer for about 10 minutes to ensure it cools completely.
- Once the flour/milk mixture has cooled completely, cream together the softened butter and granulated sugar with your mixer until light and fluffy. When the sugar is well incorporated into the butter, add in the vanilla extract and mix for 30 seconds longer. Add the cooled, thickened milk/flour mixture and mix on low speed for about 30 seconds. Then, turn the mixer to high and continue mixing for about 3 minutes, or until the frosting is light, airy, and fluffy, much like whipped cream. If the consistency isn’t quite there, keep mixing! Finally, fold in 1 cup of crushed Oreos and mix for about 30 seconds until evenly distributed.
- To frost the cooled cupcakes, transfer the frosting to a piping bag (or a Ziploc bag with a snipped corner). Pipe the frosting onto each cupcake using your desired technique. For garnish, top each frosted cupcake with an additional whole Oreo cookie.
Recipe inspired by CenterCutCook
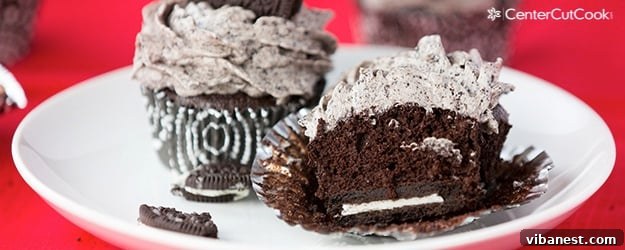
We hope you love these delightful Chocolate Oreo Cupcakes as much as we do! Don’t forget to share your creations. You can mention @CenterCutCook and tag #CenterCutCook on social media. Happy baking!