
How to Make Homemade Butter: Fresh, Flavorful, and Surprisingly Simple!
Have you ever imagined crafting your own batch of fresh, creamy butter right in your kitchen? What if we told you it only takes *one* ingredient and a few short minutes to transform humble heavy cream into a golden, spreadable delight? Forget bland, store-bought blocks; imagine waking up to the rich taste of homemade butter, customized exactly to your liking, without any fuss. It’s not a dream – it’s a delicious reality, and it’s far easier than you might think!
The journey to homemade butter often begins with a spark of curiosity, much like my own. I vividly recall watching a cooking show one crisp autumn afternoon, where a guest effortlessly demonstrated making butter. I was captivated, almost missing the entire process due to its sheer simplicity! A quick rewind (thank goodness for DVRs!) confirmed what my eyes could barely believe: whipping heavy cream long enough truly does yield beautiful, fresh butter. This revelation inspired me to try it for myself, and I haven’t looked back since. The rumors are absolutely true: heavy cream, with enough agitation, will turn into butter. And the best part? It’s surprisingly effortless, even if you opt for the manual method.
Why Homemade Butter is a Game-Changer for Your Kitchen
Beyond the undeniable satisfaction of creating something from scratch, making your own butter offers a world of benefits that store-bought varieties simply can’t match. You’ll experience unparalleled freshness, superior taste, and the freedom to customize every batch.
Unmatched Freshness and Superior Taste
One of the most compelling reasons to make your own butter is the unparalleled freshness. Freshly churned butter possesses a delicate, rich flavor and a wonderfully creamy texture that’s a cut above anything you’ll find on supermarket shelves. It’s free from preservatives and artificial additives, offering a pure, wholesome taste that enhances everything from toast and pancakes to baked goods and savory dishes. The subtle nuances of flavor from high-quality heavy cream truly shine through, elevating your culinary creations to new heights.
Endless Customization Options for Every Occasion
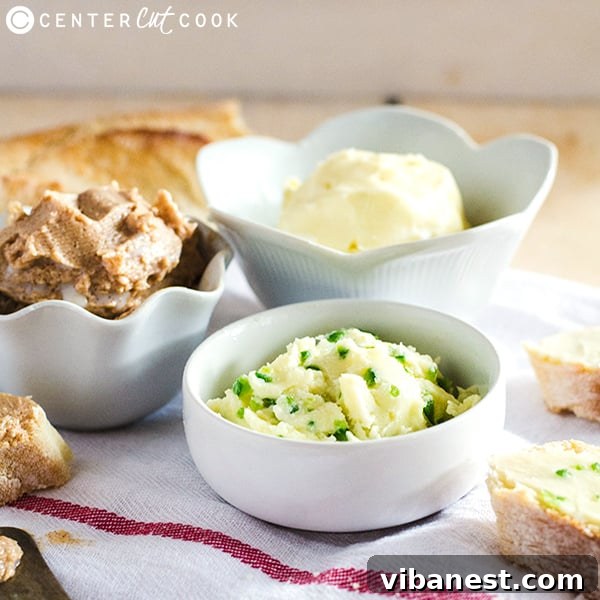
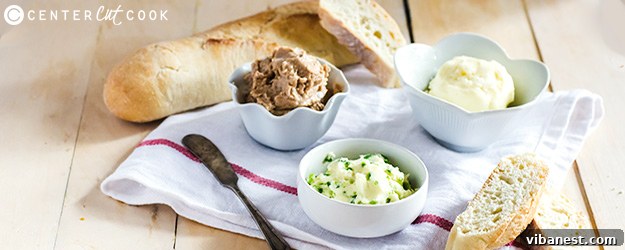
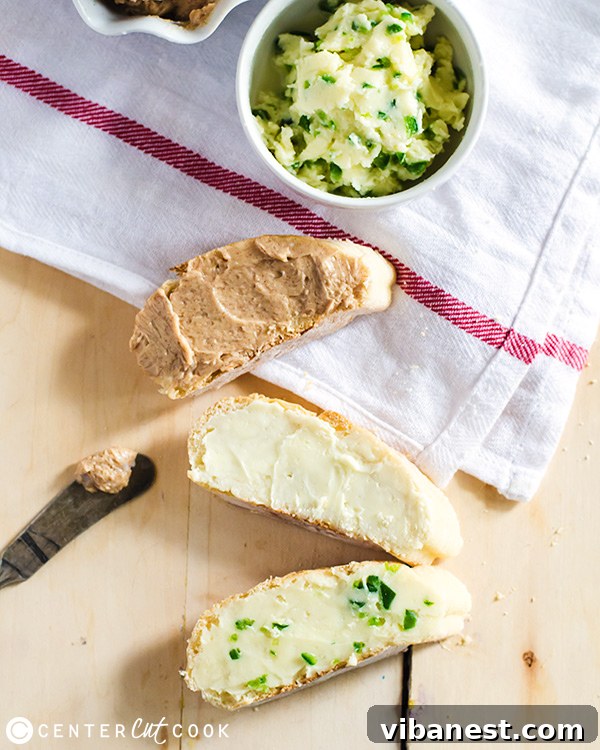
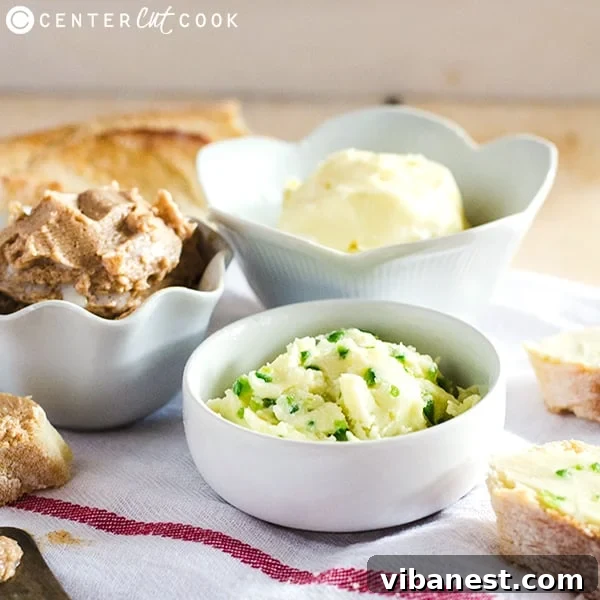
This is where homemade butter truly shines! You have complete control over the flavor profile, allowing you to tailor your butter for any meal or occasion. Imagine a breakfast spread featuring a sweet cinnamon-honey butter, a savory herb-infused butter for dinner rolls, or even a spicy jalapeño butter for your cornbread. The possibilities are genuinely limitless. You can experiment with:
- Sweet Additions: Cinnamon, brown sugar, honey, maple syrup, vanilla extract, cocoa powder, or citrus zest (orange, lemon).
- Savory Additions: Fresh herbs like dill, chives, basil, rosemary, thyme, parsley; garlic powder, onion powder, smoked paprika, black pepper, sea salt flakes, or chili flakes.
- Unique Blends: Sun-dried tomato and basil, roasted garlic and herb, orange zest and ginger, or even a touch of truffle oil for a gourmet touch.
Whether you prefer a simple salted butter or an adventurous gourmet blend, making it yourself means you dictate the ingredients and the intensity of flavor. It’s an opportunity to unleash your culinary creativity and impress your guests with bespoke butter creations!
Understanding the Magic: How Heavy Cream Becomes Butter
The transformation of heavy cream into butter is a fascinating, yet simple, process rooted in emulsion science. Heavy cream is essentially an emulsion of tiny fat globules suspended in water. When you whip or churn the cream, you’re physically disrupting these fat globules. The constant agitation causes the delicate membranes surrounding the fat cells to break, allowing the individual fat molecules to clump together. As more and more fat molecules coalesce, they separate from the liquid (which becomes buttermilk), forming a solid mass – your delicious butter! This process, whether done by hand or with a machine, relies on consistent movement to achieve the desired separation and bring you a fresh batch of homemade goodness.
Mastering the Art of Butter Making: Essential Tips and Tricks
While the process is incredibly straightforward, a few key tips can ensure your homemade butter turns out perfectly every time. Starting with high-quality heavy cream is crucial; look for cream with a high-fat content (at least 36%) and, ideally, organic and pasture-raised for the best flavor. Temperature also plays a vital role – cream that is slightly chilled (not ice-cold, which can make it harder to churn, nor room temperature, which can take longer) works best for whipping.
The Importance of Salt in Your Homemade Butter
Typically, I buy unsalted butter for baking, where precise salt control is essential. However, when it comes to homemade butter – especially those sweet or savory flavored varieties – a touch of salt can be absolutely transformative. Salt acts as a powerful flavor enhancer, bringing out the subtle sweetness, highlighting the herbs, or amplifying the spices you’ve added. A pinch of good quality sea salt can elevate your butter from merely delicious to truly extraordinary, creating a perfectly balanced flavor profile that sings on your palate. Don’t be afraid to experiment with the amount of salt to find your ideal balance.
Don’t Waste the Buttermilk! A Hidden Culinary Gem
As your heavy cream transforms into butter, a delicious byproduct is created: fresh buttermilk! This liquid, which separates from the solid butterfat, is incredibly versatile and shouldn’t be discarded. Unlike commercial buttermilk, which is often cultured, this is traditional “churned” buttermilk with a slightly sweeter, less tangy flavor. It’s perfect for adding moisture and tenderness to a variety of baked goods and savory dishes. Consider using this flavorful liquid for:
- Fluffy pancakes and waffles, adding a delicate tang and tender texture.
- Moist muffins and quick breads, enhancing their crumb structure.
- Creating a tender, flavorful marinade for chicken, especially for fried chicken.
- Making light and airy scones or biscuits.
- Crafting smooth and creamy salad dressings.
Always reserve this flavorful liquid; it’s a hidden gem that adds depth and richness to countless recipes, making your homemade butter process even more rewarding.
Your Simple Homemade Butter Recipe: Two Easy Methods
Making your own butter at home is surprisingly simple, whether you prefer a hands-on approach with a mason jar or the convenience of a stand mixer. Both methods yield delicious, fresh butter in minutes!
INGREDIENTS
- 1 pint (2 cups) heavy cream (at least 36% milkfat), preferably organic and cold but not icy.
OPTIONAL FLAVOR ADD-INS
Unleash your creativity! Here are some popular ideas, but feel free to experiment:
- Classic Salted Butter: 1/4 teaspoon fine sea salt.
- Cinnamon Honey Butter: 1-2 tablespoons honey + 1/2 teaspoon ground cinnamon.
- Savory Herb Butter: 1-2 tablespoons finely chopped fresh herbs (e.g., chives, dill, basil) + 1/4 teaspoon garlic powder + 1/4 teaspoon sea salt.
- Spicy Jalapeño Honey Butter: 1-2 teaspoons finely minced fresh jalapeño (seeds removed for less heat) + 1 tablespoon honey.
- Brown Sugar & Vanilla: 1 tablespoon light brown sugar + 1/2 teaspoon vanilla extract.
- Citrus Zest: Zest of 1/2 lemon or orange.
- Maple Pecan: 1-2 tablespoons maple syrup + 1 tablespoon finely chopped toasted pecans.
DIRECTIONS – MASON JAR METHOD (Perfect for a fun, arm-workout activity!)
- Prepare Your Jar: Fill a clean, standard pint-sized (16 oz) or quart-sized (32 oz) mason jar about halfway with cold heavy cream. Do not overfill, as the cream needs ample room to agitate and churn effectively.
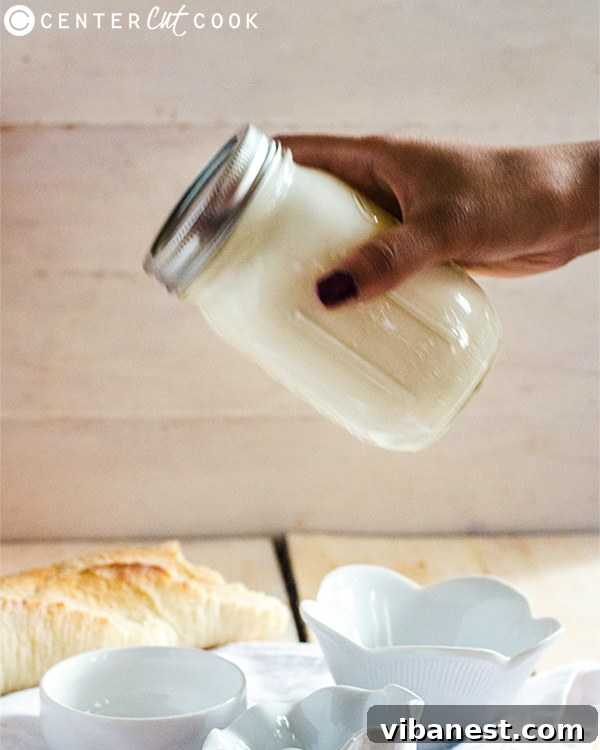
- Seal and Shake: Securely close the jar tightly with its lid. Begin shaking vigorously. It’s a good idea to put on some upbeat music or involve the family for a fun activity! Maintain a consistent, energetic shake.
- Observe the Stages: For the first 3-5 minutes, you’ll feel the cream thicken significantly; it will resemble luscious whipped cream. The jar will feel noticeably heavier. This is the first stage of the transformation.
- Add Flavor (Optional): If you’re incorporating any mix-ins like salt, honey, or herbs, carefully open the jar at this whipped cream stage and gently stir them in. Re-seal the lid tightly before continuing.
- Continue Shaking Until Separation: Continue shaking for another 2-5 minutes. You’ll notice the texture changing again. The cream will appear grainy, and eventually, you’ll hear a distinct sloshing sound as the solid butterfat separates from the liquid buttermilk. The butter will start to form a solid clump inside the jar.
- Strain the Buttermilk: Carefully open the jar and pour the liquid (buttermilk) into a separate container. You should see a solid chunk of butter remaining. This flavorful liquid is excellent for baking!
- Rinse the Butter (Crucial Step for Shelf Life): To ensure your butter lasts longer and has a purer flavor, you need to rinse out any remaining buttermilk. Transfer the butter to a bowl filled with ice-cold water. Using your hands or a rubber spatula, gently knead and press the butter, changing the water several times, until the water runs completely clear. This step is critical to remove all residual buttermilk, which can cause the butter to spoil quickly.
- Shape and Store: Once thoroughly rinsed and pressed dry, shape the butter into a desired log, block, or mold. Store in an airtight container or wrapped tightly in parchment paper in the refrigerator for up to two weeks, or freeze for several months for longer preservation.
DIRECTIONS – STAND MIXER METHOD (Effortless and efficient!)
- Prepare the Mixer: Pour the cold heavy cream into the bowl of a stand mixer fitted with the whisk attachment. Using a splash guard is highly recommended to prevent splatter.
- Whip to Soft Peaks: Turn the mixer on medium speed. The cream will quickly begin to thicken and form soft peaks, much like making whipped cream (this usually takes approximately 2-3 minutes).
- Increase Speed and Observe: Increase the speed to high. Continue mixing. The cream will stiffen further, then begin to look grainy and slightly separated, almost curdled.
- Add Flavor (Optional): At this grainy stage, stop the mixer. Carefully add any optional mix-ins you choose. Resume mixing on high speed.
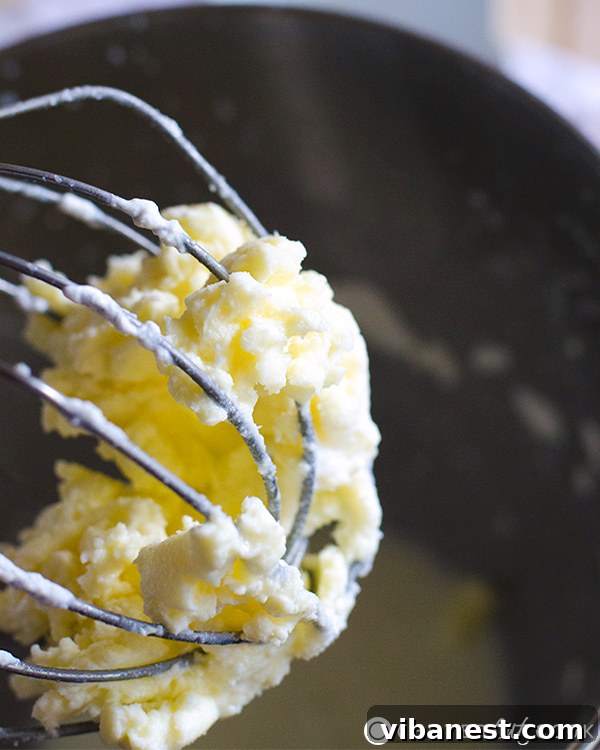
- Churn to Butter: Continue mixing on high speed. Be prepared for some potential splatter during this stage – a clean kitchen towel draped over the mixer can help contain it. Within another 2-5 minutes, you will distinctly see the solid butterfat separating from the liquid buttermilk. The butter will clump around the whisk, and a light, milky liquid will pool at the bottom of the bowl.
- Reduce Speed and Gather: Once the butter has visibly separated from the buttermilk, reduce the mixer speed to low for about 30 seconds. This helps to gather the butter onto the whisk and minimizes further splatter, making it easier to remove.
- Remove and Strain: Carefully remove the whisk from the mixer, using a spatula to push the butter off into a fine-mesh strainer or colander lined with cheesecloth, placed over a bowl. Strain the buttermilk into a separate container.
- Rinse the Butter (Crucial Step for Shelf Life): Transfer the butter to a bowl filled with ice-cold water. Using your hands or a rubber spatula, knead and press the butter, changing the water several times, until the water runs completely clear. This critical step removes all residual buttermilk, which is essential for extending the shelf life and ensuring pure flavor.
- Shape and Store: Once thoroughly rinsed and pressed dry, shape the butter as desired. Store in an airtight container or wrapped tightly in parchment paper in the refrigerator for up to two weeks, or freeze for up to six months for optimal freshness.
Frequently Asked Questions About Homemade Butter
What kind of cream should I use for making butter?
Always use heavy cream or whipping cream with at least 36% milkfat. The higher the fat content, the better the yield and the quicker the butter will form. Avoid ultra-pasteurized cream if possible, as the extreme heat treatment can sometimes alter the fat globules, making it more difficult or take longer to churn into butter.
How long does homemade butter last, and how should I store it?
When properly rinsed to remove all buttermilk (which is crucial!), homemade butter can last up to two weeks in an airtight container in the refrigerator. For longer storage, it can be frozen for several months, typically up to six months, without significant loss of quality. Make sure it’s tightly wrapped to prevent freezer burn.
What can I do with the leftover buttermilk?
The fresh buttermilk created during the butter-making process is a fantastic bonus and should absolutely not be discarded! It’s slightly sweeter and less tangy than commercial cultured buttermilk. Use it in any recipe that calls for buttermilk, such as fluffy pancakes, waffles, biscuits, muffins, cornbread, or even as a tenderizing marinade for chicken. It adds wonderful moisture and a delicate, tender crumb to baked goods.
Why isn’t my cream turning into butter, or why is it taking so long?
Several factors could be at play if your butter isn’t forming as expected:
- Cream Temperature: Ensure your cream is cold, but not ice-cold. Room temperature cream can take much longer to churn. Ideally, take it out of the fridge 10-15 minutes before starting.
- Fat Content: Double-check that you are using heavy cream with at least 36% fat. Lighter creams (like half-and-half or light cream) will not work for butter making.
- Patience: Sometimes it just needs more time! Keep whipping or shaking; the process can vary depending on the cream, temperature, and method.
- Over-chilling: If the cream is too cold, the fat globules might be too firm to coalesce easily. Let it sit out for a few minutes to warm up slightly if it feels icy.
- Ultra-Pasteurized Cream: As mentioned, ultra-pasteurized cream can sometimes be more challenging to churn due to changes in its fat structure.
Conclusion: Embrace the Joy of Homemade Butter
Making your own butter at home is a wonderfully rewarding culinary adventure that is surprisingly simple, requires minimal ingredients, and opens up a world of fresh flavors and customization possibilities. From the rich, pure taste of classic salted butter to imaginative herb or sweet varieties, you’ll discover a newfound appreciation for this kitchen staple. The process is not only educational but also incredibly satisfying, yielding a product that far surpasses anything you can buy in a store. So, grab a pint of heavy cream, choose your preferred method – be it the invigorating mason jar shake or the effortless stand mixer churn – and embark on the delightful journey of crafting your very own batch of golden, delicious homemade butter. Your taste buds, your family, and your breakfast table will undoubtedly thank you!