
Enchanting Witch Hat Cupcakes: Your Guide to Spooky & Sweet Halloween Treats
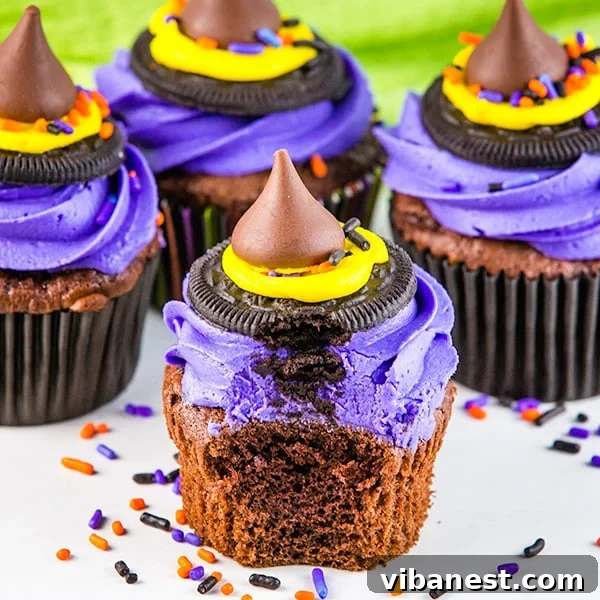
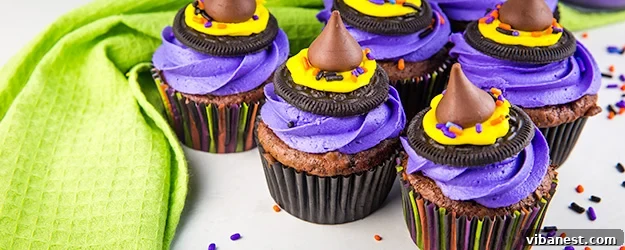
Prepare to cast a delicious spell this Halloween with our utterly enchanting Witch Hat Cupcakes! These delightful treats are not just incredibly fun to create but also serve as a captivating centerpiece for any Halloween celebration. Loved by both children and adults alike, these cupcakes offer the perfect blend of spooky charm and irresistible flavor, making them an essential addition to your list of Halloween party ideas or a delightful surprise for any spooky occasion.
Whether you’re brainstorming Halloween treat ideas for coworkers, planning a fun activity for your child’s classroom party, or simply looking for a festive dessert to enjoy at home, these Witch Hat Cupcakes are surprisingly simple to assemble and wonderfully satisfying to devour. Our comprehensive guide ensures that every step, from baking the perfectly moist base to crafting the iconic witch hats, is straightforward and enjoyable, transforming a simple cupcake into a magical masterpiece that will leave everyone bewitched.
Elevating Your Cupcake Base: The Secret to Unforgettable Moistness and Flavor
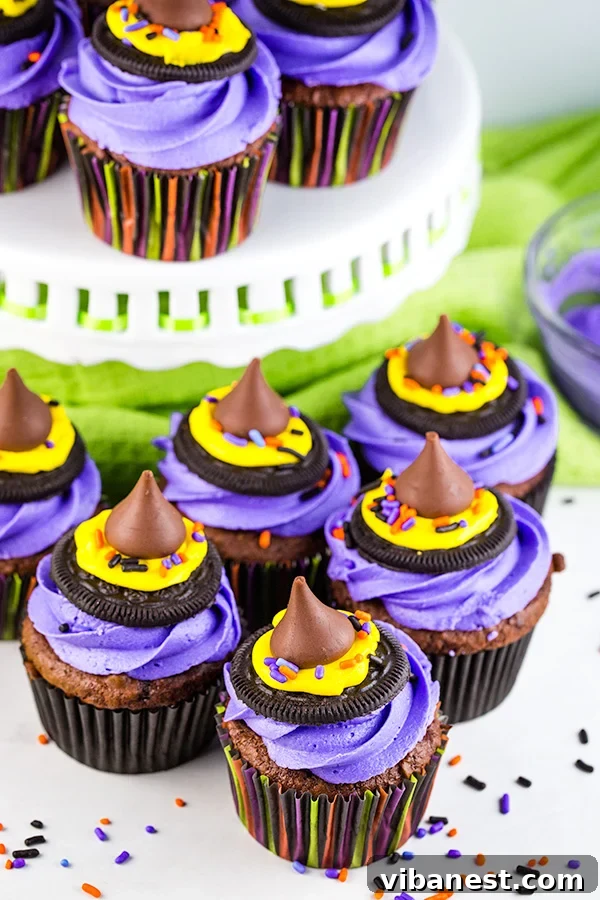
While the visual appeal of these charming treats is undeniably simple and fun, the secret to truly outstanding Witch Hat Cupcakes lies beneath the frosting – in a perfectly moist and flavorful cake base. A common question among busy bakers is: Can I use a box mix? The answer is a resounding yes! We embrace making baking accessible and enjoyable, and a good quality Devil’s Food cake mix provides an excellent, convenient foundation to build upon. However, we’re not just using it straight from the package; we’re going to “doctor it up” a bit to significantly elevate its taste and texture beyond ordinary box-mix expectations.
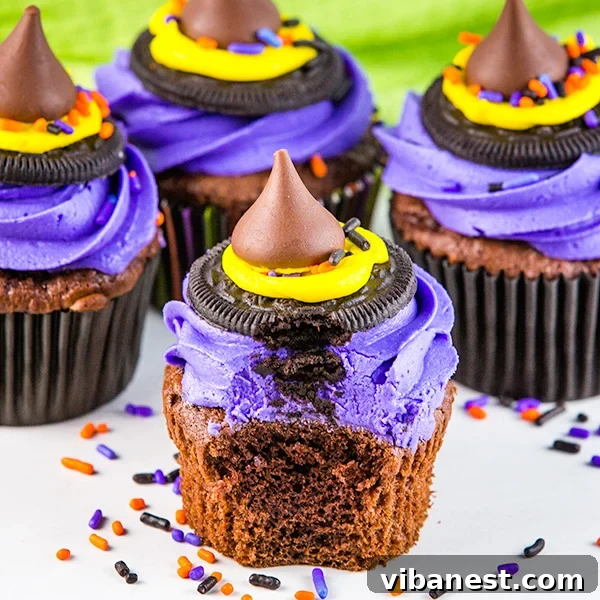
Our special touch involves incorporating a box of instant chocolate pudding mix and a generous dollop of sour cream into your Devil’s Food cake batter. These two ingredients are true game-changers, working wonders to infuse the cupcakes with an incredible richness and an unbelievably tender, moist crumb that rivals many bakery-bought alternatives. The instant pudding mix not only deepens the chocolate flavor, making it more intense and luxurious, but also acts as a moisture binder, preventing dry, crumbly cupcakes. Simultaneously, the sour cream adds a subtle tang, enhances the cake’s structure, and contributes significantly to a super soft, melt-in-your-mouth texture. This simple yet effective trick transforms an ordinary box mix into something truly extraordinary, ensuring your Halloween Witch Hat Cupcakes are not just visually stunning but also incredibly delicious.
Why This “Doctoring Up” Method Works Wonders:
- Enhanced Moisture: Sour cream and pudding mix are hydration heroes, ensuring your cupcakes stay incredibly moist for days.
- Richer Flavor Profile: The pudding mix intensifies the chocolate notes, delivering a more gourmet, decadent taste.
- Tender Crumb: Sour cream contributes to a finer, softer cake crumb, making each bite a delightful experience.
- Effortless Upgrade: Despite the significant improvements, this method adds minimal extra steps, making it perfect for busy schedules.
Crafting the Iconic Witch Hat Decoration: A Simple Bakery-Inspired Technique
The true magic of these Witch Hat Cupcakes comes alive through their whimsical and easily recognizable decoration. While you can find a variety of witch-themed decorating ideas online, the method we’re eager to share with you today is directly inspired by a local bakery’s beloved technique. It’s our absolute favorite for its delightful appearance and surprising ease, proving that you don’t need to be a professional pastry chef to create stunning Halloween treats!
At the heart of our decoration is a classic, velvety buttercream frosting. When it comes to coloring your frosting, you have boundless creative freedom. We chose vibrant purple and sunny yellow to capture that quintessential Halloween mystique and playful contrast, but feel free to experiment! Ghastly green, fiery orange, or even a deep midnight blue would also look wonderfully festive and fitting for the season. To achieve your desired hue, simply add a few drops of gel food coloring (which offers more vibrant color without thinning your frosting) to your buttercream, stir thoroughly to combine, and continue adding drops until the color intensity perfectly matches your spooky vision. Remember, it’s always easier to add more color than to try and lighten it!
Assembling Your Edible Witch Hats: A Step-by-Step Guide
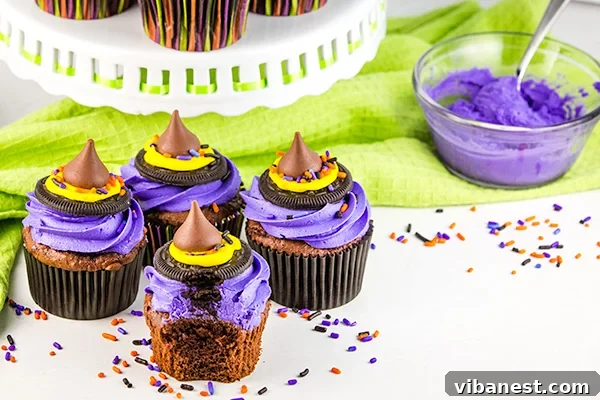
Once your cupcakes are completely cooled and generously frosted with your chosen base color (we used purple for a classic look!), the exciting assembly process begins:
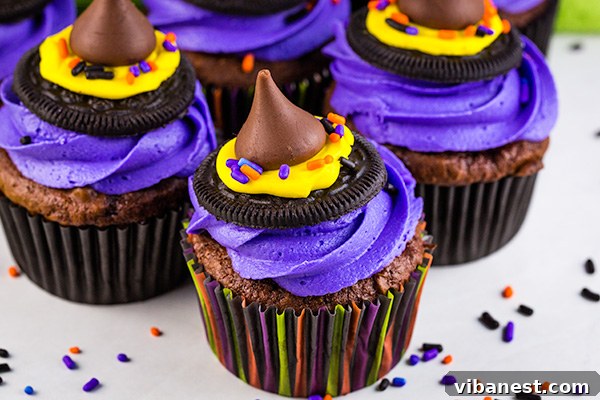
- The Hat Brim (Oreo Cookie Base): Carefully place a single Oreo cookie wafer (with the cream filling removed) flat on top of each frosted cupcake. For this recipe, you’ll need to separate 12 Oreos, effectively giving you 24 single cookie wafers to serve as the perfect dark, flat base for your witch’s hat.
- The Hat Band (Yellow Frosting): Using a piping bag filled with your contrasting yellow frosting (a simple snip off the corner of the bag will suffice, no special tip needed here), pipe a small, dime-sized dollop directly onto the center of the Oreo cookie. This bright yellow accent serves as the decorative band of the witch’s hat, adding a cheerful pop of color.
- The Hat Peak (Hershey’s Kiss): Gently place an unwrapped Hershey’s Kiss right on top of the yellow frosting dollop. The flat base of the Hershey’s Kiss will adhere perfectly to the frosting, forming the iconic conical peak of the witch’s hat. Lightly press down to ensure it’s securely in place.
- The Finishing Touch (Festive Sprinkles): For an extra festive flourish and a touch of sparkle, scatter a few Halloween-themed sprinkles around the yellow frosting band. This final detail completes your adorable witch hat, making it truly irresistible!
Voila! You now have a batch of incredibly cute and utterly delicious Witch Hat Cupcakes, ready to dazzle and delight at your next Halloween gathering. This decorating method is not only visually stunning but also surprisingly quick, allowing you to create a large batch of these charming treats without extensive effort, leaving you more time to enjoy the festivities.
Versatility and Spooky Fun: Perfect for Every Halloween Occasion
These charming Witch Hat Cupcakes are far more than just a recipe; they represent a versatile culinary craft that lends itself beautifully to a myriad of Halloween festivities. Their straightforward design and assembly make them an ideal choice for almost any spooky occasion, ensuring they’ll be a resounding hit wherever they appear. From school events to office parties, and cozy family gatherings, these cupcakes adapt perfectly.
A Fantastic Halloween Project for Kids and Classrooms
If you’re searching for an engaging, hands-on, and delicious activity for children, these Witch Hat Cupcakes are absolutely perfect for a school Halloween project or a kids’ party craft station. Imagine the sheer joy and excitement on young faces as they get to assemble their very own edible witch hats! To ensure a smooth, mess-free, and enjoyable experience for younger participants, we highly recommend preparing a few key components in advance:
- Pre-Baked and Frosted Cupcakes: Have all the cupcakes baked, completely cooled, and base-frosted (for example, with the purple or green frosting) beforehand. This allows children to skip the baking and complex piping steps, focusing directly on the fun of decorating.
- Prepped Assembly Ingredients: Make sure all the “hat assembly” ingredients are prepped and ready for immediate use. This means thoroughly separating the Oreo cookies and carefully scraping off their cream filling, and unwrapping all the Hershey’s Kisses. Pre-preparation transforms the activity into a simple, creative assembly line.
- Organized Decorating Stations: Create individual decorating stations. Each station could include a base-frosted cupcake, an Oreo wafer, an unwrapped Hershey’s Kiss, a small dollop of yellow frosting (perhaps in a small plastic baggie with the corner snipped for easy kid-friendly piping), and a selection of festive sprinkles.
This organized approach allows children to fully immerse themselves in the creative and fun parts of decorating, fostering their imagination and fine motor skills, while providing a tangible, tasty reward for their efforts. It’s an unforgettable and engaging way to celebrate Halloween in the classroom or at any children’s party.
Beyond the Classroom: Office Celebrations, Neighbors & Family Gatherings
But the fun and versatility of these Witch Hat Cupcakes extend far beyond kids’ projects! They are equally suitable for adult-oriented celebrations, thoughtful gestures, and festive home enjoyment:
- Office Potlucks & Coworker Treats: Impress your colleagues with a batch of homemade, festive treats. These cupcakes are a delightful way to bring some Halloween cheer to the workplace and are sure to be a conversation starter and a highly sought-after dessert.
- Halloween Party Desserts: Whether you’re hosting an intimate gathering or a grand costume party, these charming cupcakes will undoubtedly be a crowd-pleaser. Their distinctive and adorable design ensures they stand out beautifully on any dessert table.
- Neighborly Gifts: Spread the Halloween spirit and warmth by gifting a few of these delightful cupcakes to your neighbors. It’s a sweet, personalized gesture that fosters community cheer during the spooky season.
- Family Dessert Tradition: Simply enjoy them with your family for a festive Halloween evening. They make an ordinary night feel special and celebratory, creating cherished memories around the kitchen table.
This recipe yields a generous batch of 24 delicious cupcakes, making it perfect for sharing. No matter the occasion, these Witch Hat Cupcakes promise to bring smiles, spark conversations, and add a special touch of Halloween magic to everyone who gets to enjoy them.
Expert Tips for Perfectly Spooky Witch Hat Cupcakes Every Time
To ensure your Witch Hat Cupcakes turn out absolutely perfect, visually stunning, and incredibly delicious every single time, consider these additional tips and tricks from seasoned bakers. These insights will help you achieve the best flavor, texture, and presentation for your Halloween masterpiece, making your baking experience smooth and rewarding.
Baking & Batter Mastery:
- Room Temperature Ingredients are Key: For the most consistent batter and frosting texture, always ensure your eggs, milk, and sour cream (for the cupcakes) and butter (for the frosting) are brought to room temperature before mixing. This allows them to emulsify better, creating a smoother, more uniform mixture that bakes and whips beautifully.
- Avoid Overmixing the Batter: When combining your cupcake batter ingredients, mix only until they are just combined and moistened. Then, beat for the specified time. Overmixing can overdevelop the gluten in the flour, which can lead to tough, dense cupcakes instead of light and airy ones.
- Evenly Fill Cupcake Liners: To achieve uniform cupcake sizes and ensure even baking, use an ice cream scoop or a measuring cup to fill each liner approximately 3/4 full. Consistency in size also makes them easier and more appealing to decorate.
- The Toothpick Test for Doneness: The classic toothpick test is crucial for perfectly baked cupcakes. Insert a wooden toothpick into the center of a cupcake; if it comes out clean with no wet batter, they are done. Avoid overbaking, which is a common culprit for dry cupcakes.
Frosting & Decoration Perfection:
- Whip Your Butter Thoroughly: For truly light, airy, and fluffy buttercream, beat your softened butter in the mixer for the full 5 minutes until it’s visibly lighter in color and incredibly airy. This step incorporates essential air, resulting in a wonderfully smooth and easy-to-pipe frosting.
- Adjust Frosting Consistency with Care: Buttercream consistency is paramount for successful piping. If your frosting is too thick, add milk one tablespoon at a time until it reaches a medium-stiff consistency that holds its shape well. If it’s too thin, gradually add a little more sifted powdered sugar.
- Opt for Gel Food Coloring: For more vibrant, intense colors without thinning your frosting, always use gel food coloring. Add a small amount at a time, mixing well, until you achieve your desired spooky shade.
- Piping Bag Technique: If you’re new to piping, a quick practice run on a piece of parchment paper can be very helpful. For the purple frosting, a 1M star tip creates a beautiful swirl. For the yellow frosting, a simple snip off the corner of the piping bag will create a clean, small dot.
- Secure the Witch Hat Elements: When placing the Hershey’s Kiss onto the yellow frosting, give it a gentle but firm press to ensure it adheres securely and won’t wobble or fall off during transport or serving.
- Neat Sprinkle Application: For a clean look, you can pour your Halloween sprinkles into a small bowl and gently roll the edge of the cupcake (after the yellow frosting and Kiss are on) or use your fingers to carefully place them precisely.
Storage & Make-Ahead Strategies:
- Cool Cupcakes Completely: This cannot be stressed enough – always ensure your cupcakes are absolutely, completely cooled before applying any frosting. Warm cupcakes will cause your beautiful buttercream to melt and slide right off.
- Optimal Storage: Store your frosted Witch Hat Cupcakes in an airtight container at room temperature for up to 2-3 days. If your kitchen is particularly warm, or if you prefer, they can be stored in the refrigerator. Just remember to bring them back to room temperature before serving for the best texture and flavor.
- Prepare Components in Advance: You can bake the cupcakes a day or two in advance and store them unfrosted in an airtight container. The buttercream can also be made a day ahead and stored in the refrigerator; simply re-whip it for a minute or two before use to restore its fluffy consistency.
With these expert tips in your arsenal, you’re well on your way to creating a batch of Witch Hat Cupcakes that are not only visually stunning and perfectly aligned with the Halloween spirit but also incredibly delicious and a true joy to share. Happy Halloween baking, and may your treats be as magical as your celebrations!
If you’re still craving more fun and easy Halloween treat ideas to complete your festive spread, these Spooky Spider Cookies are another wonderfully cute and delightfully creepy option that’s sure to be a hit!
CUPCAKE INGREDIENTS (Yields 24 Cupcakes)
- 1 box Devil’s Food cake mix (standard size, typically 15.25 oz / 432g)
- 1 – 3.9 ounce box instant chocolate pudding mix (ensure it’s *instant*, not cook & serve)
- 1/2 cup sour cream (full-fat for the richest, moistest results)
- 1/4 cup vegetable oil (or canola oil)
- 1 cup 2% milk (or whole milk for an even richer cake)
- 4 large eggs, ideally at room temperature
FROSTING INGREDIENTS
- 1 cup unsalted butter, softened completely to room temperature
- 4.5 cups powdered sugar (confectioners’ sugar), sifted if it’s clumpy
- 2 tablespoons 2% milk (or whole milk), plus extra if needed for consistency
- 3 teaspoons pure vanilla extract
- Pinch of salt (approximately 1/4 teaspoon, to balance sweetness)
- Purple gel food coloring (for the main frosting)
- Yellow gel food coloring (for the hat band)
WITCH HAT ASSEMBLY INGREDIENTS
- 24 standard cupcake liners
- Halloween sprinkles (or any festive sprinkles you prefer)
- 12 standard Oreo cookies (twisted apart, and the cream filling scraped off, yielding 24 cookie wafers)
- 24 standard Hershey Kisses, completely unwrapped
CUPCAKE DIRECTIONS
- Preheat your oven to 350 degrees F (175 degrees C). Line two standard 12-cup muffin pans with a total of 24 cupcake liners and set them aside.
- In a large mixing bowl, combine the Devil’s Food Cake mix, instant chocolate pudding mix, sour cream, vegetable oil, 2% milk, and large eggs.
- Using an electric mixer (stand mixer or hand mixer), beat on low speed until all ingredients are just moistened and thoroughly incorporated. Then, increase the mixer speed to medium and continue beating for an additional 2 minutes, ensuring the batter is smooth and well combined. Scrape down the sides of the bowl as needed to ensure everything is mixed evenly.
- Divide the batter evenly among the 24 prepared cupcake liners, filling each approximately 3/4 of the way full. This should be about 3 tablespoons of batter per liner.
- Bake for 16-20 minutes, or until a wooden toothpick inserted into the center of a cupcake comes out clean. Be very careful not to overbake, as this can dry out the cupcakes.
- Allow the cupcakes to cool in the muffin pans for 5 minutes before carefully transferring them to a wire rack to cool completely. It is crucial that the cupcakes are entirely cool before you begin frosting them to prevent melting. While they are cooling, you can start preparing your frosting.
FROSTING DIRECTIONS
- In the bowl of a stand mixer fitted with the paddle attachment (or using a hand mixer), place the softened unsalted butter. Beat on medium-high speed for about 5 minutes, or until the butter becomes light, airy, and noticeably whiter in color. This step is essential for creating truly fluffy buttercream.
- Reduce the mixer speed to low. Gradually add the powdered sugar (about 1 cup at a time), milk, pure vanilla extract, and a pinch of salt to the whipped butter. Mix on low speed until the powdered sugar is mostly incorporated, then increase the speed to high and beat for another 2 minutes until the frosting is light, smooth, and fluffy.
- Check the frosting consistency: If your frosting is too thick, add more milk, 1 tablespoon at a time, until it reaches your desired medium-stiff consistency that is suitable for piping. If it’s too thin, add a little more powdered sugar gradually.
- In a separate small bowl, scoop out about 1 cup of the prepared buttercream. Add a couple of drops of yellow gel food coloring to this portion and mix thoroughly with a fork or spatula until the color is uniform and vibrant. Set this aside; this will be used for the hat band.
- Add about 5-6 drops of purple gel food coloring to the remaining larger batch of frosting in the mixer. Mix well on medium speed until the color is completely uniform and no streaks of white frosting remain.
- Prepare a piping bag fitted with a 1M star tip (or your preferred large open star tip) and carefully fill it with the purple frosting.
- Once the cupcakes are completely cooled, pipe a generous swirl of purple frosting onto each cupcake, covering the entire top.
ASSEMBLY DIRECTIONS
- Place one cream-removed Oreo cookie wafer flat on top of each purple-frosted cupcake. This forms the essential base, or brim, of the witch’s hat.
- Fill a second piping bag with the yellow frosting. No special tip is needed for this part; you can simply snip a small corner off the bag to create a fine stream. Pipe a dime-sized amount of yellow frosting onto the very center of each Oreo cookie.
- Gently place an unwrapped Hershey Kiss on top of the yellow frosting dollop. Lightly press down on the Hershey Kiss to ensure it adheres securely and stands upright, forming the perfect peak of the witch’s hat.
- Finally, scatter some festive Halloween sprinkles around the yellow frosting “hat band” for an extra touch of sparkle, charm, and holiday spirit.
Recipe credit:
Brittany Jenkins